Table of Contents
Advertisement
Advertisement
Table of Contents

Related Manuals for Biotage SPE Dry 96


Summary of Contents for Biotage SPE Dry 96
- Page 1 Biotage SPE Dry 96 and ® Biotage SPE Dry 96 Dual ® User Manual...
-
Page 2: Table Of Contents
Temperature Control Method Development Starting Guidelines Thermally Labile Samples Solvent Evaporation Times Needle Depth Maintenance The System Suggested Wash Procedure for the Needles Needle Replacement Troubleshooting Specifications SPE Dry 96 and SPE Dry 96 Dual User Manual | © Biotage 2017... -
Page 3: Introduction
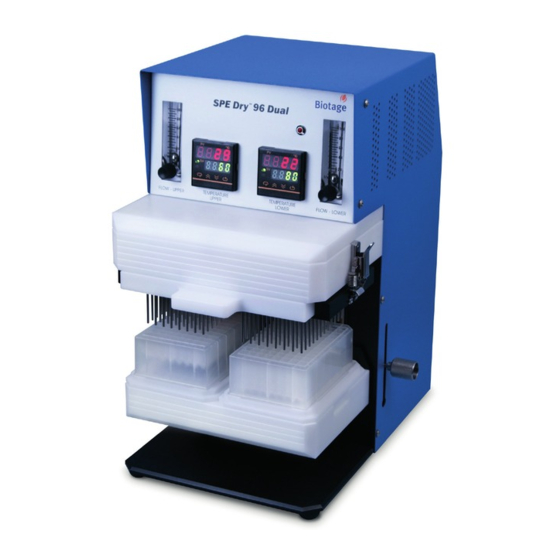
Plate height stops and knurled stops knob Lower needle Sliding arm Lower needle assembly and knurled assembly knob Lower head Lower head Figure 2 . The front of SPE Dry 96 Dual. Figure 1. The front of SPE Dry 96. -
Page 4: System Precautions And Warranty
Biotage for immediate replacement if any of these items are missing. Warranty and Liability See the “Biotage Terms & Conditions of Sale” document at www.biotage.com. SPE Dry 96 and SPE Dry 96 Dual User Manual | © Biotage 2017... -
Page 5: Installation
110 VAC power outlet. The power cord inlet also houses the electrical breaker fuse. The system's power switch is located on the lower left side near the rear of the SPE Dry 96 system or the lower rear near the left side of the SPE Dry 96 Dual system; see Figure 3 and Figure 4. -
Page 6: Operation
Set the pressure regulator on the inlet gas supply to 50 psi (SPE Dry 96) or 60 psi (SPE Dry 96 Dual). Slowly open the knobs on the flow meters by turning them counterclockwise. -
Page 7: Method Development
Lock plate into position and note the time. As a reference, a 500 µL sample of methanol should take about 11 minutes (SPE Dry 96) or 15 minutes (SPE Dry 96 Dual) to reach dryness at 20% relative humidity. Flow Rate... -
Page 8: Maintenance
Latch Catch Slide out the needle assembly Figure 7 . The upper needle assembly of the SPE Dry 96 Dual system. SPE Dry 96 and SPE Dry 96 Dual User Manual | © Biotage 2017... -
Page 9: Needle Replacement
Maintenance Needle Replacement 1. Remove the bad needle with long nose pliers. 2. Insert needle into the housing of the needle replacement tool (P/N SD-9606); see Figure 9. Figure 9. Inserting the needle into the needle replacement tool. 3. Position the needle perpendicular to the needle head assembly;... -
Page 10: Troubleshooting
No gas emits from the needles: » Check that the inlet gas supply pressure is set between 15 and 50 psi (SPE Dyr 96) or 15 and 60 psi (SPE Dry 96 Dual). » Check that the gas flow is set correctly. -
Page 11: Specifications
Dimensions (W X H X D): SPE Dry 96: 9.52" x 15.72" x 12.05" (242 mm x 400 mm x 306 mm) SPE Dry 96 Dual: 10.0" x 15.5" x 15.0" (254 mm x 394 mm x 381 mm) Weight: SPE Dry 96: 25 lbs (11.36 kg) - Page 12 Part Number: 415970-B © 2017 Biotage. All rights reserved. No material may be reproduced or published without the written permission of Biotage. Information in this document is subject to change without notice and does not represent any commitment from Biotage. E&OE.
Need help?
Do you have a question about the SPE Dry 96 and is the answer not in the manual?
Questions and answers