Advertisement
Quick Links
English
English
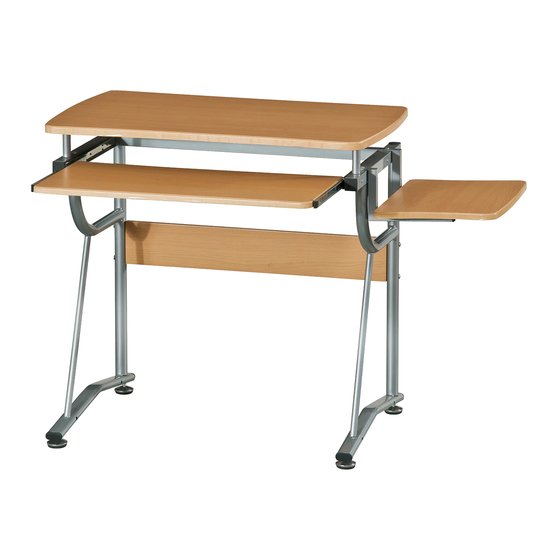
MULTI-FUNCTIONAL COMPUTER TABLE
MULTI-FUNCTIONAL COMPUTER TABLE
MODEL RTA - 8336
MODEL RTA - 8336
Thanks for purchasing one of our products, please read carefully the assembly
Thanks for purchasing one of our products, please read carefully the assembly
instructions before the installation (Attention: Do not tighten the screws before
instructions before the installation (Attention: Do not tighten the screws before
all screws are in place).
all screws are in place).
D06 080906
ASSEMBLY INSTRUCTION
ASSEMBLY INSTRUCTION
IMPORTANT:
IMPORTANT:
solution of a smooth soap and water, then cleared
solution of a smooth soap and water, then cleared
with a dry towel. Do not use solvents over surfaces
with a dry towel. Do not use solvents over surfaces
or structural tubes.
or structural tubes.
Surfaces must be cleaned with a
Surfaces must be cleaned with a
MODEL RTA-8336
MODEL RTA-8336
Advertisement

Related Manuals for Techni Mobili RTA-8336


Summary of Contents for Techni Mobili RTA-8336
- Page 1 Thanks for purchasing one of our products, please read carefully the assembly instructions before the installation (Attention: Do not tighten the screws before instructions before the installation (Attention: Do not tighten the screws before all screws are in place). all screws are in place). MODEL RTA-8336 MODEL RTA-8336 D06 080906...
- Page 2 ó ó sobre esta un trapo seco. No utilice solventes, MODELO RTA-8336 MODELO RTA-8336 sobre las superficie ni las estructuras tubulares. Gracias por comprar uno de nuestros productos por favor lea cuidadosamente las instrucciones de ensamblaje antes de instalar la unidad.(Atencion: No adjuste firmemente los tornillos antes de tener la...
- Page 3 RTA-8336 PARTS LIST PARTS LIST LISTA DE PARTES Main Structures Horizontal Tube Studs Back Panel Estructuras Principales Topes Tubo Horizontal Panel Posterior Derecho Right Left Izquierdo Supporting Tubes Keyboard Panel Tabletop Sliders Panel Superior Tubos de Soporte Deslizadores Porta teclado...
- Page 4 RTA-8336 STEPS STEPS PASOS 6PCS 6X60 MM 4PCS Insert the Studs (3) into the holes of the Main Structures (1) and Use screws A to fix the Horizontal Tube (2) and the Back Tight them well. Panel (4) between the Main Structures (1).
- Page 5 RTA-8336 4PCS 6X25 MM 4PCS 4PCS 6X35 MM Insert the screws E into the holes of the back face of the Tabletop(5) and then screw the Supporting Tubes(6) over them. Fix the Tabletop(5) to the Main Structures (1) Inserte y atornille los Tornillos E en los huecos using screws B.
- Page 6 RTA-8336 2PCS 2PCS 2PCS 6X35 MM 6X60 MM Insert the Studs For CPU Holder(13) into the Protector Tube(12), then use screws A to fix the Protector Tube(12) to the CPU Panel (11). Finally, fix the CPU Panel (11) to the right Structure(1) also with Screws A.
- Page 8 PRODUCT WARRANTY TECHNI MOBILI DESK WARRANTY LIMITED 5-YEAR WARRANTY RTA Products, LLC warrants to the Original Purchaser who acquired a new product from RTA Products or its authorized resellers that this product will be free from defects in its workmanship and materials, under normal use and service conditions, as described herein.
Need help?
Do you have a question about the RTA-8336 and is the answer not in the manual?
Questions and answers