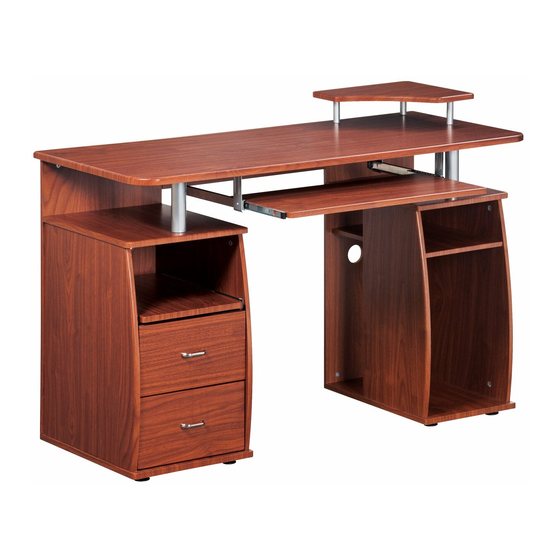
Techni Mobili RTA-8211 Assembly Instructions Manual
Hide thumbs
Also See for RTA-8211:
- Assembly instructions manual (15 pages) ,
- Assembly instructions manual (18 pages) ,
- Assembly instructions manual (17 pages)
Advertisement
Quick Links
Advertisement

Subscribe to Our Youtube Channel
Summary of Contents for Techni Mobili RTA-8211
- Page 1 Scan QR Code to view full assembly video B11 190612...
- Page 2 RTA-8211...
- Page 3 RTA-8211 MAIN PARTS LIST • Drawers front panel • Scanner panel sliders • Drawers left panel • Drawers right panel • Drawers back panel • Drawers bottom panel • Handles • Drawer sliders Sets • Scanner panel • Left panel •...
- Page 4 RTA-8211 MAIN PARTS LIST • Keyboard Sliders • Keyboard panel • Tabletop • CPU box top panel • Support tubes • Slider Base • Central back panel • Support tubes for for tabletop accessory shelf panel •Accessory shelf panel LOCATION OF THE MAIN PARTS ( FOR REFERENCE )
- Page 5 RTA-8211 LIST OF SCREWS AND FITTINGS PART QTY. ITEM PART QTY. ITEM 6X40 MM WASHER 3X15 MM 6X30 MM 4X35 MM 5X40 MM 6X25 MM 4X20 MM Φ 5 X17 MM 4X14 MM 6X12 MM GROMMET 4X4 MM SCREWDRIVER 6X35 MM...
- Page 6 RTA-8211 BEFORE YOU START THE ASSEMBLY, PLEASE READ THE FOLLOWING TIPS AND WARNINGS. ❼ ❶ To avoid misalignments, Do a quick inventory to make always leave the screws loose sure the package contains all the and tighten them until all pieces parts and hardware listed in the are positioned correctly.
- Page 7 RTA-8211 STEPS FOR ASSEMBLY STEP 1 Hardware: 6x25mm Scan QR Code to view this step STEP 2 Hardware: 4X35mm 4X20mm Scan QR Code to view this step...
- Page 8 RTA-8211 STEPS FOR ASSEMBLY STEP 3 Hardware: 3x15mm x4 Scan QR Code to view this step STEP 4 Use screws (B) to assemble the flat drawer sliders ( 8 ) on the middle and Hardware: bottom sets of slider holes as indicated.
- Page 9 RTA-8211 STEPS FOR ASSEMBLY STEP 5 Hardware: 3x15mm Scan QR Code to view this step IMPORTANT: Make sure you use in this step the correct sliders ( 4 ) which are longer and have more holes than sliders ( 22 ).
- Page 10 RTA-8211 STEPS FOR ASSEMBLY STEP 9 STEP 10 Hardware: Hardware: 3X15mm 6X40mm Scan QR Code to Scan QR Code to view this step view this step STEP 11 Hardware: 6X40mm Scan QR Code to view this step STEP 12 Hardware:...
- Page 11 RTA-8211 P.10 P.10 STEPS FOR ASSEMBLY STEP 13 Hardware: 6X40mm Scan QR Code to view this step STEP 14 Hardware: 6X25mm Scan QR Code to view this step...
- Page 12 P.11 RTA-8211 P.11 STEPS FOR ASSEMBLY STEP 16 STEP 15 Hardware: Hardware: 4X4mm 6X12mm Scan QR Code to Scan QR Code to view this step view this step STEP 17 Hardware: 4X14mm Scan QR Code to view this step...
- Page 13 P.12 RTA-8211 P.12 STEPS FOR ASSEMBLY STEP 18 2 PERSONS REQUIRED Hardware: 6X25mm 6X35mm Scan QR Code to view this step STEP 19 Hardware: 4X14mm Scan QR Code to view this step...
- Page 14 P.13 RTA-8211 P.13 STEPS FOR ASSEMBLY STEP 20 Hardware: 6X30mm Scan QR Code to view this step STEP 21 Hardware: 6X35mm Scan QR Code to view this step STEP 22 Insert the Pins (M) into one of the 3 sets of holes on the CPU box side panels &...
-
Page 15: Final Step
P.14 RTA-8211 P.14 FINAL STEP ALL DONE! Give yourself a nice pat on the back. You did a great job! - Page 16 P.15 RTA-8211 P.15 AFTER THE ASSEMBLY IS DONE, PLEASE READ CAREFULLY THE FOLLOWING WARNINGS FOR CARE AND MAINTENANCE: • Do not exceed the indicated weight limits. • Do not expose the surfaces to direct sunlight or to extreme environmental conditions.


Need help?
Do you have a question about the RTA-8211 and is the answer not in the manual?
Questions and answers