Table of Contents
Advertisement
Advertisement
Table of Contents

Related Manuals for Cantium Scientific MicroBio MB2


Summary of Contents for Cantium Scientific MicroBio MB2
- Page 1 MicroBio MB2, MB2-HiFlow and MB2-RSH Bioaerosol Sampler Operating Manual...
- Page 2 MicroBio MB2 Bioaerosol Sampler Operating Manual Applicable to MB2 standard, HiFlow and RSH models This work is licensed under a Creative Commons Attribution, Non-Commercial, ShareAlike 4.0 International License. https://creativecommons.org/licenses/by-nc-sa/4.0/ Qualisair™ is a registered trademark of Cantium Scientific Limited Cantium Scientific Limited ...
-
Page 3: Table Of Contents
Contents Regulatory Compliance ..............Warranty ..................... MicroBio MB2 Technical Specification ..........MicroBio MB2-HiFlow Technical Specification ........MicroBio MB2-RSH Technical Specification ........Introduction ..................Installing Battery ................. Battery Management ................. Sampling .................... Selection of Media ................IQ / OQ / PQ .................. - Page 4 Unit Version ....................Restore Factory Defaults ................Settings ....................Settings - Language .................. Settings - Battery Type ................Settings - Automatic Power Off ..............Tripod Mounting ................. Temperature and Humidity ..............Determining Results ................Change Plate / Dish Type ..............Cleaning .....................
-
Page 5: Regulatory Compliance
Regulatory Compliance EC Declaration of Conformity This is to certify that MicroBio MB2 products manufactured from April 2017 comply with the essential requirements of the following European Community Directives when used according to their intended purpose: Electromagnetic Compatibility (EMC) Directive 2014/30/EU BS EN 61326-1:2013 Scientific, Test and Measurement... - Page 6 Waste Electrical and Electronic Equipment Directive 2012/19/EU. Outside of the European Union, consult local regulations or your local distributor. The MicroBio MB2 key parts are manufactured from the following: Enclosure Material Recyclable Blower housing...
-
Page 7: Warranty
Warranty The manufacturer warrants this product to be free from defects in materials and workmanship for 24 months from the date of purchase. If your product is found to be defective within that period, please contact Cantium Scientific Limited or your local distributor who will arrange for repair of the instrument, or if necessary a replacement. -
Page 8: Microbio Mb2 Technical Specification
Technical Specification MicroBio MB2 Flow Rate: 100 L.min -1 ‡ Sample Volume: 10 to 10,000 litres in varying steps Sampling Volume Capacity: ~ 60,000 litres before recharge* 1.7 µm (220 x 1mm hole head) d50 Particle size: 1.35 µm (400 x 0.7mm hole head) 9.62 ms... -
Page 9: Microbio Mb2-Hiflow Technical Specification
Technical Specification MicroBio MB2-HiFlow Flow Rate: 180 L.min -1 ‡ Sample Volume: 10 to 10,000 litres in varying steps Sampling Volume Capacity: ~ 40,000 litres before recharge* d50 Particle size: 1.71 µm Mean particle velocity: 9.55 ms Weight (excluding charger 840g (inc. -
Page 10: Microbio Mb2-Rsh Technical Specification
Technical Specification MicroBio MB2-RSH Flow Rate: 100 L.min -1 ‡ Sample Volume: 10 to 10,000 litres in varying steps Sampling Volume Capacity: ~ 60,000 litres before recharge* 1.7 µm (220 x 1mm hole head) d50 Particle size: 1.35 µm (400 x 0.7mm hole head) 9.62 ms... -
Page 11: Introduction
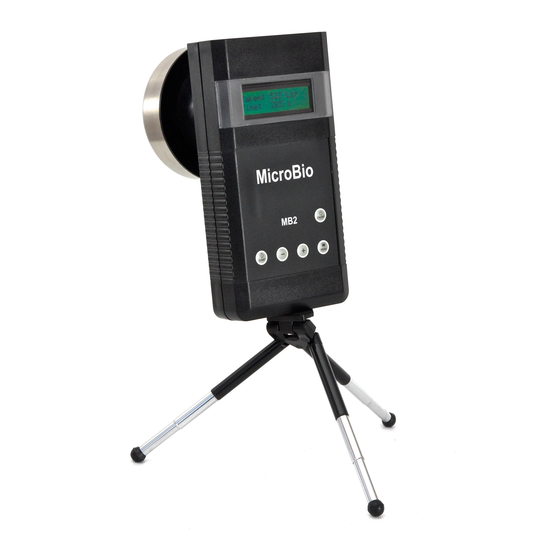
Introduction The MicroBio MB2 is part of the MicroBio range of bioaerosol samplers and is one of the most economical hand-held samplers in the world for monitoring airborne micro-organisms or bioaerosols. It is available with a standard flow rate of 100 litres per minute or the HiFlow model with a flow rate of 180 litres per minute. -
Page 12: Installing Battery
Installing Battery The battery is held in a compartment at the back of the MicroBio MB2. The unit is supplied with 4 x AA NiMH rechargeable cells. The cells must be removed for re-charging. To open the battery compartment press firmly on the “OPEN” marking on the battery compartment lid near the serial number label and then slide downwards. -
Page 13: Battery Management
Battery Management The air blower in the MicroBio MB2 requires the use of cells that are capable of high current drain. Low cost alkaline or budget rechargeable cells are often not capable of delivering the required power while maintaining their terminal voltage and the sampler may stop operating without warning. -
Page 14: Sampling
Sampling The selection of the sample volume is important for reliable sampling. If the contact plate or petri dish is overloaded with colonies it is difficult to make an accurate count. With experience, the user will anticipate the probable bioaerosol concentration in an area, but it may be necessary to make a preliminary survey at a number of sampling volumes to identify the optimum setting. -
Page 15: Inserting A Contact Plate Or Petri Dish
firmly on the support plate, then re-fit the sampling head. The standard MicroBio MB2 can use 220 or 400 hole sampling heads. The 220 hole sampling head can be used with both 55mm/65mm contact plates or 90mm petri dishes, but only the centre 55mm of the petri dish will collect samples. -
Page 16: Switching On And Off
MB2 will automatically switch off after a period of inactivity. Automatic and manual switch off is prevented during sampling, delayed start and sequential sampling. When switching off, a warning will sound and the display will show “switching off” while the MicroBio MB2 saves usage data to memory. Switching off... -
Page 17: Take A Sample
Take a Sample When switched on the unit immediately enters Take Sample mode. This mode can also be selected by pressing MENU to show the following screen, then pressing START. Take Sample Select the volume to be sampled by choosing a preset or manually adjust ⊖... - Page 18 ⊕ ⊖ If Adjust Volume is selected, use to set the required volume from 10 to 10000 litres. Press START to begin sampling. Air Volume +/- 100L During sampling the display will show the sampled volume taken and the time remaining before sampling is complete. Sampled: Time: 00:00:53...
-
Page 19: Delayed Sample
Delayed Sample The Delayed Sample feature allows the user to set the MicroBio MB2 to start sampling after a given time between 1 minute and 3 hours. Select this option by pressing MENU, then pressing START. Delayed Sample ⊕ ⊖... -
Page 20: Sequential Sampling
8 hour period (t ), broken into five separate samples (n). These numbers are entered into the MicroBio MB2 following a simple set of questions. The MicroBio MB2 then calculates how much air needs sampling per sequence (t being the time to take each sample) and the time... -
Page 21: Sequential Sampling - Configuration
Using the equation above, the interval between each of these 200 litre samples is calculated as 7,050 seconds or 1 hour, 57 minutes and 30 seconds. At the end of the sampling sequence the MicroBio MB2 displays a finished message and will automatically power off. When the MicroBio MB2 is next switched on, it will display a finished message with the total volume of... - Page 22 ⊕ ⊖ If Preset Volume is selected, use to select the required preset volume, then press START. Select Preset 100L ⊕ ⊖ If Adjust Volume is selected, use to set the required volume to be sampled then press START. The volume may be set in the range of 10 to 10000 litres.
- Page 23 START. Set Delay 01:00:00 The MicroBio MB2 will calculate the volume each sequence is to take and the interval time between each sample. Sequential Sampling process will commence, displaying a countdown if a delay was set. The first sample will be taken, then wait for the calculated interval before taking the next sample.
-
Page 24: User Presets
User Presets Factory default preset volumes are 100, 200, 400, 500, 750, 1000, 2000, 5000 and 10000 litres. However, the User Preset feature allows modification of the nine preset volumes. Press MENU to navigate to this option, then press START. User Presets The user is presented with Preset Volume [1] and the current set volume. -
Page 25: Unit Status
Unit Status Unit Status displays information about the MicroBio MB2. Press START ⊕ ⊖ select this mode, then to navigate through the information. Pressing MENU will exit this mode. Unit Status Battery Level Displays a percentage of battery capacity and voltage at rest. The capacity is only an approximation and cannot be used to determine the exact remaining sampling capacity. -
Page 26: Total Volume Count
Total Volume Count Displays the total litres of air the MicroBio MB2 has sampled since the last factory reset. This figure is useful for manufacturer’s maintenance and reliability statistics and may also be used as an indicator for the user’s regular calibration regime. -
Page 27: Restore Factory Defaults
When Unit Status mode is selected, it is possible to perform a factory reset ⊕ ⊖ on the MicroBio MB2 by holding down simultaneously. The sampler will restart and initialise all settings to factory defaults and reset the total counts to zero. -
Page 28: Settings Battery Type
START to store the setting. Battery Type Alkaline Battery Type NiMH Selecting the wrong type will not cause any harm to the MicroBio MB2 or the cells, but will give incorrect reporting of capacity. -
Page 29: Settings - Automatic Power Off
Settings - Automatic Power Off By default, the MicroBio MB2 will power off after 60 seconds of inactivity. This can be adjusted if required from 10 seconds to 5 minutes, or disabled. Settings Auto-off When the Auto-off option is shown on the screen, press START to select. -
Page 30: Tripod Mounting
Tripod Mounting The MicroBio MB2 incorporates a standard ¼”-20 UNC tripod mount, as defined in ISO1222:2010. Tripods designed for most photographic equipment are compatible with the MicroBio MB2. Temperature and Humidity It is useful to measure these at the time of each sample. Temperature and humidity are important factors in the likely concentration and viability of airborne micro-organisms. - Page 31 Alternatively, the following equation can be used to determine a corrected count. 0.483 ⎛ ⎞ ⎜ ⎟ 1.075 ⎜ ⎟ ⎜ ⎟ 1.052 − ⎝ ⎠ Where n is the number of holes on the sampling head, n is the number of counted colonies and n is the corrected count.
-
Page 32: Change Plate / Dish Type
Change Plate / Dish Type The MicroBio MB2 can accommodate both 55mm/65mm contact plates or 90mm petri dishes. The MicroBio MB2 is factory fitted with the petri dish springs (Cantium Scientific Limited part number A-00070), but these can be removed and replaced with the supplied contact plate springs (Cantium Scientific Limited part number A-00068). -
Page 33: Cleaning
All equipment should be handled aseptically. The MicroBio MB2 is suitable for use with Hydrogen Peroxide Vapour (H vapour) bio-decontamination. As the MicroBio MB2 has a fan within the sampling head, it is recommended for optimum decontamination the... -
Page 34: Validation
Validation Some industries require sampling equipment to be validated before each use. For the 100 L/min MicroBio MB2 and MB2-RSH this can be achieved using the MicroBio Validation Kit, part number A-00058 available from Cantium Scientific Limited or your local distributor. For the MB2-HiFlow, validation can be achieved using the Qualisair™... -
Page 35: Troubleshooting And Technical Support
There is variation in the outside diameter of plates/ dishes between manufacturers. The MicroBio MB2 holding springs can be adjusted to accommodate this variation. -
Page 36: Appendix A - 220 Hole Count Correction Table
Appendix A - 220 Hole Count Correction Table Count Corrected Count Corrected Count Corrected Count Corrected Note: For counts greater than that shown in the table above, please refer to ‘Determining Results’ section. -
Page 37: Appendix B - 400 Hole Count Correction Table
Appendix B - 400 Hole Count Correction Table Count Corrected Count Corrected Count Corrected Count Corrected Note: For counts greater than that shown in the table above, please refer to ‘Determining Results’ section. -
Page 38: Appendix C - Culture Media Types
Appendix C - Culture Media Types Some examples of culture media are given in the table below. However, always check with your supplier for the optimum medium to use for your specific application. Incubation Micro-organism Agar Culture Medium Temperature Bacteria: Human Flora Blood Agar 35 - 37°C... -
Page 39: Appendix D - Replacement Parts
Appendix D - Replacement Parts Description Part Number 55mm contact plate holding springs A-00068 90mm Petri dish holding springs A-00070 Head retaining spring A-00071 2mm Hex-key A-00206 Head screw pack A-00232 MB2 nitrile head O-ring A-00227 Battery charger and cells A-00053 NiMH rechargeable cell pack A-00320... -
Page 40: Appendix E - Bioaerosols
Appendix E - Bioaerosols What is a bioaerosol? Bioaerosols are airborne particles, solid or liquid. They can be large molecules or volatile compounds. They contain living organisms. They will vary in size from a fraction of a micron to around 100 microns. As with inert “dust”... -
Page 41: Monitoring Of Bioaerosols
Indoor areas: Many indoor areas are associated with bioaerosol problems. In all food processing plants, hygiene requires that levels of airborne micro- organisms are kept as low as possible. Hospitals and healthcare facilities are not only sources of a variety of organisms, but require that patients are not exposed to any of them. -
Page 42: Appendix F - Mb2-Rsh Installation
Appendix F - MB2-RSH Installation The first task is to run the connecting cable from where the sampling head is to be positioned to where the control unit is to be located. A connector is pre-fitted to the cable end to be connected to the remote sampling head. -
Page 43: Fitting The Connector For Unterminated Cables
Fitting the Connector for Unterminated Cables The following tools are required to fit the connector: 1 x Soldering iron and solder (lead free) 1 x 2.5mm slot screwdriver The connector is assembled in the order as shown in the photographs below. 1. - Page 44 3. Remove cable clamp. 4. Solder cable onto connector pins. The connector body has pin numbers embossed onto the surface adjacent to the pins. i. Pin 1: Red ii. Pin 2: Blue 5. Fit frame onto cable end and refit cable clamp. The clamp must clamp on the outer sheath/heat-shrink on the end of the cable.
- Page 45 6. Fit the pin housing back onto the frame, noting the raised pegs on the rim of the pin housing that sit into the holes on the frame. Then replace the frame cover. 7. Slide the assembly, strain relief and metal shell together. 8.
-
Page 46: Connecting The Control Unit And Remote Sampling Head
Connecting the Control Unit and remote Sampling Head The connectors are polarised so that they can only be connected in the correct manner. The remote head unit requires the female connector and the male connector end of the cable connects to the control unit. Operation Once installed, the MB2-RSH operates in exactly the same way as a conventional MB2 bioaerosol sampler. - Page 47 NOTES:...
- Page 48 Cantium Scientific Limited MicroBio MB2 Bioaerosol Sampler Operating Manual www.cantiumscientific.com October 2019 (Rev. 5) A-00435...
Need help?
Do you have a question about the MicroBio MB2 and is the answer not in the manual?
Questions and answers