
Subscribe to Our Youtube Channel
Related Manuals for Swiss Madison SM-WC426


Summary of Contents for Swiss Madison SM-WC426
- Page 1 INSTALLATION wiss adison ® ® INSTRUCTIONS Wall-Hung Concealed Tank System SM-WC426 Share your pictures for a feature using #SwissMadison www.swissmadison.com | 1-434-623-4766 | info@swissmadison.com...
-
Page 2: Prior To Installation
· We recommend a professional contractor. Customer is responsible for any damage that may occur during installation. · Swiss Madison recommends using a cement board or tile backer board for the walboard backing, avoid gypsum board as it may compromise the load strength of the toilet installation. - Page 3 Thank you for your purchase! Thank you for purchasing a Swiss Madison Concealed Tank System. We appreciate your business and know you will enjoy your product for many years to come. If you have any questions or require assistance we would be happy to help, please contact us at 1-434-6234766 or info@swissmadison.com.
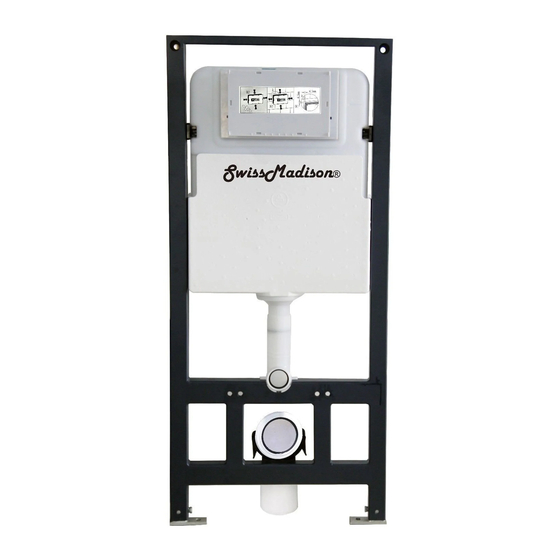
- Page 4 CONCEALED TANK SYSTEM ROUGH DIMENSIONS The step-by-step guidelines in the installation instructions are a general reference for installing a Swiss Madison Concealed Tank System. Should there be any discrepancies, Swiss Madison cannot be held liable. It is recommended to install all Swiss Madison products by hiring a licensed professional 1.
-
Page 5: Installation Instructions
CONCEALED TANK SYSTEM INSTALLATION INSTRUCTIONS Loose Parts: SM-CPT61 Discharge pipe 2x6 SM-CPT62 Pipes inlet/outlet 2x6 SM-CPT64 4 Pcs bolts 2x6 SM-CPT66 Mounting box 2x6 SM-CPT68 Thread bolt 2x6 SM-CPT51 Actuator plastic pins 1. Attach Legs · Attach legs to framing ·... - Page 6 CONCEALED TANK SYSTEM INSTALLATION INSTRUCTIONS 2. Fasten Mounts · After adjusting bowl height, fasten four mounts (A). · Screw carrier to wood framing flush across the front. NOTE: It is recommended to use 2 1/2” screws and 1 1/4” fender washers (4 of each total). ·...
- Page 7 CONCEALED TANK SYSTEM INSTALLATION INSTRUCTIONS 4. Fasten Mounts · Tie your mechanical coupling into your exsisting sanitary line using a 4x3” or 3x3” depending on your installation. · Thread in threaded bolts, be sure the slotted end is to the outside for later adjustments. Place plastic sleeves over the end of the bolts to protect during installation.
- Page 8 CONCEALED TANK SYSTEM INSTALLATION INSTRUCTIONS 6. Remove Actuator Cover 7. Tighten Water Connection · Hold shutoff valve stationary while tightening your water connection. · Install the locking nut as shown below. — 7 —...
- Page 9 CONCEALED TANK SYSTEM INSTALLATION INSTRUCTIONS 8. Flush Debris · Once the water connection is made to the water shutoff valve, undo the other side of the hose. · Turn on the valve to flush out any debris before re-installing to the actuator. 00:00:45 9.
- Page 10 CONCEALED TANK SYSTEM INSTALLATION INSTRUCTIONS 10. Secure Roughing Box · Ensure roughing box is secure to keep any debris from entering the tank. “Click” 11. Install Wall Materials · Trim roughing box after installing wall materials. max. ¹⁄8” max. ¹⁄8” ¹⁄2”- 2³⁄4”...
- Page 11 CONCEALED TANK SYSTEM INSTALLATION INSTRUCTIONS Toilet Installation 1. Fit Pipes · Install pipes and make sure they are thouroughly inserted. · With a ruler, mark a line on the pipe where it meets the finished wall. · Remove from wall and install pipes in the back of the toilet and make sure they are thouroughly inserted. ·...
- Page 12 CONCEALED TANK SYSTEM INSTALLATION INSTRUCTIONS 3. Mount Bowl · With grease sponge, thoroughly lubricate all ends. · Before mounting, measure thickness of china and mounting hardware to get approximate depth of threaded rods. · Use slotted end of thread bolt to adjust in or out. Do not damage the thread. 1”...
- Page 13 If you have any questions or concerns, please contact us directly at 1-434-MADISON (623-4766) WARNING: Contents of your order may contain sharp and possibly other harmful pieces and may cause hazard to children and adults. Swiss Madison® is not responsible in any way for personal dam- ages.
Need help?
Do you have a question about the SM-WC426 and is the answer not in the manual?
Questions and answers