
Related Manuals for Swiss Madison SM-WC326


Summary of Contents for Swiss Madison SM-WC326
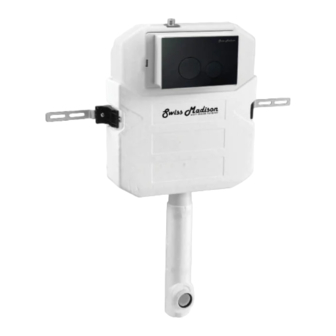
- Page 1 Back-to-Wall Carrier System ® INSTALLATION INSTRUCTIONS w e l l m a d e f o r e v e r Commercial Concealed In-Wall Toilet Tank for Back-to-Wall Toilet SM-WC326 @SwissMadison #WellMadeForever www.swissmadison.com | 1-434-623-4766 | info@swissmadison.com...
-
Page 2: Prior To Installation
· · The step-by-step guidelines in the installation instructions are a general reference. Should there be any discrepancies, Swiss Madison cannot be held liable. It is recommended to install all Swiss Madison products by hiring a licensed professional. · Read installation and maintenance instructions thoroughly before installing. Be sure to use proper tools and always wear proper personal safety accessories for your protection. - Page 3 BACK-TO-WALL CARRIER SYSTEM INSTALLATION INSTRUCTIONS Parts for Reference: 14 15 Flush Actuator not included *Click* — 2 —...
- Page 4 BACK-TO-WALL CARRIER SYSTEM INSTALLATION INSTRUCTIONS 39 ³⁄8” · Pay close attention to the 39 3/8” measurement (height from your finished floor). · Unit may be easily installed in wood framing (2” x 6” wall) frame accordingly and fasten 39 ³⁄8” securely.
- Page 5 BACK-TO-WALL CARRIER SYSTEM INSTALLATION INSTRUCTIONS 39 ³⁄8” L (max.¹5⁄64”) · From finished floor to mark indicated. · Refer to bowl being used to measure the correct heights and measurements (see below). L=X-H · De-burr any particles from pipe after cutting. Grease ·...
- Page 6 BACK-TO-WALL CARRIER SYSTEM INSTALLATION INSTRUCTIONS · Remove cover plate to install water supply valve. · Teflon tape is recommended on valve threads. Attach to waste supply valve and tighten carefully (see below). · Install into tank and secure. — 5 —...
- Page 7 BACK-TO-WALL CARRIER SYSTEM INSTALLATION INSTRUCTIONS · Flush out water supply line before connecting to tank supply. Connect and tighten. · Remember to turn the valve on once the installation is complete. *Click* · You will hear a “click” when installed properly. —...
- Page 8 BACK-TO-WALL CARRIER SYSTEM INSTALLATION INSTRUCTIONS · Carefully cut off excess after complete installation. ²5⁄32” ~ 2 ³⁄4” max. ¹⁄8” max. ¹⁄8” Toilet Installation L+¹5⁄64” · Carefully measure between your marks, this distance will be cut off the bald end. · Add 15/64” to measurement before ·...
-
Page 9: Installation Instructions
BACK-TO-WALL TOILET INSTALLATION INSTRUCTIONS Adjusting Flush Volume Make sure your water connection is shut prior to adjusting flush volume if the unit is already hooked up to the water line. Remove the inlet and outlet valves from the concealed cistern tank: Adjust the dimension of the outlet valve (A, B) and the dimension of the inlet valve (C) with the following dimensions (make sure to measure in mm): WC324 A= 9mm B= 2mm, C= 42mm... - Page 10 (including, without limitation, costs associated with ‘professionals’ or ‘experts’, investigations, audits, analyses, attorneys and any other professional/hired services). The Swiss Madison® warranty is a comprehensive and explicit limit of liability. All items not disclosed within the warranty are not addressable within the responsibility of Swiss Madison®. Certain states have variances regarding implied warranties;...
Need help?
Do you have a question about the SM-WC326 and is the answer not in the manual?
Questions and answers