GCX VHM Installation Manual
Wall mount kit for philips intellivue mx600/700/800 and mp60/70
Hide thumbs
Also See for VHM:
- Installation & operation manual (50 pages) ,
- Mounting assembly installation manual (3 pages)
Table of Contents
Advertisement
Quick Links
3875 Cypress Drive Petaluma, CA 94954 800.228.2555 707.773.1100 Fax 707.773.1180 www.gcx.com
VHM Wall Mount Kit for Philips IntelliVue MX600/700/800 and MP60/70
The purpose of this guide is to:
1. Describe attachment of Philips-supplied Table Mount to Mounting Plate (page 2).
2. Describe mounting of VHM Arm in the Channel (page 2).
3. Describe attachment of Down Post to VHM Arm (page 3).
4. Describe mounting of Flexible Module Server (FMS) on Down Post (page 3).
5. Describe counterbalance adjustment (page 4).
6. Describe operation and adjustment of VHM Arm (page 5 – 6).
Parts Reference
The following parts and hardware are included in this installation kit (hardware not shown):
Item #
Description
1
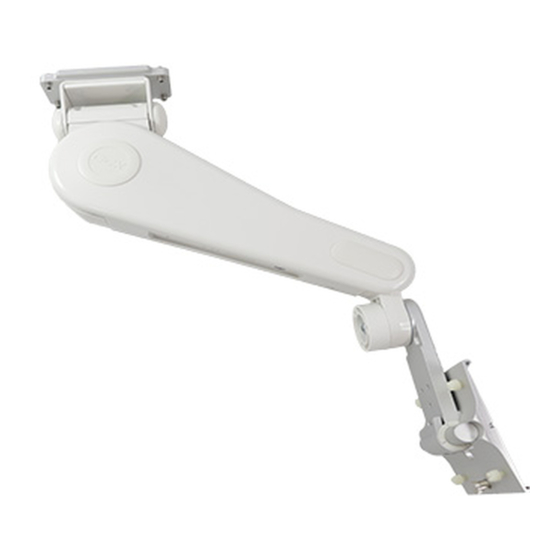
VHM Arm with Mounting Adapter
2
Locking Lever, Height Adjustment
3
Cable Guide
4
6'' Down Post Kit
5
#10-32 x 3/8'' Socket Head Cap Screw (SHCS)
6
M6 x 12mm FHMS
5/32" [4mm] Hex Wrench
7
8
1/8'' Hex Wrench
9
1/2'' [13mm] Socket Wrench
10
Wall Channel Cover, 16''/40.6cm
*11
Spacer
*12
M6 x 14mm Pan Head Machine Screw (PHMS)
*See "Non-Table Mount" (page 3) for use of these parts.
Tools Required: 5/32'' and 1/8'' hex wrenches (provided), Phillips screwdriver (not provided), and 1/2'' [13mm] socket
wrench (provided).
WARNING!
The VHM Arm contains a strong spring which is used to counterbalance the weight of the mounted
device.
The Arm housing should never be disassembled by non-GCX personnel.
mounted device should only be removed with the Arm in its highest vertical position, and with the Height
Locking Lever engaged. Failure to follow these guidelines could result in serious injury.
Before mounting the Arm:
1. Note that this arm has a wide range of motion both up/down and side to side. Please consider carefully the device
being mounted and the proximity of the assembly to other equipment, hospital personnel, and the patient. GCX
recommends that the hospital's risk management personnel verify the appropriateness of the application prior to
installation and use.
2. The combination of the MX600/700/800 and an 8-slot FMS exceeds the acceptable load limit for the VHM Arm,
however a 4-slot FMS can be used.
Installation Guide
Qty
1
1
1
1
4
3
3
1
1
12
1
1
1
2
DU-AG-0018-25 Rev J 4/19/17 GCX Corp Page 1 of 8
1
3
Additionally, the
2
Advertisement
Table of Contents

Related Manuals for GCX VHM


Summary of Contents for GCX VHM
- Page 1 2. The combination of the MX600/700/800 and an 8-slot FMS exceeds the acceptable load limit for the VHM Arm, however a 4-slot FMS can be used.
- Page 2 3. The combination of MP60/70 and an 8-slot or 4-slot FMS exceeds the acceptable load limit for the VHM Arm. MP60/70 can only be used without a FMS. 4. If assistance is needed regarding an application, please contact a GCX product specialist at (800) 228-2555 or +1 707- 773-1100.
- Page 3 Mounting the Monitor on the Arm Table Mount Mount the monitor in accordance with the Philips Table Mount instruction sheet. CAUTION : Ensure the device mounting locking mechanism is properly engaged at all times DU-AG-0018-25 Rev J 4/19/17 GCX Corp Page 3 of 8...
- Page 4 Mounting the Flexible Module Server (FMS) on the Down Post 1. Attach the FMS to the Down Post by placing the Clamp around the Down Post and tightening the knob. Clamp Down Post DU-AG-0018-25 Rev J 4/19/17 GCX Corp Page 4 of 8...
- Page 5 Arm. Use caution while performing this procedure. The VHM Arm must be adjusted to counterbalance the mounted instrument throughout the Arm’s vertical range of motion. When properly counterbalanced, the VHM Arm will maintain its height without engagement of the Height Locking Lever.
- Page 6 1/2'' [13mm] box or open-end wrench, tighten or loosen Pivot Bolt and Hex Nut to desired tension. Reinstall bolt caps back over each end of Pivot Bolt. 1/2" [13 mm] Socket Wrench DU-AG-0018-25 Rev J 4/19/17 GCX Corp Page 6 of 8...
- Page 7 3. Relieve the weight of the mounted instrument by lifting against the underside of the Arm, near the instrument. Simultaneously, push up or pull down the opposite end of the Arm immediately in front of the Slide. 4. Tighten four (4) set screws. DU-AG-0018-25 Rev J 4/19/17 GCX Corp Page 7 of 8...
- Page 8 Dry the arm thoroughly after cleaning. CAUTION: GCX makes no claims regarding the efficacy of the listed chemicals or processes as a means for controlling infection. Consult your hospital’s infection control officer or epidemiologist. To clean or sterilize mounted instruments or accessory equipment, refer to the specific instructions delivered with those products.
Need help?
Do you have a question about the VHM and is the answer not in the manual?
Questions and answers