EarthWay 2170 Assembly Instructions Manual
Commercial broadcast spreader with side spread control
Hide thumbs
Also See for 2170:
- Operating instructions manual (9 pages) ,
- Assembly and operating instructions manual (9 pages) ,
- Assembly instructions manual (10 pages)
Table of Contents
Advertisement
Quick Links
MODEL # 2170
Prior to assembly, you will
need the following tools:
Needle nose pliers
#2 Phillips screwdriver
Adjustable wrench or ½" box
wrench
7/16" wrench
P2170_M52164_Rev_May2020_compressed
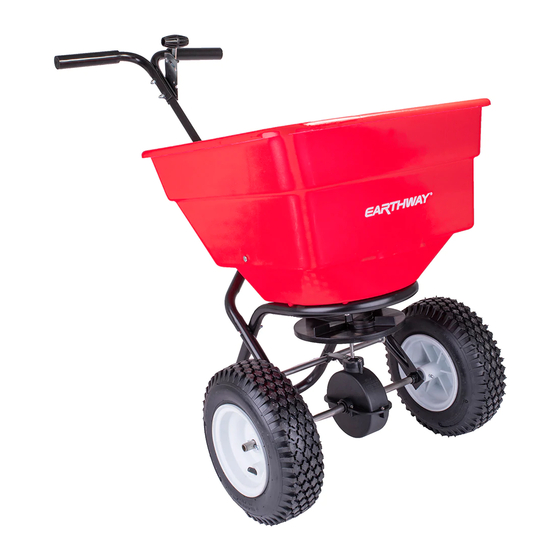
Commercial Broadcast Spreader
with Side Spread Control
ASSEMBLY INSTRUCTIONS
SIDE SPREAD CONTROL
Your EarthWay spreader includes a feature called side
spread control. This feature turns off fertilizer from being
spread to the left side. To activate this feature, slide the
lever below the hopper to the right (if standing behind
the spreader) and walk along a sidewalk or flowerbed
that is 12"-14" on your left side. Fertilizer will not spread
to the left. This feature is better than a deflector as no
material is wasted by the deflector.
ASSEMBLY HARDWARE
SPREADER COMPONENTS
PAGE 1
Advertisement
Table of Contents

Related Manuals for EarthWay 2170


Summary of Contents for EarthWay 2170
- Page 1 MODEL # 2170 ASSEMBLY INSTRUCTIONS SIDE SPREAD CONTROL Your EarthWay spreader includes a feature called side spread control. This feature turns off fertilizer from being spread to the left side. To activate this feature, slide the lever below the hopper to the right (if standing behind the spreader) and walk along a sidewalk or flowerbed that is 12″-14″...
-
Page 2: Helpful Hints
Assembly and Operation Instructions HELPFUL HINTS Read the directions before assembly. If your spreader does not spread evenly, be sure the FRONT on the gear box points to the front of the spreader. The impeller must turn clockwise. Reversing the gearbox will cause the impeller to turn counter clockwise. Clean the impeller plate after each use. - Page 3 Step 4: hole in center of hoppers bottom. The word “FRONT” on the GEARBOX must point to Front of the HOPPER. The EarthWay logo is on the front of the hopper. (A) Install lower handles onto the frame to Step 5: both sides as shown.
- Page 4 Assembly and Operation Instructions NOTE: Notch on bearings and lower handles. Bearings must go through flat side of lower handle (from the outside to the inside). NOW GO BACK AND TIGHTEN ALL NUTS AND BOLTS STARTING WITH FIRST STEP. DO NOT OVER TIGHTEN. Slide axle bushing over axle and into axle Step 7: bearing to both sides as shown.
- Page 5 Assembly and Operation Instructions TURN SPREADER UPRIGHT ON TO WHEELS. Insert 2″ bolt through Gauge & Lever assembly, Step 10: next through upper handle, then the handle shaft and then the other upper handle and secure with locknut. TIGHTEN ALL HARDWARE NOW P2170_M52164_Rev_May2020_compressed PAGE 5...
- Page 6 Assembly and Operation Instructions Insert pivot rod into shut-off plate as shown. Step 11: Turn to lock in place. Insert other end of pivot rod into pivot and Step 12: bracket assembly as shown. Turn to lock in place. Install handle shaft to lower handles and pivot & bracket assembly as shown. Using ¼-20 x 2″ bolts and Step 13: locknuts.
- Page 7 Assembly and Operation Instructions Install flattened end of control rod in to lever Step 15: on gauge as shown. Turn to lock in place. Next push lever forward to setting “0”. Align control rod with hole in pivot bracket, pull lever backward to insert control rod through hole in pivot bracket.
-
Page 8: Customer Service
ONE YEAR WARRANTY EarthWay Products, Inc. warrants this product free of defects in original workmanship and materials for a period of one year to the end user with the original purchase receipt. If a manufacturing non-conformance is found, EarthWay Products, Inc. at its discretion will repair or replace the part(s)/product at no charge provided the failure is not the result of incorrect installation, mishandling, misuse, tampering, or normal wear and tear as determined by EarthWay. -
Page 9: New Feature
The SideSpred-Control™ maintains the correct application rate while it is activated, giving you excellent results in seeding or spreading while controlling the spread pattern on the left side of the spreader. The SideSpred-Control™ is an EarthWay exclusive. - Page 10 Assembly and Operation Instructions 2170 Broadcast Spreader Parts List KEY # PART # DESCRIPTION 40003 SQUARE SCREEN HOPPER ASSEMBLY 60335 (2170/2170T) 33117 AGITATOR 12209 HOPPER BUSHING 36214 1/4-20 X 1 1/2" PHPMS S.S. 1/4-20 NYLON INS LOCKNUT 32103 ZINC 1/4-20 X 1" HHMS S.S.
- Page 11 Assembly and Operation Instructions Broadcast Setting Matrix Calibration Techniques How to ensure your spreader is properly calibrated Make sure the drop holes in the bottom of the hopper are fully open when the Rate Control handle is on #30. If not, please adjust control cable or control rod to allow for a full open hopper position at #30.
- Page 12 Assembly and Operation Instructions ESTABLISHING A SETTING RATE Determine the rate by dividing the bag weight by the coverage of the bag listed (Example: (37lbs/10,000square Step 1: feet = .0037), then multiply by 1,000 (.0037x1000 = 3.7lbs/1,000 square feet). That will give the suggested LBS/1,000 square feet rate.
Need help?
Do you have a question about the 2170 and is the answer not in the manual?
Questions and answers