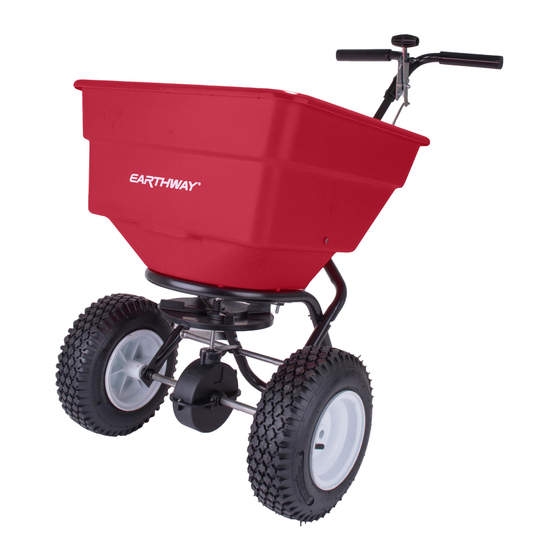
Advertisement
2170T C
ommerCial
B
roadCasT
ASSEMBLY and OPERATING INSTRUCTIONS
PLEASE CALL IF YOU ARE MISSING ANY PARTS, HAVE ANY DIFFICULTY IN ASSEMBLY, OR HAVE ANY QUESTIONS
REGARDING THE SAFE OPERATION OF THIS SPREADER. THIS MODEL INCLUDES LIFETIME TECHNICAL SUPPORT
SUPPORT HOT LINE: 574-848-7491 or 800-294-0671, EMAIL: TECHSUPPORT@EARTHWAY.COM
HELPFUL HINTS:
; If your spreader does not spread evenly, be sure the word "FRONT" on the gear box points toward the tow bar of the
spreader. The impeller must turn clockwise. Reversing the gearbox will cause the impeller to turn counter clockwise.
Clean the impeller surface after each use. Fertilizer stuck on the impeller blades will cause uneven spreading.
; Your spreader is designed to be pulled at three miles per hour, which is a brisk walking speed. Slower or faster speeds will
change the spread patterns. Wet fertilizer will also change the spread pattern and flow rate. Clean and dry your spreader
thoroughly after each use. Coat all metal surfaces (inside & outside of chassis) with light oil or silicon spray to help
prevent corrosion. Wash between the shut-off plate and bottom of the hopper.
; Gears are permanently lubricated at the factory. Do not open the gearbox or dirt may enter.
IF YOUR SPREADER COMES SEMI ASSEMBLED, SKIP TO STEP #7
33117
32100
Qty 1
Qty 2
36210
Qty 2
36214
31100
Qty 4
*31114
Qty 7
12152
12148
Qty 2
Qty 2
*Included in Extension Kit
1. Remove and identify all loose parts from carton
1/4-20 SS Locknut
(Qty 4 #36214)
1/4-20 X 1½"
Phillips Panhead
T
ow
s
preader
READ THE DIRECTIONS BEFORE ASSEMBLY
36300
32103
Qty 6
Qty 9
36105
Qty 1
33109
Qty 1
31120
Qty 1
Qty 2
31106
Qty 3
.
(Qty 4 #36300)
2. Position hopper on side. Install frame using (4) 1/4-20 x 1½" Pan Head Phillips
machine screws and (4) 1/4-20 nylon insert locknuts. First put bolts through holes in
frame then through the holes in bottom of hopper. Secure with locknuts. TIGHTEN
THESE LOCKNUTS NOW......TIP: coat stainless steel bolts with wax or grease
before tightening to prevent them from seizing.
DO NOT TIGHTEN WITH POWER TOOLS.
ROCK SALT and POWDERED MATERIALS
should not be used in this spreader as it will damage
33108
Qty 1
the gearbox and can void the warranty.
Use only granular materials.
30
Do not tow
OVER
faster than
3 MPH
3 MPH
12
22
13
18
15
14
28
10
7-2013 Pt# 52165
9
21
6
7
MADE IN THE USA
PAGE 1
Advertisement
Table of Contents

Summary of Contents for EarthWay 2170T
- Page 1 PLEASE CALL IF YOU ARE MISSING ANY PARTS, HAVE ANY DIFFICULTY IN ASSEMBLY, OR HAVE ANY QUESTIONS REGARDING THE SAFE OPERATION OF THIS SPREADER. THIS MODEL INCLUDES LIFETIME TECHNICAL SUPPORT SUPPORT HOT LINE: 574-848-7491 or 800-294-0671, EMAIL: TECHSUPPORT@EARTHWAY.COM HELPFUL HINTS: READ THE DIRECTIONS BEFORE ASSEMBLY ;...
- Page 2 Pinion Front Shaft ⅛ x 1¼” Impeller Cotter Pin (#36105) COAST WHEEL HOLE Cross Brace Gearbox Brace DRIVE WHEEL HOLE Gearbox & Axle Assembly 3. Install impeller onto pinion shaft. Insert 1/8”x 1¼” cotter pin through impeller then through pinion shaft. Use hole closest to the gear box. Spread cotter pin to prevent from falling out.
- Page 3 1/4 - 20 Lock Nut Shut-Off Rotate Plate Pivot 1/4 - 20 Lock Nut Pivot Rod with extra bend 1/4 X 1½” Hex Head Bolt 1/4 X 2” Hex Head Bolt 1/4 X 1½” 1/4 X 1¾” Hex Head Bolt Hex Head Bolt 1/4 X 2¼”...
- Page 4 GAUGE & LEVER ASSEMBLY Gauge Setting Overlay Control Rod 14. Install (1) 1/4-20 regular nut (not a locknut) Tabbed Hole on to control rod as shown. Control Rod Lever Tensioning Nut 15. Install flattened end of control rod in to lever on gauge as shown. Turn to lock in place.
-
Page 5: Year Limited Warranty
5-YEAR LIMITED WARRANTY Earthway Products, Inc. warrants this product free of defects in original workmanship and materials for a period of 5-Years to the end user with the original purchase receipt. If a manufacturing non-conformance is found, Earthway Products, Inc. at its discretion will repair or replace the part(s) or product at no charge provided the failure is not the result of incorrect installation, mishandling, misuse, tampering, or normal wear and tear as determined by Earthway. -
Page 6: Parts List
3-Side Salt Deflector Kit Standard Settings Gauge Overlay #12196 and OPTIONAL Lesco Settings Gauge Overlay #12195 You can find replacement nuts & bolts at your local hardware store. 2170T Broadcast Tow Spreader ~ Parts List Key # Part # Description...


Need help?
Do you have a question about the 2170T and is the answer not in the manual?
Questions and answers