Table of Contents
Advertisement
Advertisement
Table of Contents

Related Manuals for DAL-BO PowerRoll 1030

Summary of Contents for DAL-BO PowerRoll 1030
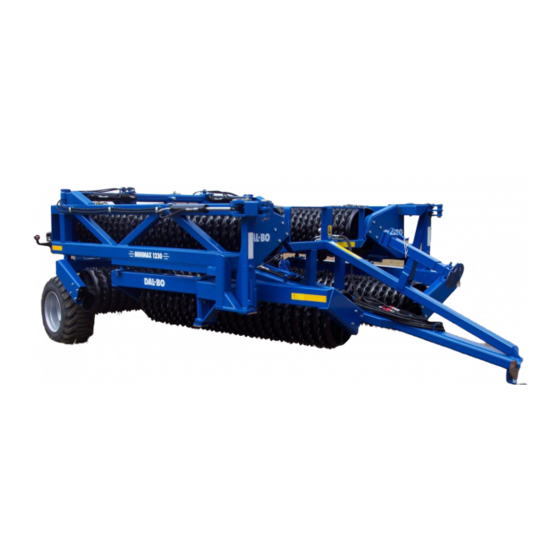
- Page 1 PowerRoll GB – 1030 & 1230...
- Page 3 Points, which are of importance with regard to safety are marked Using the roller with a non-original hydraulic circuit will invalidate the warranty. Dal-Bo cannot be held liable for damage caused by a non-original hydraulic circuit. Tighten all screw connections after a few hours' use. ...
-
Page 4: Table Of Contents
Contents: Application: ............................5 Noise:............................. 5 Dust: .............................. 5 Handling: ............................6 Assembly: ............................6 Starting: .............................. 9 Operation: ............................9 Unfolding: ............................. 9 Folding: ............................10 Maintenance: ..........................11 REPAIRS: ............................12 Wheels: ............................12 Bearings, rings and shafts: ......................13 Rams: ............................ -
Page 5: Application
The PowerRoll must not be used as a transporter, pile driver, hydraulic press or the like. If in doubt, ask your dealer or DAL-BO. The PowerRoll must not be used for rolling roads or similar hard surfaces. -
Page 6: Handling
Wheel 19.0/45-17 (optional extra) Assembly: See fig. 1. The machine should be assembled by your Dal-Bo dealer's qualified fitters at an "approved" workshop: A crane which can lift at least 1000 kg should be used. 1. Fit the central section pos. 1 with roller rings, and position it in the centre of a flat area of floor so that it is resting on the roller rings and wheel hubs. - Page 7 7. Fit the inner side sections pos. 6 without the roller rings. This is done by hooking onto the middle of the roller section itself so that the frame can be turned to get the pin pos. 7 in. This requires two people. It is important to guide the side sections so that hole in the bushing is aligned with the hole in the pin.
- Page 8 Using the roller with a non-original hydraulic circuit will invalidate the warranty. Dal-Bo cannot be held liable for damage caused by a non-original hydraulic circuit. 14. Operate the large rams so that the roller tips into working position. This allows the wheels to be fitted without using a jack.
-
Page 9: Starting
19. Using the rams (pos. 5), swing the side sections in until they hit the stop/ transport bearing. Keep an eye on the hydraulic hoses. Take care not to get trapped. 20. Using the large rams (red hoses), lower the side sections into the transport bearing. -
Page 10: Folding
Check all the accumulators on the machine at least once a year for leaks and to ensure that the precharge pressure is set correctly. Contact an authorized Dal-Bo dealer for more information. Folding: First release the pressure from the side sections (blue hoses) by unfolding them (pressure on the gauge drops). -
Page 11: Maintenance
Maintenance: Retighten all screw connections, including hub nuts, after the first day of work. Chassis - 12 lubrication points - lubricate daily. Roller bearings - 10 - lubricate every 50 working hours. Lubricate the wheel bearings once a season by removing the hub caps and greasing. -
Page 12: Repairs
REPAIRS: Wheels: To change a wheel because of a puncture or the like, put the machine in working position. This allows the wheel to be removed without using a jack. Replacing wheel bearings. See fig. 6. 1. Remove the hub cap (pos. 21). 2. -
Page 13: Bearings, Rings And Shafts
Bearings, rings and shafts: Removal of roller shaft with rings for replacement of bearings, rings or shaft. Should be done at a workshop. Side section - REMOVAL: This requires an approved crane which can lift at least 1000 kg. Park the roller with the section in question beneath the crane - preferably connected to a tractor. - Page 14 Crosskill rings. Note the direction of rotation of the shaft. After the outside stopring, fig. 8 pos.1, start with a small ring. It must face as shown in fig. 8. Then fit a bushing. On top of this fit a large ring which faces as shown in fig. 8. Finish with a small ring.
- Page 15 Unfold the roller frame as described above. Attach two chains/straps. Lift the complete shaft with rings up and into the roller frame using an approved crane (min. 1000 kg). Note that the last stopring to be fitted, fig. 7 -9 pos. 2, must face the middle of the roller.
-
Page 16: Rams
On top of this fit a large ring which faces as shown in fig. 8. Finish with a small ring. Make sure that the rings are tight up against each other. Welled rings. Start with two rings which are bolted together as shown in fig. Fill the shaft until approx. - Page 17 3. Remove the sleeve (pos. 4). 4. Pull the gland off the piston rod (pos. 2). 5. The sealings above the sleeve are now removed, (pos. 5,6,7,8,9), use either a awl or a screwdriver. 6. Clean all the parts. Check for filings and shavings, make sure that their is no rust in the gland.
- Page 18 3. Remove the lock nut (pos. 1). 4. Remove the sleeve shoe (pos. 2). 5. Pull the top off the piston rod (pos.7). 6. Remove the packings from the top and sleeve shoe (pos. 3 + 4 + 8 + 9 + 10 + 11) - use an awl or screwdriver if necessary).
- Page 19 Replacing the hydraulic sealings: REMOVAL: 1. Drain the oil out of the ram (if necessary use compressed air to move the piston forward and back to force the oil out. 2. Run the piston into middle position. Unscrew the top (pos. 11) 30 mm. If the top is sitting very tight, this can be remedied by heating the front of the sleeve to approx.
-
Page 20: Outer Sections
Outer sections: Outer sections should be replaced at a workshop. See fig. 14. This job is best done with the roller in transport position. Remove the shaft with roller rings as described above. Hook onto roughly the middle of the frame and lift until the pin (pos. 1) can be taken out. -
Page 21: Drawbar
Remove the ram. The hoses can remain attached. Remove the locking screws (pos. 2). Hook onto the centre of the roller frame and lift so that the large pin can be removed. Take care. The frame can swing round. Assemble in reverse order. -
Page 22: Optional Extras
DK-2600 Hvidovre +45 31 49 15 33 Fax +45 31 49 78 79 Spare parts for the system can be obtained through DAL-BO or from TRANSPORT-TEKNIK direct. WABCO is an international company with service centres in Germany, Belgium, Brazil, France, the UK, Holland, India, Italy, Japan, Austria, Sweden, Switzerland, Spain and the USA. - Page 23 The following firms in Germany carry a full range of equipment, comprising: Original WABCO brake equipment All screw connections, hoses, hose clips, brackets, etc. Fitting instructions Brake diagram Fendt: Case, John Deere, Ebro, Eicher, Fendt, X. Fendt & Co. Fiatagri, Ford, Hürlimann, KHD, Joh Georg Fendt Strasse 4 Lamborghini, Landini, MF, Renault,...
- Page 24 Air brake diagram: Supply (red) Brake (yellow) Figure 16 ITEM DESIGNATION WABCO Order No. Hose coupling (red) 952.200.021.0 Hose coupling (yellow) 952.200.022.0 Line filter 432.500.020.0 Trailer brake valve 971.002.150.0 Release valve 963.001.012.0 Tank 40 l Std. 640 040.276.0745.10 Air tank mounting for 40 l-276 mm 541018 Drain valve 934.300.001.0...
- Page 25 POS 4: Line filter 432.500.020.0 Figur 17 Pos 5: Breakvalve 971.002.150.0 Release valve 963.001.012.0 Figure 18 Pos 6: Airtank 40 ltr. Std. 640 040.276.0745.10 Pos 7: Drainvalve 934.300.001.0 Figure 19...
- Page 26 Pos 8/13: Membrane ram 20” 423.105.900.0 Break hub, key lenth=225 PBA-ST 6006/B318 75x400 10.10.215233 Figure 20...
-
Page 27: Spare Parts
SPARE PARTS:...
Need help?
Do you have a question about the PowerRoll 1030 and is the answer not in the manual?
Questions and answers