Poly CCX Series User Manual
Business media phones with opensip
Hide thumbs
Also See for CCX Series:
- User manual ,
- Quick start manual (4 pages) ,
- User manual (88 pages)
Table of Contents
Advertisement
USER GUIDE
6.2.11 | June 2020 | 3725-49794-001A
Poly CCX Business Media Phones with OpenSIP
Getting Help
For more information about installing, configuring, and
administering Poly/Polycom products or services, go to
Polycom Support.
Plantronics, Inc. (Poly — formerly Plantronics and Polycom)
345 Encinal Street
Santa Cruz, California
95060
©
2020 Plantronics, Inc. All rights reserved. Poly, the propeller
design, and the Poly logo are trademarks of Plantronics, Inc.
All other trademarks are the property of their respective
owners.
Advertisement
Table of Contents

Related Manuals for Poly CCX Series


Summary of Contents for Poly CCX Series
- Page 1 Plantronics, Inc. (Poly — formerly Plantronics and Polycom) 345 Encinal Street Santa Cruz, California 95060 © 2020 Plantronics, Inc. All rights reserved. Poly, the propeller design, and the Poly logo are trademarks of Plantronics, Inc. All other trademarks are the property of their respective owners.
-
Page 2: Table Of Contents
Related Poly and Partner Resources..................9 Getting Started....................10 CCX Phone Hardware Overview..................11 Poly CCX 400 Business Media Phones Hardware..........11 Poly CCX 500 Business Media Phones Hardware..........13 Poly CCX 600 Business Media Phones Hardware..........15 Poly CCX 700 Business Media Phones Hardware..........17 LED Indicators on CCX Phones................ - Page 3 Contents Call a Favorite......................33 Place a Call over Bluetooth..................33 Place a Call from a Locked Phone................. 33 Redial a Number....................33 End an Audio Call......................33 Answering Audio Calls...................... 34 Answer an Incoming Call..................34 Answer a Call When in a Call.................34 Answer Calls Automatically..................
- Page 4 Contents Rejecting Calls with Do Not Disturb............... 44 Reject Anonymous Calls..................45 Recording Audio Calls..................47 Guidelines When Recording Calls..................47 Record a Call........................48 Pause a Recording......................48 Resume a Recording......................48 Stop Recording......................... 48 Record a Conference Call....................49 Browse Recorded Calls.....................49 Play a Recorded Call......................
- Page 5 Contents Merge Calls into a Conference Call................59 End a Conference Call................... 59 Hold a Conference Call..................60 Resume a Conference Call..................60 Split a Conference Call...................60 Shared Lines.....................61 Shared Line Limitations.....................61 Answering Calls on Shared Lines..................61 Missed and Received Calls on Shared Lines..............61 Hold a Call Privately on a Shared Line................
- Page 6 Receiving PTT Broadcasts..................79 Reply to PTT Broadcasts..................79 End PTT Broadcasts....................80 Push To Talk Settings..................... 80 Poly CCX Phone Settings................82 Password Required to Access Basic Settings..............82 Set the System Language....................82 Disable Call Waiting......................83 Time and Date Display...................... 83 Change the Time and Date Format................
- Page 7 Contents Change the Volume....................91 Updating Your Buddy Status..................... 91 Update Your Buddy Status..................91 Automatically Update Your Buddy Status...............91 Security Classification....................... 92 View the Security Classification for Your Phone.............92 Modify Security Classification Level............... 92 Clear Call Logs and Contacts................... 92 Restrict Call Log and Contact Uploads................
- Page 8 Contents Connecting to a Wireless Network............... 104 Connect to a Wireless Network..................104 Disconnect from a Wireless Network................104 Remove a Wireless Network...................105 BroadSoft Features..................106 BroadSoft Directories...................... 106 View a List of BroadSoft Contacts................106 Searching the BroadSoft Directory...............107 Add BroadSoft Contacts to the Local Directory............107 Managing a Personal BroadSoft Directory............
- Page 9 Contents Using the Global Address Book................120 Using the Personal Address Book................121 Accessibility Features................... 123 Users Who Are Deaf or Hard of Hearing.................123 Users with Limited Mobility....................124 Users Who Are Blind, Have Low Vision, or Have Limited Vision........124 Maintaining Your Phone.................125 Investigate Warnings.......................125 Remove Warnings......................125 Reboot Your Phone......................
-
Page 10: Before You Begin
Create an account to access Poly support personnel and participate in developer and support forums. You can find the latest information on hardware, software, and partner solutions topics, share ideas, and solve problems with your colleagues. -
Page 11: Getting Started
Getting Started Topics: ▪ CCX Phone Hardware Overview • Navigating Poly CCX Phones ▪ Entering Information Using the Onscreen Keyboard • Entering Chinese Characters with PinYin Before you use your phone, familiarize yourself with its features and user interface. Note: As you read this guide, remember that your system administrator configures certain features or your network environment may determine them. -
Page 12: Ccx Phone Hardware Overview
The following topics describe the hardware features for Poly CCX business media phones. Poly CCX 400 Business Media Phones Hardware The following figure displays the hardware features on Poly CCX 400 business media phones. The table lists each feature numbered in the figure. - Page 13 Getting Started Reference Number Feature Feature Description Touchscreen Enables you to select items and navigate menus on the touch-sensitive screen. Volume keys Adjusts the volume of the handset, headset, speaker, and ringer. USB port(s) CCX 400 phones contain one USB-A port. Enables you to attach a USB flash drive or USB headset.
-
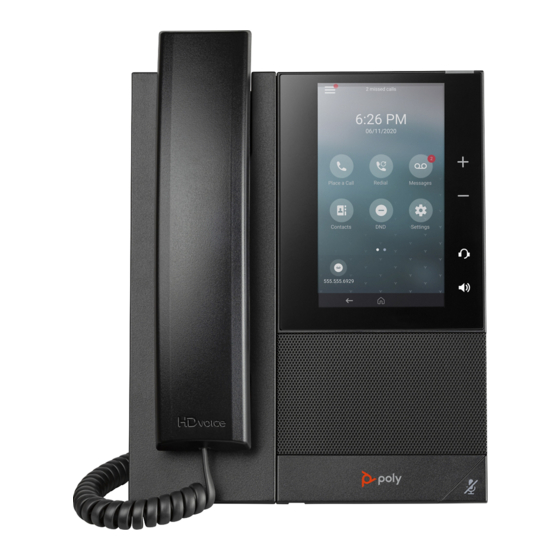
Page 14: Poly Ccx 500 Business Media Phones Hardware
Getting Started Poly CCX 500 Business Media Phones Hardware The following figure displays the hardware features on Poly CCX 500 business media phones with OpenSIP. The table lists each feature numbered in the figure. Figure 2: Poly CCX 500 phone hardware features... - Page 15 Feature Description Volume keys Adjusts the volume of the handset, headset, speaker, and ringer. USB port(s) Poly CCX 500 phones include one USB-A port and one USB-C port. Enables you to attach a USB flash drive or USB headset. Headset indicator Displays when the phone is powered on.
-
Page 16: Poly Ccx 600 Business Media Phones Hardware
Getting Started Poly CCX 600 Business Media Phones Hardware The following figure displays the hardware features on Poly CCX 600 business media phones. The table lists each feature numbered in the figure. Figure 3: Poly CCX 600 Phone Hardware Features... - Page 17 Getting Started Reference Number Feature Feature Description Message waiting indicator Flashes red to indicate you have an incoming call or new messages. Application Command Displays when the phone is powered on and the service is available. Icon may vary. Volume keys Adjusts the volume of the handset, headset, speaker, and ringer.
-
Page 18: Poly Ccx 700 Business Media Phones Hardware
Getting Started Poly CCX 700 Business Media Phones Hardware The following figure displays the hardware features on Poly CCX 700 business media phones. The table lists each feature numbered in the figure. Figure 4: Poly CCX 700 Phone Hardware Features... -
Page 19: Led Indicators On Ccx Phones
Provides ringer and speakerphone audio output. Mute key Mutes local audio during calls and conferences. LED Indicators on CCX Phones The LEDs on Poly CCX phones indicate phone and accessory states. CCX Phones LED Descriptions Color State and Description Speakerphone Off –... -
Page 20: Navigating Poly Ccx Phones
Blinking Red – New or unread voicemails are available, incoming call and missed call. Navigating Poly CCX Phones Your phone has icons, status indicators, and user screens to help you navigate and understand important information on the state of your phone. - Page 21 Getting Started Figure 5: CCX with OpenSIP default Home screen Figure 6: CCX 600 and CCX 700 default Home screen Procedure » Do one of the following: • If you set the Meetings screen as your home page, select Home or swipe left on the touchscreen.
- Page 22 Getting Started Access the Lines Screen The lines screen provides access to all assigned lines and your favorite contacts. Figure 7: CCX 400 and 500 Lines Screen Figure 8: CCX 600 and CCX 700 Lines Screen Procedure » To access the lines screen: •...
- Page 23 Getting Started Access the Meetings Screen The meetings view is available when your administrator enables Microsoft Exchange calendaring on your phone. Figure 9: CCX 400 and CCX 500 Meetings Screen Meetings view displays scheduled meeting for the current day. To view meeting details, select a meeting. Procedure »...
- Page 24 Getting Started Access the Calls Screen The calls screen provides access to the phone dialer, your calls logs, contacts, and your calendar (if configured). Figure 10: CCX 400 and CCX 500 Calls Screen Figure 11: CCX 600 and CCX 700 Calls Screen Procedure »...
- Page 25 Getting Started Access the Active Call Screen Return to an active call from another screen. You can navigate away from the active call screen to perform other tasks on the phone. If you select the dialer, the phone places the active call on hold. Procedure »...
-
Page 26: Entering Information Using The Onscreen Keyboard
Getting Started Entering Information Using the Onscreen Keyboard The onscreen keyboard enables you to enter information into text fields using the touchscreen. The onscreen keyboard displays when a text field displays. When a text field requires only numbers, it displays a numerical keypad instead. The following icons also display on the keyboard: ▪... -
Page 27: Enter Chinese Characters With The Onscreen Keyboard
Getting Started 3. Use the left and right arrow keys or swipe the recommendation area on the touch screen to change the selected character. 4. Press Select to select the character from the recommendation area. After you select the character, it displays in the input field at the cursor location. Enter Chinese Characters with the Onscreen Keyboard You can use the onscreen keyboard and the PinYin input widget to enter Chinese characters on supported CCX phones. -
Page 28: Logging In To And Locking Your Phone
Poly phone before you can use one. By default, Poly devices don’t require you to log in before you can use them. If you don’t log in, you see the default profile. When you log in, you have full access to your personal settings and your directory. -
Page 29: Change Your Login Password
Logging In to and Locking Your Phone Your personal profile is no longer accessible, and either the User Login screen displays for the next user or the default profile displays. Change Your Login Password You can change your login password from any phone on your network. Procedure 1. -
Page 30: Log In To A Guest Automatic Call Distribution Phone
Logging In to and Locking Your Phone Your personal profile is no longer accessible, and the phone displays the default host profile. Log In to a Guest Automatic Call Distribution Phone Log in to your Automatic Call Distribution (ACD) account after you log in as a guest on a host phone. Your system administrator enables Flexible Seating with the ACD on your phone. -
Page 31: Lock Your Phone
Logging In to and Locking Your Phone • Place outgoing calls to emergency and authorized numbers only • Place outgoing calls to a contact, unless your system administrator restricts your phone to placing calls to emergency and authorized numbers only •... -
Page 32: Audio Calls
Audio Calls Topics: • Use the Handset, Headset, or Speakerphone • Placing Audio Calls ▪ End an Audio Call • Answering Audio Calls ▪ Decline an Incoming Call • Holding and Resuming Calls • Calling Contacts from Directories • Placing Intercom Calls ▪... -
Page 33: Placing Audio Calls
Audio Calls Placing Audio Calls Poly phones enable you to place calls to local numbers, international numbers, and contacts. You can initiate calls from your favorites list, recent calls list, and your phone directory. From a locked phone, you can place calls to numbers authorized by your system administrator. -
Page 34: Call A Favorite
Audio Calls Call a Favorite Contacts you add as favorites display at the bottom of the Home screen with an avatar. You can place a call to favorites by selecting the favorite’s avatar. Procedure » On the Home screen, select a favorite. Place a Call over Bluetooth You can pair and connect your phone with a Bluetooth–enabled mobile phone or tablet. -
Page 35: Answering Audio Calls
Audio Calls ▪ Select Hang Up ▪ On the Calls screen, select the call and select Hang Up ▪ On the Calls screen, select a held call, select Resume , and select Hang Up ▪ If you’re using the handset, return the handset to the cradle. Answering Audio Calls When you receive an incoming call on your phone, you can choose to answer the call in a number of different ways. -
Page 36: Answer A Call On A Locked Phone
Audio Calls Answer a Call on a Locked Phone You can enable your phone to accept calls while it's locked. To answer calls on a locked phone, enter your password. Procedure 1. On the Incoming Call screen, select Answer. 2. Enter your password and select Enter. The call connects. -
Page 37: Calling Contacts From Directories
Audio Calls Calling Contacts from Directories On CCX business media phones, you can search for and call contacts in your Contact Directory, and the Corporate Directory. Call a Contact from a Directory Place a call directly from your directory or select contacts in your directory to call on the Place a Call screen. -
Page 38: Place An Intercom Call During A Call
Audio Calls 3. Select Dial. The phone plays a tone and the contact’s phone answers the call automatically. 4. After your contact answers the call, speak your message and select End Call. Place an Intercom Call During a Call You can place an intercom call to another contact during an active call. Procedure 1. -
Page 39: Transfer A Call Using Blind Transfer
Audio Calls Transfer a Call Using Blind Transfer When you use Blind call transfers, calls transfer as soon as the recipient’s line connects. Procedure 1. During a call, select Transfer . 2. Dial a number or select a contact from Recent Calls or Contacts. The call transfers as soon as the recipient’s line connects. -
Page 40: Unmute The Microphones
Audio Calls Unmute the Microphones Unmute your audio when you’re ready to speak and let others on the call hear you. Procedure » Do one of the following: ▪ Select Unmute ▪ Select the Mute key on the phone. ▪ Select the Mute key on the microphone. -
Page 41: Retrieve A Parked Broadsoft Call
Audio Calls Procedure » During a call, press Hold and dial *68 and the contact’s line extension. For example, dial *684144. Retrieve a Parked BroadSoft Call When a contact parks a call on your line, the status message and the Call Park icon display on your phone until the parked call is either retrieved, ignored, or the parked caller ends the call. -
Page 42: Managing Calls Remotely With Broadworks Server
Audio Calls Managing Calls Remotely with Broadworks Server Manage calls to your line remotely using the BroadWorks Anywhere or Remote Office features. When you register your phone with a BroadWorks server and sign in to BroadSoft UC-One, you can manage calls to your line remotely. You can handle any incoming calls to your office phone on other phones or mobile devices. -
Page 43: Managing Calls With Broadsoft Uc-One Remote Office
Audio Calls Edit BroadWorks Anywhere Locations After you enable BroadWorks Anywhere and add locations on phone, you can edit the added locations. Procedure 1. Do one of the following: • Select UC-One on the Home screen. • Go to Settings > Features > UC-One Call Settings. 2. -
Page 44: Ignoring Or Rejecting Incoming Calls
Audio Calls For more information on using Remote Office, contact your system administrator or service provider. Add a Remote Office Number You can add one number only as your remote office number. Procedure 1. Do one of the following: • Select UC-One on the Home screen. -
Page 45: Ignore Or Silence An Incoming Call
Audio Calls Note: You cannot reject calls on shared lines. You can only silence the ringer. Ignore or Silence an Incoming Call Ignore or silence a call to mute the ringer without rejecting the call. When you ignore a silence a call, the incoming call notification continues to display. Procedure »... -
Page 46: Reject Anonymous Calls
Audio Calls Note: When you set your presence status to Do Not Disturb and enable DND on your phone, a message reflecting your Do Not Disturb status scrolls under the time display. The DND icon doesn’t display in the status bar. Enable Do Not Disturb Enable DND to prevent your phone from ringing and to send all incoming calls to voicemail. - Page 47 Audio Calls Procedure 1. Do one of the following: • Select UC-One on the Home screen. • Go to Settings > Features > UC-One Call Settings. 2. If your phone has multiple lines, select a phone line. 3. Select Anonymous Call Reject. 4.
-
Page 48: Recording Audio Calls
Recording Audio Calls Topics: • Guidelines When Recording Calls • Record a Call • Pause a Recording • Resume a Recording • Stop Recording • Record a Conference Call • Browse Recorded Calls • Play a Recorded Call • Pause and Resume Played Recordings •... -
Page 49: Record A Call
Recording Audio Calls Record a Call The phone allows you to record an active audio call. Make sure to inform your contacts on the call before you begin recording. Some things to note about recording: • You can’t record when there are no connected calls, when you place a new call to transfer a call or initiate a conference, or when you have an incoming call. -
Page 50: Record A Conference Call
Recording Audio Calls Record a Conference Call You can record a conference call in the same way as an active call with the following exceptions: • All conference call participants are recorded. When a conference participant mutes their audio, that participant is not recorded. -
Page 51: Stop Playing A Recording
Recording Audio Calls Procedure 1. To pause the recording, select Pause. 2. Select Resume to continue playing the recording. Stop Playing a Recording After you finish listening to a recording, you can stop playing it by exiting the recording. Procedure »... -
Page 52: Video Calls
You can place video calls on the following Poly CCX phones: ▪ Poly CCX 600 business media phones with a Poly EagleEye Mini camera (see the camera’s setup sheet for information on how to attach the camera to your phone) ▪... -
Page 53: Place A Video Call
Video Calls Place a Video Call Depending on how the system is set up by your administrator, you can place a video call to one contact or add video during an audio call. Procedure 1. Select Place a Call. 2. Enter a contact's number or select a contact from Contacts or Recent Calls. 3. -
Page 54: Set The Call Rate For Video Calls
2. Select Camera Settings > Target Frame Rate. 3. Choose Up or Down to adjust the frame rate. Adjust Video Quality You can adjust the camera settings on your Poly CCX system to improve video quality. Procedure 1. Do one of the following: •... -
Page 55: Adjust The Video Display
Crop: The system enlarges and crops the video to fit your screen without stretching the video. 3. Select Save. Adjust the Camera Position During a Call You can control the position of a Poly camera during or before a video call. Procedure 1. Do one of the following: •... -
Page 56: Changing The Video Call And Picture-In-Picture (Pip) Displays
Video Calls Changing the Video Call and Picture-in-Picture (PIP) Displays You can set up your phone so that it displays all video during calls in specific ways. You can choose to do the following: • Display all incoming video calls on the full screen •... -
Page 57: Mixed Audio And Video Calls
Video Calls When enabled, this setting automatically enables your phone to display far-side video in full screen. When disabled, far-side video is displayed in the smaller Active Call screen. 3. Select Save. Mixed Audio and Video Calls Your system displays different options based on the equipment you and your contacts use during a call. ▪... -
Page 58: Camera Status Indicators And Messages
Video Calls Camera Status Indicators and Messages Your camera has LED indicators that display on the camera and status messages that display on your phone. Camera LED Indicators LED State Phone State No LED One of the following: • Phone has no power •... -
Page 59: Managing Video Calls Without A Usb Camera
Video Calls Message Action Camera removed. Indicates that you have detached your camera from your phone. (CCX 600 only) Camera is not connected Indicates that a camera is not attached to your phone and that you are accessing a feature or function that requires that the camera be attached. (CCX 600 only) Managing Video Calls without a USB Camera A video-enabled CCX 600 phone can receive video even if you don’t attach a USB camera. -
Page 60: Conference Calls
Conference Calls Topics: • Audio Conference Calls When you initiate a conference call, you can hear audio for two or more contacts, manage conference participants, and join calls into a conference or split a conference into individual calls. Audio Conference Calls Start a conference call with two contacts on hold. -
Page 61: Hold A Conference Call
Conference Calls Hold a Conference Call When you place a conference call on hold, you place all conference participants on hold. Procedure » Select Hold . Resume a Conference Call Resuming a held conference call enables all participants to hear the audio of everyone on the call. Procedure »... -
Page 62: Shared Lines
Shared Lines Topics: • Shared Line Limitations • Answering Calls on Shared Lines • Missed and Received Calls on Shared Lines • Hold a Call Privately on a Shared Line All CCX support multiple and shared lines. Your administrator can customize your phone to enable multiple shared lines. - Page 63 Shared Lines Check with your system administrator to find out if this feature is available on your phone. Procedure » During a call, press More > Pvt Hold. The call is held on your phone, and the line shows as busy on the other shared line users' phones. When you hold a call privately, other users on the shared line cannot resume or pick up the call.
-
Page 64: Call Lists And Directories
Call Lists and Directories Topics: • Recent Calls • Favorites and Contact Lists • Contact Directory • Corporate Directory All CCX phones support a Recent Calls list, a Contact Directory, and a Corporate Directory. The phones can also support a BroadSoft Directory and the Ribbon Communications Address Books depending on your server and if enabled by your system administrator. -
Page 65: Sort Entries By Call Type
Call Lists and Directories 2. Under Sort, choose Time or Name. 3. Under Order, choose Ascending or Descending. Sort Entries by Call Type When you filter calls, you can choose to display only missed, received, or placed calls. You can also choose to display all call types (the default). -
Page 66: Favorites And Contact Lists
Call Lists and Directories 2. From the Call Details screen, select Add to Contacts. 3. To make the saved content a favorite, select Favorite. Favorites and Contact Lists You can add contacts as favorites, view and manage BroadSoft UC-One contacts, and watch contacts in your Buddy list. -
Page 67: Using Buddy Lists
Call Lists and Directories 2. Next to the contact’s name, select the information icon 3. View the contact’s information including their job title, email, contact number. View Favorites from the Lines Screen You can view a list of favorites on the Lines screen. Procedure »... - Page 68 Call Lists and Directories 2. On the Contact Information screen, select Edit 3. From the Edit Contact screen, select Watch Buddy > Enabled. The default setting is Disabled. When enabled, the contact is added to your Buddy list so you can monitor the contact's status.
- Page 69 Call Lists and Directories View Your Watcher List Contacts who can monitor your phone's status are added to the Watcher list. Procedure 1. Go to Settings > Features > Presence. A list of contacts that can monitor your status is displayed. 2.
-
Page 70: Contact Directory
Call Lists and Directories Contact Directory You can store a large number of contacts in the Contact Directory, as well as add additional contacts, view and update a contact's information, and delete contacts from the directory. Contact your system administrator for the exact number of contacts you can store in the Contact Directory for your phone model. -
Page 71: View Contact Information
Call Lists and Directories View Contact Information From your Contact Directory, you can view information, such as name and phone number, for any contacts saved to the directory. You can also view additional information, such as a job title, label, or email address. -
Page 72: Searching The Corporate Directory
Call Lists and Directories Searching the Corporate Directory In the Corporate Directory, you can perform a quick or advanced contact search. Search the Corporate Directory You can search for contacts in the Corporate Directory using either their first name or last name. Procedure 1. - Page 73 Call Lists and Directories 2. From the search results, choose the contact and select View. 3. Select Save. 4. Enter any additional contact information and select Save.
-
Page 74: Accessing, Sending, And Broadcasting Messages
Accessing, Sending, and Broadcasting Messages Topics: • Accessing Voicemail • Instant Messaging • Broadcasting Messages with Group Paging • Broadcasting Messages with Push to Talk You can access, send, and broadcast a variety of message types. Note: Your phone may not support all of the features described in this section. Check with your system administrator to find out which features are available on your phone. -
Page 75: Remove The Message Alert
Accessing, Sending, and Broadcasting Messages Remove the Message Alert If you are not ready to listen to your messages when you receive new messages, you can temporarily remove the message alert. Procedure 1. Go to Messages. 2. Select Message Center. 3. -
Page 76: Reply To Instant Messages
Accessing, Sending, and Broadcasting Messages Reply to Instant Messages After you read an instant message on your phone, you can send a reply to the message. Procedure 1. Go to Messages. 2. Select Instant Messages. 3. From the Instant Messages screen, select a message and select Reply. 4. -
Page 77: Receiving Pages
Accessing, Sending, and Broadcasting Messages Procedure 1. From the Lines screen, select the Paging soft key. 2. From the Paging Groups screen, select a paging group. 3. To begin a page, select Page. Just before the page starts, you'll hear an alert tone, and then the page begins. 4. -
Page 78: Group Paging Settings
Accessing, Sending, and Broadcasting Messages Group Paging Settings You can change your default paging group, update page group subscriptions, and enable pages to play during active calls on your phone. Note: The features described in this section require access to the Basic settings menu on the phone. If your phone requires a password to access the Basic settings menu, contact your system administrator for assistance customizing your phone. -
Page 79: Broadcasting Messages With Push To Talk
Accessing, Sending, and Broadcasting Messages Broadcasting Messages with Push to Talk The Push to Talk (PTT) feature enables you to transmit messages and listen to replies much like a walkie- talkie. Your system administrator sets up the feature, defines up to 25 channels for PTT mode, and assigns a label to each channel that easily identifies the channel, such as All, HR Dept, Shipping Staff, or Executives. -
Page 80: Receiving Ptt Broadcasts
Accessing, Sending, and Broadcasting Messages others a chance to reply. At any time during the waiting period, you can resume your broadcast by pressing and holding Talk. If no one broadcasts during the waiting period, the channel closes and the broadcast ends. •... -
Page 81: End Ptt Broadcasts
Accessing, Sending, and Broadcasting Messages The broadcast is sent to all people listening on the channel. 3. When you finish talking, release Talk. The broadcast enters another waiting period until someone broadcasts again. If no activity occurs within the waiting period, the channel closes and no more broadcasts can take place. End PTT Broadcasts After you end a broadcast, the channel remains open so others can respond. - Page 82 Accessing, Sending, and Broadcasting Messages 3. From the Channel Subscriptions screen, select the channel you want to subscribe to and select Yes. Enable PTT Broadcasts to Play During Active Calls The Accept While Busy setting determines what happens when you are in a call and receive a PTT broadcast.
-
Page 83: Poly Ccx Phone Settings
Set the System Language Poly phones support several languages that you can choose to display on the phone. Check with your system administrator to find out which languages your phone supports. -
Page 84: Disable Call Waiting
Poly CCX Phone Settings Disable Call Waiting The Call Waiting feature is enabled by default. If enabled by your system administrator, you can disable Call Waiting. If you disable Call Waiting, any incoming calls received on your phone while you are in a call are automatically sent to voicemail. -
Page 85: Set The Backlight Intensity
Poly CCX Phone Settings • Backlight On: The brightness of the screen when there’s activity. • Backlight Idle: The brightness of the screen when there’s no activity. • Maximum Intensity: The brightness scale that applies to both Backlight On and Backlight Idle intensities. -
Page 86: Adding Personal Photos As Your Background
Poly CCX Phone Settings Procedure 1. Go to Settings > Basic > Preferences. 2. Select Background and select a background image. Depending how your system is set up, you might have to select Background > Select Background. The Select Background screen is displayed. -
Page 87: Reset Your Background
Poly CCX Phone Settings Procedure 1. Attach a USB flash drive to the USB port on your phone. 2. Navigate to Settings > Features > Removable Storage Media > Picture Frame. Your pictures display one-by-one. 3. Use the arrow keys to find your picture and then select the Set Background icon The picture you selected is displayed on the Home and Lines screens. -
Page 88: Use Personal Photos As Screen Savers
Poly CCX Phone Settings Use Personal Photos as Screen Savers You can enable your phone to display your personal photos on a USB flash drive as a screen saver. To set up a screen saver of your photos, you must set up certain screen saver settings, place your photos on a USB flash drive, and attach the USB flash drive to the phone. -
Page 89: Use Your Phone As A Digital Picture Frame
Poly CCX Phone Settings You can disable a screen saver—prevent it from starting, even if your phone has been idle for the specified period of time—by doing the following: • Disabling the Screen Saver setting. When you disable the setting, the screen saver does not display, even though the USB flash drive is still attached. -
Page 90: Power Saving Mode
Power Saving Mode By default, Poly phones enter power saving mode and turn off the screen after being idle for a certain period of time to conserve energy. You can determine the period of time that the phone is idle before the screen turns off, and you can set different idle timeouts for office hours and off hours, such as evenings and weekends. -
Page 91: Changing Audio Settings
Poly CCX Phone Settings • Office Hours Idle Timeout: The number of minutes (1 to 600) the phone waits during office hours before starting power saving mode. • Off Hours Idle Timeout: The number of minutes (1 to 10) the phone waits during nonoffice hours before starting power saving mode. -
Page 92: Change The Volume
» Press one of the volume keys to increase or decrease the audio. Updating Your Buddy Status Poly phones enable you to sign into and update your presence status on your phone to let contacts know when you are busy or available. -
Page 93: Security Classification
Poly CCX Phone Settings 2. Select Presence > Idle Timeout. 3. Enable Office Hours and Off Hours, and enter the number of minutes your phone should be idle before your status changes to Away. Security Classification For CCX phones registered with the BroadSoft BroadWorks Server, you can view and modify the security classification level for your phone, if enabled by your system administrator. -
Page 94: Restrict Call Log And Contact Uploads
Poly CCX Phone Settings 2. Select Yes. Restrict Call Log and Contact Uploads By default, the phone stores your call logs and saved contacts. If desired, restrict the phone from uploading your call logs and contacts to the server. Procedure 1. -
Page 95: Phone Applications
• Using the Launch Pad Poly phones can support optional applications configured by your system administrator. Ask your system administrator if your phone supports any of the applications discussed in this section. Note: Some of the features described in this section require access to the Basic settings menu. If your phone requires a password to access the Basic settings menu, contact your system administrator for assistance. -
Page 96: Open The Calendar
Phone Applications 4. Choose your account or enter your login credentials. The Web Sign-in screen disappears and your phone returns to the home page. Open the Calendar Access the calendar from the Meetings screen, the Home screen, or the Call screen. Procedure »... -
Page 97: View The Idle Browser
Phone Applications • Idle Browser—Displays noninteractive web content. The Idle Browser displays noninteractive web content on the Lines screen when no calls are in progress. Your system administrator determines what displays on the Idle Browser for your phone. • Web Browser—Enables you to search and view web pages The Web Browser is an interactive browser. -
Page 98: Using The Launch Pad
Phone Applications Icon Action Enables the toolbar to hide every three seconds. To display a hidden toolbar, you have to press the touchscreen until the toolbar displays. Exits the Web Browser and returns to the phone's Home screen. Using the Launch Pad The Launch Pad enables you to access local or web applications, directories, and information feeds. -
Page 99: Navigate The Launch Pad
Phone Applications Navigate the Launch Pad When you are using the Launch Pad application, a group of soft keys display to help you navigate the Launch Pad. Procedure » Do one of the following: • Tap Home to display the Launch Pad's main window with all the Launch Pad applications. •... -
Page 100: Connecting Bluetooth And Usb Devices
Connect a maximum of two Bluetooth devices at a time. Host mode – Connect a Bluetooth headset to place and answer calls with a Bluetooth headset. Device mode – Connect your smartphone to manage calls and user your Poly CCX phone as a Bluetooth speaker. -
Page 101: Using Bluetooth Headsets
Connecting Bluetooth and USB Devices Using Bluetooth Headsets If your system administrator has enabled Bluetooth capability for your phone, you can use a Bluetooth headset to handle calls. When a Bluetooth headset is connected and in use, the headset key glows blue. -
Page 102: Disconnect Or Unpair A Connected Bluetooth Device
Connecting Bluetooth and USB Devices Pair and Connect a Smartphone to Your Phone You can use your CCX phone to control smartphone calls and for audio playback. You can pair up to two smartphones to your CCX phone. However, you can only connect and use one smartphone at a time for call control and audio playback. -
Page 103: Play Audio From A Bluetooth Device
Connecting Bluetooth and USB Devices Play Audio from a Bluetooth Device Use your phone as a Bluetooth speaker for music or videos played on your mobile phone or tablet. Procedure 1. Connect your mobile phone or tablet with the phone. 2. -
Page 104: Change The Headset Mode
Connecting Bluetooth and USB Devices Change the Headset Mode To control your phone using your headset, the headset must be in soft phone mode. Headsets that come with a docking station have two modes: soft phone and desk phone mode. If you cannot operate the phone from your headset, it is possible your headset is in desk phone mode. -
Page 105: Connecting To A Wireless Network
Connecting to a Wireless Network Topics: ▪ Connect to a Wireless Network ▪ Disconnect from a Wireless Network ▪ Remove a Wireless Network You can connect your Wi-Fi capable phone to a wireless network. Note: CCX 600 and CCX 700 phones support wireless network connectivity. Connect to a Wireless Network After you enable Wi-Fi on your phone, connect to a wireless network. -
Page 106: Remove A Wireless Network
Connecting to a Wireless Network Remove a Wireless Network Remove any saved wireless network that is no longer necessary. Procedure 1. Select the connected wireless network SSID from the list. 2. Select Forget. -
Page 107: Broadsoft Features
BroadSoft Features Topics: ▪ BroadSoft Directories • Managing BroadSoft UC-One Favorites and Contacts • BroadSoft UC-One Simultaneous Ring • BroadSoft Executive-Assistant ▪ Access the Call Actions for BroadWorks Dynamic Busy Lamp Field (BLF) The following features are available when your administrator configures your phone with BroadSoft. BroadSoft Directories If enabled by your system administrator, you can access, search for, and call contacts in any of your company's BroadSoft directories from any phone. -
Page 108: Searching The Broadsoft Directory
BroadSoft Features Searching the BroadSoft Directory You can access and search the BroadSoft directory on the phone, and you can choose to perform a simple or advanced search for contacts. After the system administrator configures the enterprise directory, you can view a list of contacts by default in the BroadSoft directory. -
Page 109: Managing A Personal Broadsoft Directory
BroadSoft Features Managing a Personal BroadSoft Directory If enabled by your system administrator, you can view and edit contacts in your Personal Directory on the BroadSoft Server from supported CCX phones. Add a Contact to the Personal BroadSoft Directory You can add a new contact to the Personal Directory from your phone and store the contact's name and phone number to the directory on the phone and the BroadSoft server. -
Page 110: Broadsoft Uc-One Contacts' Presence Information
BroadSoft Features BroadSoft UC-One Contacts' Presence Information UC-One contacts are Enterprise Directory contacts that have Instant Messaging and Presence (IM&P) enabled, and you can view their presence information on your phone. While you can view UC-One contacts presence information on the Lines screen, you cannot change your presence status on the phone. -
Page 111: View Aggregated Self-Presence For Broadsoft Lines
BroadSoft Features View BroadSoft UC-One Favorites in the Contact List In addition to viewing UC-One favorites on the Lines screen, you can also view your favorites in the UC- One Contacts list. Procedure 1. Select Directories > UC-One Contacts. 2. Select the group name to view the list of contacts for that group. View BroadSoft UC-One Groups You can access your BroadSoft UC-One groups on your phone, but you cannot create new groups, delete existing groups, or move contacts from one group to another on your phone. -
Page 112: Broadsoft Uc-One Simultaneous Ring
BroadSoft Features Procedure 1. Select Directories > UC-One Contacts. 2. Select Search. 3. Enter your contact's first or last name. A list of search results display. BroadSoft UC-One Simultaneous Ring When your phone is registered with a BroadWorks server and you are signed into the phone with your BroadSoft UC-One credentials, you can use the Simultaneous Ring feature to add a list of up to 10 extensions and phone numbers that will ring simultaneously when you receive an incoming call on your line. -
Page 113: Delete Numbers From The Simultaneous Ring List
BroadSoft Features You cannot pick up or barge in on calls answered on another phone. The contact who answers the call must transfer the call to your phone or park the call on your line for you to speak with the caller. -
Page 114: Assistant Options
BroadSoft Features 2. Select Call Filtering then select On. Set a Filter Criteria for Filtered Calls Executives can determine which types of calls are filtered to an assistant by choosing whether to filter all calls, internal calls, external calls, or calls as specified in an extended filter, which executives can create and edit in the BroadSoft BroadCloud portal. - Page 115 BroadSoft Features Place a Call on Behalf of an Executive As an assistant, you can make calls on behalf of any of your assigned executives. When a call is made on behalf of an executive, a solid red bar displays on the executive’s line key, if the executive’s line is a shared line.
-
Page 116: Pick Up A Held Executive Call On A Shared Line
BroadSoft Features Pick Up a Held Executive Call on a Shared Line Executives and assistants can both pick up held calls on shared or private executive lines. On shared lines, the executive and assistant can view the status of calls on both phones and choose which call to pick up. -
Page 117: Access The Call Actions For Broadworks Dynamic Busy Lamp Field (Blf)
BroadSoft Features Access the Call Actions for BroadWorks Dynamic Busy Lamp Field (BLF) You can access the call actions settings on the phone and modify the settings from the Attendant Call Action menu when dynamic BLF is configured on the phone. You can one touch the following BLF actions on the phone: ▪... -
Page 118: Ribbon Communications Features
Ribbon Communications Features Topics: • Ribbon Communications Multiple Appearance Directory Number - Single Call Appearance • Managing the Ribbon Communications Address Books The following features are available when your administrator configures your phone with Ribbon Communications. Ribbon Communications Multiple Appearance Directory Number - Single Call Appearance Register your phone with the Ribbon Communications server to use Multiple Appearance Directory Number - Single Call Appearance (MADN-SCA). -
Page 119: Leave A Bridge Call
Ribbon Communications Features Procedure 1. Press and hold the corresponding line key for the shared line for one second. 2. Select the Barge In soft key. A bridge tone plays notifying the other call participants that you are barging in on the call. Leave a Bridge Call Any member in a bridge call can leave the call, and the call remains active. -
Page 120: Managing The Ribbon Communications Address Books
Ribbon Communications Features Enable Privacy After you enable privacy for an active call on a public shared line, you cannot disable privacy for the call. You can allow other MADN members to join the active call by transferring the call or initiating a conference call. -
Page 121: Using The Global Address Book
Ribbon Communications Features Using the Global Address Book Ribbon Communications Global Address Book (GAB) is a read-only directory similar to the Corporate Directory, which is a company directory enabled and populated with contacts by your system administrator. Use the GAB to search for and save contacts to the Contact Directory or Personal Address Book (PAB). Perform a Simple Search of the Global Address Book A simple search enables you to search for contacts using either their first or last name or by typing a few letters or their name. -
Page 122: Using The Personal Address Book
Ribbon Communications Features View Persistency is enabled and you can view your most recent search each time you return to the GAB. Using the Personal Address Book Search for contacts, edit contact information, and save contacts to the PAB. Note: Before importing contacts to your phone, make sure you save all of your contacts to your PAB. Save contacts to your PAB using the Ribbon Communications Personal Agent on your computer. - Page 123 Ribbon Communications Features A message asking for confirmation to delete the contact is displayed. 2. Select Yes to delete the contact. Editing Contacts in the Personal Address Book You can edit contacts in the PAB on your phone or in your Ribbon Communications Personal Agent on your computer.
-
Page 124: Accessibility Features
Users with Limited Mobility • Users Who Are Blind, Have Low Vision, or Have Limited Vision Poly products include a number of features to accommodate hearing, vision, mobility, or cognitively impaired users. Users Who Are Deaf or Hard of Hearing Your phone includes accessibility features for users who are deaf or hard of hearing to use the phone. -
Page 125: Users With Limited Mobility
Accessibility Features Accessibility Feature Description TTY support The phones support commercial TTY devices such as Ultratec Superprint. Additionally, the phones provide acoustically coupled TTY support. Users with Limited Mobility Your phone includes accessibility features to enable users with limited mobility to use various phone features. -
Page 126: Maintaining Your Phone
Maintaining Your Phone Topics: • Investigate Warnings • Remove Warnings • Reboot Your Phone • Update the Phone’s Configuration • Test the Hardware • Clean the Touchscreen • View Software Details • Updating the Phone Software • CSTA Lines When the phone isn’t operating properly, investigate or troubleshoot issues along with any other tasks your administrator may ask you to perform. -
Page 127: Reboot Your Phone
Maintaining Your Phone Reboot Your Phone To assist with troubleshooting, your system administrator may ask you to restart your phone. Caution: Before you restart the phone, contact your system administrator. If the phone is malfunctioning, you may be able to restore normal operation without restarting it. Additionally, your system administrator may want to troubleshoot the phone before you restart it. -
Page 128: View Software Details
Maintaining Your Phone Use a clean, dry, microfiber cloth—the kind you would use to clean glass surfaces—to wipe the screen. Don’t use chemicals to clean the screen. Procedure 1. Go to Settings > Basic. 2. Select Screen Clean. 3. Wipe the screen with the clean, dry, microfiber cloth. Note: If the screen is still dirty after cleaning, dampen a soft, lint-free cloth with an isopropyl alcohol and water solution of 50:50, then wipe the screen with the cloth. -
Page 129: Postpone Software Updates
Maintaining Your Phone Postpone Software Updates Instead of updating your software immediately, you can choose to postpone the update for a later time. You can choose to postpone the software update from 15 minutes up to six hours. You can postpone the software update up to three times. -
Page 130: Troubleshooting
Recording Issues and Solutions • Reset the Phone to Factory Defaults If you’re having issues with your Poly phone, you can try the troubleshooting options and solutions in the following topics to resolve certain issues. Speakerphone If your speakerphone doesn't work, your system administrator may have disabled it. If this is the case, a message displays after you press the speakerphone key informing you that Handsfree mode is disabled. -
Page 131: Check The Status Of The Calendar
Troubleshooting Check the Status of the Calendar Issues with the phone’s connection to the Microsoft server may cause calendar problems. Without a functioning connection, you may not see the Calendar icon on the Home screen or you may not receive meeting reminders. -
Page 132: Troubleshoot Audio And Echo Issues
Troubleshooting Issue Corrective Action I can't enter information in a phone field using my Check to see if the phone field has a flashing cursor. computer keyboard. You can use PDC only to enter information in a phone field if the field has a flashing cursor. I can't place a call. -
Page 133: Recording Issues And Solutions
Polycom Phones on Polycom Support for a list of USB devices supported on Poly phones. Reset the Phone to Factory Defaults Access the phone reset option without having to enter an administrator password. After the administrator configures this feature on the phone, you can reset the phone to factory default settings.
Need help?
Do you have a question about the CCX Series and is the answer not in the manual?
Questions and answers