Table of Contents
Advertisement
Quick Links
Advertisement
Table of Contents

Subscribe to Our Youtube Channel
Related Manuals for GLP JDC Line 500


Summary of Contents for GLP JDC Line 500
- Page 1 JDC Line 500 Software version 0.x.x...
- Page 2 This manual covers fixture software version 0.x.x © 2020 German Light Products GmbH. All rights reserved. The marks ‘GLP’ and ‘German Light Products’ are trademarks registered as the property of German Light Products GmbH in Germany, in the United States of America and in other countries.
-
Page 3: Table Of Contents
Avoiding damage from light sources and heat ....... 9 Avoiding damage from dust and airborne particles ..... 10 Transportation and storage ............10 3. JDC Line 500 overview ..............11 4. Features ................... 12 Fixture control ................12 5. Installation ..................13 Permitted mounting options ............. -
Page 4: Safety
The user documentation for GLP JDC Line 500 lighting fixtures consists of: • The JDC Line 500 Quick Start and Safety Manual, supplied with JDC Line 500 fixtures and available for download from www.glp.de. The Quick Start and Safety Manual contains important safety information and installation instructions that the installer and user must read. -
Page 5: Electrical Safety
• Check the GLP website at www.glp.de and make sure that you have the latest version of this manual. Check the fixture software version indicated on page 2 of this manual and then use the fixture’s control panel to check the version installed in the... -
Page 6: Fire Safety And Protection From Burns
- US power cable: 16 A, 14 AWG, UL-listed, E304117, SJT, 4.9 ft. - EU power cable: 16 A, 1.5 mm², H07RN-F, 1.5 m. Do not connect more than two (2) JDC Line 500 fixtures to power in a chain at 100- 120 V, 60 Hz. -
Page 7: Eye Safety
Eye safety • The JDC Line 500 is classified as a Risk Group 2 lighting fixture according to EN 62471. Possibly hazardous radiation emitted. Do not stare into the light output from the fixture. May be harmful to the eyes. -
Page 8: Installation Safety And Protection From Personal Injury
• You may suspend a maximum of two (2) meters (4 x JDC Line 500 or 2 x JDC Line 1000 or a combination of these fixtures up to 2 meters in length) fastened together... -
Page 9: Avoiding Damage To The Fixture
• Do not aim other high-powered beam lights directly at the fixture. Do not operate the fixture in ambient temperatures above 40° C / 104° F. Allow free airflow around the fixture. JDC Line 500 Quick Start and Safety Manual Rev. A... -
Page 10: Avoiding Damage From Dust And Airborne Particles
• Transport the fixture in its original packaging to protect it from damage caused by shocks during transportation. • Store the fixture in a dry location when not in use. JDC Line 500 Quick Start and Safety Manual Rev. A... -
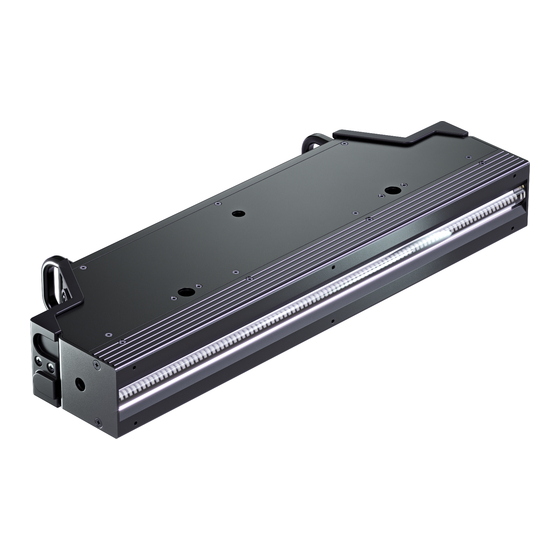
Page 11: Jdc Line 500 Overview
H – Control panel with multi-color backlit LED display Q – 6 x M4 threaded holes for permanent mounting of I – AC mains power OUT/THRU accessories (Neutrik powerCON TRUE1) JDC Line 500 Quick Start and Safety Manual Rev. A... -
Page 12: Features
Power and data can be daisy-chained and fixtures interlocked for ease of installation. The JDC Line 500 is not suitable for household use, for use in any location where unattended children have access to it, or for use in locations that may become submerged in water. -
Page 13: Installation
- a rigging clamp bolted directly to the fixture. Fastened to a surface at any angle by means of a JDC Line 500 Rigging Bracket with bolts or similar fasteners. Suspended vertically from a rigging truss or similar structure by means of an M10 threaded eyebolt screwed into the end of the fixture with an M10 locknut and washer. -
Page 14: Installing A Rigging Bracket
Installing a Rigging Bracket The JDC Line Rigging Bracket is supplied with the JDC Line 500. You can use it to suspend the fixture from a rigging truss or fasten the fixture to a secure surface or structure at any angle. Rigging clamps for fastening the Rigging Bracket to a truss are available from GLP as optional accessories. -
Page 15: Installing Alignment Brackets
Placing on a horizontal surface You can place a JDC Line 500 fixture on a horizontal surface so that the fixture is lying horizontally. You can stack multiple fixtures on top of each other in a column but you must stabilize... -
Page 16: Installing On A Rigging Truss
A. Either: - Bolt a rigging clamp to an 89 mm Omega Bracket from GLP with a high-strength steel bolt and self-locking nut, then fasten the Omega Bracket to the Rigging Bracket using quarter-turn fasteners locked into two receptacles B or C, or - bolt a rigging clamp directly to the Rigging Bracket using a high-strength M12 steel bolt passed through one of the holes D and fastened with a self-locking nut. -
Page 17: Mounting On A Surface
German Light Products® Mounting on a surface To bolt the JDC Line 500 to a surface or structure using its Rigging Bracket: Check that the surface or structure is secure and can safely hold the weight of fixtures, hardware and cables. Check that all hardware is approved for the weight that it will support and is in perfect condition. - Page 18 Max. 15 mm Figure 8. Maximum protrusion into hole in end of fixture To suspend the JDC Line 500 vertically from a rigging truss or similar structure: See Figure 9. Obtain an M10 eyebolt A that is approved for the weight that it will support, an M10 nut B and washer C.
-
Page 19: Suspending Fixtures Vertically In A Two-Meter Column
• four (4) JDC Line 500 fixtures, • two (2) JDC 1000 fixtures, or • two (2) JDC Line 500 fixtures and one JDC Line 1000 fixture. Warning! Use only an eyebolt to support the column. Do not use a rigging clamp, as any lateral movement at the bottom of the column can apply leveraged forces and cause this arrangement to fail. -
Page 20: Ac Mains Power
AC power at 100-240 V, 50/60 Hz. Do not connect the fixture to power at any other voltage or to an external dimmer. The JDC Line 500 does not have a power ON/OFF switch. Power is applied to the fixture as soon as the power cable becomes live. -
Page 21: Connecting Multiple Fixtures To Power In A Chain
100-120 V, 60 Hz. Do not connect more than four (4) JDC Line 500 fixtures in total to power in one chain at 200-240 V, 50 Hz. The power input cable supplied with the fixture is rated 16 A maximum. Add... -
Page 22: Connecting To Dmx Data
Check that all cables and connectors are suitable for the installation environment and application (see recommendations in ‘Avoiding damage to the fixture’ on page 9). The JDC Line 500 supports USITT DMX 512A, Art-Net and sACN DMX control data signal protocols. It also supports RDM (Remote Device Management). -
Page 23: Starting And Stopping Operation
The JDC Line 500’s TRUE1 mains power input connector supports hot-plugging, and connecting and disconnecting a live power cable is an option, especially if you need to shut down power urgently, but it is still good practice to shut down power to the AC mains power circuit before connecting and disconnecting power cables. -
Page 24: Service
Figure 11. Optical accessory safety cable attachment See Figure 11. If you install a GLP accessory on the front of the fixture, secure it by fastening the clip on its safety cable into the receptacle marked Safety Cable (arrowed) on the top of the fixture. -
Page 25: Glp Service And Support
Observe the safety warnings given in the ‘Safety’ chapter starting on page 4. To install an optical accessory such as a GLP diffuser on the JDC Line 500: Hold the diffuser up to the front of the fixture and snap the diffuser’s magnetic mounts into place so that they hold the diffuser in its correct position over the fixture’s front glass. -
Page 26: Technical Specifications
Maximum power consumption, all LEDs at 100% output: 700 W Maximum permitted number of fixtures daisy-chained to power 2 x JDC Line 500 total per chain @ 100-120 V, 60 Hz 4 x JDC Line 500 total per chain @ 200-240 V, 50 Hz JDC Line 500 Quick Start and Safety Manual Rev. - Page 27 Height without Rigging Bracket: 74 mm / 2.91 ins. Height including Rigging Bracket: 90 mm / 3.55 ins. Width: 507 mm / 19.96 ins. Depth: 202 mm / 7.94 ins.) Weight: 6 kg / 13.3 lbs. JDC Line 500 Quick Start and Safety Manual Rev. A...
-
Page 28: Dimensions
11. Dimensions All dimensions are in millimeters JDC Line 500 Quick Start and Safety Manual Rev. A...
Need help?
Do you have a question about the JDC Line 500 and is the answer not in the manual?
Questions and answers