GeoVision GV-IPCAM H.264 Series Faq
Hide thumbs
Also See for GV-IPCAM H.264 Series:
- User manual (667 pages) ,
- Hardware manual (78 pages) ,
- How-to manual (15 pages)
Table of Contents
Advertisement
Quick Links
[FAQ]
How to load default settings to GV-IP cameras?
Article ID: GV15-11-19-f
Release Date: 11/19/2015
Applied to
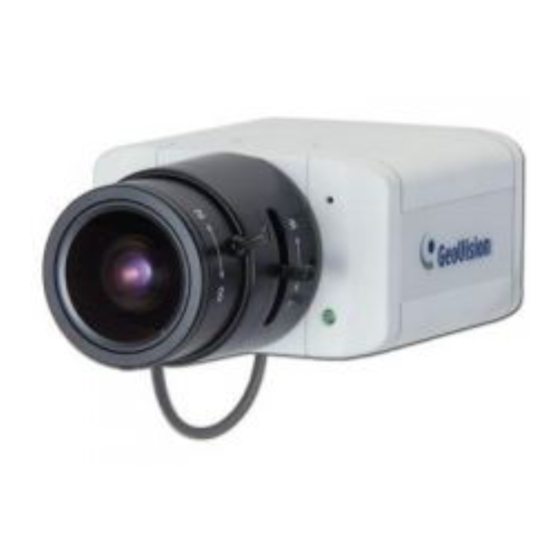
GV-IPCAM H.264 Series
Summary
Among different models of GV-IP cameras, you can restore factory default settings through
the Web interface or directly on the camera. The time of loading default settings for each
model can vary and the way the LEDs flash can also be different.
1
Advertisement
Table of Contents

Related Manuals for GeoVision GV-IPCAM H.264 Series


Summary of Contents for GeoVision GV-IPCAM H.264 Series
- Page 1 Article ID: GV15-11-19-f Release Date: 11/19/2015 Applied to GV-IPCAM H.264 Series Summary Among different models of GV-IP cameras, you can restore factory default settings through the Web interface or directly on the camera. The time of loading default settings for each...
-
Page 2: Table Of Contents
Contents Using the Web Interface ....................3 Directly on the Camera....................4 Box Camera ......................4 Ultra Box Camera and Target Box Camera ..............5 Mini Fixed Dome .......................6 Mini Fixed Rugged Dome ..................7 IR Arctic Box Camera ....................7 Target Mini Fixed Target Mini Fixed Rugged Dome ..........8 Bullet Camera ......................9 Ultra Bullet Camera....................9 Target Bullet Camera....................10... -
Page 3: Using The Web Interface
Restoring to Default Settings There are twelve models of GV-IPCAM H.264 Series: Box, Ultra Box, Mini Fixed Dome, Mini Fixed Rugged Dome, Bullet, Ultra Bullet, PTZ and PT, Vandal Proof IP Dome, Fixed IP Dome, Cube, and Advanced Cube. Using the Web Interface On the left menu of Web interface, select Management and select Tools. -
Page 4: Directly On The Camera
Directly on the Camera Box Camera 1. Keep the power and network cables connected to the camera. 2. Use a pin to press and hold the default button on the back panel of the camera. Default button 3. Release the default button when the status LED blinks. This shall take about 8 seconds. Status LED 4. -
Page 5: Ultra Box Camera And Target Box Camera
Ultra Box Camera and Target Box Camera 1. Keep the power and network cables connected to the camera. 2. Use a pin to press and hold the default button on the back panel of the camera. Default button 3. Release the default button when the status LED blinks. This shall take about 8 seconds. Status LED 4. -
Page 6: Mini Fixed Dome
Mini Fixed Dome 1. Keep the power and network cables (or PoE) connected to the camera. 2. Press and hold the default button. GV-MFD120 / 130 / 320 Default button Status LED GV-MFD1501 Series / 2401 Series / 3401 Series / 5301 Series 3. -
Page 7: Mini Fixed Rugged Dome
Mini Fixed Rugged Dome 1. Keep the power and network cables connected to the camera. 2. Press and hold the default button. Status LED Default button 3. Release the default button when the status LED blinks. This shall take about 8 seconds. 4. -
Page 8: Target Mini Fixed Target Mini Fixed Rugged Dome
4. When the status LED fades, the process of loading default settings is completed and the camera reboots automatically. Target Mini Fixed Target Mini Fixed Rugged Dome 1. Keep the PoE cable connected to the camera. 2. Press and hold the default button for about 8 seconds. Default button 3. -
Page 9: Bullet Camera
Bullet Camera 1. Keep the power and network cables connected to the camera. 2. Loosen the camera’s cover and remove the Silica Gel Bag. 3. Press and hold the default button for 8 seconds. Default button 4. Release the default button. When the process of loading default settings is completed, the camera reboots automatically. -
Page 10: Target Bullet Camera
Target Bullet Camera 1. Keep the power and network cables (or PoE) connected to the camera. 2. Loosen the camera’s cover. 3. Press and hold the default button for about 8 seconds. 4. Release the default button. When the process of loading default settings is completed, the camera reboots automatically. -
Page 11: Target Vandal Proof Ip Dome
Status LED Default 3. Release the default button when the status LED blinks. This shall take about 8 seconds. When the status LED fades, the process of loading default settings is completed and the camera reboots automatically. Target Vandal Proof IP Dome 1. -
Page 12: Fixed Ip Dome
Fixed IP Dome 1. Keep the power and network cables (or PoE) connected to the camera. 2. Use a pin to press and hold the default button on the panel. Status LED Default button 3. Release the default button when the status LED blinks. This shall take about 8 seconds. 4. -
Page 13: Cube Camera
3. Release the default button when the status LED blinks. 4. When the status LED fades, the process of loading default settings is completed and the camera reboots automatically Cube Camera 1. Keep the power and network cables connected to the camera. 2. -
Page 14: Advanced Cube Camera
Advanced Cube Camera 1. Keep the power and network cables connected to the camera. 2. Use a pin to press and hold the default button on the panel. Default button Status LED 3. Release the default button when the status LED blinks. This shall take about 8 seconds. 4. -
Page 15: Pinhole Camera
3. Release the default button when the status LED blinks. This shall take about 8 seconds. 4. When the status LED turns orange, the process of loading default settings is completed and the camera is ready for use. Pinhole Camera 1. - Page 16 GV-FER521 System Status LED Default button GV-FE2302 / 3402 / 3403 / 5302 / 5303 System Status LED Default button GV-FER3402 / 3403 / 5302 / 5303...
- Page 17 GV-FER12203 Default button System Status LED 3. Release the default button when the system status LED blinks. 4. When the status LED fades, the process of loading default settings is completed and the camera reboots automatically.
Need help?
Do you have a question about the GV-IPCAM H.264 Series and is the answer not in the manual?
Questions and answers