
Subscribe to Our Youtube Channel
Related Manuals for GeoVision GV-CR1320


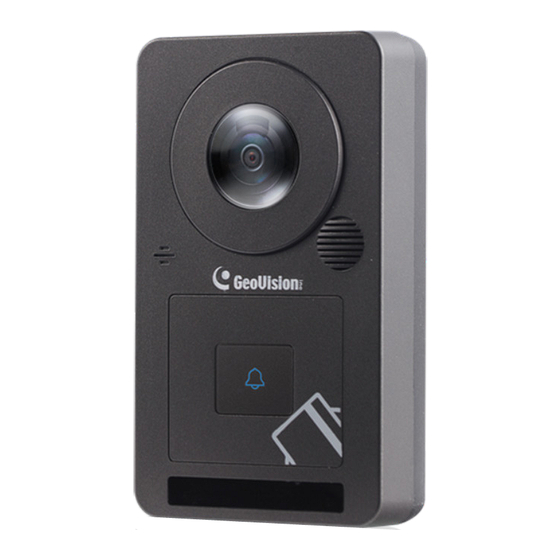
Summary of Contents for GeoVision GV-CR1320
- Page 1 GV-CR1320 Camera Reader User’s Manual Before attempting to connect or operate this product, please read these instructions carefully and save this manual for future use. CR1320-UM-C...
- Page 2 GeoVision. Every effort has been made to ensure that the information in this manual is accurate. GeoVision, Inc. makes no expressed or implied warranty of any kind and assumes no responsibility for errors or omissions. No liability is assumed for incidental or consequential damages arising from the use of the information or products contained herein.
-
Page 3: Table Of Contents
1.4 Optional Accessories ..................... 5 1.5 Overview........................ 6 1.6 Installation ......................7 1.6.1 Wire Definition ................... 7 1.6.2 Installing GV-CR1320 ................8 1.6.3 Replacing the Silica Gel Bag..............9 1.7 Connecting GV-CR1320 ..................10 1.7.1 Connecting Input Devices .................11 1.7.2 Connecting Output Devices ..............11 1.8 Powering on GV-CR1320..................13... - Page 4 3.2.7 Picture-in-Picture and Picture-and-Picture View........26 3.2.8 Video and Audio Configuration ..............28 3.2.9 Remote Configuration ................29 3.2.10 Camera Name Display................29 3.2.11 Image Enhancement................29 3.2.12 I/O Control ....................30 3.2.13 Visual Automation...................31 Chapter 4 Administrator Mode ...........32 4.1 Video ........................34 4.1.1 Video Settings ..................35 4.1.2 Motion Detection..................39 4.1.3 Privacy Mask ....................40 4.1.4 Text Overlay .....................41...
- Page 5 5.4.2 Running Watermark Proof ................83 5.4.3 The Watermark Proof Window ..............84 Chapter 6 GV-DVR / NVR / VMS Configurations ....85 6.1 Setting up GV-CR1320 on GV-DVR / NVR ............85 6.1.1 Customizing the Basic Settings..............86 6.2 Setting up GV-CR1320 on GV-VMS ..............90 Appendix.
-
Page 6: Naming And Definition
Naming and Definition GV-DVR/NVR GeoVision Analog and Digital Video Recording S oftware. The GV- DVR/NVR also refers to Multicam System , GV-NVR System, GV- Hybrid DVR System and GV-DVR System at the same time. GV-VMS GeoVision Video Management System for IP cameras. -
Page 7: Installation Considerations
When placed at a building gate, GV-CR1320 should be about 1.4-1.5 meters above the ground. When placed at a parking lot gate, GV-CR1320 should be about 1.2 meters above the ground to match t he hei ght of vehicles. -
Page 8: Chapter 1 Introduction
VoIP Calls: When the touchpad is activated, GV-CR1320 will place a call to the operator through the Internet using VoIP. The operator can then communicate with the visitor and enter the access code to open the door. -
Page 9: Key Features
Reader 13.56 MHz Reader (Mifare DESFire, Mifare Plus and Mifare Classic) Support for GV-Proximity Cards with GID (GeoVision identifier) to enhance security Access by card plus face detection Network interface for connecting to and access control by controllers ... -
Page 10: System Requirements
Introduction 1.2 System Requirements To access the functions and settings of GV-CR1320 on the Web interface, ensure your PC has good network connection and use one of the following web browsers: Internet Explorer 9 x or later Microsoft Edge ... -
Page 11: Packing List
1.3 Packing List GV-CR1320 Mounting Plate Standard Screw x 2 Plastic Screw Anchor x 2 Security Screw Torx Wrench Silica Gel Bag Micro SD Card 2 (inserted and formatted) Download Guide ... -
Page 12: Optional Accessories
3 to 12 cm and al lows you to open the door with a wave of Infrared Button hand. GV-WTR allows the RS-485 interface of GV-CR1320 to support GV-WTR Wiegand, thereby enabl ing the camera reader to be connected to... -
Page 13: Overview
Beeper. Resets all configurations to default factory settings. See 5.3 Default Button Restoring to Factory Default Settings. Power Cable Connects to power supply. See 1.8 Powering on GV-CR1320. Connects to network and power supply. See 1.7 Connecting Ethernet Port GV-CR1320. -
Page 14: Installation
Introduction 1.6 Installation 1.6.1 Wire Defi nition The wire definit s of GV-CR1320 are illustrated below. Figure 1-2 Wire Definition Wire Definition RJ-45 Ethernet Blue RS-485 + 12V DC Light Blue RS-485 - Black Gray Output NO Yellow Input 1... -
Page 15: Installing Gv-Cr1320
1.6.2 Installing GV-CR1320 After the location of GV-CR1320 is decided, follow the steps below to install the camera reader. Note: You will need to prepare a single gang power box for wall mount installation. 1. Attach the single gang power box to the wall. -
Page 16: Replacing The Silica Gel Bag
1.6.3 Replacing the Silica Gel Bag If you opened the compartment cover at the back of your GV-CR1320 to change a new Micro SD card, you must follow the steps below to replace the original silica gel bag with a new one. -
Page 17: Connecting Gv-Cr1320
1.7 Connecting GV-CR1320 There are two ways to connect GV-CR1320 to a GV-AS Controller, as illustrated below: Network Door Network (sends card number) GV-ASManager GV-AS Controller GV-CR1320 Network (sends live view) Figure 1-6 via GV-WTR Door Wiegand 1... -
Page 18: Connecting Input Devices
1.7.1 Connecting Input Devices All inputs are dry contact and can be configured as normally open (NO) or normally closed (NC) through the GV-CR1320 Web interface. The default value is NO. To change the input status, see 4.2.1 Input Setting The table below shows the wire assignments of input connectors on GV-CR1320. - Page 19 (-) points of the locking device and the external power supply together, and connect the (+) point on the external power supply to the Output NO or Output NC wire on GV-CR1320 based on the state of the locking device.
-
Page 20: Powering On Gv-Cr1320
/ output devices ex ceed 12V. 1.8.1 LED Status & Beeper Normally, the LED on GV-CR1320 is blue during standby mode and the LED flashes green when a card is granted access. The LED status and beeper under different conditions are listed below. -
Page 21: Chapter 2 Getting Started
Follow the steps below to get GV-CR1320 working on the network: 1. Use a standard network cable to connect the GV-CR1320 to your network. 2. Connect power using one of the two methods described in 1.8 Powering on GV-CR1320: 3. You can now access the Web interface of GV-CR1320. -
Page 22: Creating Login Credential
Getting Started 2.1 Creating Login Credentials When purchasing a new GV-CR1320 or after loading default, you need to se t up a login username and password for the GV-CS1320. nload and inst all GV-IP Dev ice Utility from our website... -
Page 23: Checking The Dynamic Ip Address
Follow the steps below to assign a static IP address. Note: GV-CR1320 has a default IP address of 192.168.0.10. The computer used to set the IP address must be under the same LAN as the device. If your router supports DHCP server, GV-CR1320 will obtain a dynamic IP address from the DHCP server each time it connects to the LAN, instead of using 192.168.0.10. - Page 24 1. If Dynamic IP Address or PPPoE is enabled, you need to know which IP address GV-CR1320 will get from the DHCP server or ISP to log in. If your GV-CR1320 is installed under a LAN, use the GV-IP Device Utility to look up its current dynamic address.
-
Page 25: Chapter 3 Accessing The Camera Reader
3.1 Accessing Your Surveillance Ima Start the Internet Explorer browser. Type the IP address or domain name of GV-CR1320 in the Location / Address field of your browser. Figure 3-1 Enter your username and password. -
Page 26: Functions Featured On The Main Page
Accessing the Camera Reader Note: To enable the updating of images in Microsoft Internet Explorer, you must set your browser to allow ActiveX Controls and perform a one-time installation of GeoVision’s ActiveX component onto your computer. 3.2 Functions Featured on the Main Page This section introduces the features of the Live View window on the main page. - Page 27 No. Name Function 3 Microphone Talks to the surveillance area from the local computer. 4 Speaker Listens to the audio around GV-CR1320. Takes a snapshot of the live video. 5 Snapshot --- See 3.2.3 Snapshot of a Live Video. Records live video to the local computer.
-
Page 28: The Control Panel Of The Live View Window
Figure 3-4 formation] Displays the version of GV-CR1320, local time of the local computer, host time of G V-CR1320 , and the number of users logging in to GV-CR1320. - Page 29 Gamma: Adjusts the relative proportions of bright and dark areas White balance: GV-CR1320 automatically adjusts the color to be closest to the image you are viewing. You can choose one of the four presets: Auto, Outdoor, Indoor, and Fluorescent. You can also choose Manual to adjust the white balance manually.
- Page 30 Metering: Controls the camera reader’s exposure. Select Normal for GV-CR1320 to adjust exposure based on the full live view. Select Regional Metering for GV-CR1320 to adjust exposure of specified zones. Draw directly on the live view and a block marked with “AE (automatic exposure)”...
-
Page 31: Snapshot Of A Live Video
(No. 2, 3.2.1 The Live View Window). 3.2.5 Digital PTZ The Digital P TZ (DPTZ) function of GV-CR1320 allows you to simulate the PTZ movement on the screen 1. Right-click on the live view to display a drop-down list. -
Page 32: Wide Angle Lens Dewarping
Accessing the Camera Reader 3.2.6 Wide Angle Lens Dewarping Use the Wide Angle Lens Dewarping function to reduce the warping of live view. 1. Right-click on the live view to display a drop-down list. 2. Select Wide Angle Setting. The Wide Angle Dewarping Setting window appears. -
Page 33: Picture-In-Picture And Picture-And-Picture View
3.2.7 Picture-in-Picture and Picture-and-Picture View Two types of close-up views are available to provide clear and detailed images of the surveillance area: Picture-in-Picture (PIP) and Picture-and Picture (PAP ). After entering the live view window, the image is displayed in PIP mode by default. Picture-in-Picture View With the Picture in Picture (PIP) view, you can crop the video t o get a close-up view or zoom... - Page 34 Accessing the Camera Reader Picture-and-Picture View With the Picture and Picture (PAP) view, you can create a split video effect with multiple close-up views on the image. A total of 7 close -up views can be defined. Figure 3-9 Right-click the live view and select PAP. Three inset windows appear at the bottom. Draw a navigation box on the image, and this selected area is immediately reflected in one inset window.
-
Page 35: Video And Audio Configuration
3.2.8 Video and Audio Configuration You can enable the microphone and speaker for two-way audio communication and set the number of frames to keep for live view buffer. Click the Show System Menu button (No. 9, 3.2.1 The Live View Window), and select Video and Audio Configuration. ... -
Page 36: Remote Configuration
Accessing the Camera Reader 3.2.9 Remote Configuration You can upgrade firmware over the network. Click the Sho w System Menu button (No. 9, 3.2.1 The Live View Window), and select Remote Config. For details, see 5.1.1 Using the Web Interface. 3.2.10 Camera Name Display To display the camera reader’s name on the image, click the Show System Menu button (No. -
Page 37: I/O Control
3.2.12 I/O Control Click the I/O Control button (No. 9, 3.2.1 The Live View Window) and select I/O Control. The I/O Control window appears. The I/O Control window provides a real-time graphic display of the device status, I/O status and alarm events. Additionally, you can remotely force output(s) to be trigg ered. -
Page 38: Visual Automation
Accessing the Camera Reader 3.2.13 Visual Automation The Visual Automation allows you to change the current state of the electr onic device by simply clicking on its image, e.g. turning the light ON. This feature is only available when the Visual Automation is set ahead by the Administrator. -
Page 39: Chapter 4 Administrator Mode
Chapter 4 Administrator Mode The Administrator can access system configuration of GV-CR1320 through the network. The following configuration categories are available: Video and Motion, I/O Control, Events and Alerts, Monitoring, Recording Schedule, Network, Management, SIP and Access Control. Figure 4-1... - Page 40 Administrator Mode List of Menu Options Find the topic of interest by referring to the section number prefixed to each option. 4.1.1 Video Settings 4.1.2 Motion Detection 4.1.3 Privacy Mask 4.1 Video and Motion 4.1.4 Text Overlay 4.1.5 Tampering Alarm 4.1.6 Visual Automation 4.2.1 Input Setting 4.2 I/O Control...
-
Page 41: Video
4.1 Video GV-CR1320 supports dual streams, Streaming 1 and Streaming 2, which allow separate codec and resolutions settings for a single video transmission. In a bandwidth-limited network, such as mobile phone surveillance, this dual-stream feature allows you to view live video in lower resolution (Streaming 2) while recording in a higher resolution (Streaming 1) at the same time. -
Page 42: Video Settings
Administrator Mode 4.1.1 Video Settings Figure 4-2... - Page 43 Figure 4-3 [Video Signal Type] Configure the codec type, signal format, resolution and frame rate from the options listed below. Streams Codec Options Image Resolution Maximum Frame Rate 1600 x 1200, 1280 x 960 Stream 1 H.264, MJPEG 15 fps 1920 x 1080, 16:9 1280 x 720...
- Page 44 [H.264 Video Entropy Coding Setting] By default, the entropy coding is set to CAVLC. To change it to CABAC, click and select from the drop-down list. [Text Overlay Settings (OSD)] Displays device name, date, and/or time on the live view and recorded videos when viewing through GeoVision software and third-party software through RTSP. ...
- Page 45 D/N: Sets the Day/Night mode of GV-CR1320. Auto: Select Auto for the GV-CR1320 to detect the amount of light present and automatically switch to monochrome in a poorly-lit scene. Use the drop-down list to adjust the sensitivity level of light sensor from 0 to 10.
-
Page 46: Motion Detection
Administrator Mode 4.1.2 Motion Detection Motion detection is used to generate an alarm whenever motion is detected in the video image. You can configure up to 8 areas with different sensitivity values for motion detection. Set up at least one area to enable this function, which is disabled by default. Figure 4-5 Select the desired sensitivity by moving the slider. -
Page 47: Privacy Mask
The Privacy Mask function is used to block out sensitive areas on live view and recorded clips for cameras connecting to GeoVision software. This feature is ideal for locations with displays, keyboard sequences (e.g. passwords), and for anywhere else you don’t want sensitive information visible. -
Page 48: Text Overlay
Administrator Mode 4.1.4 Text Overlay The Text Overlay allows you to overlay any text in any place on the camera view. Up to 16 text messages can be created on one camera view. The overlaid text will be saved in the recordings. -
Page 49: Tampering Alarm
To notify GV-Center V2, GV-Vital Sign Monitor and GV-DVR / NVR / VMS when a tampering event occurs, enable the connection to these systems. See 4.3.3 Center V2, 4.3.4 Vital Sign Monitor, 6.1 Setting up GV-CR1320 on GV-DVR / NVR, and 6.2 Setting up GV-CR1320 on GV-VMS. - Page 50 Administrator Mode 3. Select the desired detection sensitivity by moving the slider. The higher the value, the more sensitive the camera is to scene changes. 4. In the Tolerance Time of Alarm field, specify the time length allowed for scene changes before an alarm is generated.
-
Page 51: Visual Automation
4.1.6 Visual Automation This intuitive feature helps you automate any electronic device by triggering the connected output device. You can change the current state of the electronic device, e.g. light on, by simply clicking on its image. Note: Before using the Visual Automation function, make sure the connected output device is properly configured, see 4.2.2 Output Setting. -
Page 52: I/O Control
Administrator Mode 4.2 I/O Control After installing the I/O device, you need to enable the I/O settings on the device. 4.2.1 Input Setting To activate the sensor input, select Enable. Figure 4-11 Normal State: You can set the input state to trigger actions by selecting Open Circuit (N/O) or Grounded Circuit (N/C). -
Page 53: Output Setting
4.2.2 Output Setting Figure 4-12 Select Enable to start the output device. Choose the output signal that mostly suits the device you are using: N/O (Open Circuit), N/C (Grounded Circuit), N/O Toggle, N/C Toggle, N/O Pulse or N/C Pulse. For Toggle output type, the output continues to be triggered until a new input trigger ends the output. -
Page 54: Events And Alerts
Administrator Mode 4.3 Events and Alerts For the events of motion detection or I/O trigger, the Administrator can set up three trigger actions: 1. Send a captured still image by E-mail or FTP. 2. Notify Center Monitoring Station, Center V2 or Vital Sign Monitor, by video or text alerts. 3. - Page 55 [Enable] Select Enable to set up e-mail notifications. Sever URL/IP Address: Type the SMTP Server’s URL address or IP address. Server Port: Type the SMTP Server’s port number or keep the default value 25. From email address: Type the sender’s e-mail address. ...
-
Page 56: Ftp
Administrator Mode 4.3.2 FTP You can also send the captured images to a remote FTP server as alerts. Figure 4-14 [Upload to an FTP Server] Enable: Select to enable the FTP function and then select Active Mode or Passive Mode, depending on the setting of your FTP server. - Page 57 Alerts Interval time in minute: Specify the interval between FTP alerts. The interval can be between 0 and 60 minutes. The option is useful for the frequent event occurrence by which any event triggers during the interval period will be ignored. [FTP –...
-
Page 58: Center V2
Administrator Mode 4.3.3 Center V2 After a motion or an I/O triggered event, the central monitoring station Center V2 can be notified by live videos and text alerts. For the live monitoring through Center V2, you must already have a subscriber account on Center V2. The device can connect to up to 2 Center V2 stations simultaneously. - Page 59 Detection, 4.1.5 Tampering Alarm and 4.2.1 Input Setting. [Select schedule time] You can optionally set a schedule for which GV-CR1320 is connected to Center V2. Span 1- Span 3: Set different time frames during the day to enable the connection. Each day can be divided into 3 time frames, represented by Span 1 to Span 3.
-
Page 60: Vital Sign Monitor
Administrator Mode 4.3.4 Vital Sign Monitor After a motion or an I/O triggered event, the central monitoring station Vital Sign Monitor can be notified by text alerts. For the monitoring through Vital Sign Monitor, you must already have a subscriber account on Vital Sign Monitor. The device can connect up to 2 Vital Sign Monitors simultaneously. - Page 61 Detection, 4.1.5 Tampering Alarm and 4.2.1 Input Setting. [Select schedule time] You can optionally set a schedule for which GV-CR1320 is connected to Vital Sign Monitor. Span 1- Span 3: Set different time frames during the day to enable the connection. Each day can be divided into 3 time frames, represented by Span 1 to Span 3.
-
Page 62: Video Gateway / Recording Server
Administrator Mode 4.3.5 Video Gateway / Recording Server GV-Video Gateway / GV-Recording Server is a video streaming server designed for large- scale video surveillance deployments. The GV-Video Gateway / GV-Recording Server (with recording capability) can receive up to 128 channels from various IP video devices, and distribute up to 300 channels to its clients. - Page 63 Note: For related settings to activate the monitoring through Center V2, see 4.1.2 Motion Detection, 4.1.5 Tampering Alarm and 4.2.1 Input Setting. [Select schedule time] You can optionally set a schedule for which GV-CR1320 is connected to Video Gateway / Recording Server. ...
-
Page 64: Rtsp/Onvif
Enable Audio: Turns the audio streaming on or off. Disable Authentication: By default, when accessing live view through the RTSP command, the ID and password of GV-CR1320 are required. Select this option to disable the authentication prompt. [ONVIF] ... -
Page 65: Monitoring
4.5 Recording Schedule The schedule is provided to activate the connected I/O devices on a specific time each day. 4.5.1 I/O Monitor You can set the schedule for which the connected I/O devices are enabled for GV-CR1320. Figure 4-19 ... -
Page 66: Network
Administrator Mode 4.6 Network The Network section includes some basic but important network configurations that enable the GV-CR1320 to be connected to a TCP/IP network. 4.6.1 Status You can access an overview of GV-CR1320’s network status. Figure 4-20 4.6.2 LAN According to your network environment, select among DHCP, static IP and PPPoE. - Page 67 IP address or look up the address using GV-IP Device Utility. Static IP address: Assign a static IP or fixed IP to GV-CR1320. Type GV-CR1320’s IP address, Subnet Mask, Router/Gateway, Primary DNS server and Secondary DNS server.
-
Page 68: Advanced Tcp/Ip
Administrator Mode 4.6.3 Advanced TCP/IP This section introduces the advanced TCP/IP settings, including the DDNS Server, HTTPS port, streaming port, UPnP and QoS. Figure 4-22... - Page 69 2. Service Provider: Select the DDNS service provider you have registered with. 3. Host Name: Type the host name used to link to GV-CR1320. For users of GeoVision DDNS Server, it is unnecessary to fill the field because the system will detect the host name automatically.
- Page 70 [Network Connection Check Settings] The camera checks for Internet connection, and reboots when it is disconnected from the Internet. This function is enabled by default. Note: If you do not intend to connect GV-CR1320 to the network, disable this function to prevent automatic reboot.
-
Page 71: Ip Filtering
4.6.4 IP Filtering The Administrator can set IP filtering to restrict access to GV-CR1320. Figure 4-23 To enable the IP Filter function: 1. Enable IP Filtering: Enable the IP Filtering function. 2. Filtered IP: Type the IP address from which you want to restrict the access. -
Page 72: Snmp Settings
7. Type the Authentication Password and Current Password (Encrypted). You will need to type these passwords in the SNMP software to be able to access GV-CR1320. 8. To enable access to Read Only Name, type a community string to allows read-only access to GV-CR1320, and set up the Authentication Type, Authentication Password and the Current Password (Encrypted). -
Page 73: Management
4.7 Management The Management section includes the settings of data and time and user account. You can also view the firmware version and execute certain system operations. 4.7.1 Date and Time The date and time settings are used for date and time stamps on the image. Figure 4-25... - Page 74 [Date & Time on IPCAM] Displays the current date and time on GV-CR1320 [Time Zone] Sets the time zone for local settings. Select Enable Daylight Saving Tim to automatically adjust GV-CR1320 for daylight saving time. Select the Start and Stop time to enable the daylight savings function.
-
Page 75: Storage Settings
4.7.2 Storage Settings GV-CR1320 supports micro SD card for storing the device’s log information, which has already been inserted and formatted by default. Figure 4-26... - Page 76 Administrator Mode [Storage Settings] Name: Type the name of the storage device. The name can only contain English letters (of upper or lower cases), numerals, slashes, and hyphens. Enable recycling: When selected, the system will overwrite the oldest recorded files after the storage space is lower than specified.
-
Page 77: User Account
4.7.2 User Account You can change the Administrator’s login name and password. To remain logged in after reboot, select Disable auto logout after reboot. Figure 4-27 4.7.3 Log Information The log information contains dump data that is used by service personnel for analyzing problems. -
Page 78: Tools
You can use additional tools to execute certain system operations and view the firmware version. Figure 4-28 [Host Settings] Enter a descriptive name for GV-CR1320. [Auto Reboot Setup] Select Enable to activate automatic reboot and specify the time for reboot in the sub fields. -
Page 79: Language
[Firmware Update] Displays the firmware version of GV-CR1320. [System Settings] Clicking the first Load Default button will restore GV-CR1320 to factory default settings. Clicking the second Load Default button will restore GV-CR1320 to factory default settings (Except network). Note: After clicking the first default function, you will need to configure the camera reader’s network setting again. -
Page 80: Sip
Protocol (VoIP) calls. You can connect to a SIP server and configure VoIP service on the setting page. The GV-CR1320 can then place a call to the operator with an IP phone or a computer with VoIP software. With VoIP, the operator can communication with the visitor and enter the access code to open the door. -
Page 81: Sip Setting
Select the type of Port used from UDP, TCP or TLS. [SIP Outgoing Call Setting] Select Enable Alternate to allow GV-CR1320 to make phone calls to at most three phone numbers registered on SIP server. If unanswered, GV-CR1320 will automatically forward the... -
Page 82: Access Control
Alternate Outgoing Call SIP Name: Type the third phone number for GV-CR1320 to call. [SIP Incoming Call Setting] Select Decline to reject phone calls from SIP server to GV-CR1320. It indicates that the operator cannot talk to the visitor. [SIP Video Setting] Select Enable Video to display live view of GV-CR1320 during the SIP call. -
Page 83: Basic Setting
GID. Note: 1. If face detection fails, the card will not be recognized by GV-CR1320. 2. When Card and Face mode is enabled, the cardholder should stand in front of GV- CR1320 for at least 5 seconds to allow face detection before presenting the card. -
Page 84: Chapter 5 Advanced Applications
In this case, please contact your sales representative and send your device back to GeoVision for repair. 5. If firmware upgrade fails, you will need to restore the GV-CR1320 to the default settings. For details, see 5.3 Restoring to Factory Default Settings in the User’s Manual. -
Page 85: Using The Web Interface
5.1.1 Using the Web Interface 1. In the Live View window, click the Show System Menu button (No. 8, Figure 3-4) and select Remote Config. This dialog box appears. Figure 5-1 2. Click the Browse button to locate the firmware file (.img) saved at your local computer. 3. -
Page 86: Using The Ip Device Utility
2. On the GV-IP Device Utility, click the Search button to locate the available IP devices under the same LAN. 3. Double-click GV-CR1320 in the list to bring up a dialog box, and click the Firmware Upgrade tab. This dialog box appears. Figure 5-2 4. -
Page 87: Backing Up And Restoring Settings
5.2.1 Backing Up the Settings 1. Run GV-IP Device Utility and locate GV-CR1320. See Steps 1-2 in 5.1.2 Using the IP Device Utility. 2. Double-click a GV-CS1320 in the list to bring up a dialog box, and click the Export Settings tab. -
Page 88: Restoring The Settings
Advanced Applications 5.2.2 Restoring the Settings 1. Following Step 1-2 in 5.2.1 Backing Up the Settings and click the Import Settings tab. This dialog box appears. Figure 5-4 2. Click the Browse button to locate the exported file (.dat). 3. Select Upgrade all devices to apply the settings to all devices of the same model in the same LAN. -
Page 89: Restoring To Factory Default Settings
5.3 Restoring to Factory Default Settings You can restore GV-CR1320 to factory default settings using the Web interface or directly on the camera. To restore to default settings using the Web interface: 1. In the left menu, select Management and select Tools. -
Page 90: Verifying Watermark
Advanced Applications 5.4 Verifying Watermark The watermark is an encrypted and digital signature embedded in the video stream during the compression stage, protecting the video from the moment of its creation. Watermarking ensures that an image is not edited or damaged after it is recorded. To enable the watermark function, see [Watermark], 4.1.1 Video Settings. -
Page 91: The Watermark Proof Window
5.4.3 The Watermark Proof Window Figure 5-5 The controls in the window: No. Name Description Open File Opens the recorded file. First Frame Goes to the first frame of the file. Play Plays the file. Previous Frame Goes to the previous frame of the file. Next Frame Goes to the next frame of the file. -
Page 92: Chapter 6 Gv-Dvr / Nvr / Vms Configurations
The above maximum numbers of streams are based on the maximum resolution for the camera reader and the codec H.264. By default, GV-CR1320 is in dual streams and will take up 2 streams when connected to GV-DVR / NVR / GV-VMS. -
Page 93: Setting Up Gv-Cr1320 On Gv-Dvr / Nvr
6.1 Setting up GV-CR1320 on GV-DVR / NVR To set up GV-CR1320 and receive live view on the GV-DVR / NVR, follow these steps: On the main screen, click the Configure button, select System Configure, select Camera Install and click IP Camera Install. This dialog box appears. - Page 94 GV-DVR / NVR / VMS Configurations Type the IP address, username and password of GV-CR1320. Modify the default HTTP port if necessary. Select GeoVision from the Brand drop-down list and select the model from the Device drop-down list. This dialog box appears.
-
Page 95: Customizing The Basic Settings
6.1.1 Customizing the Basic Settings After GV-CR1320 is connected and assigned with a display position, you can configure the GV-CR1320’s settings such as frame rate, codec type and resolution. Right-click the desired camera reader to see the following list of options: Figure 6-6 ... - Page 96 Frames to keep in live view buffer: Specifies the number of frames to keep in the live view buffer. Recording Codec Format: Specifies whether to record in standard or GeoVision type of MJPEG H.264 codec. Automatically Adjust DST: If enabled, the time on the GV-IP device Web interface will be synchronized with the time of the GV-DVR / NVR when DST period starts or ends on the GV-DVR / NVR.
-
Page 97: Setting Up Gv-Cr1320 On Gv-Vms
6.2 Setting up GV-CR1320 on GV-VMS Follow the steps below to manually connect your GV-CR1320 to GV-VMS. 1. To access the IP Device Setup page, click Home , select Toolbar , click Configure and select Camera Install. Figure 6-7 2. Click Add Camera . - Page 98 Port: Modify the video streaming port number if necessary. 6. Click Apply to add the GV-CR1320 to the list. 7. To connect the added GV-CR1320, click the box besides the ID column. Upon successful connection, the Status icon shows green, with the video resolution and bit rate being displayed in the correspondent columns.
-
Page 99: Appendix
Appendix A. RTSP Protocol Support The camera reader can support RTSP protocol for both video and audio streaming. If you are using Quick Time player, use the following RTSP command: rtsp://<IP of the camera reader>:8554/<CH No.>.sdp For example, rtsp://192.168.3.111:8554/CH001.sdp If you are using VLC player, use the following RTSP command: rtsp://<ID>:<Password>@<IP of the camera reader>:8554/<CH No.>.sdp For example, rtsp://admin:admin@192.168.3.111:8554/CH001.sdp Note:...
Need help?
Do you have a question about the GV-CR1320 and is the answer not in the manual?
Questions and answers