Table of Contents
Advertisement
OPERATOR'S MANUAL
WITH CENTRAL SUSPENSION
KDTC 260
KDTC 260 S/W
KDTC 300
KDTC 300 S/W
KDTC 340
REAR DISC MOWER
- 2,6 m KDTC 261
- 2,6 m KDTC 261 S/SL/W
- 3,0 m KDTC 301
- 3,0 m KDTC 301 S/SL/W
- 3,4 m KDTC 341
Serial No:
Translation of the original operator's manual
– English –
SaMASZ Sp. z o.o.
Poland, 16-060 Zabłudów, ul. Trawiasta 1
S – Mowers with tine conditioner
SL - Mowers with light weight swath conditioner
W – Mowers with roller conditioner
Established – 1984
NIP PL-966-159-29-76
tel. (+48) (85) 664 70 31
fax (+48) (85) 664 70 41
e-mail: samasz@samasz.pl
www.samasz.pl
- 2,6 m
- 2,6 m
- 3,0 m
- 3,0 m
- 3,4 m
IN290EN005
20.02.2017
EDITION NO 5
Advertisement
Table of Contents

Related Manuals for SaMASZ KDTC 260


Summary of Contents for SaMASZ KDTC 260
- Page 1 SaMASZ Sp. z o.o. Poland, 16-060 Zabłudów, ul. Trawiasta 1 Established – 1984 NIP PL-966-159-29-76 tel. (+48) (85) 664 70 31 fax (+48) (85) 664 70 41 e-mail: samasz@samasz.pl www.samasz.pl OPERATOR’S MANUAL REAR DISC MOWER WITH CENTRAL SUSPENSION KDTC 260...
- Page 2 Well-proven design with thousands of machines in regular use in many countries and quality materials ensure high durability and reliability of SaMASZ mowers. We congratulate you on the purchase of your new SaMASZ mower and wish you much pleasure and the very best work results through the years to come.
-
Page 3: Table Of Contents
Operator’s manual Rear disc mowers with central suspension Contents page 1. IDENTIFYING THE MACHINE ..................... 3 2. INTRODUCTION ........................3 3. PROPER USE..........................4 3.1. Technical data ............................. 5 3.2. Design and working principle ......................7 3.3. Standard equipment and spare parts....................8 4. - Page 4 Operator’s manual Rear disc mowers with central suspension 9.2. Scrapping ............................41 10. HYDRAULIC SCHEME ......................41 11. WARRANTY CLAIM ......................42 12. WARRANTY TERMS ......................42 12.1. Warranty claims procedures ......................42 12.2. Warranty repairs record ........................44 APPENDIX Defining the total weight, axis load, tyre load capacity and minimum load ..45 - 2 -...
-
Page 5: Identifying The Machine
Operator’s manual Rear disc mowers with central suspension 1. IDENTIFYING THE MACHINE Data plate is mounted to the mower’s main frame in the place shown below in Fig. 1. Fig. 1. Data plate place Data plate includes: - name and adress of the manufacturer, - model year, - CE marking means, that the produce - version number,... -
Page 6: Proper Use
Operator’s manual Rear disc mowers with central suspension 3. PROPER USE Mower KDTC is equipped with "Perfect Cut" cutterbar. Tab. 1 shows the differences in mowing height depending on angle at which cutterbars are set and what kind of skids are applied. Tab. -
Page 7: Technical Data
Nosie level 101 ± 1 dB 113 ± 1 dB Amax 116 ± 1 dB Cpeak Tab. 3. Specifications Model: KDTC 260 S KDTC 300 S KDTC 260 W KDTC 300 W Working width 2.60 m 3.00 m 2.60 m 3.00 m... - Page 8 Operator’s manual Rear disc mowers with central suspension Tab. 4. Specifications Model: KDTC 261 KDTC 301 KDTC 341 Working width 2.60 m 3.00 m 3.40 m Number of knives [pcs] 12 (2 x6) 14 (2 x 7) 16 (2 x 8) Tractor PTO rpm 540 (1000 –...
-
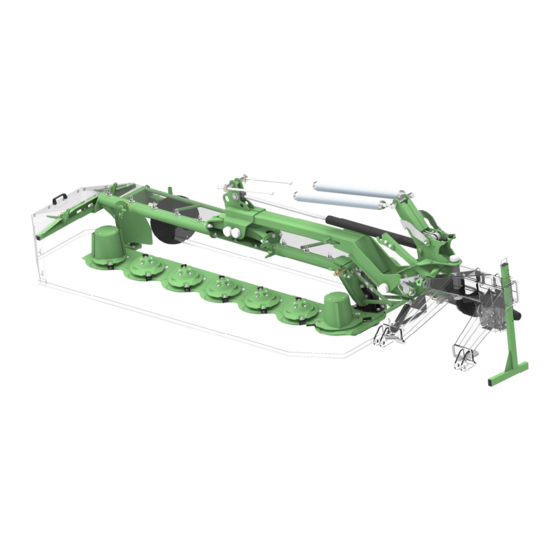
Page 9: Design And Working Principle
(9). There are also swath discs (5) mounted on the main frame and safety guard (6). Fig. 3. Parts of SaMASZ rear disc mower with central suspension and tine conditioner (for mowers of type KDTC 261 S/SL, KDTC 301 S/SL) 1 –... -
Page 10: Standard Equipment And Spare Parts
(8) and chain gearbox (11) is transmitted to tine conditioner (12) (not applicable to KDTC 260 S and KDTC 300 S, where conditioner is powered through chain gear). Hydraulic cylinder (2) is used to adjust the mower to working position. It is supplied from outer hydraulics of the tractor. - Page 11 S/SL/W KDTC 301 S/SL/W PTO shafts of other brands with equivalent parameters could be used after SaMASZ permission. NOTICE: Lubricate the PTO shaft with high quality multi-purpose grease every 50 shaft operating hours. If access holes are available, lubricate fittings through access holes.
-
Page 12: Safety Advice
Operator’s manual Rear disc mowers with central suspension 4. SAFETY ADVICE 4.1. Safety rules and regulations Front axis of the tractor should be weighted to keep the balance. If need be, use front wheel weights. Any operation with the hydraulic lift lever should be done from the operator’s seat; DO NOT ... -
Page 13: Mounting Mower Onto Tractor
Operator’s manual Rear disc mowers with central suspension Always comply with safety decals describing hazards, and warning signs placed on the machine. Before you start the tractor make sure that every other drives are turned off and the levers ... -
Page 14: Transport
Operator’s manual Rear disc mowers with central suspension 4.3. Transport Every position change of the mower can only be done when there is nobody around (pay particular attention to children). For the transport period put warning plate with combined lights and reflectors and warning ... -
Page 15: Working Parts
Rear disc mowers with central suspension Fig. 7. Location of centre of gravity Tab. 7. Location of centre of gravity Mowers Dimension KDTC KDTC KDTC KDTC KDTC [mm] KDTC 260 KDTC 340 260S 260W 300S 300W 1660 1780 1920 1820 1980... -
Page 16: Tarpaulin Guards
Fig. 8. Mounting tarpaulin guard on mower 4.8. Residual risk Despite the fact, that SaMASZ company – the manufacturer of the mower takes the responsibility for the mower design and manufacturing, in order to eliminate hazard, certain risk when operating the mower is unavoidable. -
Page 17: Residual Risk
Operator’s manual Rear disc mowers with central suspension 2. Danger of injury, abrasion and damage of skin This kind of risk occurs during replacement of working parts with sharp edges. During any maintenance work always use safety gloves. 3. Danger of liquid ejection out of hydraulic system During connection of hydraulic hoses to hydraulic connectors make sure, that either tractor’s or mower’s hydraulic system is without pressure. -
Page 18: Safety Decals And Their Meaning
Operator’s manual Rear disc mowers with central suspension 4.9. Safety decals and their meaning CAUTION: a) all warning decals should be clean and legible, b) lost or damaged decals must be replaced, c) please order new decals from your dealer or supplier. N-01 N-02 N-03... - Page 19 Operator’s manual Rear disc mowers with central suspension N-40 N-48 N-49 N-50 Transport hook for lifting Stay away from mower’s Do not get too close to Do not get under the mower of the mower inclination area the hoist of the tractor during operation of the hoist N-52...
- Page 20 Operator’s manual Rear disc mowers with central suspension N-201 N-213 N-224 Permissible speed (For: KDTC S/SL) Do not open and remove safety guards with motor operating N-28/N-29 N-109 N-02; N-03; N-04 N-14; N-15; N-52 N-01 N-83 N-06; N-07; N-23 N-63; N-150 N-201 N-48;...
-
Page 21: Design And Operations Of Hydraulic Safety Breakaway Device
5. OPERATION CAUTION: During storing of the machines in company SaMASZ the cylinders are protected by special grease in order to secure them against weather which may cause their premature wear. Before starting the operation excess grease should be removed from the cylinders. -
Page 22: Preparing The Mower For Transport
Operator’s manual Rear disc mowers with central suspension After the mower has been attached to tractor, check the balance and steerability of tractor- mower set. To do this, calculate to formulas given in the appendix or weigh the set, and then drive on the scales only with front axis of the tractor (the mower must be in transport position –... -
Page 23: Preparing The Mower For Transport On Public Roads
0,5 m Fig. 17. SaMASZ rear disc mower in its transport position 5.3. Preparing the mower for transport on public roads To meet safety precautions concerning transport on the public roads in Poland the mower should be equipped with the following devices: portable warning-light plates, to be mounted on both sides of mower top guard in their holders. -
Page 24: Switching From Transport To Working Position
Operator’s manual Rear disc mowers with central suspension Fig. 18. Instruction of PTO shaft shortening CAUTION: The PTO shaft should be mounted only during operation time and disconnected from tractor PTO for transport and service. CAUTION: Use the machines with PTO shafts designed to drive them. Before the work begins, check the safety guards (in tractor, mower and PTO shaft), if they are placed correctly and are not damaged. -
Page 25: Preparing The Mower For Work
Y should be about 0 to 10 cm for KDTC 260, KDTC 261. For KDTC 300 , KDTC 301 Y should be from 30 to 40 cm. For KDTC 340, KDTC 341 from 50 to 60 cm (Fig. 19). -
Page 26: Essential Information Concerning Mowing
Operator’s manual Rear disc mowers with central suspension 5.7.1. Essential information concerning mowing Optimum work parameters 1. Inclination towards the front 0÷5 degrees which stands for 4.5÷7 cm of mowing height. 2. Operation speed ≥ 10 km/h. 3. Keep the constant PTO rpm = 470÷520 rpm. PTO rpm > 540 may cause stripes of uncut grass between the disc. -
Page 27: Mower Clogging And Jams
Operator’s manual Rear disc mowers with central suspension 5.7.2. Mower clogging and jams When operating the mower pay attention to variable conditions on field, which may influence the mower clogging and jams, such as: terrain unevenness, height and density of grass as well as other objects in the grass (stones, branches, piles of soil). -
Page 28: Dismounting Mower From Tractor
Operator’s manual Rear disc mowers with central suspension Fig. 22. Adjustment of support springs Fig. 23. Mower in vertical position CAUTION: Improperly relieved cutting unit of the mower will cause increase of cutterbar pressure on the ground which will lead to faster wear of sliding skids, overload of cutterbar, higher fuel consumption, damage to the stubble and contamination of the fodder. -
Page 29: Mounting And Adjustments
Operator’s manual Rear disc mowers with central suspension 6. MOUNTING AND ADJUSTMENTS 6.1. Assembling / disassembling main frames When assembling and disassembling main frames from the mower's linkage, in order to unscrew nuts M20 use a special key (Fig. 25) delivered with the mower. Fig. -
Page 30: Replacing The Knives And Knife Mountings
Operator’s manual Rear disc mowers with central suspension 6.3. Replacing the knives and knife mountings Worn and/or damaged knives should be immediately replaced. Replace knives, if necessary, only in sets. Make sure all knives in a set are of the same length and weight. -
Page 31: Adjusting The Cutterbar
Swath width is adjusted with swath guides mounted on the 3-point linkage frame of the cutterbar (Fig. 31). In order to adjust the guide, the following should be performed (for: KDTC 260, KDTC 261, KDTC 300, KDTC 301, KDTC 340, KDTC 341): loosen locknuts (2) and screws (3), ... - Page 32 5 - shield adjustment screws, 6 - guide arm, 7 – shield In order to set swath width, adjustment of swath guides (1) should be performed (Fig. 32) (for: KDTC 260 S, KDTC 261 S/SL, KDTC 300 S, KDTC 301 S/SL): loosen eye screw (2) of the swath guide, ...
-
Page 33: 3-Point Linkage Support Chain
6.6. Adjusting conditioner 6.6.1. Adjusting clearance between conditioner screen and roller (Models: KDTC 260 S, KDTC 300 S, KDTC 261 S/SL, KDTC 301 S/SL) Depending on size and thickness of the mowing grass, there may be a necessity to adjust the mask of conditioner. -
Page 34: Adjusting Conditioner's Shaft Rotary Speed
„-” - reducing plate – conditioner clearance width Fig. 35a. Adjustment of the scarifier guard (for models: KDTC 260 S, KDTC 300 S) „+” - increasing plate - conditioner clearance width „-” - reducing plate – conditioner clearance width Fig. -
Page 35: Replacing The Conditioner's Tines
Rear disc mowers with central suspension 6.7. Replacing the conditioner’s tines (Models: KDTC 260 S, KDTC 300 S, KDTC 261 S/SL, KDTC 301 S/SL) Each time before operation inspect condition of bolts, on which flails are mounted and condition of flails themselves. When inspecting also take notice of condition of rubbers where flails... -
Page 36: Adjusting Force Of The Pressure Of Roller Conditioner
6.8. Adjusting force of the pressure of roller conditioner (Models: KDTC 260 W and KDTC 300 W) With factory set rollers, a ridge on one roller should enter a groove on the other. Clearance between a ridge and a groove on rollers should be within 2-5mm. -
Page 37: Inspecting Tension Of Belt On Belt Gear For Rollers
Operator’s manual Rear disc mowers with central suspension min. Fig. 39. Permissible wear of knife holder pin on disk a) knife base M12 b) knife base M12 with claw WARNING! When operating pay attention whether there are no excessive vibrations of the mower which may indicate that the disc(s) operate with 1 cutting knife attached only. -
Page 38: Off-Season Maintenance And Storing
Operator’s manual Rear disc mowers with central suspension if necessary, lubricate the parts and units according to lubrication instructions (chapter 7). Parts, which may cause risk to operator’s health and safety are as follows: damaged tarpaulin covers, worn or damaged hydraulic hoses, PTO shaft guides, worn knives and knife holder pins. 6.9.4. -
Page 39: Intersecting Axis Gears
Rear disc mowers with central suspension Tab. 9. Oil capacities Model Oil capacity [l] Oil type Lubrication frequency KDTC 260 S/W KDTC 261 S/SL/W KDTC 300 S/W After first 50 h of operation, then after next 80W90 KDTC 301 S/SL/W... -
Page 40: Roller Conditioner's Gearbox
Operator’s manual Rear disc mowers with central suspension Tab. 10. Oil capacities in intersecting axis gears Oil capacity Model Oil type Lubrication frequency All types SAE 80W/90, API GL-4 After first 50 h of operation, then Gear after next 500 h (or at least once a 052-02.0100AB.L year) SAE 80W/90, API GL-4... -
Page 41: Bearings And Joint
Operator’s manual Rear disc mowers with central suspension 7.4. Bearings and joint Every 50 mower working hours lubricate tine/roller conditioner’s bearings (Fig. 44, Fig. 45) with LT43 grease (or other designed to lubricate rolling and slide bearings, that work in - C do+130 C) and main joints of the mower (Fig. -
Page 42: Defects And Their Repairs
Safety device is working Worn elements of safety device or This repair must be done by often without clear reason improper regulation SaMASZ service Mower does not work, even though the drive is Damaged intersecting axis gear Replace intersecting axis gear transmitted from the tractor Damaged gears in the cutterbar. -
Page 43: Disassembly And Withdrawal From Use
Operator’s manual Rear disc mowers with central suspension 9. DISASSEMBLY AND WITHDRAWAL FROM USE 9.1. Disassembly Before starting any repair or service the mower should be cleaned and any grass or dirt removed. Carefully check nuts and bolts for correct tension and the pins for wear. Replace as necessary. -
Page 44: Warranty Claim
2. The warranty period is for two years from the date of sale to the purchaser, stated above. 3. Any repair which is subject to warranty should be carried out by an authorised SaMASZ dealer. Upon completion of the repair the dealer must submit a warranty claim within 21 days. - Page 45 The Manufacturer have right to introduce design modifications. NOTICE: The SaMASZ company constantly works on development of all of ist machines types and models. Therefore, there is always a possibility in change of form, equipment and technology of the delivered machines. No claims can arise from data, drawings and descriptions included herein as well as in the spare part list.
-
Page 46: Warranty Repairs Record
Operator’s manual Rear disc mowers with central suspension 12.2. Warranty repairs record Repairs description and changed spare parts: Date, stamp and signature of repair shop Date, stamp and signature of repair shop Date, stamp and signature of repair shop - 44 -... -
Page 47: Appendix Defining The Total Weight, Axis Load, Tyre Load Capacity And Minimum Load
Operator’s manual Rear disc mowers with central suspension APPENDIX Defining the total weight, axis load, tyre load capacity and minimum load CAUTION: When mounting the machine on a tractor using front and/or rear 3-point linkage, a maximum value of permissible load cannot be exceeded – tractor's front axis load must be 20% of the tractor's overall weight. - Page 48 Operator’s manual Rear disc mowers with central suspension Calculating minimum weight of front ballast M – machine mounted at tractor's rear or P min. at rear and front: Calculating minimum weight of rear ballast M – machine mounted at tractor's front: ...
Need help?
Do you have a question about the KDTC 260 and is the answer not in the manual?
Questions and answers