Table of Contents
Advertisement
SaMASZ Sp. z o.o.
Poland, 16-060 Zabłudów, ul. Trawiasta 1
Established – 1984
NIP PL-966-159-29-76
tel. (+48) (85) 664 70 31
fax (+48) (85) 664 70 41
e-mail: samasz@samasz.pl
www.samasz.pl
OPERATOR'S MANUAL
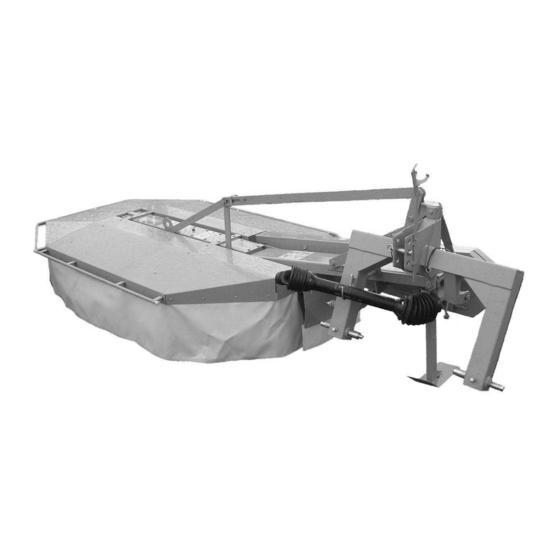
REAR DRUM MOWER
Z 010 (H) – 5'5"
Z 010/1 (H) – 6'1"
Z 010/2 (H) – 6'11"
Z 010/4 – 6'11"
IN005USA011
Serial No:
2015.10.29
EDITION NO 11
The original instruction
Advertisement
Table of Contents

Subscribe to Our Youtube Channel
Related Manuals for SaMASZ Z 010


Summary of Contents for SaMASZ Z 010
- Page 1 (+48) (85) 664 70 31 fax (+48) (85) 664 70 41 e-mail: samasz@samasz.pl www.samasz.pl OPERATOR’S MANUAL REAR DRUM MOWER Z 010 (H) – 5′5″ Z 010/1 (H) – 6′1″ Z 010/2 (H) – 6′11″ Z 010/4 – 6′11″ IN005USA011 Serial No: 2015.10.29...
- Page 2 DANGER DO NOT TURN THE DRIVE ON IF THE MOWER IS NOT IN WORKING POSITION DANGER DO NOT LIFT THE MOWER IF MOWING DISCS HAVE NOT COME TO COMPLETE STANDSTILL DANGER DO NOT OPERATE WHEN ANY PERSON REMAINS IN THE DANGER AREA OF 164′ ADJUSTING THE MOWER FOR MOWING WARNING! Keep this manual for further reference.
-
Page 3: Table Of Contents
Rear drum mower Operator s manual ’ Z 010; Z 010/1; Z 010/2; Z 010/4 Contents Page 1. IDENTIFYING THE MACHINE ...................... 2 2. INTRODUCTION ..........................2 3. TECHNICAL DATA........................... 3 3.1. Specifications ..........................3 3.2. Design and working principle ......................4 3.3. -
Page 4: Identifying The Machine
Rear drum mower Operator s manual ’ Z 010; Z 010/1; Z 010/2; Z 010/4 1. IDENTIFYING THE MACHINE Data plate is mounted to the mower s main frame in the place shown below (Fig. 1). ’ Fig. 1. Data plate location Fig. -
Page 5: Technical Data
Operator s manual ’ Z 010; Z 010/1; Z 010/2; Z 010/4 3. TECHNICAL DATA Rotary suspended rear drum mower is designed for mowing and forming rows of: common grass, medick, etc on grasslands and on stone free fields. Grassland being mowed should be even, previously prepared by rolling and other treatment. -
Page 6: Design And Working Principle
Rear drum mower Operator s manual ’ Z 010; Z 010/1; Z 010/2; Z 010/4 3.2. Design and working principle Fig. 2. Parts of SaMASZ rear drum mower flat cover – 3-point-linkage frame, cutting unit, – – middle bar, cover guard, –... -
Page 7: Safety Precautions
Lubricate the PTO shaft with high quality multi-purpose grease every 50 shaft operating hours (Fig. 4). If access holes are accessible, lubricate fittings through access holes. PTO shafts of other brands with equivalent parameters could be used after first obtaining SaMASZ permission. NOTE: Before any operation read the on the mower’s PTO shaft operator... -
Page 8: General Safety Rules And Regulations
Operator s manual ’ Z 010; Z 010/1; Z 010/2; Z 010/4 Safety Signal Words This manual and the safety labels attached to this equipment utilize signal words that signify safety hazards with different levels of severity. Below are the words used and the definitions for these words: •... -
Page 9: Conditions Of Mounting Mower On Tractor
Operator s manual ’ Z 010; Z 010/1; Z 010/2; Z 010/4 Before starting work and periodically thereafter, replace any damaged, missing and/or worn knives and knife holders. When driving on public roads always comply with local traffic regulations, especially those concerning warning lights. -
Page 10: Putting The Mower Onto Another Vehicle For Transport
’ Z 010; Z 010/1; Z 010/2; Z 010/4 which the operations take place is clear and that there is a sufficient escape route, i.e. a free, safe zone to which the operators can quickly move if the load should fall. -
Page 11: Working Parts
Rear drum mower Operator s manual ’ Z 010; Z 010/1; Z 010/2; Z 010/4 Fig. 5. Transport holders Fig. 6. Location of centre of gravity on rear drum mowers Tab. 3. Location of centre of gravity Mower type Dimension [ft, in]... -
Page 12: Residual Risk
4.6. Residual risk Despite the fact that SaMASZ Białystok, the manufacturer of the mower, has taken great care in the design and manufacturing of the mower, certain risks during mower operation and maintenance are unavoidable. -
Page 13: Safety Labels And Their Meaning
Rear drum mower Operator s manual ’ Z 010; Z 010/1; Z 010/2; Z 010/4 5. Residual risk assessment Residual risk occurs from not complying with the instructions and safety precautions. Such risk can be minimized by doing the following: thorough familiarizing yourself with operator’s manual,... - Page 14 Rear drum mower Operator s manual ’ Z 010; Z 010/1; Z 010/2; Z 010/4 N-09 N-40 N-13 Caution: rotor (Z 010/4) Transport hook for lifting of the mower N-14 N-15 N-29 N-48 N-49 Stay away from mower’s Do not get too close to...
-
Page 15: Design And Operation Of Safety Breakaway Device
N-204; N-205; N-206 N-167; N-168 N-05 N-55 N-29 N-49 N-40 Fig. 7a. Warning decals placed on the mower (Z 010, Z 010/1, Z 010/2) N-01; N-02; N-03 N-04; N-05; N-06 N-07; N-09; N-49 N-13; N-14; N-15 N-50; N-117 N-05 N-55 N-204;... - Page 16 Operator s manual ’ Z 010; Z 010/1; Z 010/2; Z 010/4 Fig. 9. The mower is retracted when the safety device operates Safety device’s spring (Fig. 8) is adjustable by changing the force needed to make safety device work. In the event of hitting an immovable obstacle one of the safety device flat bars slides out and disengages the safety device.
-
Page 17: Operation
Operator s manual ’ Z 010; Z 010/1; Z 010/2; Z 010/4 Fig. 11. Safety breakaway device a) transport position, b) working position b) In order to move the mower’s safety breakaway device from working to transport position, do the following: lower the mower’s cutting unit onto the ground,... -
Page 18: Preparing The Mower For Transport
Rear drum mower Operator s manual ’ Z 010; Z 010/1; Z 010/2; Z 010/4 Fig. 12. Attaching the mower to the tractor 5.2. Preparing the mower for transport NOTE Moving the mower from working position to transport position and vice versa may only take place on an even and stable ground. -
Page 19: Mower Design With Hydraulic Lifting (Optional Equipment)
Operator s manual ’ Z 010; Z 010/1; Z 010/2; Z 010/4 5.2.2. Mower design with hydraulic lifting (optional equipment) In order to put the mower to the transport position, do the following: connect the hydraulic hose for lifting the mower to tractor hydraulic unit, lift the mower with tractor’s hydraulic lift until the lower lift pins of the mower’s linkage frame... -
Page 20: Mechanical Lock Of Hydraulic Lifting
The rear panel comprises a warning plate with lights combined with red reflectors, Fig. 18. SaMASZ mower in the transport position with warning plates warning triangle which can be mounted in holder on top mower guard. - Page 21 PTO shaft. WARNING: For Z 010/2 mower use shaft with right overrunning clutch only. See Tab. 2 and Fig. 4b. Use of a shaft with no clutch may cause serious damage to the mower and therefore void the warranty.
-
Page 22: Adjusting Conditioner Shaft's Position
Rear drum mower Operator s manual ’ Z 010; Z 010/1; Z 010/2; Z 010/4 5.5. Adjusting conditioner shaft s position ’ Correct position of conditioner’s shaft in relation to operating discs enables proper distribution of swath for further treatment. Therefore pay particular attention to the position of the conditioner's housing so that the constant distance of ∼0.79″... -
Page 23: Operation
Rear drum mower Operator s manual ’ Z 010; Z 010/1; Z 010/2; Z 010/4 5.7. Operation 5.7.1. Standard mower design lower the mower until the sliding discs have come to contact with the ground, set the safety breakaway device in working position (according to item 4.8a), (Fig. -
Page 24: Dismounting Mower From Tractor
Rear drum mower Operator s manual ’ Z 010; Z 010/1; Z 010/2; Z 010/4 5.8. Dismounting mower from tractor WARNING: When dismounting, make sure there is no person in between the mower and the tractor. To dismount the mower from the tractor: turn cutterbar's drive off, place the mower on an even, paved ground;... -
Page 25: Adjusting The Cutting Unit
2.60″ - 2.68″ is achieved. Additional spacers can be ordered (optional extra equipment). NOTE: When mounting additional distance rings use longer bolts - M10x35 (Z 010, Z 010/1) or M10x40 (Z 010/2, Z 010/4) and tighten them with a torque of 55 - 23 -... -
Page 26: 3-Point Linkage Support Chain
Rear drum mower Operator s manual ’ Z 010; Z 010/1; Z 010/2; Z 010/4 Support disc Distance ring Sliding disc Fastening bolts Support disc Additional spacer Sliding disc Fig. 27. Adjusting the cutting height by fitting or removing the distance ring 6.5. -
Page 27: Checking V-Belts Tension
Rear drum mower Operator s manual ’ Z 010; Z 010/1; Z 010/2; Z 010/4 Knife Bolec base Fig. 29. Permissible wear of knife holders 6.6.2. Checking V-belts tension Check the V-belt tension. Their deflection under finger pressure must not exceed 1.18″. -
Page 28: After-Season Maintenance And Storing Of Machine
Rear drum mower Operator s manual ’ Z 010; Z 010/1; Z 010/2; Z 010/4 6.6.4. After-season maintenance and storing of machine At the end of mowing season the following shall be performed: lower the mower’s cutting unit onto the ground,... -
Page 29: Lubrication Instruction
Main frame air-escape valve with plastic cap Gearbox Fig. 31. Lubrication points a) mowers Z 010; Z 010/1; Z 010/2, b) mower Z 010/4 Tab. 6. Lubricating mowers Symbol Oil type Lubrication frequency Gear oil... -
Page 30: Defects And Their Repairs
Rear drum mower Operator s manual ’ Z 010; Z 010/1; Z 010/2; Z 010/4 8. DEFECTS AND THEIR REPAIRS Defect Reason Repair Lack of knives Put on knives Worn knives Replace knives Space between the knife and knife Remove dirt (wash with water holder filled with mud, grass, etc. -
Page 31: Disassembly And Withdrawal From Use
2. Warranty period is for two years from the date of sale to the purchaser, stated above. 3. Any repair which is subject to warranty should be carried out by an authorised SaMASZ dealer. Upon completion of the repair, the dealer must submit a warranty claim within 14 days. - Page 32 - not original SaMASZ knives, e) negligent maintenance, f) use of non-genuine spare or replacement parts that are not specifically designed for the...
-
Page 33: Warranty Repairs Record
Rear drum mower Operator s manual ’ Z 010; Z 010/1; Z 010/2; Z 010/4 11.2. Warranty repairs record Repair description and changed spare parts: Date, stamp and signature of repair shop. Date, stamp and signature of repair shop. Date, stamp and signature of repair shop.
Need help?
Do you have a question about the Z 010 and is the answer not in the manual?
Questions and answers
Hi. I'm looking for the replacement drive belts' but do not have any dimensions