Table of Contents
Advertisement
Quick Links
Advertisement
Table of Contents

Related Manuals for Knauer Azura DAD 6.1L


Summary of Contents for Knauer Azura DAD 6.1L
- Page 1 Detector DAD 6.1L/DAD 2.1L/MWD 2.1L Instructions HPLC Document No. V6700...
- Page 2 Support: Do you have questions about the installation or the operation of your instrument or software? International Support: Contact your local KNAUER partner for support: www.knauer.net/en/Support/Distributors-worldwide Support in Germany (Austria & Switzerland on case-to-case basis): Phone: +49 30 809727-111 (workdays 9-17h CET)
-
Page 3: Table Of Contents
Table of contents 1. General ................1 About these instructions . - Page 4 Connecting the leak management ........13 Inserting the flow cell.
- Page 5 9.3.3 Cleaning protocol for KNAUER LightGuide Flow cells ....51 Replacing the flow cell........... 52 Replacing the lamps.
- Page 6 13.4 Fiber optic cables............68 14.
-
Page 7: General
These operating instructions are an integral part of the device. It must be kept in the immediate vicinity of the device and accessible to the user at all times. You can download these and other instructions from the KNAUER web- site: www.knauer.net/library... -
Page 8: Legal Information
1.4.4 Warranty seal A blue or orange warranty seal is affixed to some devices. A blue seal is used by KNAUER’s Manufacturing or Customer Support ƒ for devices to be sold. After repair, service technicians attach an orange seal onto the identi- ƒ... -
Page 9: Basic Safety Instructions
Operation in potentially explosive areas without special and additio- ƒ nal explosion protection. Contact the KNAUER Customer Support for more information. User qualification The user is qualified to handle the device if all of the following points apply: He has at least a basic knowledge of liquid chromatography. -
Page 10: Operator Responsibility
Basic safety instructions Operator responsibility The operator is any person who operates the device himself or leaves it to a third party for use and who bears the legal product responsibility for the protection of the user or third parties during operation. The obligations of the operator are listed below: Know and follow the applicable work safety regulations ƒ... -
Page 11: Working With Solvents
Basic safety instructions Working with solvents 2.6.1 General requirements The user is trained for handling different solvents. ƒ Note recommended solvents and concentrations in these instructions ƒ in order to avoid personal injury or damage to the device. For exam- ple, certain chemicals may cause PEEK capillaries to swell or burst (see „14 Chemical compatibility of wetted materials“, p. -
Page 12: Specific Environments
Devices which are shipped without the completed document “Service request form and decontamination report” will not be repaired. If you would like to return a device to KNAUER, make sure to enclose the com- pleted document: www.knauer.net/servicerequest AZURA® Detector DAD 6.1L, DAD 2.1L, MWD 2.1L Instructions, V6700... -
Page 13: Product Information
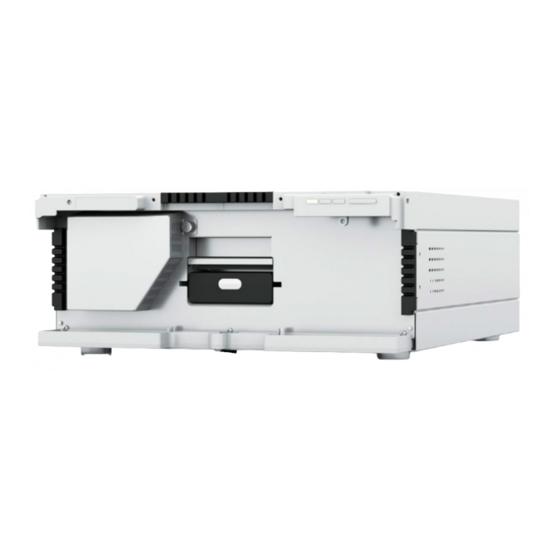
3. Product information Features The AZURA® detector DAD 6.1L/DAD 2.1L/MWD 2.1L (further on referred to as “detector“ in general, or “DAD 6.1L“,“DAD 2.1L“, and “MWD 2.1L“) can be used for analytical, semi-preparative and preparative applications. Scope of delivery The following items should be included in the scope of delivery: Detector with test cell ƒ... -
Page 14: Performance Overview
Product information Rear view On the rear of the detector, the connectors for LAN and power plug are located, as well as the serial number of the device and the power switch (on/off). RS-232, Please note that the service interface is solely used for repair and main- service interface tenance tasks performed by service technicians. - Page 15 Various types of flow cells allow a wide range of applications. Flow cell cartridges with KNAUER PressureProof and KNAUER LightGuide techno- logy as well as KNAUER Fiber Optics Technology are available (see chap- ter„13. Reorders“ on page 64). KNAUER LightGuide Flow Cell Cartridges combine a maximum light ƒ...
-
Page 16: Symbols And Signs
Product information Symbols and signs The following symbols and signs can be found on the device: Symbol Meaning High-voltage hazard Electrostatic discharge hazard, damages to sys- tem, device, or components can occur. Obey maximum load for leak tray during transpor- tation, installation and operation. -
Page 17: Installation And Initial Startup
4. Installation and initial startup Before you determine the operation site, read the chapter “Technical Data” (see chapter 12 on page 60). There you will find all device-speci- fic information on power supply, ambient conditions and humidity. Note: The intended use be ensured only if the requirements for ambient conditions of the operating environment are met. -
Page 18: Space Requirements
Country-specific plugs: Before switching on the device, check whether ƒ the supplied plug is approved for your country. Overview of the de- vice- and country-specific plug types from KNAUER: www.knauer.net/plugs Power strips: If several devices are connected to one power strip, al- ƒ... -
Page 19: Connecting The Leak Management
Installation and initial startup Connecting the leak management The leak management consists of the leak sensor and the drainage sys- tem. The drainage system ensures that escaping liquids flow into a waste bottle. If there is too much liquid, the red LED starts flashing. Both the de- vice and the data acquisition via chromatography software are stopped. -
Page 20: Inserting The Flow Cell
Installation and initial startup Inserting the flow cell Note: Pay attention to the compatibility of the flow cell. Before taking a flow cell filled with solvent into operation, please make certain that the used eluent is miscible with that one used previously. Ot- herwise purge the flow cell with a medium miscible with both the elu ents. -
Page 21: Inserting The Flow Cell With Fiber Optics
Installation and initial startup 4.5.1 Inserting the flow cell with fiber optics KNAUER fiber optic cables are extremely robust. Nevertheless fiber optic cables are sensitive to bending. The minimum bending radius is 100 mm (short term: 70 mm). Observe the following regarding the use of fiber optics: UV light will cause the fiber optic to become blind with time (solariza- ƒ... -
Page 22: Connecting The Capillaries
ƒ Screw-type cap fittings and cap fittings were removed. ƒ Note: The KNAUER LightGuide flow cell cartridges have unisex input and output connections. Component defect Damage to components due to excessive tightening possible. Observe the torque of the screw connection Use 5 Nm torque for stainless steel fi ttings. -
Page 23: Computer Control
Installation and initial startup Computer control Note: HPLC devices from KNAUER only work with IP addresses, which have been assigned by IPv4. IPv6 is not supported. This chapter describes how to set up a chromatography system in a local area network (LAN) and how a network administrator can integrate this LAN into your company network. -
Page 24: Connecting Devices With Lan
Set the router properties (see section 4.7.4). 4.7.4 Configuring the router The router is preset at the factory. Information about address, user name and password is noted in the router manual: www.knauer.net/router AZURA® Detector DAD 6.1L, DAD 2.1L, MWD 2.1L Instructions, V6700... -
Page 25: Integrating Lan Into The Company Network
Installation and initial startup Process Procedure 1. To open the router configuration, start your Internet browser and enter the IP address (does not apply for all routers). 2. Enter user name and password. 3. Configure the router as DHCP server. 4. -
Page 26: Setting Ip Addresses Via Software
Installation and initial startup Setting IP addresses via software Note: Check the IT security standards for your lab before intervening in the LAN settings. Static IP addresses are required to run certain chromatography software, PurityChrom® e.g. Purity Chrom®. For a comprehensive overview on how to set static IP addresses for PurityChrom®, refer to the document „PurityChrom®... -
Page 27: Mobile Control: Setting A Dynamic Ip Address Via Device Name
Installation and initial startup 4.8.2 Mobile Control: Setting a dynamic IP address via device name Prerequisites The device is switched on. ƒ Mobile Control is installed and running. ƒ The connection between Mobile Control and the device has been ƒ established. -
Page 28: Firmware Wizard: Setting A Static Ip Address
Installation and initial startup Fig. 17: Reset device to default settings 4.8.4 Firmware Wizard: Setting a static IP address Note: More information about LAN settings can be found in the Mobile Control Software Instructions in the chapter "Firmware Wizard” (docu- ment no. -
Page 29: Firmware Wizard: Setting A Dynamic Ip Address
Installation and initial startup Process 4. Enter the IP address into the text field <IP address> 5. Optionally, adjust subnet mask and gateway 6. Click <Reset Conn. Settings> to accept changes. 7. Restart the device (recommended). Result The device is now accessible via the static IP address. 4.8.5 Firmware Wizard: Setting a dynamic IP address Prerequisites The device is switched on. -
Page 30: Remote Control
Installation and initial startup 4.8.6 Remote control On the rear panel of the detectors an electrical connector socket is loca ted which serves to send or receive signals from other instruments. For example start signals from an injection valve or an autosampler can be put to the START input. -
Page 31: Connections To The Terminal Strip
Installation and initial startup 4.8.7 Connections to the terminal strip Connection Function Relay Contact EV 1 The contact is on a floating basis. Its setting (Event 1) depends on the settings in Mobile Control or software. Steady-rate signal: ƒ passive = open relay contact ƒ... -
Page 32: Connecting The Pin Header
Installation and initial startup Connection Function Autozero TTL Input ƒ Low active Secure switching threshold at least 10 mA A signal (short-circuit to ground) sets the measu- ring signal to zero. +5 V Provides a voltage of 5 V with respect to GND. This makes it possible to supply a load that is switched by an EVENT. -
Page 33: Integrator Connector
Installation and initial startup Fig. 20: Depressor tool and pin header Process 1. Insert the depressor tool in an upper small opening at the front of the pin header 2. Insert the cable into the opening underneath the inserted de- pressor tool 3. -
Page 34: Integrating The Detector Into The System
Installation and initial startup Integrating the detector into the system To integrate the detector into a system, note the ambient conditions found in the chapter „12. Technical data“ on page 60, as well as the am- bient conditions of other devices to be integrated into that system. The detector is integrated into the HPLC flow system by connecting the capillary to the flow cell and the HPLC system. -
Page 35: Operation
If the device is part of an HPLC system, you should also note the following: The network connection to the router is established ƒ The chromatography software has been installed by KNAUER or a ƒ com pany authorized by KNAUER. A flow cell is inserted. -
Page 36: Software Operation
Mobile Control. The device status can however be monitored. You find more information about supported software packages and firm- ware versions in the list „KNAUER software device support“ (document no. V1663): www.knauer.net/softwarecontrol You find a detailed description on chromatography software in the corres- ponding software instructions. -
Page 37: Default Settings
Operation The LEDs can have different colors depending on the operating condi tions. Standby To start the standby, keep the standby button pressed for 5 seconds. Note: Malfunctioning system after repeated standby possible. After repe- atedly using standby, restart the device using the power switch to reset the device‘s data storage. -
Page 38: Glp
Operation Parameter Setting Extended linear range Analog out Offset 1 = 0.00 mV, Scale 1 = 1 AU/V Flow cell Test cell Event check All events deactivated (o) Date/Time Current date/time Wake-up Current date/time Leak sensor ON, Sensitivity = low The following GLP data for the instruments can be found in your software: GLP Data Units Explanation... - Page 39 Operation GLP Data Units Explanation Lamps - Serial number power supply Operating time Firmware version Supply number Indicates how often the lamp power supply has been changed since manufacture. Lamps - Serial number deuterium lamp Operating time Starts Lamp number Indicates how often the lamp has been changed since manufacture.
-
Page 40: Optimizing The Detector
Optimizing the detector 6. Optimizing the detector In this chapter, you find information on how to optimize your detector. General Performance The performance of the detector is largely dependent on the perfor- ƒ mance of the HPLC system. Noise can be related to pump stability, the flow cell cleanliness, lamp ƒ... - Page 41 Optimizing the detector small, the noise may be higher and the signal may be too small due to less light reaching the photodiodes. Ideal flow cell volume therefore is a compromise between peak broade- ning and sensitivity (see Fig. 25). Fig.
- Page 42 Optimizing the detector For the same concentration, the peak height will be higher if the path length is longer. Path lengths of 3 mm, 10 mm, and 50 mm are available for the detectors. A longer path length, therefore, increases the sensitivity of a method (see Fig.
-
Page 43: Selecting The Wavelength
Optimizing the detector Selecting the wavelength Signal wavelength Wavelength selection can influence the sensitivity, selectivity and linearity of a measurement. The measurement wavelength can be selected within the range from 190–1000 nm for the DAD 6.1L or 190–700 nm for the DAD 2.1L and MWD 2.1L in 1 nm steps. The best wavelength for a given measurement (signal wavelength) is that which fives the maximum ab- sorption above the UV cutoff of the mobile phase. -
Page 44: Spectral Range
Optimizing the detector The selection of bandwidth is a balance between sensitivity and selecti- vity. Narrow bandwidths increase selectivity, whereas broad bandwidths increase sensitivity. Default bandwidth By default (see section „5.5 Default settings“ on page 31), the band- width for the signal wavelength is set to 8 nm and for the reference wave- length the bandwidth is set to 30 nm. -
Page 45: Integration Time
Optimizing the detector Default data rate The default data rate setting for the detectors is 1 Hz (see section „5.5 Default settings“ on page 31). The maximum data rate (digital signal) is 100 Hz. Lower data rates store average data points. A 50 Hz data rate averages 2 points. -
Page 46: Subtraction Of The Baseline Chromatogram
Optimizing the detector Subtraction of the baseline chromatogram The baseline subtraction can eliminate the effects of drift that result from solvent, gradient, or flow programming. The baseline profile is subtracted from the measured chromatogram. This results in a mathematically repro- cessed chromatogram with an ideally flat baseline. -
Page 47: Functionality Tests
Installation Qualification (IQ) The customer may request the Installation Qualification, which is free of charge. In case of a request, the Technical Support of KNAUER or from a provider authorized by KNAUER performs this functionality test during the installation. -
Page 48: Troubleshooting
8. Troubleshooting First measures: Check all cables and fittings. ƒ Check if air has gotten into the supply lines. ƒ Check the device for leakages. ƒ Further measures: Compare occurring errors with the list of possible errors (see below). ƒ Contact the Customer Support. -
Page 49: Possible Problems And Solutions
Clean fiber optic ends with alcohol and cot- ton bud. Further measures Install the maintenance software (Service Tool). ƒ Save device information and send to manufacturer. ƒ Inform the Technical Support of KNAUER. ƒ AZURA® Detector DAD 6.1L, DAD 2.1L, MWD 2.1L Instructions, V6700... -
Page 50: System Messages
Switch off lamp and turn on again. In case the start” system message repeats itself, inform the Tech- nical Support of KNAUER . The lamp unit has to be replaced. No lamp ignition when starting the device or the manual validation. - Page 51 The lamp cover was mounted incorrectly or the micro switch is malfunctioning. Mount the lamp cover. In case the system mes- sage repeats itself, inform the Technical Support of KNAUER. “Lamp not GLP data can not be read and lamp operation installed”...
- Page 52 Wavelength accuracy test failed. Restart the vali- fai led” dation. Holmium oxide and/or Ha, Hb lines do not meet the specifications. In case the system message repeats itself, in- form the Technical Support of KNAUER. AZURA® Detector DAD 6.1L, DAD 2.1L, MWD 2.1L Instructions, V6700...
-
Page 53: Maintenance And Care
9. Maintenance and care General Maintenance of a HPLC instrument is critical to the success of analyses and the reproducibility of results. If you require a maintenance task which is not described here, contact your dealer or the Customer Support. All wetted components of a device, e. g. -
Page 54: Maintenance Contract
Maintenance and care 9.1.2 Maintenance contract Opening the device or removing housing parts may only be performed by KNAUER or a company authorized by KNAUER and is covered by a sepa rate maintenance contract. 9.1.3 Maintenance intervals Operating hours Using Mobile Control or software, you can read out the operating hours of the detector. -
Page 55: Surfaces
Maintenance and care 9.2.2 Surfaces Device defect Intruding liquids can cause damage to the device. Place solvent bottles next to the device or in a solvent tray. Moisten the cleaning cloth only slightly. All smooth surfaces of the device can be cleaned with a mild, commerci- ally available cleaning solution, or with isopropanol. -
Page 56: Advanced Cleaning
Maintenance and care Next step Check if the baseline noise has disappeared. 9.3.2 Advanced cleaning This section describes a cleaning procedure for aggressive cleaning of LightGuide flow cells. Preparation All chemical reagents should be of at least ACS-Grade, preferably of chemicals HPLC-Grade. -
Page 57: Cleaning Protocol For Knauer Lightguide Flow Cells
Afterwards you can start your application 9.3.3 Cleaning protocol for KNAUER LightGuide Flow cells Preliminary note KNAUER recommends to carry out this cleaning procedure at regular intervals (every two weeks) when using acetonitrile-containing eluents in order to extend the life of the flow cells. Materials Potassium hydroxide (pellets) ƒ... -
Page 58: Replacing The Flow Cell
Maintenance and care Cleaning procedure Process Steps 1. For cleaning, the flow cell may need to be rinsed with water be- forehand. The flow cell must not contain any residues of organic solvents! 2. A syringe with Luer Lock adapter is filled with at least 5 ml of the cleaning solution and connected to the inlet port of the flow cell. -
Page 59: Replacing The Lamps
Maintenance and care Performance decrease Any components in the light path like fiber optic ends become contamina ted when touched with fingers. Avoid touching the ends without gloves. Use alcohol and a cotton bud for cleaning. Steps Figure 1. Press the release lever down. -
Page 60: Removing The Deuterium Or Halogen Lamp
Maintenance and care 9.5.1 Removing the deuterium or halogen lamp Prerequisites The device is switched off. ƒ The lamp has cooled down. ƒ Tools Allen screwdriver, 2.5 mm ƒ Phillips screwdriver PH1 ƒ Note: If the device is still in operation, the integrated security switch turns off the lamp automatically on opening the lamp cover. -
Page 61: Installing The Deuterium Or Halogen Lamp
Maintenance and care Process Step Figure 4. Using the screwdriver, loosen the two screws 5. Remove the lamp. Fig. 35 Screws on the lamp socket Next step Insert a new lamp. 9.5.2 Installing the deuterium or halogen lamp Removing the lamp cover switches off the device. Prerequisites The device is switched off. -
Page 62: Checking The Fittings
Maintenance and care Process Step Figure 4. Using the screwdriver, tighte the two screws the lamp socket. 5. Connect the plug and tighten the lock ring. Fig. 38 Installing the deuterium lamp 6. Attach the lamp cover and fix it with the screws Fig. -
Page 63: Decommissioning
Maintenance and care Decommissioning The detector is designed for the use of different solvents. In case the detector has not been used for several weeks, solvent residues may cause damage. We, therefore, recommend to: Flush the flow cell and the capillaries. ƒ... -
Page 64: Transport And Storage
Do not hold onto front cover or leak tray, as these parts are loosely attached to the device. 10.2 Transporting the device Documents: If you want to return your device to KNAUER for repairs, ƒ enclose the „Service request form and decontamination report“which... -
Page 65: Disposal
160214. 11.2 WEEE registration number KNAUER as a company is registered by the WEEE number DE 34642789 in the German "Elektroaltgeräteregister" (EAR). The number classifies to category 8 and 9, which, among others, comprises laboratory equipment. -
Page 66: Technical Data
12. Technical data 12.1 DAD 6.1L Detection Detector type Diode array detector Number of diodes 1024 Pixel pitch 0.8 nm/diode Detection channels 8 (digital), 4 (analog) Light source High brightness deuterium (D ) lamp and halo- gen lamp with integrated GLP chip Wavelength range 190–1000 nm Spectral bandwidth... -
Page 67: Dad 2.1L
Technical Parameters Detailed report including lamp recognition, ope rating hours, lamp operating hours, number of lamp ignitions Display Mobile Control (optional) Ambient conditions Temperature range 4–40 °C, 39.2–104 °F Humidity: below 90 %, non-condensing General Power supply 100–240 V, 50–60 Hz, 75 W Dimensions 361 x 158 x 523 mm (H x W x D) Weight 13.8 kg Leak sensor... -
Page 68: Mwd 2.1L
Technical data Communication Interfaces LAN (RJ-45), RS-232 (SUB-D 9), multi-pin connector, analog (RCA cinch connector) Control Front panel, Mobile Control, software, event con trol, analog, terminal protocol Inputs Error (IN), Start (IN), Autozero, Event 1–2 (TTL, OC, Relay) Outputs Error (OUT), +5 V, Valve +24 V, Valve (OUT), Start (OUT) Analog output Wavelength 0–10 V, flow rate 0–10 V... - Page 69 Technical data Detection Wavelength Internal holmium filter and deuterium lines verifica tion Noise ± 5 µAU at 254 nm Drift 400 µAU/h at 254 nm Linearity > 1.6 AU at 274 nm, typically 2.5 AU Time constants 0.0 / 0.1 / 0.2 / 0.5 / 1.0 / 2.0 / 5.0 / 10.0 s Integration time Automatic (5–1000 ms) Communication...
-
Page 70: Conditions For Specification
For reorders of spare parts use the enclosed packing list. Contact the Technical Support in case there are any questions on spare parts or acces sories. Further information on spare parts and accessories can be found online: www.knauer.net 13.1 Devices and accessories Name Order No. -
Page 71: Flow Cells
A0574 Kit for flow cell cleaning A05052 13.2 Flow cells Technical data Order No. Standard Path length 10 mm AMC19XA KNAUER LightGuide Connection 1/16“ Flow Cell Cartridge Volume 2 µl (0.8 µl dispersion vol.) Wetted parts PEEK, quartz, Teflon, Titanium, SSt Max. flow rate 5 ml/min... -
Page 72: Flow Cells With Fiber Optics
Reorders Technical data Order No. Analytical Path length 10 mm AMC38 KNAUER Pressure- Connection 1/16“ Proof Volume 10 µl Flow Cell Cartridge Wetted parts Titanium, quartz, PEEK (biocompatible) Max. flow rate 20 ml/min Max. pressure 300 bar Semi-Preparative Path length 3 mm AMB18 KNAUER Pressure- Connection 1/16“... - Page 73 Reorders Technical data Order No. Path length 0.5 mm A4089 Connection 1/16“ Volume 3 µl Wetted parts SSt, quartz, PTFE Max. flow rate 250 ml/min Max. pressure 200 bar A4096 Path length 0.5 mm Connection 1/16“ Volume 3 µl Wetted parts PEEK, quartz, PTFE Max. flow rate 250 ml/min Max.
-
Page 74: Fiber Optic Cables
Reorders 13.4 Fiber optic cables Name Order Number 2 x fiber optics, 750 mm A0740 2 x fiber optics, 750 mm, high temperature A0740HT up to 85°C 2 x fiber optics, custom made A0743 AZURA® Detector DAD 6.1L, DAD 2.1L, MWD 2.1L Instructions, V6700... -
Page 75: Chemical Compatibility Of Wetted Materials
The following list contains information about the chemical compatibility of all wetted materials which are used in devices made by KNAUER. The data bases on a literature research on the manufacturer specifications of the materials. The wetted materials of this device are listed in the chapter “Technical data”. - Page 76 Chemical compatibility of wetted materials Polyimide (Vespel®) This material is wear-resistant and permanent resilient thermically (up to 200 °C) as well as mechanically. It is chemically broadly inert (pH range 1-10) and is especially resistant against acidic to neutral and organic solvents, but vulnerable to pH strong chemical or oxidizing environments: It is incompatible with concentrated mineral acids (such as sulfuric acid), glacial acetic acid, DMSO and THF.
-
Page 77: Non-Metals
Chemical compatibility of wetted materials Polychlortrifluorethylene (PCTFE, Kel-F®) The semi-crystalline thermoplastic material is plasticizer-free and dimen- sionally stable, even in a wide temperature range (−240 °C to+205 °C). It is moderately resistent against ether, halogenated solvents and toluene. Halogenated solvents over +60 °C and chlorine gas should not be used. Fluorinated rubber (FKM) The elastomer consisting of fluorinated hydrocarbon stands out due to a high resistance against mineral oils, synthetic hydraulic fluids, fuels,... -
Page 78: Metals
Chemical compatibility of wetted materials Mineral wool This insulating material consists of glass or stone wool fibres and isolates in high oxidizing conditions and at high temperatures. Mineral wool is valid as commonly inert against organic solvents and acids. Glass, glass fibre, quartz, quartz glass These mineral materials are resistant against corrosion and wear and are mostly chemical inert. -
Page 79: Index
40 troubleshooting 45 Leaks beseitigen 57 fiber optics LED 31 adapter 15 flow cells 66 KNAUER Fiber Optics 9 maintenance 47 remote operation 36 contract 48 Firmware Wizard: intervals 48 Setting IP addresses 22–23 mirror 8, 9... - Page 80 Index Mobile Control 30 time constant 38 GLP data 9, 48 transport 58 Setting IP addresses 20–22 unpacking 11 Old devices 59 OpenLAB 30 operation warmup time 34 operating hours 48 wavelength 37 Operation Qualification (OQ) 41 WEEE Registration Number 59 operation site 11 weight 58 Original packaging 58...
- Page 81 Latest KNAUER instructions online: www.knauer.net/library KNAUER Phone: +49 30 809727-0 Wissenschaftliche Geräte GmbH Fax: +49 30 8015010 Hegauer Weg 38 E-Mail: info@knauer.net 14163 Berlin Internet: www.knauer.net © KNAUER 2020...
Need help?
Do you have a question about the Azura DAD 6.1L and is the answer not in the manual?
Questions and answers
Добрый день! Не могли бы вы подсказать габаритные размеры в мм, каждого из представленных блоков: Knauer Azura P 6.1L, Knauer Azura AS 6.1L, Knauer Azura CT 2.1, Knauer Azura DAD 6.1L, Knauer Azura RID 2.1L?