Table of Contents
Advertisement
Repair
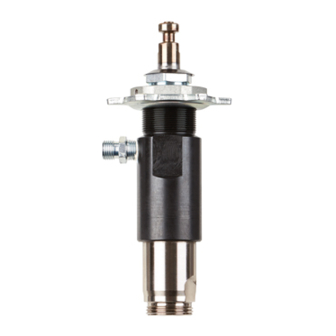
PRO-DUTY
Displacement Pump
For professional use only.
Models: PRO-DUTY Quick Repair Pump: 17M990, 17M991
PRO-DUTY Pump: 17M988, 17M989
Important Safety Instructions
Read all warnings and instructions in this manual and related manuals.
Be familiar with the controls and the proper usage of the equipment.
Save these instructions.
PRO-DUTY Quick Repair Pump
3A4347D
ti29850a
PRO-DUTY Pump
EN
Advertisement
Table of Contents

Subscribe to Our Youtube Channel
Related Manuals for Graco Airlessco PRO-DUTY Series


Summary of Contents for Graco Airlessco PRO-DUTY Series
- Page 1 Repair PRO-DUTY 3A4347D Displacement Pump For professional use only. Models: PRO-DUTY Quick Repair Pump: 17M990, 17M991 PRO-DUTY Pump: 17M988, 17M989 Important Safety Instructions Read all warnings and instructions in this manual and related manuals. Be familiar with the controls and the proper usage of the equipment. Save these instructions.
-
Page 2: Table Of Contents
Content Content Warnings ............. 3 Pressure Relief . -
Page 3: Warnings
Warnings Warnings The following warnings are for the setup, use, grounding, maintenance, and repair of this equipment. The exclamation point symbol alerts you to a general warning and the hazard symbols refer to procedure-specific risks. When these symbols appear in the body of this manual or on warning labels, refer back to these Warnings. - Page 4 Warnings SKIN INJECTION HAZARD High-pressure spray is able to inject toxins into the body and cause serious bodily injury. In the event that injection occurs, get immediate surgical treatment. • Do not aim the gun at, or spray any person or animal. •...
-
Page 5: Pressure Relief
Pressure Relief Pressure Relief Trigger Lock Follow the Pressure Relief Procedure whenever you see this symbol. Always engage the trigger lock when sprayer is stopped to prevent the gun from being Engage the trigger lock. triggered accidentally by hand or if dropped or bumped. - Page 6 Pressure Relief Hold a metal part of the gun firmly to a Open any fluid drain valves in system. grounded metal pail. Trigger the gun to Leave drain valves open until ready to relieve pressure. spray again. ti24585a ti24608a Engage the trigger lock. If you suspect the spray tip or hose is clogged or that pressure has not been fully relieved:...
-
Page 7: Pump Removal
Pump Removal Pump Removal Pump removal includes disconnecting the Swing pump rod cover open. fluid inlet and outlet and removing the pump. PRO-DUTY Quick Repair Pump Removal Perform Pressure Relief Procedure, page Use a hammer to loosen pump retaining nut. ti27250a Disconnect outlet hose and suction hose from pump. -
Page 8: Pro-Duty Pump Removal
Pump Removal PRO-DUTY Pump Use a screwdriver to push retaining spring up then push pin out. Removal Loosen pump jam nut by hitting firmly with a hammer. Unscrew pump. Stop pump with piston rod in the lowest position. Perform Pressure Relief Procedure, page 5. -
Page 9: Repair
Repair Repair Disassemble Pump Disassemble intake valve. Clean and inspect. Pry the button plug off the top of the pump. Unscrew packing nut from cylinder. PRO-DUTY Quick Repair pump retain- O-ring at the bottom may require a pick ing nuts are not removable and not sold for removal. -
Page 10: Assemble Pump
Repair Tap piston rod out of cylinder with a soft hammer or flip over and tap piston rod NOTICE out against a bench. If using a pick to remove the O-ring use care to avoid damage to the machined surfaces. 11. - Page 11 Repair Drop the ball into the piston. Torque to 175 ± 15 in.-lb (20 ± 2 N•m). Assemble upper-throat packing stack. Use leather throat packings soaked earlier alternating with white V-pack- ings. Install from the top of the cylinder (lips face in). Insert O-ring into piston body.
- Page 12 Repair Loosely install packing nut into top of cylinder. Grease o-ring and place on outside diameter ring groove of the intake valve housing. Assemble lower piston packing stack. Install from the bottom of the cylinder (lips face in). Alternate white and brown V-packings.
- Page 13 Repair Throat and Piston Packing 10. Thread intake valve housing into cylinder to dimension shown. Adjustment This equipment stays pressurized until pressure is manually relieved. To help prevent serious injury from pressurized fluid, such as skin injection, splashed fluid 1.895 in. and moving parts, follow the Pressure (48.1mm) ±...
-
Page 14: Pump Installation
Pump Installation Pump Installation Slide pump all the way into drive hous- ing. Pump installation includes securing the pump and connecting to the fluid inlet and outlet. PRO-DUTY Quick Repair Pump Installation Connect outlet hose to pump. ti25139a Close pump rod cover. Make certain that it is flush against drive housing. -
Page 15: Pro-Duty Pump Installation
Pump Installation Install suction hose. Pull piston rod out. Screw in pump until holes in connecting rod and piston rod align. ti24090b ti29879a PRO-DUTY Pump Push pin into hole. Push retaining ring Installation spring into groove all the way around connecting rod. -
Page 16: Parts
Parts Parts ti29881a 3A4347D... -
Page 17: Parts List
Parts Parts List Ref. Part Description Qty. Ref. Part Description Qty. 125724 V-PACKING, piston, 2 17J183 SEAT, top (piston) KIT, rod, piston V-Max 17P096 PRO-DUTY Quick UHMWPE Repair, pump 176755 V-PACKING, leather 17P095 PRO-DUTY, pump 17J188 GLAND, male, pis- 180656 PLUG, button ton, lower 17J184 V-PACKING, throat, 176754 GLAND, male, throat,... -
Page 18: Technical Specifications
Technical Specifications Technical Specifications PRO-DUTY Displacement Pump Metric Maximum fluid working pressure 3300 psi 227 bar, 22.7 MPa Inlet/Outlet Sizes Fluid inlet size 1.0 in. diameter Fluid outlet size 1/4 in. Wetted materials on all models stainless steel, PTFE, leather, nylon, zinc-plated and nickel-plated carbon steel, tungsten carbide, chrome plating, UHMWPE, acetal, polyethylene, nylon 3A4347D... -
Page 19: Airlessco Standard Warranty
Airlessco Standard Warranty Airlessco Standard Warranty Airlessco warrants all equipment referenced in this document which is manufactured by Airlessco and bearing its name to be free from defects in material and workmanship on the date of sale to the original purchaser for use. - Page 20 Airlessco reserves the right to make changes at any time without notice. Original Instructions. This manual contains English. MM 3A4347 GRACO INC. AND SUBSIDIARIES • P.O. BOX 1441 • MINNEAPOLIS MN 55440-1441 • USA Copyright 2016, Graco Inc. All Graco manufacturing locations are registered to ISO 9001.
Need help?
Do you have a question about the Airlessco PRO-DUTY Series and is the answer not in the manual?
Questions and answers