Advertisement
Quick Links
23001 Industrial Blvd, Rogers, MN 55374 / 1-866-527-7637 / www.motoalliance.com
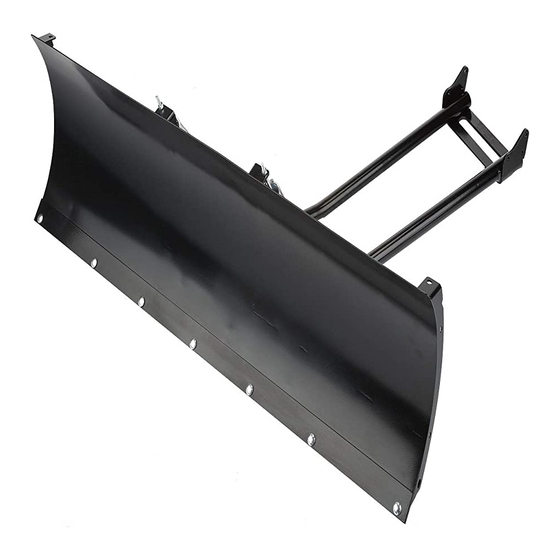
VIPER PLOW SYSTEM / Yamaha Grizzly 700
MA11125
Thank you for purchasing the premium VIPER PLOW system. You now have a top-of-the-
line plow system to using for shoving aside snow and dirt with the use of your ATV. Please
note the following instructions and heed all warnings.
WARNING!!!
SEVERE INJURY OR DEATH MAY RESULT IF YOU IGNORE ANY OF
THE FOLLOWING.
−Read the Plow Operator's Manual, the Winch Operator's Manual, and all warning labels
before operating.
−Operate ATV at a walking speed with the blade installed. Do Not exceed 5mph (8 km/h)
even with the blade up.
-Plow Cautiously, impact with a hidden or stationary object may cause the ATV to stop
suddenly or go out of control.
--Do Not operate the ATV on slopes greater than 10° with the plow installed.
−Do Not stand or ride on the plow.
Stay clear of moving parts and joints. Keep others away when operating or adjusting plow.
−Inspect the plow mechanism, fasteners, cable, and adjustments before operating. Replace
all worn or damaged parts before operating.
−Lower the plow to the down position before leaving the ATV
unattended.
Advertisement

Subscribe to Our Youtube Channel
Related Manuals for Motoalliance VIPER PLOW


Summary of Contents for Motoalliance VIPER PLOW
- Page 1 VIPER PLOW SYSTEM / Yamaha Grizzly 700 MA11125 Thank you for purchasing the premium VIPER PLOW system. You now have a top-of-the- line plow system to using for shoving aside snow and dirt with the use of your ATV. Please note the following instructions and heed all warnings.
- Page 2 Using the existing cross-member holes as PARTS LIST locators, drill through all four cross-member holes with a 5/16” drill bit as shown in 4 Flat Washer, 5/16” 4 Lock Washer, 10mm figure 3. Drill only through the skid-plate 1 Bolt, 3/8” dia – 1” long and nothing else on the bike.
- Page 3 CAUTION FAILURE TO TIGHTEN THE MOUNTING BRACKET BOLTS MAY CAUSE SERIOUS DAMAGE TO YOUR PLOW MOUNT AND BIKE. BE SURE TO TIGHTEN THEM SNUGGLY. The plow mount assembly should look like the one in figure 5. Double check to make sure all the bolts are fastened tightly.
- Page 4 FIGURE FOUR: U-Bolt and Mount FIGURE FIVE: Completed Mount...
Need help?
Do you have a question about the VIPER PLOW and is the answer not in the manual?
Questions and answers