Table of Contents
Advertisement
Quick Links
User Documentation - ME1100
User Documentation - ME1100
Table of Content
Table of Content
User Documentation - ME1100
Product description
Overview
Specifications
Platform components
Product architecture
Description of system access methods
Recommended technical expertise
Getting started
Getting started - Application installation and performance benchmarking
Planning
Environmental considerations
Power consumption and power budget
Network architecture
MAC addresses
PCI mapping
Platform, modules and accessories
Material, information and software required
Hardware compatibility list
Validated operating systems
Security
Installing
Mechanical installation and precautions
ESD protections
Unboxing
Component installation and assembly
Airflow
Rack installation
Cabling
Software installation and deployment
Preparing for installation
Installing an operating system on a server
Verifying installation
Common software installation
Configuring
Configuring system access methods
Configuring and managing users
Baseboard management controller - BMC
Configuring the network time protocol - NTP
Basic BIOS option configuration
Operating
Default user names and passwords
www.kontron.com
// 1
Advertisement
Chapters
Table of Contents

Related Manuals for Kontron ME1100


Summary of Contents for Kontron ME1100
- Page 1 User Documentation - ME1100 User Documentation - ME1100 Table of Content Table of Content User Documentation - ME1100 Product description Overview Specifications Platform components Product architecture Description of system access methods Recommended technical expertise Getting started Getting started - Application installation and performance benchmarking...
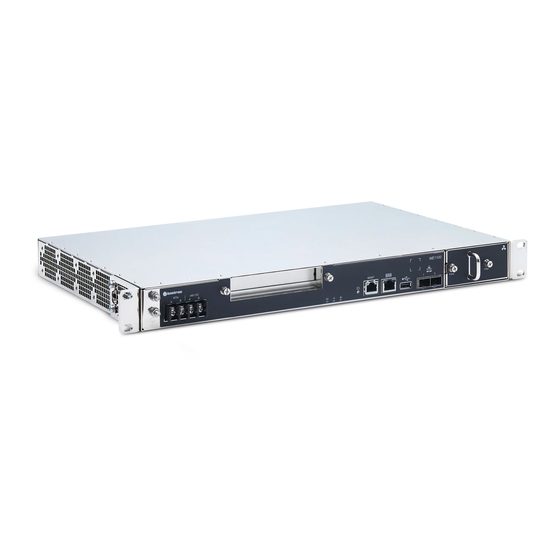
- Page 2 Our mobile edge Xeon® D servers enable content and applications to reside closer to the edge. This allows operators to solve challenges related to restricted space and power while reducing overall costs. The ME1100 1U platform enables edge applications based on Radio Access Network, artificial intelligence, data caching, ultra-low latency and high-bandwidth, among others.
- Page 3 Specifications Specifications {This article details dimensions, shipping weights, environmental specifications and power consumption and lists key hardware and software features.} Table of contents ME1100 key hardware features ME1100 key software features ME1100 physical dimensions ME1100 packaging physical dimensions ME1100 shipping weights...
- Page 4 70 [2.8] Between rack mounting points Front clearance 100 [4] Recommended Rear clearance None ME1100 packaging physical dimensions ME1100 packaging physical dimensions Depth (mm [in]) Depth (mm [in]) Width (mm [in]) Width (mm [in]) Height (mm [in]) Height (mm [in]) 422 [16.6]...
- Page 5 Certain limitations may apply. These limitations could be the result of the operating temperature range of installed configurable components (e.g., SFP+ module, SSD and PCIe add-in card). Kontron recommends using SFP+ and SSD modules with an industrial operating temperature range (-40°C to +85°C).
- Page 6 Critical alarm active (service/maintenance is required) Button state Button state Behavior Behavior Reset button pressed CPU resets (does not affect the management controller) Management/control plane port LEDs Management/control plane port LEDs Port number 3 is the platform management port. www.kontron.com // 6...
- Page 7 Fans and filter Fans and filter The ME1100 platform is equipped with a fan tray assembly comprised of fans and a filter. The filter can be pulled out by itself or the entire fan tray assembly (i.e., the fans www.kontron.com...
- Page 8 To service the filter only: unfasten the filter screw and clean using oil-free compressed air. Always replace the fan tray with the equivalent fan tray assembly (part number). Two fan tray kits are available for the ME1100 product. Fan tray with 3 fans (standard) and fan tray with 4 fans when ME1100 is configured with 2.5-in SSDs.
- Page 9 Management interface (BMC) Management interface (BMC) – through the management plane and the data plane of the platform NOTE: The management plane and the control plane of the ME1100 platform are physically accessible through the front RJ45 connector. NOTE: Paths to the operating system...
- Page 10 Paths to the management interface (BMC) Paths to the management interface (BMC) To access the management interface (BMC) through one of the paths, refer to Accessing a BMC on an ME1100 Paths to the management interface (BMC) Paths to the management interface (BMC)
- Page 11 Rack installation material Network cables and modules Network infrastructure Software required Installing a PCIe add-in card in an ME1100 Opening the enclosure Adjusting the PCIe add-in card space length to three-quarter length Adjusting the PCIe add-in card rear mounting bracket...
- Page 12 Introduction This getting started section describes the network integration, platform access and operating system installation steps required to start operating an ME1100 platform equipped with one PCIe add-in card provided by the customer and 4 SSD drives and used to leverage two segregated network links (one for the management plane and one for the data plane).
- Page 13 Panduit Hand Crimp Tool (638130400) Item_5 One 8 AWG ground cable based on the length required item_6 One ground lug right angle, 8 AWG (Kontron P/N 1064-4226) item_7 One hand crimp tool, Panduit CT-1700 Item_8 8 mm wrench or equivalent tool...
- Page 14 > You now have the material and software required. Proceed with the installation of the PCIe add-in card. > You now have the material and software required. Proceed with the installation of the PCIe add-in card. Installing a PCIe add-in card in an ME1100 Installing a PCIe add-in card in an ME1100...
- Page 15 NOTE: The unit's default configuration is set for a full-height, half-length ( FHHL ) PCIe add-in card. If your PCIe add-in card is FHHL , skip to NOTE: Connecting the PCIe add-in card Adjusting the PCIe add-in card rear mounting bracket Adjusting the PCIe add-in card rear mounting bracket www.kontron.com // 15...
- Page 16 Step_3 Move the PCIe rear mounting bracket to the desired position and fasten the screw with a T8 Torx screwdriver . Step_4 Reattach the power cable using a tie wrap as shown in the picture. Connecting the PCIe add-in card Connecting the PCIe add-in card www.kontron.com // 16...
- Page 17 Installing a thermal probe for the PCIe add-in card Installing a thermal probe for the PCIe add-in card Locating the thermal probe connection Locating the thermal probe connection Installing the thermal probe Installing the thermal probe Relevant sections: Relevant sections: Managing customer added sensors www.kontron.com // 17...
- Page 18 Racking the platform Racking the platform The airflow of the platform goes from right to left, facing front. Ensure there is no physical obstruction that would hinder proper airflow when choosing a location for the platform in the rack. www.kontron.com // 18...
- Page 19 2. Connect one SFP or SFP+ cable to port 1 for the data plane. Building and connecting the power cables Building and connecting the power cables Installation of this product must be performed in accordance with national wiring codes and conform to local regulations. Material required Material required www.kontron.com // 19...
- Page 20 Kontron suggests using crimp lugs (ring or spade crimp lug, straight, isolated, UL94V-0) on the power cables. Connect the appropriate cable to the appropriate polarity. Kontron suggests the following wire gauges for -48V DC and RTN: 14 AWG or 12 AWG.
- Page 21 A serial console tool is installed on the external computer. Speed (Baud): 115200 Data bits: 8 Stop bits: 1 Parity: None Flow Control: None Recommended emulation mode: VT100+ NOTE: NOTE: PuTTY is recommended. Port location Port location www.kontron.com // 21...
- Page 22 Step_4 The BIOS sign on screen displays “Entering Setup…”. NOTE: NOTE: It will take several seconds to display and enter the BIOS setup menu. Step_5 The BIOS setup menu is displayed. Accessing the BMC network configuration menu Accessing the BMC network configuration menu www.kontron.com // 22...
- Page 23 Step_4 (Optional) When the BIOS sign on screen is displayed, press the specified key to enter the BIOS setup menu. Then, access the Server Mgmt Server Mgmt menu and select BMC network configuration BMC network configuration . Make a note of the address displayed as it is your management IP address ( BMC MNGMT_IP ). www.kontron.com // 23...
- Page 24 Cookies must be enabled in order to access the website. For further information about enabling cookies, please refer to your Web browser's documentation. NOTE: The procedure may vary depending on the browser used. Examples provided use Firefox. NOTE: www.kontron.com // 24...
- Page 25 Step_5 You now have access to the management Web UI of the BMC. You can use the interface. Changing the user name and password Changing the user name and password NOTE: All user names and passwords must have a minimum of 8 characters NOTE: minimum of 8 characters . www.kontron.com // 25...
- Page 26 Change Password box. Step_5 Create a new password. Step_6 Confirm the password. Step_7 Press Save Save . Launching the KVM Launching the KVM The Web UI allows remote control of the server through a KVM (Keyboard, Video, Mouse) interface. www.kontron.com // 26...
- Page 27 Step_2 Once the ISO file is loaded, click on Start Media Start Media at the top right of the screen. NOTE: NOTE: Once clicked, the Start Media button becomes the Stop Media Stop Media button. Accessing the BIOS setup menu Accessing the BIOS setup menu www.kontron.com // 27...
- Page 28 Enter . The server will reboot and the media installation process will start. > You are now ready to complete operating system installation according to your application requirements. > You are now ready to complete operating system installation according to your application requirements. www.kontron.com // 28...
- Page 29 Exit and press Enter and Exit Enter to confirm and save the new boot order. Verifying operating system installation Verifying operating system installation All the results and commands may vary depending on the operating system and the devices added. www.kontron.com // 29...
- Page 30 (Optional) If a PCIe add-in card is installed, verify that the card is detected. LocalServer_OSPrompt:~# lspci lspci Step_11 Verify communication between the operating system and the BMC. LocalServer_OSPrompt:~# ipmitool mc info ipmitool mc info Benchmarking an application Benchmarking an application www.kontron.com // 30...
- Page 31 Monitoring platform sensors using the Web UI Monitoring platform sensors using the Web UI NOTE: Refer to NOTE: Accessing a BMC on an ME1100 to access the BMC Web UI. The key sensors to look at are the following: Temperature sensors...
- Page 32 Temp NTC sensor is the one linked to the thermal probe physically connected in the platform. Its thresholds need to be set according to the specific parameters and uses of the PCIe add-in card installed. Proceed as shown below with the appropriate sensor (Temp NTC). www.kontron.com // 32...
- Page 33 Special considerations must be taken if you are exposing the ME1100 to a temperature shock, such as taking the equipment out of a service truck left outside for the night in sub zero temperatures and taking it inside for installation in a heated facility.
- Page 34 Table of contents Once the network architecture is planned, go to sections Baseboard management controller - BMC to discover the management IP address and Material, information and software required to continue the planning. Relevant sections: Relevant sections: Product architecture www.kontron.com // 34...
- Page 35 Discovering a MAC address using the BIOS Accessing the BIOS using a serial console (physical connection) Prerequisites Port location Access procedure Accessing the BMC network configuration menu ME1100 MAC addresses Interface description Interface description MAC address MAC address Notes Notes...
- Page 36 Step_4 The BIOS sign on screen displays “Entering Setup…”. NOTE: NOTE: It will take several seconds to display and enter the BIOS setup menu. Step_5 The BIOS setup menu is displayed. Accessing the BMC network configuration menu Accessing the BMC network configuration menu www.kontron.com // 36...
- Page 37 8086 8C26 USB Controller Intel Corporation 8 Series/C220 Series Chipset Family USB EHCI #1 (rev 05) (prog-if 20 [EHCI]) 00:1F.0 8086 8C54 ISA Bridge Intel Corporation C224 Series Chipset Family Server Standard SKU LPC Controller (rev 05) www.kontron.com // 37...
- Page 38 Intel Corporation Xeon E7 v4/Xeon E5 v4/Xeon E3 v4/Xeon D Memory Controller 0 - Channel 0 Error (rev 03) FF:14.3 8086 6FB3 System peripheral Intel Corporation Xeon E7 v4/Xeon E5 v4/Xeon E3 v4/Xeon D Memory Controller 0 - Channel 1 Error (rev 03) www.kontron.com // 38...
- Page 39 Intel Corporation Xeon E7 v4/Xeon E5 v4/Xeon E3 v4/Xeon D Power Control Unit (rev 03) Platform, modules and accessories Platform, modules and accessories {This article provides the complete list of compatible parts and components that can be ordered from Kontron .} Description Description...
- Page 40 Panduit Hand Crimp Tool (638130400) Item_5 One 8 AWG ground cable based on the length required item_6 One ground lug right angle, 8 AWG (Kontron P/N 1064-4226) item_7 One hand crimp tool, Panduit CT-1700 Item_8 8 mm wrench or equivalent tool...
- Page 41 DDR4 industrial memory (-40°C to 85°C) Manufacturer Manufacturer Manufacturer P/N Manufacturer P/N Type Type Size Size Description Description Status Status Kontron P/N Kontron P/N Innodisk M4C0-4GSSLWSJ-U48 UDIMM 4 GB DDR4-2133/2400 ECC Active 1065-6675 A4C04QV8BLTDSW UDIMM 4 GB DDR4-2133/2400 ECC Active...
- Page 42 2.5-in industrial SSD drives (-40°C to 85°C) Manufacturer Manufacturer Manufacturer P/N Manufacturer P/N Type Type Size Size Status Status Kontron P/N Kontron P/N Innodisk DES25-C12DK1EW3QF-U48 SATA III (6.0Gb/S) 7mm 512 GB Active 1065-8263 AF512GSMCJ-VABIP SATA III (6.0Gb/S) 9mm 512 GB...
- Page 43 The platform features a Trusted Platform Module (TPM). Determine your requirement with regards to hardware-based, security-related functions. Refer to Configuring For more information on security features, contact Kontron. Installing Installing {This section provides Information about installing the platform hardware components, operating systems and softwares.}...
- Page 44 {This article gives specific instructions to safely unbox the product and to validate the bill of materials.} What's in the box What's in the box The ME1100 platform box includes one ME1100 edge computing 1U platform. one ME1100 edge computing 1U platform. Step_1 Carefully remove the platform from its packaging.
- Page 45 The maximum form factor of the optional PCIe add-in card is full-height, three-quarter length (FH3/4L). A T10 Torx screwdriver, scissors and a tie wrap are required. NOTE: In this example, the rear mounting bracket is moved from half length to three-quarter length. NOTE: www.kontron.com // 45...
- Page 46 Step_3 Move the PCIe rear mounting bracket to the desired position and fasten the screw with a T8 Torx screwdriver . Step_4 Reattach the power cable using a tie wrap as shown in the picture. Connecting the PCIe add-in card Connecting the PCIe add-in card www.kontron.com // 46...
- Page 47 2 T10 Torx captive screws into the front plate (6 lbf·in torque) Installing an M.2 storage Installing an M.2 storage Locating the M.2 storage Locating the M.2 storage Installing the M.2 storage Installing the M.2 storage Only one M.2 SSD storage device can be installed per chassis. www.kontron.com // 47...
- Page 48 Step_5 Visually inspect each lever to ensure they are fully closed and correctly engaged with the notches on the DIMM edge. (E) Replacing an SSD Replacing an SSD Up to four 2.5-in SSDs can be installed in the server as an option. www.kontron.com // 48...
- Page 49 Step_5 Fasten each carrier bracket with one T10 Torx scre w (6 lbf·in torque). Installing a thermal probe for the PCIe add-in card Installing a thermal probe for the PCIe add-in card Locating the thermal probe connection Locating the thermal probe connection www.kontron.com // 49...
- Page 50 (Optional) Building a thermal probe (Optional) Building a thermal probe A thermal probe can be purchased from Kontron or built. Component Component Description Description NTC thermistor GA10K3A1IA NTC thermistor 10 Kohm, 3976K Bead Connector XHP-2 Connector housing 2.5 mm, 2 position Pins SXH-001-P0.6...
- Page 51 Replacing a fan tray assembly The ME1100 platform is equipped with a fan tray assembly comprised of fans and a filter. The filter can be pulled out by itself or the entire fan tray assembly (i.e., the fans and the filter) can be pulled out.
- Page 52 Table of contents Installing an ME1100 platform in a 19-in rack The airflow of the platform goes from right to left, facing front. Ensure there is no physical obstruction that would hinder proper airflow when choosing a location for the platform in the rack.
- Page 53 Installation of this product must be performed in accordance with national wiring codes and conform to local regulations. Pliers may be used to bend the crimp lugs. www.kontron.com // 53...
- Page 54 Material required Kontron suggests using crimp lugs (ring or spade crimp lug, straight, isolated, UL94V-0) on the power cables. Connect the appropriate cable to the appropriate polarity. Kontron suggests the following wire gauges for -48V DC and RTN: 14 AWG or 12 AWG.
-
Page 55: Table Of Contents
Installing an OS on a server using the KVM Installing an OS on a server using the KVM Relevant section: Relevant section: Accessing a BMC on an ME1100 Prerequisites Prerequisites The BMC IP address is known (refer to section Configuring/Baseboard management controller (BMC) to obtain the BMC MNGMT_IP). -
Page 56: Changing The User Name And Password
Step_5 You now have access to the management Web UI of the BMC. You can use the interface. Changing the user name and password Changing the user name and password NOTE: All user names and passwords must have a minimum of 8 characters NOTE: minimum of 8 characters . www.kontron.com // 56... -
Page 57: Launching The Kvm
Change Password box. Step_5 Create a new password. Step_6 Confirm the password. Step_7 Press Save Save . Launching the KVM Launching the KVM The Web UI allows remote control of the server through a KVM (Keyboard, Video, Mouse) interface. www.kontron.com // 57... -
Page 58: Mounting The Operating System Image Via Virtual Media
Step_2 Once the ISO file is loaded, click on Start Media Start Media at the top right of the screen. NOTE: NOTE: Once clicked, the Start Media button becomes the Stop Media Stop Media button. Accessing the BIOS setup menu Accessing the BIOS setup menu www.kontron.com // 58... -
Page 59: Selecting The Boot Order From Boot Override
Enter . The server will reboot and the media installation process will start. > You are now ready to complete operating system installation according to your application requirements. > You are now ready to complete operating system installation according to your application requirements. www.kontron.com // 59... -
Page 60: Completing Operating System Installation
Boot Override section. Step_7 Choose the PXE option desired. > You are now ready to complete operating system installation according to your application requirements. > You are now ready to complete operating system installation according to your application requirements. www.kontron.com // 60... -
Page 61: Completing Operating System Installation
In the " Test this media & install CentOS 7 Test this media & install CentOS 7 " entry replace the " quiet quiet " argument with " console=ttyS0,115200n81 console=ttyS0,115200n81 ". Step_7 Save the file and eject the USB key. Configuring Boot Override Configuring Boot Override www.kontron.com // 61... -
Page 62: Completing Operating System Installation
{This article details the tests to perform in order to validate that all of the platform's devices are properly mounted and recognized by the OS.} Relevant sections: Relevant sections: PCI mapping Common software installation All the results and commands may vary depending on the operating system and the devices added. www.kontron.com // 62... - Page 63 NOTE: Updating the packages may take a few minutes. NOTE: Step_10 (Optional) If a PCIe add-in card is installed, verify that the card is detected. LocalServer_OSPrompt:~# lspci lspci Step_11 Verify communication between the operating system and the BMC. LocalServer_OSPrompt:~# ipmitool mc info ipmitool mc info www.kontron.com // 63...
- Page 64 [Content under creation] Network infrastructure integration [Content under creation] Parallel configuration [Content under creation] High availability Configuring system access methods Configuring system access methods {This article provides detailed setup instructions to enable system access for all available methods.} Table of contents www.kontron.com // 64...
- Page 65 General considerations and warnings about network configuration The architecture of the ME1100 platform offers many entry points, including two LAN channels to the BMC. Use caution when configuring network accesses. Your access to the system could be interrupted should you disable the access point you entered through.
- Page 66 Add @ @ to the URL followed by the BMC management IP address. https://Administrator:superuser@172.16.205.245 https://Administrator:superuser@172.16.205.245 Step_4 Add the Redfish API suffix to the URL. https://Administrator:superuser@172.16.205.245/redfish/v1/ https://Administrator:superuser@172.16.205.245/redfish/v1/ Step_5 Access the API using an HTTP client and verify that the URL is valid. Configuring BMC SNMP Configuring BMC SNMP www.kontron.com // 66...
- Page 67 Step_2 (Optional) To be able to see human-readable MIBs (instead of seeing the OID), also install snmp-mibs-downloader. RemoteComputer_OSPrompt:~# yum install snmp-mibs-downloader yum install snmp-mibs-downloader Verifying SNMP communication for a user Verifying SNMP communication for a user www.kontron.com // 67...
- Page 68 Adding a BMC user Deleting or disabling a BMC user Configuring privilege level for BMC users Managing Redfish users Configuring Redfish user names and passwords Adding a Redfish user Deleting a Redfish user Configuring Redfish privilege level www.kontron.com // 68...
- Page 69 IPMI over LAN (IOL) Using IPMI via KCS Configuring BMC user names and passwords using the Web UI Configuring BMC user names and passwords using the Web UI Refer to Accessing a BMC using the Web UI for access instructions. www.kontron.com // 69...
- Page 70 Save . Configuring BMC user names and passwords using IPMI over LAN (IOL) Configuring BMC user names and passwords using IPMI over LAN (IOL) Refer to Accessing a BMC using IPMI over LAN (IOL) for access instructions. www.kontron.com // 70...
- Page 71 Verify that the credentials updated correctly by using an access method that requires a login. NOTE: NOTE: Other parameters could limit the accessibility of the user that is trying to manage the BMC. Refer to ipmitool ipmitool documentation. www.kontron.com // 71...
- Page 72 Step_6 Press Save Save to exit. Adding a BMC user using IPMI over LAN (IOL) Adding a BMC user using IPMI over LAN (IOL) Refer to Accessing a BMC using IPMI over LAN (IOL) for access instructions. www.kontron.com // 72...
- Page 73 IPMI over LAN (IOL) Disabled using IPMI via KCS Deleting a BMC user using the Web UI Deleting a BMC user using the Web UI Refer to Accessing a BMC using the Web UI for access instructions. www.kontron.com // 73...
- Page 74 NOTE: The first and second user names of the user list are reserved fields and therefore can't be disabled. Configuring privilege level for BMC users Configuring privilege level for BMC users BMC user privilege level can be configured : Using the Web UI Using IPMI over LAN (IOL) www.kontron.com // 74...
- Page 75 NOTE: The first and second user names of the user list are reserved fields and therefore can't be modified. Configuring privilege level for BMC users using IPMI via KCS Configuring privilege level for BMC users using IPMI via KCS Refer to Accessing a BMC using IPMI via KCS for access instructions. www.kontron.com // 75...
- Page 76 NOTE: Once the password is modified, it needs to be updated in the ROOT_URL. NOTE: Step_7 Verify that the credentials updated correctly by opening a new session in the Redfish API. Adding a Redfish user Adding a Redfish user Refer to Accessing a BMC using Redfish for access instructions. www.kontron.com // 76...
- Page 77 Configuring SNMP users using BMC SNMP BMC SNMP users are shared with BMC users. To configure a user, refer to Configuring BMC users To enable or disable SNMP access, refer to Configuring BMC SNMP Configuring OS users Configuring OS users www.kontron.com // 77...
- Page 78 The network configuration allows for setting the two BMC LAN ports (channel 1 and channel 2) either on different networks or on the same network. Two management IP addresses can be configured for the ME1100 platform: one for LAN channel 1 (RJ45 connector – port 3); and one for LAN channel 2 (SFP connector –...
- Page 79 When requesting a DHCP lease, the platform BMC supplies the DHCP server with information to update the DNS system. If the DHCP server is configured for Dynamic DNS update, an entry will be added for a host name that is made up of the “ME1100” prefix and the BMC MAC address.
- Page 80 Step_5 The BIOS setup menu is displayed. Accessing the BMC network configuration menu Accessing the BMC network configuration menu NOTE: LAN channel 1 corresponds to the RJ45 connector (port 3) and LAN channel 2 corresponds to the SFP connector (port 2). NOTE: www.kontron.com // 80...
- Page 81 The procedures described below must be performed for one interface at a time. If the application requires multiple interfaces, configure them separately. A static IP address can be configured: Using the BIOS setup menu Using IPMI Configuring a static IP address using the BIOS setup menu Configuring a static IP address using the BIOS setup menu www.kontron.com // 81...
- Page 82 BIOS. Configuring a static IP address Configuring a static IP address NOTE: LAN channel 1 corresponds to the RJ45 connector (port 3) and LAN channel 2 corresponds to the SFP connector (port 2). NOTE: www.kontron.com // 82...
- Page 83 -I lanplus -H [BMC MNGMT_IP] -U [IPMI user name] -P [IPMI password] . Configuring a static IP address Configuring a static IP address NOTE: LAN channel 1 corresponds to the RJ45 connector (port 3) and LAN channel 2 corresponds to the SFP connector (port 2). NOTE: www.kontron.com // 83...
- Page 84 If the IP address of the BMC is known, any BIOS access methods will work. Refer to Accessing the BIOS to choose an access method. Accessing the BMC network configuration menu Accessing the BMC network configuration menu www.kontron.com // 84...
- Page 85 Configuring a dynamic IP address using DHCP Configuring a dynamic IP address using DHCP NOTE: LAN channel 1 corresponds to the RJ45 connector (port 3) and LAN channel 2 corresponds to the SFP connector (port 2). NOTE: www.kontron.com // 85...
- Page 86 NOTE: Depending on the existing infrastructure, it may take several seconds to gather an IP from the DHCP server. Step_2 Verify that the configuration has changed. LocalServer_OSPrompt:~# ipmitool lan print [LAN_CHANNEL] ipmitool lan print [LAN_CHANNEL] NOTE: NOTE: This is the management IP address ( BMC MNGMT_IP BMC MNGMT_IP ). www.kontron.com // 86...
- Page 87 The BMC IP address is known (refer to section Configuring/Baseboard management controller (BMC) to obtain the BMC MNGMT_IP). The remote computer has access to the management network subnet. Relevant sections: Relevant sections: Baseboard management controller - BMC Accessing a BMC on an ME1100 Procedure Procedure www.kontron.com // 87...
- Page 88 Access the operating system using an IPMI method (IOL or KCS). Step_2 Verify that the local time and date match the server's time and date. LocalServer_ OSPrompt:~# ipmitool sel time get ipmitool sel time get Setting the BMC time and date Setting the BMC time and date www.kontron.com // 88...
- Page 89 Basic BIOS option configuration Basic BIOS option configuration {This section details the most common configuration options related to the BIOS.} Table of contents Changing the boot order Overriding the boot order Enabling secure boot Configuring the TPM www.kontron.com // 89...
- Page 90 Override section, select the desired option and press Override Enter . The server will boot from a particular device. Enter NOTE: this selection will only affect the current boot. NOTE: Enabling secure boot Enabling secure boot Refer to Accessing the BIOS for access instructions. www.kontron.com // 90...
- Page 91 Step_5 Set the Secure Boot Secure Boot to [Enabled]. [Enabled]. Then, if required, you can configure keys using the Secure Boot Mode [Custom]. Configuring the TPM Configuring the TPM Refer to Accessing the BIOS for access instructions. www.kontron.com // 91...
- Page 92 Note: The Power LED blinks at 50%, 1Hz during platform power-up. It indicates that the application is NOT Note: NOT ready. It can be changed to solid lit either by the BIOS before OS load or by the client's application. www.kontron.com // 92...
- Page 93 The BMC can be accessed using SNMP. However, before configuring SNMP, the default user name and password must be changed as a minimum of 8 characters are required for both. Refer to Configuring BMC user names and passwords using the Web UI The ME1100 platform includes one BMC. www.kontron.com // 93...
- Page 94 {This article provides access paths to the prompts and interfaces that allow configuration, monitoring or troubleshooting.} Children Accessing the operating system of a server Accessing the BIOS Accessing a BMC on an ME1100 Accessing the operating system of a server Accessing the operating system of a server Table of contents...
- Page 95 Step_4 Log in to the BMC Web UI using the appropriate credentials. NOTE: NOTE: Default Web UI user name and password is admin/admin. Step_5 You now have access to the management Web UI of the BMC. You can use the interface. Launching the KVM Launching the KVM www.kontron.com // 95...
- Page 96 NOTE : If the OS is not displayed, perform a server reset. Refer to NOTE : Platform power management Accessing an OS using SSH, RDP or customer application protocols Accessing an OS using SSH, RDP or customer application protocols www.kontron.com // 96...
- Page 97 Recommended emulation mode: VT100+ NOTE: PuTTY is recommended. NOTE: Redirection to the serial port is configured in the OS. NOTE: If the OS was installed by Kontron, console redirection is enabled by default. NOTE: Port location Port location Access procedure...
-
Page 98: Access Procedure
Accessing the BMC of the server for which you want to access the BIOS Accessing the BMC of the server for which you want to access the BIOS To obtain the list of default user names and passwords, refer to Default user names and passwords. www.kontron.com // 98... - Page 99 Step_4 Log in to the BMC Web UI using the appropriate credentials. NOTE: NOTE: Default Web UI user name and password is admin/admin. Step_5 You now have access to the management Web UI of the BMC. You can use the interface. Launching the KVM Launching the KVM www.kontron.com // 99...
- Page 100 Step_3 A new browser window opens and displays the server screen. NOTE: NOTE: If an OS is installed, the image displayed might be that of the OS. Accessing the BIOS setup menu Accessing the BIOS setup menu www.kontron.com // 100...
-
Page 101: Step_1
A community version of ipmitool is installed on a remote computer to enable remote monitoring—it is recommended to use ipmitool version 1.8.18. Relevant section: Relevant section: Baseboard management controller - BMC Access procedure To obtain the list of default user names and passwords, refer to Default user names and passwords. www.kontron.com // 101... -
Page 102: Physical Connection To The Device Is Required
NOTE: The serial console port is compatible with Cisco 72-3383-01 cable. A serial console tool is installed on the external computer. Speed (Baud): 115200 Data bits: 8 Stop bits: 1 Parity: None Flow Control: None Recommended emulation mode: VT100+ NOTE: NOTE: PuTTY is recommended. www.kontron.com // 102... -
Page 103: Which The Device Is Connected
NOTE: It may take a few seconds for the BIOS sign on screen to display confirmation message “Entering Setup…”. Step_4 The BIOS sign on screen displays “Entering Setup…”. NOTE: NOTE: It will take several seconds to display and enter the BIOS setup menu. Step_5 The BIOS setup menu is displayed. www.kontron.com // 103... -
Page 104: [Bios_Registry] .Json .Json | Jq -R | Jq -R
-k -s [ROOT_URL ]Systems/Self/Bios | ]Systems/Self/Bios | jq '.Attribute. jq '.Attribute. [ATTRIBUTE_TAG [ATTRIBUTE_TAG ] ] ' ' Accessing a BMC on an ME1100 Accessing a BMC on an ME1100 Table of contents Accessing a BMC using the Web UI Prerequisites... -
Page 105: Accessing A Bmc Using The Web Ui
NOTE: The procedure may vary depending on the browser used. Examples provided use Firefox. NOTE: Access procedure Access procedure To obtain the list of default user names and passwords, refer to Default user names and passwords. www.kontron.com // 105... -
Page 106: Accessing A Bmc Using Ipmi Over Lan (Iol)
A community version of ipmitool is installed on a remote computer to enable remote monitoring—it is recommended to use ipmitool version 1.8.18. Relevant section: Relevant section: Baseboard management controller - BMC Access procedure Access procedure To obtain the list of default user names and passwords, refer to Default user names and passwords. www.kontron.com // 106... -
Page 107: Accessing A Bmc Using Ipmi Via Kcs
Accessing a BMC using BMC SNMP Accessing a BMC using BMC SNMP NOTE : The current implementation supports version 3 of the SNMP protocol. For the commands to work, snmpwalk version 5.8 or higher must be installed. NOTE : www.kontron.com // 107... - Page 108 Available power commands The power states of the ME1100 platform can be managed using various commands sent through the platform Web UI or an IPMI client (IOL or KCS). It is recommended to use the Web UI, and automation of power management tasks requires an IPMI access .
- Page 109 Step_3 Verify the power status. RemoteComputer_OSPrompt:~$ curl -k -s [ROOT_URL curl -k -s [ROOT_URL ]Chassis/Self | jq .PowerState ]Chassis/Self | jq .PowerState Reset (warm boot) Reset (warm boot) Using the Web UI Using IPMI (IOL) www.kontron.com // 109...
- Page 110 LocalServer_OSPrompt:~# ipmitool chassis power cycle ipmitool chassis power cycle NOTE: NOTE: It may take a moment for the OS to reboot. ACPI shutdown (clean shutdown) ACPI shutdown (clean shutdown) Using the Web UI Using IPMI (IOL) www.kontron.com // 110...
- Page 111 -k -s [ROOT_URL ]Chassis/Self | jq .PowerState ]Chassis/Self | jq .PowerState Sending a power command using the Web UI Sending a power command using the Web UI Refer to Accessing a BMC using the Web UI for access instructions. www.kontron.com // 111...
- Page 112 Viewing sensor details The platform has many sensors, you can refer to the Sensor list for details and to determine the sensor ID. There are several methods to monitor platform sensors, including: Using the BMC Web UI Using IPMI www.kontron.com // 112...
- Page 113 For sensor data interpretation instructions, refer to Interpreting sensor data For instructions on how to access the BMC, refer to Accessing a BMC on an ME1100 Monitoring using the BMC Web UI Monitoring using the BMC Web UI Accessing sensor details...
- Page 114 NOTE: For a negative threshold value add double dashes (--) before the sensor command and type the negative value. LocalServer_OSPrompt:~# ipmitool -- sensor thresh [SENSOR_ID] [THRESH_TYPE] [NEG ipmitool -- sensor thresh [SENSOR_ID] [THRESH_TYPE] [NEG VALUE] VALUE] Monitoring using Redfish Monitoring using Redfish Creating URL extensions Creating URL extensions www.kontron.com // 114...
-
Page 115: Step_1
Event/Reading type code Event/Reading type code Description Description Implementation notes Implementation notes [Sensor_ID] [Sensor_ID] Temp CPU 01h(Temperature) 01h(Threshold Based) CPU Temperature CPU Status Processor Status (Processor) (Sensor Specific) Temp DIMM A 01h(Temperature) 01h(Threshold Based) DIMM A0 Temperature via SPD www.kontron.com // 115... - Page 116 04h (Fan) 01h(Threshold Based) Speed of fan #4 (RPM) May be absent depending on configuration. Fan presence 04h (Fan) 7Dh (Kontron instance-specifier) Fan presence Fan failure 04h (Fan) 7Dh (Kontron instance-specifier) Indicates a defective fan Fan tray pres 04h (Fan) 08h (‘digital’...
-
Page 117: Step_2
The third column writes discrete discrete for discrete sensors or a unit type for non-discrete sensors. Step_3 Refer to Interpreting non-discrete sensor data Interpreting discrete sensor data depending on the sensor's event/reading type. Interpreting non-discrete sensor data Interpreting non-discrete sensor data www.kontron.com // 117... -
Page 118: Using Ipmi (Iol)
IPMI A A ccessing event data bytes 2 and 3 ccessing event data bytes 2 and 3 using the Web UI using the Web UI Refer to Accessing a BMC using the Web UI for access instructions. www.kontron.com // 118... - Page 119 Interpretation information Interpretation information Each sensor has a Sensor type attribute and a Sensor event/reading type attribute. When a sensor created an event specified, more data about the event can be found in www.kontron.com // 119...
- Page 120 Report an entity presence on the platform. 2Bh (Version change) Report the state of hardware, firmware or software version. D3h (OEM jumper status) Kontron custom jumper status sensor type. Refer to OEM event/reading type Sensor event/reading type Sensor event/reading type The sensor event/reading type attribute defines how the reading of the value should be interpreted and how the sensor-related events are triggered.
- Page 121 OEM event/reading type An OEM event/reading type is a discrete type of sensor, meaning that it has no numerical value. When a sensor is of type OEM, the event offset values are defined in the following table. www.kontron.com // 121...
- Page 122 Jumper present on pins 9–10 (FPGA - spare jumper 1) Jumper present on pins 11–12 (CPU clear bios setup in FLASH) Jumper present on pins 13–14 (FPGA - spare jumper 2) Fan presence 04h (Fan) 7Dh (Kontron Fan1 instance specifier) Fan2 Fan failure...
- Page 123 Not used for this sensor. status event. Managing customer added sensors Managing customer added sensors {This article provides informations and instructions to monitor and integrate customer-specific sensors in the cooling mechanism of the platform} Table of contents www.kontron.com // 123...
- Page 124 {This article explains how to view system logs, how to replace, backup and restore components, and how to upgrade and scale the platform. } Children System event log Component replacement [Content under creation] Backup and restore Upgrading [Content under creation] Scaling www.kontron.com // 124...
- Page 125 NOTE: Depending on the event, there may not be an associated sensor attribute. However, if this attribute is present, refer to NOTE: Interpreting sensor data for further interpretation instructions. Clearing the system event log Clearing the system event log www.kontron.com // 125...
- Page 126 Step_2 Verify that the system event log was properly cleared. LocalServer_OSPrompt:~# ipmitool sel elist ipmitool sel elist Using Redfish Using Redfish Accessing the system event log Accessing the system event log Refer to Accessing a BMC using Redfish for access instructions. www.kontron.com // 126...
- Page 127 Component replacement Component replacement {This article gives detailed instructions to safely replace components.} The only built-in component of the ME1100 platform that can be replaced is the fan tray assembly. Refer to Component installation and assembly for the replacement procedure.
- Page 128 Platform cooling and thermal management {This article provides informations about platform cooling and thermal management mechanism and describes specific behavior across platform operating temperature range. } Table of contents Thermal management Behavior upon startup at temperatures below 0°C Default temperature thresholds www.kontron.com // 128...
- Page 129 The ME1100 platform can operate within an ambient temperature range of -40°C to +65°C. If the ambient temperature is below 10°C below 10°C and no sensor has exceeded its temperature thresholds, the fans will be on standby (not running and making no sound).
- Page 130 [Content under creation] Working with logs [Content under creation] Working with error messages [Content under creation] Networking issues Factory default [Content under creation] Troubleshooting fans [Content under creation] How to recover from an erroneus CTRL-C Support information www.kontron.com // 130...
- Page 131 Accessing a BMC using IPMI over LAN (IOL ). To use IOL, add the IOL parameters to the command: -I lanplus -H [BMC MNGMT_IP] -U [IPMI user name] -P [IPMI -I lanplus -H [BMC MNGMT_IP] -U [IPMI user name] -P [IPMI password] . password] www.kontron.com // 131...
- Page 132 Collecting the system event logs System event logs can be collected: Using the BMC Web UI Using IPMI Collecting the system event logs using the BMC Web UI Collecting the system event logs using the BMC Web UI www.kontron.com // 132...
- Page 133 Accessing a BMC using IPMI over LAN (IOL ). To use IOL, add the IOL parameters to the command: -I lanplus -H [BMC MNGMT_IP] -U [IPMI user name] -P [IPMI -I lanplus -H [BMC MNGMT_IP] -U [IPMI user name] -P [IPMI password] . password] www.kontron.com // 133...
- Page 134 BMC using IPMI over LAN (IOL ). To use IOL, add the IOL parameters to the command: -I lanplus -H [BMC MNGMT_IP] -U [IPMI user name] -P [IPMI password] -I lanplus -H [BMC MNGMT_IP] -U [IPMI user name] -P [IPMI password] . www.kontron.com // 134...
- Page 135 There are two ways to restore the BMC settings to factory default: Using the Web UI Using Redfish Restoring Default BMC Settings Using the BMC Web UI Restoring Default BMC Settings Using the BMC Web UI Refer to Accessing a BMC on an ME1100 for access instructions. www.kontron.com // 135...
- Page 136 Step_6 Confirm the factory default restoration by clicking on OK. NOTE: NOTE: The platform will reset. Restoring Default BMC Settings Using Redfish Restoring Default BMC Settings Using Redfish Refer to Accessing a BMC on an ME1100 for access instructions. www.kontron.com // 136...
- Page 137 Step_3 After reset, the BMC settings should have been restored to default. Support information Support information {This article provides a list of additional support resources.} Kontron's technical support team can be reached through the following means: By phone: 1-888-835-6676 By email: support-kci@kontron.com Via the websites: www.symkloud.com...
-
Page 138: Applications Commands
AMI IPMI session timeout configuration command AMI UDS information commands AMI dual image support configuration command %No title% APML commands SB-RMI commands SB-TSI commands DCMI commands PNM commands Remote images service commands Applications commands Applications commands IPM device commands IPM device commands www.kontron.com // 138... -
Page 139: Watchdog Timer Commands
Net function Command Command Command name Command name Supported parameters Supported parameters 0x06 0x22 Reset Watchdog Timer 0x06 0x24 Set Watchdog Timer 0x06 0x25 Get Watchdog Timer BMC device and messaging commands BMC device and messaging commands www.kontron.com // 139... -
Page 140: Ipmi 2.0 Specific Commands
Operating System Name -0x4 0x06 0x59 Get System Info Parameters Set In Progress -0x0 System Firmware -0x1 Version System name -0x2 Primary Operating -0x3 System Name Operating System -0x4 Name. IPMI 2.0 specific commands IPMI 2.0 specific commands www.kontron.com // 140... -
Page 141: Chassis Commands
Boot info acknowledge -0x4 Boot flags -0x5 Boot initiator info -0x6 Boot initiator mailbox -0x7 AMI OEM parameter -0x60 0x00 0x0A Set Front Panel Button Enables 0x00 0x0B Set Power Cycle Interval 0x00 0x0F Get POH Counter www.kontron.com // 141... -
Page 142: Bridge Commands
0x04 0x02 Platform Event 0x04 0x10 Get PEF Capabilities 0x04 0x11 Arm PEF Postpone Timer 0x04 0x12 Set PEF Configuration Set In Progress -0x0 Parameters PEF control -0x1 PEF Action -0x2 global control PEF Startup Delay -0x3 www.kontron.com // 142... -
Page 143: Storage Commands
Get Sensor Event Status 0x04 0x2D Get Sensor Reading 0x04 0x2E Set Sensor Type 0x04 0x2F Get Sensor Type 0x04 0x30 Set Sensor Reading And Event Status Storage commands Storage commands FRU information commands FRU information commands www.kontron.com // 143... -
Page 144: Sdr Repository Commands
Supported parameters Supported parameters function function 0x0c 0x01 Set LAN Set In Progress -0x0 Configuration Authentication -0x1 Parameters Type Support Authentication -0x2 Type Enables IP Address -0x3 IP Address Source -0x4 MAC Address -0x5 Subnet Mask -0x6 www.kontron.com // 144... - Page 145 Type Support Authentication -0x2 Type Enables IP Address -0x3 IP Address Source -0x4 MAC Address -0x5 Subnet Mask -0x6 IPv4 Header -0x7 Primary RMCP -0x8 Port Number Secondary RMCP -0x9 Port Number BMC Generated -0xa ARP control www.kontron.com // 145...
- Page 146 Set Bad Password 0x36 Threshold Set Baud Rate 0x0c 0x11 Get Serial/Modem Configuration Set In Progress Set Bad Password 0x36 Threshold Set Baud Rate 0x0c 0x12 Set Serial/Modem Mux Serial over LAN commands Serial over LAN commands www.kontron.com // 146...
- Page 147 -0x3 & Character Send Threshold SOL Retry -0x4 SOL non-volatile bit rate -0x5 SOL volatile bit rate -0x6 SOL Payload Channel -0x7 SOL Payload Port Number -0x8 AMI commands AMI commands AMI YAFU commands AMI YAFU commands www.kontron.com // 147...
- Page 148 AMI U-Boot memory test commands Net function Net function Command Command Command name Command name Supported parameters Supported parameters 0x32 0x9c Set U-Boot Memory Test Command 0x32 0x9d Get U-Boot Memory Test Status AMI user authentication commands AMI user authentication commands www.kontron.com // 148...
- Page 149 AMI Vmedia configuration commands Net function Net function Command Command Command name Command name Supported parameters Supported parameters 0x32 0xca Get Vmedia Configuration Command 0x32 0xcb Set Vmedia Configuration Command AMI SSL certificate commands AMI SSL certificate commands www.kontron.com // 149...
- Page 150 Get BIOS Response Data Command 0x32 0xD3 Set BIOS Flag Command 0x32 0xD4 Get BIOS Flag Command 0x32 0xd5 AMI Send PLDM Message Command 0x32 0xea BIOS Firmware Recovery Command AMI debug flag commands AMI debug flag commands www.kontron.com // 150...
- Page 151 Get SD Card Partition Command 0x32 0xdb Set SD Card Partition Command AMI BMC firmware auto-recovery command AMI BMC firmware auto-recovery command Net function Net function Command Command Command name Command name Supported parameters Supported parameters 0x32 0xF3 GetRecoveryInfo Command www.kontron.com // 151...
- Page 152 Set Active Session Count (smash) AMI Web service command AMI Web service command Net function Net function Command Command Command name Command name Supported parameters Supported parameters 0x32 0xe6 Restart Web Service Command AMI SMBMC commands AMI SMBMC commands www.kontron.com // 152...
- Page 153 SMTP Message -0x7 SMTP Sender Addr -0x8 SMTP Host Name -0x9 SMTP Port Number -0xa EnableDisableSMTP -0xb Authentication SMTP IPv6 Server Addr -0xc EnableDisable SMTP2 -0xd SMTP2 Server Addr -0xe SMTP2 User Name -0xf SMTP2 Password -0x10 www.kontron.com // 153...
- Page 154 AMI interface state commands AMI interface state commands Net function Net function Command Command Command name Command name Supported parameters Supported parameters 0x32 0x72 Get Interface State 0x32 0x71 Set Interface State AMI firewall commands AMI firewall commands www.kontron.com // 154...
- Page 155 AMI get IPV6 address command AMI get IPV6 address command Net function Net function Command Command Command name Command name Supported parameters Supported parameters 0x32 0x99 Get IPV6 Address AMI PAM order commands AMI PAM order commands www.kontron.com // 155...
- Page 156 Net function Net function Command Command Command name Command name Supported parameters Supported parameters 0x32 0x8e Get UDS Channel Information 0x32 0x9a GetUDS Session Information AMI dual image support configuration command AMI dual image support configuration command www.kontron.com // 156...
- Page 157 Read MCR 0x36 0x0C Write MCR SB-TSI commands SB-TSI commands Net function Net function Command Command Command name Command name Supported parameters Supported parameters 0x36 0x0D Read TSI Register 0x36 0x0E Write TSI Register DCMI commands DCMI commands www.kontron.com // 157...
- Page 158 0xA0 RIS Start/Stop 0x32 0xd7 Media Redirection start stop 0x32 0xd8 Get Media info 0x32 0xd9 Set Media info Document symbols and acronyms Document symbols and acronyms Symbols Symbols The following symbols are used in Kontron documentation. www.kontron.com // 158...
- Page 159 This symbol also indicates detailed information about the specific product configuration. This symbol precedes helpful hints and tips for daily use. Acronyms Acronyms For a complete list of acronyms used in Kontron documentation, go to: LINK TO COME. Safety and regulatory information Safety and regulatory information Table of contents...
- Page 160 Reliable earth-grounding Always maintain reliable grounding of rack-mounted equipment. Earth ground lug location Earth ground lug location Regulatory specifications Regulatory specifications The platform meets the requirements of the following regulatory tests and standards: Safety compliance Safety compliance www.kontron.com // 160...
- Page 161 Customer service Customer service Kontron, a trusted technology innovator and global solutions provider, uses its embedded market strengths to deliver a service portfolio that helps companies break the barriers of traditional product lifecycles. Through proven product expertise and collaborative, expert support, Kontron provides unparalleled peace of mind when it comes to building and maintaining successful products.
Need help?
Do you have a question about the ME1100 and is the answer not in the manual?
Questions and answers