Awntech Dallas Retro RR22 Owner's Manual & Installation Instructions
Hide thumbs
Also See for Dallas Retro RR22:
Table of Contents
Advertisement
Quick Links
OWNER'S MANUAL & INSTALLATION INSTRUCTIONS
Important Installation Information:
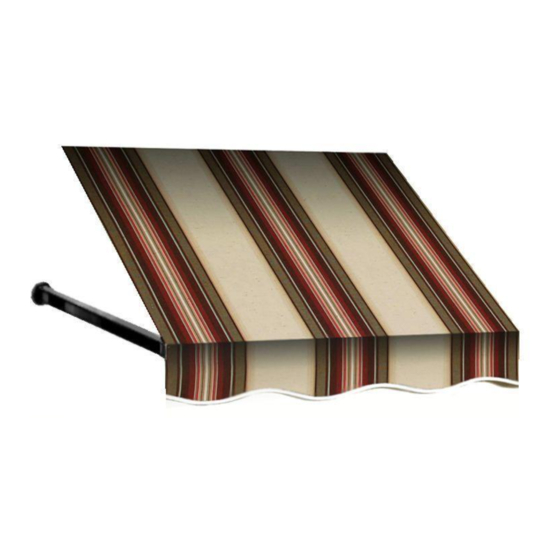
The Dallas Retro
®
part between Projection Bar (BP) and Top Bar (TB). Please read instructions fully
before installing.
NOTE: Please inspect the parts for damage during shipping and/or for any missing items. If you suspect
that there may be damage or a shortage, contact us and we will send replacement parts if needed. At
this time, visualize how the components fit together and make sure that you have identified the various
parts.
Models with Valance:
RR12, RR22, ER23, CR32, CR34, CR43, CR44, ER2442, ER12, ER1836, ER1230, ER1230, ER1030,
ER24, CR33
Awning size
3
4
5
6
7
8
9
10
11
OUR AWNINGS ARE DESIGNED 4.5" WIDER THAN STANDARD WINDOW/DOOR
OPENINGS SO THEY ANCHOR TO THE STUDS AROUND THE WINDOW OR DOOR.
EXAMPLE: RR22-5 IS FOR 5'-0" WIDE WINDOW. IT MEASURES 64.5" WIDE, 31" TALL, (24"
There is a variety of building wall surfaces; Awntech® does not supply the hardware to install your awning. You
will need to purchase installation hardware at your local hardware store. We have advised you on different
surface applications below:
1
The Dallas Retro
frame must be installed on the wall as there is no connecting
Width in inches
40.5
52.5
64.5
76.5
88.5
100.5
112.5
124.5
136.5
PLUS 7" VALANCE AND 24" DEEP (PROJECTION)
Style Awning
®
Awning Size
Width to Inches
12
13
14
15
16
17
18
19
20
148.5
160.5
172.5
184.5
196.5
208.5
220.5
232.5
244.5
Advertisement
Table of Contents

Related Manuals for Awntech Dallas Retro RR22


Summary of Contents for Awntech Dallas Retro RR22
- Page 1 PLUS 7” VALANCE AND 24” DEEP (PROJECTION) There is a variety of building wall surfaces; Awntech® does not supply the hardware to install your awning. You will need to purchase installation hardware at your local hardware store. We have advised you on different...
- Page 2 CONCRETE BLOCK WALLS: (1)1/2” masonry bit with a 3/8” shank, (4-5) 5/16”X3” Masonry anchor bolts, 9/16” socket. METAL BUILDINGS: (1) 2X6X8 #2YP Cut into 12” blocks for the back side of the metal, (4-5) 5/16”x4” lag bolts, (4- 5) 5/16” washer and 3/8” drill bit. Bolt through the washer, the bracket and the metal into wood blocks behind the metal.
- Page 3 STEP 2: The Top Bar (TB) must be installed first. Mount Provided Z-Brackets to surface, and insert TB into brackets. The C-Channel must be close to the wall. Before installing the TB you must make sure that there is enough space below to install BP.
- Page 4 Frame 2’-5’ Frame 6’-20’ STEP 4: Install the BP & FB structure to the mounting surface. The space between the top of the (TB) and the bottom of the (BP) is indicated on sheet 5. Please keep in mind BPM with a plastic flange at the end will not have pre-drilled holes.
- Page 5 ***all the sizes are in inches Space Space between Height between Height Model TB and incl. Projection Model TB and incl. Projection BP in Valance BP in Valance inches inches RR22 RR22-NV CR32 CR32-NV CR33 CR33-NV CR34 CR34-NV CR43 CR43-NV CR44 CR44-NV ER2442...
- Page 6 Frame 2’-5’ Frame 6’-20’ INSTALLING THE COVER STEP 6: Slide the tubing at the top of the fabric cover into the C-Channel on the top of (TB). STEP 7: Pull the remainder of fabric over the fame with the valance hanging down below the (NC) and (FB) bars.
- Page 7 •Promptly notify Awntech Corporation of any claims. •At Awntech’s request the purchaser may be required to provide a photographs or videos (if necessary) of any defective parts. The purchaser may also be required to pay a deposit until the defective parts are returned to Awntech Corporation for inspection.
- Page 8 Awntech Corporation shall have been advised of the possibility or likelihood of such potential loss or damage. In no event shall Awntech Corporation be liable for loss of profits and/or wages.
Need help?
Do you have a question about the Dallas Retro RR22 and is the answer not in the manual?
Questions and answers