
Subscribe to Our Youtube Channel
Related Manuals for Awntech Full Cassette


Summary of Contents for Awntech Full Cassette
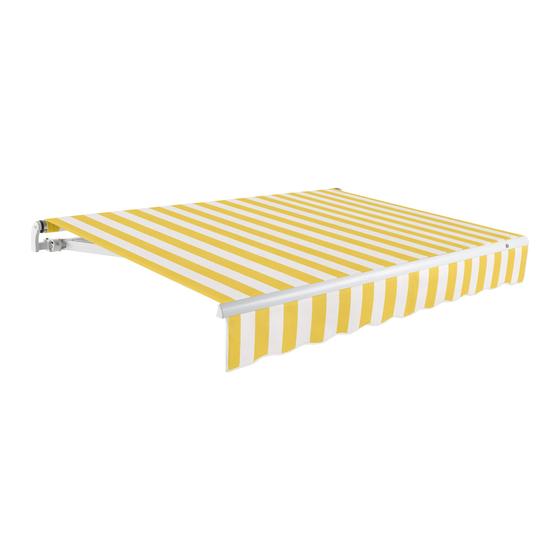
- Page 1 Version 2019-1 OWNER’S MANUL for Awntech’s retractable awning Full Cassette Model® Manual and Motorized Awning FOR TECHNICAL SUPPORT CALL US AT 800-200-5997, EAMIL AT CUSTOMERS@awntech.com or visit us at www.awntech.com Page | 1...
- Page 2 Do not leave the awning extended during extreme weather conditions such as wind, rain, snow and ice. Extreme weather conditions may cause the arms to break and can cause personal or property damage. Awntech does not take any responsibility for weather related damages and or improper use or handling.
-
Page 3: Before You Start
BEFORE YOU START: Please read instructions completely prior to attempting installation. Damages to the awning during installation are not covered by the warranty. After reading, if you feel that you still need additional installation assistance, please contact a local contractor for professional installation. - Page 4 (At this time, we have no solution for clay tile, slate, or cedar shake applications over lath.) NOTE: WE HIGHLY RECOMMEND THE PURCHASE OF A MOTOR FOR THIS APPLICATION. Awntech highly recommends that a professional roofing contractor to do the installation. It may be purchased by calling Awntech at 800-203-7049 or sending an email sales@awntech.com...
-
Page 5: Installing Brackets
INSTALLING BRACKETS PLACEMENT OF THE BRACKETS IN THE OPTIMUM LOCATION WILL GREATLY AFFECT YOUR LONG TERM HAPPINESS WITH YOUR AWNING. BELOW YOU WILL FIND A PLACMENT GUIDE. DETERMINING BRACKET PLACEMENT Please refer to the following drawings on page 6-8 to determine your particular mounting brackets needs. - Page 6 *Typical Height and Material, Varies from Structure to Structure THE FOLLWING PAGES ARE INSTRUCTION FOR THE MOST COMMON INSTALLATION APLICATIOINS APPLICATION A – INSTALLING WALL MOUNTING BRACKETS TO FLAT SIDING, STUCCO, CEMENT OR CULTURED STONE (OF ANY TYPE): Place a ladder safely on a flat, dry, stable surface at both ends of where the awning will be installed. Using a Chalk-line and string level (or a laser level) mark a horizontal line at your chosen height above the patio.
- Page 7 APPLICATION B – INSTALL WALL MOUNTING BRACKETS TO ALUMINUM, VINYL, HARDBOARD OR LAP SIDING. Place a ladder safely on a flat, dry, stable surface at both ends of where the awning will be installed. Using a chalk-line and string level (or a laser level) mark a horizontal line at your chosen height above the patio. Using a stud finder, Mark the center of all the studs along the line where the awning will be installed.
- Page 8 APPLICATION C – INSTALLING WALL MOUNTING BRACKETS TO FACIA CAUTION: BEFORE INSTALLING BRACKETS ON FASCIA ALL GUTTERING MUST BE REMOVED. AWNING CAN NOT BE INSTALLED ON THE FACIA IF THE FACIA BOARD IS LESS THAN 5” HIGH. TOP OF THE AWNING WILL STAY ABOVE THE ROOF LINE SINCE THE MOUNTING BRACKETS ARE THE LOWEST POINT OF THE AWNING.
- Page 9 IF YOU KNOW THE BRICK AND THE MORTAR OF YOUR HOME/BUILDING IS STRONG AND CAN HANDLE THE LOAD OF THE AWNING WITHOUT INSTALLIUNG THE BRACKETS TO THE STUDS THEN YOU MAY DO THE FOLLING (AWNTECH DOES NOT TAKE ANY RESPONSIBILITY FOR ANY DAMASGES TO THE PROPERTY AND ANY INJURIES TO THE PEOPLE IF THE AWNING IS PULLED OFF FROM THE WALL) For brick surfaces: use a 5/16”...
- Page 10 APPLICATION F – INSTALLING WALL MOUNTING BRACKETS TO CONCRETE BLOCK WALLS: Place a ladder safely on a flat, dry, stable surface at both ends of where the awning will be installed. Using a chalk-line and string level (or a laser level) mark a horizontal line, with the exterior wall surface at least 6” from the wall.
- Page 11 APPLICATION G – INSTALLATION ROOF MOUNTING BRACKET TO ROOF: (ROOF BRACKETS MUST BE PURCHASED SEPARATELY) WE HIGHLY REQUME THAT YOU HIRE A PROFESSIONAL ROOFING CONTRACTOR TO INSTALL THE ROOF MOUNT BRACKETS AND AWNING. IMPROPER INSTALLATION CAN CAUSE INJURY TO THE INSTALLER AND DAMAGER THE PROPERTY. Place a ladder safely on a flat, dry, stable surface at both ends of where the awning will be installed.
- Page 12 INSTALLING THE AWNING ONTO THE BRACKETS Place a ladder safely on a flat, dry, stable surface at both ends of where the awning will be installed. Assure that the awning is in the closed position and the arms are tied closed. This will prevent the unit form inadvertently opening while being lifted into the brackets.
- Page 13 REMOTE CONTROL MODEL – DC90 FOR AT45MR The Awntech tubular motor operates at a maximum distance of 150 Feet. Technical Specification: ▪ ▪ Power Supply 12V Battery ▪ ▪ Protection index IP30 ▪ ▪ Working temp. 23 degree F to 160 degree F Beauty-Mark®...
- Page 14 Turn on the power source. Within six seconds, press the “Program” (P2) button twice (located in the battery compartment of the remote) and then press the “UP” Button once. If the direction did not change then do the following: Turn off the power source of the awning Turn on the power source.
- Page 15 LEFT MOTOR MOUNT (when you face the house): If the awning stops from closing completely: 1. Identify the Red Limit Control (close to the wall) 2. If the awning stops from retracting completely, then turn the control “COUNTER CLOCK WISE” direction (one turn at a time) until it retracts completely.
- Page 16 RIGHT MOTOR MOUNT (when you face the house): If the awning stops from closing completely: 1. Identify the White Limit Control (away from the wall) 2. If the awning stops from retracting completely, then turn the limit control “CLOCK WISE” direction (one turn at a time) unit tit retracts completely.
- Page 17 ALWAYS KEEP YOUR AWNING RETRACTED WHEN NOT IN USE, ALWAYS RETRACT YOUR AWNING DURING RAIN, ICE, SLEET, SHOW, HIGH WIND AND GUSTY CONDITIONS. FAILURE TO DO SO CAN DAMAGE YOUR AWNING. ANY DAMAGE RESULTING FROM FAILURE TO HEED THIS WARNING WILL NOT BE COVERED UNDER YOUR AWNTECH CONDITIONAL WARRANTY.
-
Page 18: Cleaning & Caring
CLEANING & CARING NORMAL WEAR & TEAR: Certain regions of the country are extremely hard on awnings of any kind. If you live in these areas, (High maintenance areas: FL, TX, NM, AZ, NV or high altitude areas) you probably already know how the sun can take a toll. - Page 19 (a) Should the purchaser promptly notify Awntech Corporation of such defects within one year (12 months) from the date of the original purchase, the defective component will be replaced at no charge. Awntech reserves the right to ask for the defective part to be returned and/or photographs/videos of the defective part.
- Page 20 DAMAGE DUE TO IMPROPER ANCHORING, STRONG WINDS, RAIN SNOW OR ICE Awntech ® Corporation does not guarantee its retractable awnings against damages that is weather related (such as strong winds, rain, snow or ice) under any circumstances. These awnings are designed to protect the customer from the sun and UV rays. They are not designed to hold snow loads, ice loads, water pooling loads or loads from debris such as leave and falling branches.
- Page 21 Running Time From Full Charge 6 Minutes Motor Location Left (default) or Right Adjustable Pitch # of Pitch Settings 0-15 Degree Max. degrees Depending on size Weight 80-200 LBS 95-205 LBS Depends on Size Depends on Size Motor Specifications MANUAL MOTORIZED Voltage 110 V...
Need help?
Do you have a question about the Full Cassette and is the answer not in the manual?
Questions and answers
If I install a 2x6 full width header nailed to all studs, can I then attach brackets between studs if necessary.
No, brackets should not be attached between studs. They must be secured directly into the center of studs or rafters to support the weight and torque of the awning properly. Attaching to a 2x6 header alone, even if nailed to all studs, does not meet the requirement for anchoring into studs or rafters.
This answer is automatically generated