Table of Contents
Advertisement
Quick Links
OWNER'S MANUAL & INSTALLATION INSTRUCTIONS
WARNING: Adult Assembly Required
WARNING: Assembly Kit Contains Parts With Sharp Points, Sharp Edges, and Small Parts That Can Present Choking Hazards
to Children.
WARNING: Components Are Packed In Plastic Bags that are a Suffocation Hazard.
NOTE: Please inspect the parts for damage during shipping and/or for any missing items. If you suspect
that there may be damage or a shortage, contact us and we will send replacement parts if needed. At
this time, visualize how the components fit together and make sure that you have identified the various
Models with Valance:
RS22, CS33, CS3618
OUR AWNINGS ARE DESIGNED 4.5" WIDER THAN STANDARD WINDOW/DOOR OPENINGS SO THEY ANCHOR TO THE
STUDS AROUND THE WINDOW OR DOOR. EXAMPLE: RR22-5 IS FOR 5'-0" WIDE WINDOW. IT MEASURES 64.5"
WIDE, 31" TALL, (24" PLUS 7" VALANCE AND 24" DEEP (PROJECTION)
There is a variety of building wall surfaces; Awntech does not supply the hardware to install your awning. You will
need to purchase installation hardware at your local hardware store. We have advised you on different surface
applications below:
CONCRETE BLOCK WALLS: (1)1/2" masonry bit with a 3/8" shank, (4-5) 5/16"X3" Masonry anchor bolts, 9/16"
socket.
METAL BUILDINGS: (1) 2X6X8 #2YP Cut into 12" blocks for the back side of the metal, (4-5) 5/16"x4" lag bolts, (4-
5) 5/16" washer and 3/8" drill bit. Bolt through the washer, the bracket and the metal into wood blocks behind the
metal.
ANY TYPE OF SIDING: (4-5) ¼"x4" toggle bolts, (4-5) ¼" washers, (1) Flat head screwdriver, (1) ½" drill bit (or if you
hit a stud) ; (5-8) 5/16"X4" lag bolts, (4-5) 5/16" washers, (1) 3/16" drill bit and a 9/16" socket.
CONCRETE, BRICK OR STONE: (1) ½" Masonry bit with a 3/8" shank, (4-5) 5/16"x3" masonry anchor bolts, (4)
5/16"X4" bushings, 9/16" sockets. You will also need a roll of weather stripping.
Stucco: (4-5) ¼"X4" toggle bolts, (4-5) ¼" washers, (1) flat head screwdriver, (1) ½" drill bit (or if you hit a stud): (4)
5/16"X4" lag bolts, (4-5) 5/16" washers, (1) 3/16" drill bit and a 9/16" socket.
1
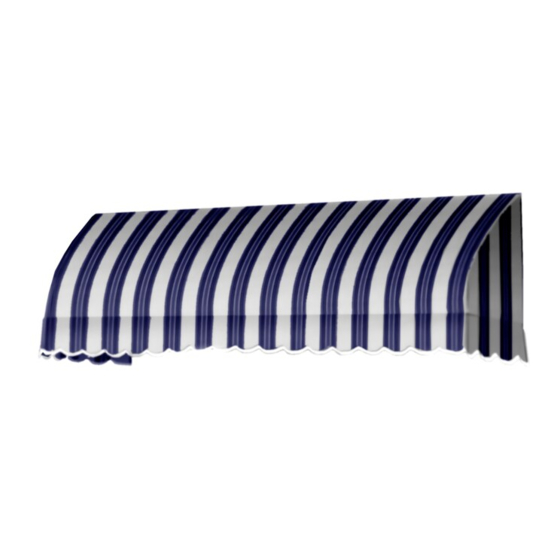
Savannah Style Awning
Awning
Width in
Awning
size
inches
3
40.5
4
52.5
5
64.5
6
76.5
7
88.5
8
100.5
9
112.5
10
124.5
11
136.5
Width to
Size
Inches
12
148.5
13
160.5
14
172.5
15
184.5
16
196.5
17
208.5
18
220.5
19
232.5
20
244.5
Advertisement
Table of Contents

Summary of Contents for Awntech Savannah
- Page 1 WIDE, 31” TALL, (24” PLUS 7” VALANCE AND 24” DEEP (PROJECTION) There is a variety of building wall surfaces; Awntech does not supply the hardware to install your awning. You will need to purchase installation hardware at your local hardware store. We have advised you on different surface applications below: CONCRETE BLOCK WALLS: (1)1/2”...
- Page 2 INSPECTED IT FOR YOU IN THE FACTORY. FACTORY. Savannah Savannah should be assembled on the ground STEP 1: Separate all of the parts, so they will will be easy to assemble. Please refer to Parts chart for quantities quantities for each part. (pg. 2) Step 2: Connect Top Bar (TB) to the (2) two two back bars (B).
- Page 3 Step 3: Connect Both Projection Bars (P) in the other ends of the Back Bars (B). The Velcro will face outwards. Frame 2’-4’ Frame 5’-24’ Step 4: Connect the Front Bar (FB) tot eh projection Bars (P). Velcro will be facing out. Secure with Self tapping screws. Frame 2’-4’...
- Page 4 Step 6: Attach CSB secure with self-tapping screws. The frame for the Savannah is complete Frame 2’-4’ Frame 5’-24’ INSTALLING THE COVER STEP 7: Slide the tubing at the top of the fabric cover into the C-Channel on the top of (TB).
- Page 5 STEP 9: Once you are satisfied with the position of the cover, Pull the tabs snugly and attach them to the pre-installed Velcro tape on the bars. MOUNTING THE AWNING STEP 10: Place the awning on in desired location. From the inside of the awning make a mark on the wall where the awning touches.
- Page 6 Step 13: Install weather Stripping on the awning outside parameter. Place the awning back on the brackets. Drill two holes for self-tapping screws thru the (TP) use Z-Brackets for guide. Secure with self-tapping screws. CLEANING & CARE NORMAL WEAR & TEAR: Certain regions of the country are extremely hard on awnings of any kind.


Need help?
Do you have a question about the Savannah and is the answer not in the manual?
Questions and answers