Awntech RN22 Owner's Manual & Installation Instructions
New yorker style awning 5'-20
Hide thumbs
Also See for RN22:
- Owner's manual & installation instructions (9 pages) ,
- Owner's manual & installation instructions (9 pages)
Advertisement
Quick Links
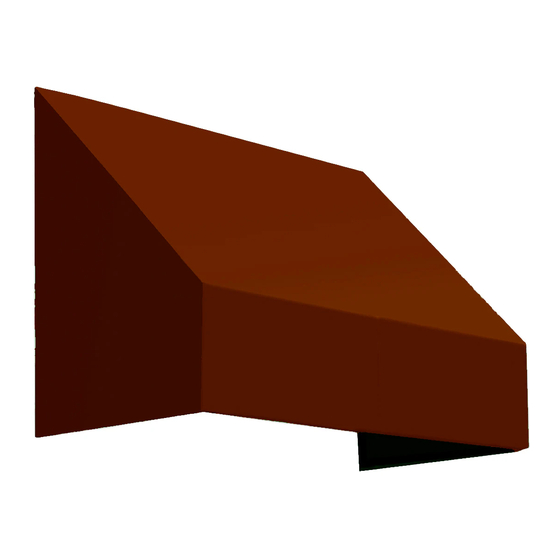
New Yorker Style Awning (5'-20)
OWNER'S MANUAL & INSTALLATION INSTRUCTIONS
⚠
Warning: Adult Assembly Required; Kit Contains Parts with Sharp Points and Edges, and Components
are Packed in Plastic Bags That Can Present a Choking Hazard to Children.
NOTE: Please inspect the parts for damage from shipping and/or any missing parts. If you suspect there
may be damage or a shortage, contact us within 5-days of delivery to report shipping damage or within
30-days of delivery to report missing or incorrect parts for a warranty replacement at no cost and we
will send replacement parts if needed. At this time, visualize how the components fit together and
determine if you have identified all necessary parts.
Models with Valance: RN22, EN23, EN24, CN32, CN33, CN34, CN43, CN44, EN2442, EN1836, EN1030
Awning Size
3
4
5
6
7
8
9
10
11
Due to the variety of construction materials, building surfaces, and mounting applications, Awntech
does not supply the hardware to install your awning. You will need to consult a contractor or purchase
installation hardware from your local hardware store. We advise you on different surface applications as
follows:
CONCRETE/STUCCO: 1/4" x 3" Masonry anchor bolts or Tapcon screws with washers.
WOOD/SIDING: 1/4" x 3" Lag screws/bolts plus nuts and washers.
OTHER MATERIALS: CONSULT A PROFESSIONAL
Page | 1
Width in Inches
40.5
52.5
64.5
76.5
88.5
100.5
112.5
124.5
136.5
Awning Size
12
13
14
15
16
17
18
19
20
⚠
Width in Inches
148.5
160.5
172.5
184.5
196.5
208.5
220.5
232.5
244.5
Advertisement

Related Manuals for Awntech RN22


Summary of Contents for Awntech RN22
- Page 1 At this time, visualize how the components fit together and determine if you have identified all necessary parts. Models with Valance: RN22, EN23, EN24, CN32, CN33, CN34, CN43, CN44, EN2442, EN1836, EN1030 Awning Size...
- Page 2 Before you begin, take inventory of all parts included by comparing the contents of your package to the parts list corresponding to the size of awning you received. Each piece should be identifiable by a label. Awning Size in Feet 8-10 11-12 13-18...
- Page 3 ASSEMBLY NOTE: All awning sizes over 6’ wide come in multiple sections. Example: Size 6’ Top Bar (TB) consists of TB1 & TB2. Front Bar (FB) is fully pre-assembled on 3’-5’ New Yorker awnings, 2 pre-assembled sections on 6’-10’ awnings and 3 pre-assembled sections on 11’-20’ awnings. Step 1) Using a Rubber Hammer, attach Projection Bars (PB) to bottom and Projection Bar Supports (PBS) to top of each side of Front Bar (FB) with Velcro on FB and PB facing upwards.
- Page 4 Step 3) Using a Rubber Hammer, attach Top Bar (TB) to Back Bars (BB). NOTE: the C-Channel across the top of the Top Bar (TB) should be oriented towards the back/wall side. Step 4) Orient awning frame on its back with Front Bar up towards the sky. Using a Power Drill and self- tapping screws, locate the pre-drilled holes and attach Cover Supports (CS) to Top Bar (TB).
- Page 5 Step 5) Orient awning frame flat on its bottom with Front Bar forward. Using a Power Drill and self- tapping screws, attach Cover Supports (CS) to Front Bar (FB). Attach Wall Support (WS) to top level of back side of Front Bar (FB). There are no pre-drilled holes for the Wall Supports (WS). The New Yorker frame is now complete.
-
Page 6: Installing The Cover
INSTALLING THE COVER Step 7) Insert tubing of fabric into C-Channel on Top Bar (TB) and slide cover across the top into correct position. Wrap fabric around frame tightly and secure to Velcro. Page | 6... -
Page 7: Mounting The Awning
Model Space Between Height w/ Projection Model Space Between Height w/ Projection TB and P Valance TB and P Valance RN22 NY1618 CN32 NY1624 CN33 NY1630 CN34 NY1818 CN43 NY1824 CN44 NY1830 EN2442... -
Page 8: Warranty
Corporation of such defects within one year (12 months) from the date of the original purchase, the defective component will be replaced at no charge to the purchaser. Awntech reserves the right to ask for the defective part to be returned and/or photos/videos of the defective part. (b) After one year but within five years (60 months) from the date of the original purchase, a defective component will be replaced upon the purchaser's payment of 1/60th of the full retail cost of the component for each month of use prior to the claim. - Page 9 RETURN QUALIFICATION: You can only return a product if it is defective upon arrival. If you simply do not like the product or if you did not measure correctly, you will only be qualified for a merchandise credit and you will be required to pay for shipping the product back to Awntech in re-stockable condition.
- Page 10 CLEANING CHART FOR TYPICAL AWNING STAINS: CLEANING & CARE: Awnings should be cleaned at least once a year in low maintenance areas or twice a year in high maintenance areas (see high maintenance areas above). Cleaning consists of brushing off debris with broom, brushing on a non-detergent cleaning compound (such as a solution of 1-part vinegar to 1-part water), allowing the awnings to sit for 20 minutes, and then rinsing.
Need help?
Do you have a question about the RN22 and is the answer not in the manual?
Questions and answers