Advertisement
Quick Links
OWNER'S MANUAL & INSTALLATION INSTRUCTIONS
WARNING: Adult Assembly Required
WARNING: Assembly Kit Contains Parts With Sharp Points, Sharp Edges, and Small Parts That Can
Present Choking Hazards to Children.
WARNING: Components Are Packed In Plastic Bags that are a Suffocation Hazard.
NOTE: Please inspect the parts for damage during shipping and/or for any missing items. If you suspect that there
may be damage or a shortage, contact us and we will send replacement parts if needed. At this time, visualize how
the components fit together and make sure that you have identified the various parts.
Models with Valance:
RB3, RB4, RB5, RB6
OUR AWNINGS ARE DESIGNED 4.5" WIDER THAN STANDARD WINDOW/DOOR OPENINGS SO THEY ANCHOR TO THE
STUDS AROUND THE WINDOW OR DOOR. EXAMPLE: RR22-5 IS FOR 5'-0" WIDE WINDOW. IT MEASURES 64.5"
WIDE, 31" TALL, (24" PLUS 7" VALANCE AND 24" DEEP (PROJECTION)
There is a variety of building wall surfaces; Awntech does not supply the hardware to install your awning. You will
need to purchase installation hardware at your local hardware store. We have advised you on different surface
applications below:
CONCRETE BLOCK WALLS: 3/8" x 3" Masonry anchor bolts or Tapcon Screws plus Washers (1 per bracket)
WOOD OR SIDING: 3/8" x 3" Lag Screws plus Washers (1 per bracket)
OTHER STRUCTURES: CONSULT A PROFESSIONALPARTS:
Other parts: Z-Brackets, Self-tapping Screws
1
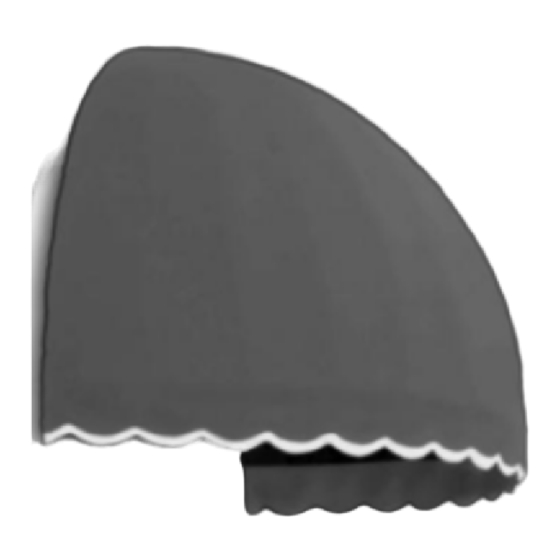
Bostonian Style Awning
Model
Width
RB3
40.5
RB4
52.5
RB5
64.5
RB6
76.5
Part No.
QTY.
PLATE
1
R1
1
R2
1
R3
1
R4
1
R5
1
R6
1
R7
1
LPR
1
RPR
1
Height w/
Projection
valance
27.25
20.5
33.25
26.25
39.25
32.25
45.25
38.25
Description
PLATE
RIB 1
RIB 2
RIB 3
RIB 4
RIB 5
RIB 6
RIB 7
LEFT PROJECTION BAR
RIGHT PROJECTION BAR
Advertisement

Related Manuals for Awntech RB3


Summary of Contents for Awntech RB3
- Page 1 WIDE, 31” TALL, (24” PLUS 7” VALANCE AND 24” DEEP (PROJECTION) There is a variety of building wall surfaces; Awntech does not supply the hardware to install your awning. You will need to purchase installation hardware at your local hardware store. We have advised you on different surface applications below: CONCRETE BLOCK WALLS: 3/8”...
- Page 2 Tools Required: Electric Impact Drill, Installation Anchors (as per your wall type), Tape Measure, Safety Glasses, 4’ Level, a Safe Ladder and #2 pencils. YOU MAY ALSO NEED AN ASSISTANT FOR LARGER AWNINGS. IT DEPENDS ON THE SIZE AND WEIGHT OF THE AWNING.
- Page 3 Step 3: Connect Both R1, R7 to RPR, LPR. Step 4: Connect the Plate to the top of the structure, secure it with provided Bolts and Nuts. Requires 7/16” wrench.
- Page 4 Step 5: Attach R2, R3, R4, R5, and R6 to top plate using provided bolts. Use self tapping screws to secure the ribs to LPR and RPR. The frame for the Bostonian is complete...
-
Page 5: Installing The Cover
INSTALLING THE COVER STEP 6: Fit the fabric over the fame with the valance hanging down below the curved bars. STEP 7: Once you are satisfied with the position of the cover, Pull the tabs snugly and attach them to the pre- installed Velcro tape on the bars. -
Page 6: Mounting The Awning
MOUNTING THE AWNING STEP 8: Place the awning on in desired location. From the inside of the awning make a mark on the wall where the awning touches. (See the chart below for the height measurements) ***all the sizes are in inches Space Height incl Model... - Page 7 NORMAL WEAR & TEAR: The weather in certain regions of the country contributes to wear and tear of the awnings. If you live in these areas (High maintenance areas: FL, TX, NM, AZ, NV or high-altitude areas) weather conditions (including sun) can take a toll.
Need help?
Do you have a question about the RB3 and is the answer not in the manual?
Questions and answers