Table of Contents
Advertisement
Advertisement
Table of Contents

Subscribe to Our Youtube Channel
Related Manuals for Ubert Top Line


Summary of Contents for Ubert Top Line
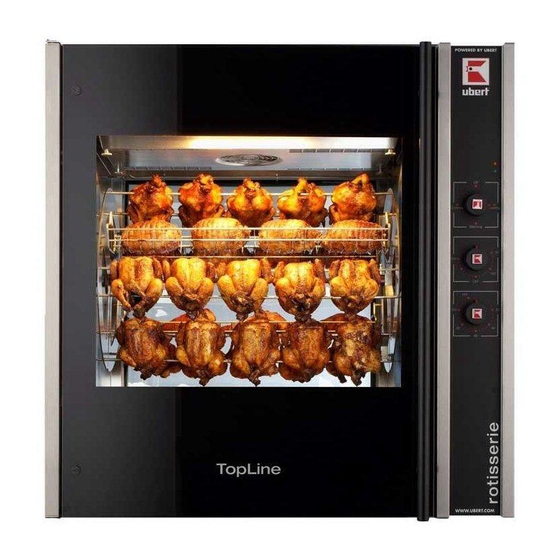
- Page 1 User Manual Rotisseries „Top Line“ RT - Series...
-
Page 3: Table Of Contents
Contents 1 Contents Contents ........................... 3 Important References........................ 4 Fundamental Safety Notes ....................4 Warranty and Liabilities ...................... 5 Symbols and Notes ......................5 Copyright ..........................5 Special safety references ....................6 Introduction ..........................8 Technical details ......................... 8 Installation and starting the operation ..................13 Unwrapping ........................ -
Page 4: Important References
The TopLine Rotisseries are built exclusively for the preparation of food only. Any other use of the unit is only allowed after consulting UBERT GASTROTECHNIK GMBH. Damages which result out of wrong use UBERT GASTROTECHNIK GMBH cannot be held responsible. Part of the due use is also: The consideration of all references of the operating manual and The observance of neccessary maintenance and service. -
Page 5: Warranty And Liabilities
Help to use all functions at your unit optimally 2.4 Copyright The copyright on this operating manual remains with the company UBERT GASTROTECHNIK GMBH. This operating manual is intended only for the operator and his staff. It contains instructions and references which neither completely nor partially is:... -
Page 6: Special Safety References
Important References 2.5 Special safety references 2.5.1 Safety devices Before operating the unit all protective devices as well as all removable parts must be installed correctly and be fully workable. Protective devices may only be removed: after stand still and Prevention of unintentional restart. - Page 7 Do not perform any changes, extensions or conversions to the unit without the manufacturer’s permission, especially welding work at supporting parts. For all conversions a written permission of the company UBERT GASTROTECHNIK GMBH is necessary. Change all parts of the unit that are in improper condition.
-
Page 8: Introduction
Introduction 3 Introduction 3.1 Technical details 3.1.1 Dimensions [mm] RT403S / RT 403 – RT 406: RT403S DE / RT403 DE – RT406 DE: Printed: 01/2018 Subject to change! TopLineUserManual.docx... - Page 9 Introduction RT407 - RT408: RT407 DE – RT408 DE: Printed: 01/2018 Subject to change! TopLineUserManual.docx...
- Page 10 Introduction RT410 - RT412: RT410 DE – RT412 DE: Printed: 01/2018 Subject to change! TopLineUserManual.docx...
- Page 11 Introduction RT414 - RT 416: RT414 DE – RT416 DE: Printed: 01/2018 Subject to change! TopLineUserManual.docx...
- Page 12 Introduction 3.1.2 Weight Type weight (in kg) RT403S [DE] ca. 92 RT 403- RT 406 [DE] ca. 92 RT 407 - RT 408 [DE] ca. 169 RT 410 - RT 412 [DE] ca. 184 RT 414 - RT 416 [DE] ca.
-
Page 13: Installation And Starting The Operation
Installation and starting the operation 4 Installation and starting the operation In general all Rotisseries „Top Line“ will be packed for safe transport after the final control in order to reach you properly. Nevertheless we ask you to have a look at the machine on arrival to check on any possible transport damages. -
Page 14: Preparation Of Operation / Starting Up
Installation and starting the operation 4.4 Preparation of Operation / Starting up Before you can operate the TopLine Rotisserie you have to clean the unit and all removable parts (e. g. spits, discs etc) carefully with a grease solvent detergent. Afterwards you have to dry all surfaces. -
Page 15: Operation
Operation 5 Operation Following you will find explanation and location of all components and their function for the use of the TopLine Rotisserie. 5.1 Operation of rotisseries equipped with manual controls 5.1.1 Operating panel Yellow Pilot Light: Indicates heating elements are running. Green Pilot Light: Indicates rotisserie is switched on. -
Page 16: Operation Of Rotisseries Equipped With Digital Electronic
Operation 5.2 Operation of rotisseries equipped with digital electronic 5.2.1 Operating panel Electronic Controller The controller is used to automatically control the grilling time period, grilling temperature and grilling end time. Function Switch has 4 positons: COOKING – Cooks the products. WARMING –... - Page 17 Operation 5.2.2 Explanation of the digital electronic Multi-Function-Display (upper 7-segment): Temperature-Display (middle 7-segment) Time-Display (lower 7-segment) Temperature Button Up Button Down Button Core Temperature Button Programming Button Start/Stop Button Time Button Start delay LED Time LED Core Temperature LED Temperature LED Spit rotation Button Multi-Function-Display (upper 7-segment) Shows program number.
- Page 18 Operation Time-Display (lower 7-segment) Shows time / start delay at operation level. Shows parameter data at programming level. If no program is running and a program is selected: Total set time of the selected program. Push to change start delay. ( starts to flash);...
- Page 19 Operation Push to decrease settings. At programming level: Push to decrease parameter data. Core Temperature Button At any time: Push to toggle between oven temperature and core temperature probe shown in the Temperature-Display Programming Button At operation level: Push for app. 5 seconds during stand-by to enter the programming level. At programming level: Push to enter the selected parameter data and change to the next parameter.
- Page 20 Flashes while the temperature can be changed by pushing up/down button 5.2.3 Operation via digital electronic To operate the rotisserie (Top Line or CONVEX) via the Digital Electronic (DE) turn the bottom knob to AUTO and (on the Top Line Rotisserie additionally) the upper knob to COOKING.
- Page 21 Operation 5.2.4 Programming the digital electronic To enter the programming level, push and hold the Programming Button until “COdE” is shown in the Temperature Display and “100” is shown in the Time Display . Now release the Programming Button . Use the up/down button to adjust to ‘555’...
-
Page 22: Component Function And Location
Operation 5.2.5 Manual Operation Turn the automatic/manual switch to MANUAL. Turn function switch to cooking. Load the spits. Note! The Loading Switch or the Function Switch can be used to load spits as outlined below. Note! The model RT 403 – RT 405 with an electronic control is not equipped with a Loading Switch. -
Page 23: Rotisserie Assembly For Operation
Operation Drip Pan is used to catch drippings from the products being grilled. The drip pan slides out of the unit. Shaft and Disk Assembly Digital Electronic Automatic/Manual Switch Function Switch Temperature Control Drip Pan Spit 5.4 Rotisserie assembly for operation Slide drip pan into bottom of unit. - Page 24 Operation Note! The configuration of holes in diskes are different. Disk with two holes near the center is assembled on the left hand side and disk with one hole near center is assembled on the right hand side. Tighten nuts against disks. Flat in disk mounts on Holes...
-
Page 25: Product Mounting And Loading
Operation 5.4.2.2 Double Spits The pointed end of the spits can be assembled into either right or left disk. If you are right handed it may be easier to install the pointed end of the spit into the disk on the left as your stronger right hand will be holding the weight of the product while your left hand positions the spit into the disk. - Page 26 Operation 5.5.2 Double spits for mounting chickens vertically Lock chicken wings down by tucking under the legs When piercing the chicken hold the spit with the support angle down and the chicken breast Lock the wings down by tucking under the legs and then pierce just below wing with spit and pierce leg just under the bone as shown in the picture below.
-
Page 27: Maintenance
Maintenance 6 Maintenance Following we will show you some advices concerning maintenance, care, trouble shooting and service for your Rotisserie „Top Line“. 6.1 Cleaning and care 6.1.1 Safety advices Before you start to clean and care switch off the appliance and disconnect it from the mains. -
Page 28: Trouble Shooting
Easily removable without tools for separate cleaning. 6.2 Trouble shooting If your Rotisserie „Top Line“ does not work satisfactorily we would like to give a first help with the following check list. Only after checking these points you should contact:... - Page 29 Maintenance Check list of your Rotisserie „Top Line“: Failure Possible cause Remedy 1. Rotisserie does not Electrical supply is interrupted Check the fuses! operate Unpluged? Fuse defect Call your local electrician! 2. Fan motor does not mechanic hindrances Switch off the unit, remove the...
-
Page 30: Wiring Diagrams
Maintenance 6.3 Wiring Diagrams RT 403 S RT 403 S DE Printed: 01/2018 Subject to change! TopLineUserManual.docx... - Page 31 Maintenance RT403 - RT406 RT 403 DE - RT 406 DE Printed: 01/2018 Subject to change! TopLineUserManual.docx...
- Page 32 Maintenance RT407 / RT408 RT407 DE / RT408 DE Printed: 01/2018 Subject to change! TopLineUserManual.docx...
-
Page 33: Spare Parts
Maintenance 6.4 Spare Parts Defect parts are to be replaced only by original spare parts of UBERT GASTROTECHNIK GMBH; the replacement is to be carried out only by their service staff or by your authorized service companies. If you do not observe this note or in... - Page 34 Maintenance RT403 DE - RT406 DE (see detail for special parts of manual controlled RT403 - RT406): Printed: 01/2018 Subject to change! TopLineUserManual.docx...
- Page 35 Maintenance RT407 DE - RT408 DE (see detail for special parts of manual controlled RT407 - RT408): Printed: 01/2018 Subject to change! TopLineUserManual.docx...
- Page 36 230V 343140 fan wheel ø150 344110 blower motor 344146 knurled nut for fan cover assy 344119 knurled nut, closed top M6 344159 display UBERT 360161 legs 361101 knob 361311 door handle 370115 capacitor 3µF 380118 gear motor...
- Page 37 230V 343140 fan wheel ø150 344110 blower motor 344146 knurled nut for fan cover assy 344119 knurled nut, closed top M6 344159 display UBERT 360161 legs 361101 knob 361311 door handle 370115 capacitor 3µF 380118 gear motor...
- Page 38 230V 342262 aux. contact 342403 contactor 342412 main heating element 240V 4,5kW 343113 fan assy 344103 knurled nut for fan cover assy 344119 display UBERT 360165 legs 361102 knob 361311 door handle 370200 gear motor 240V 380124 capacitor 4µF 380129 capacitor 240V 5µF...
- Page 39 Maintenance 6.4.3 Replacement of Quartz Heater Lamps Warning: Remove all electrical power supplied to the unit by unplugging the power cord or electrical shock could result. If the unit is permanently wired, the circuit breaker must be used to disconnect power. 1.
-
Page 40: Declaration Of Conformity
Maintenance 6.5 Declaration of Conformity Printed: 01/2018 Subject to change! TopLineUserManual.docx...
Need help?
Do you have a question about the Top Line and is the answer not in the manual?
Questions and answers