KDK M56XG Operating And Installation Instructions
Hide thumbs
Also See for M56XG:
- Operating and installation instructions (17 pages) ,
- Operating and installation instructions (16 pages)
Advertisement
Quick Links
Thank you for purchasing KDK Ceiling Fan.
Gracias por comprar un Ventilador de Techo KDK.
Before operating this product, please read the instructions carefully, and keep this manual
for future reference.
Antes de poner en marcha este producto, lea atentamente las instrucciones y guarde el
manual para consultarlo en el futuro.
.ﻗﺒﻞ ﺗﺸﻐﻴﻞ ﻫﺬﻩ ﺍﻟﻤﺮﻭﺣﺔ، ﻳﺮﺟﻰ ﻗﺮﺍﺀﺓ ﺍﻟﺘﻌﻠﻴﻤﺎﺕ ﺑﻌﻨﺎﻳﺔ، ﻭﺃﺣﻔﻆ ﻫﺬﺍ ﺍﻟﻜﺘﻴ ﹼ ﺐ ﻟﻠﺮﺟﻮﻉ ﺇﻟﻴﻪ ﻓﻲ ﺍﻟﻤﺴﺘﻘﺒﻞ
Contents / Contenido /
Safety Precautions / Precauciones de Seguridad /
Supplied Parts / Partes Suministradas /
How To Assemble / Cómo Montarlo /
How To Use / Cómo Utilizarlo /
Maintenance / Mantenimiento /
Product Specification / Especificación de Producto /
Operating And Installation Instructions
Instrucciones de Instalación y Uso
ﺍﻟﻤﺤﺘﻮﻳﺎﺕ
ﻛﻴﻔﻴﺔ ﺍﻻﺳﺘﻌﻤﺎﻝ
ﺍﻟﺼﻴﺎﻧﺔ
ﺗﻌﻠﻴﻤﺎﺕ ﺍﻟﺘﺮﻛﻴﺐ ﻭﺍﻟﺘﺸﻐﻴﻞ
ﺍﺣﺘﻴﺎﻃﺎﺕ ﺍﻵﻣﺎﻥ
ﺍﻻﺟﺰﺍﺀ ﺍﻟﻤﺮﻓﻘﺔ
ﻛﻴﻔﻴﺔ ﺍﻟﺘﺠﻤﻴﻊ
ﻣﻮﺍﺻﻔﺎﺕ ﺍﻟﻤﺮﻭﺣﺔ
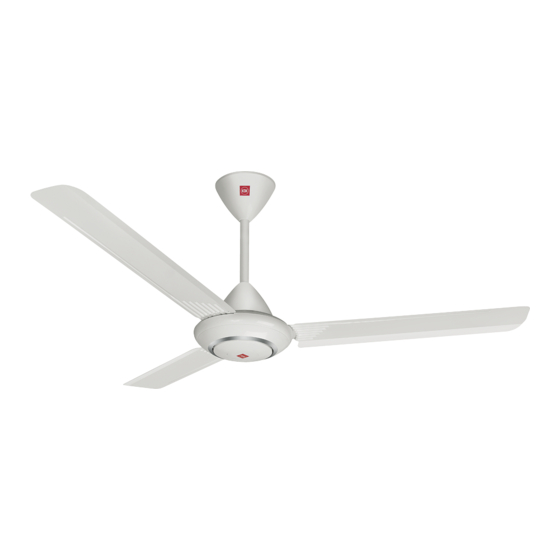
Ceiling Fan
Ventilador
de techo
ﻣﺮﻭﺣﺔ ﺳﻘﻒ
Model Number
Número del Modelo
ﺭﻗﻢ ﺍﻟﻤﻮﺩﻳﻞ
M56XG
M48XG
M60XG
M56LG
M56XGMN
M48XGMN
ﺷﻜﺮﺍ ﻟﻜﻢ ﻟﺸﺮﺍﺀ ﻣﺮﻭﺣﺔ ﺍﻟﺴﻘﻒ
.KDK
Page / Página /
ﺍﻟﺼﻔﺤﺔ
2
5
5
15
15
16
Advertisement

Related Manuals for KDK M56XG


Summary of Contents for KDK M56XG
- Page 1 M56LG M56XGMN M48XGMN Thank you for purchasing KDK Ceiling Fan. Gracias por comprar un Ventilador de Techo KDK. ﺷﻜﺮﺍ ﻟﻜﻢ ﻟﺸﺮﺍﺀ ﻣﺮﻭﺣﺔ ﺍﻟﺴﻘﻒ .KDK Before operating this product, please read the instructions carefully, and keep this manual for future reference.
- Page 2 Safety Precautions ﺍﺣﺘﻴﺎﻃﺎﺕ ﺍﻵﻣﺎﻥ Partes Suministradas To avoid the possibility of causing injury to users or damage to properties, please follow all the explanations written below. Para evitar la posibilidad de causar lesiones a usuarios o daños a propiedades, por favor siga todas las indicaciones que aparecen escritas abajo. .ﻟﺘﺠ...
- Page 3 ﺗﺤﺬﻳﺮ WARNING / ATENCIÓN / Switch off power supply and wait until the Blade is fully Do not dismantle the Ceiling Fan unless stated by this Avoid damage wire during installation eg. Deform due static, before cleaning or doing any maintenance jobs. manual.
- Page 4 ﺗﻨﺒﻴﻪ CAUTION / PRECAUCIÓN / This appliance is not intended for use by persons (including children) with reduced physical, sensory or mental capabilities, or lack of experience and knowledge, unless they have been given supervision or instruction concerning use of the appliance by a person responsible for their safety. Children should be supervised to ensure that they do not play with the appliance.
- Page 5 ﺍﻟﻘ ﺒ ﹼ ﺔ ﺍﻟﻌﻠﻮﻳﺔ 6. Speed Regulator / Regulador de Velocidad ﻣﻨﻈﹼ ﻢ ﺍﻟﺴﺮﻋﺔ 7. Part Set / Conjunto de Piezas ﻣﺠﻤﻮﻋﺔ ﺍﻻﺟﺰﺍﺀ M56XG, M48XG, M60XG M56LG ﻣﺠﻤﻮﻋﺔ ﺍﻟﺒﻜﺮﺓ Pulley Set / Conjunto de Polea / ﻏﻄﺎﺀ Pulley Set /...
- Page 6 Insert Lower Canopy to the Pipe. Then insert Upper Canopy (with logo brand) to the Pipe. Introduzca la Cubierta Inferior a la Tubería. Después introduzca la Cubierta Superior (con marca de logo) a la Tubería. .ﺍﺩﺧﻞ ﺍﻟﻘ ﺒ ﹼ ﺔ ﺍﻟﺴﻔﻠﻴﺔ ﻋﻠﻰ ﺍﻷﻧﺒﻮﺏ. ﺑﻌﺪ ﺫﻟﻚ، ﺍﺩﺧﻞ ﺍﻟﻘ ﺒ ﹼ ﺔ ﺍﻟﻌﻠﻮﻳﺔ )ﻣﻊ ﺍﻟﻌﻼﻣﺔ ﺍﻟﺘﺠﺎﺭﻳﺔ( ﻋﻠﻰ ﺍﻷﻧﺒﻮﺏ Upper Canopy (with logo brand) / Do not screw Lower and Upper Canopy Screws / Cubierta Superior (con marca de logo) /...
- Page 7 First, insert the Cap to the Motor Shaft. Then, fi x the Pipe to the Motor Shaft as shown. Ensure the Switch Lever press the Switch. Primero, inserte la Tapa al Eje del Motor. Después, fi je el Tubo al Eje del Motor se muestra. Para asegurar la Palanca del Interruptor pulse el Interruptor.
- Page 8 ﺗﺤﺬﻳﺮ WARNING / ATENCIÓN / Ensure Pipe has been fully tightened to Motor Shaft. (Bolt tightening torque is 800~1200N•cm). And, Cotter Pin must be fixed into Bolt hole and bent. Can cause injury if Ceiling Fan drops. Asegúrese de que la Tubería está totalmente apretada al Eje del Motor. (Par de apriete del perno es 800~1200N•cm).
- Page 9 Assemble Blade Assembly Set To Motor Assembly Monte el Conjunto de Montaje de Aspa al Montaje del Motor ﺗﺠﻤﻴﻊ ﻃﻘﻢ ﻣﺠﻤﻮﻋﺔ ﺍﻟﺮﻳﺸﺔ ﻋﻠﻰ ﻣﺠﻤﻮﻋﺔ ﺍﻟﻤﺤﺮﻙ Remove Blade Screw (6 pieces, silver colour) from Motor Assembly. Step 1 : Assemble Blade towards to the Cover Hook as shown in fi gure step 1. Step 2 : Tighten the Blades fi...
- Page 10 ﺍﻟﺘﺮﻛﻴﺐ ﻋﻠﻰ ﺍﻟﺴﻘﻒ Installation to Ceiling Instalación al Techo Install to Ceiling. Instalar en el Techo. .ﺍﻟﺘﺮﻛﻴﺐ ﻋﻠﻰ ﺍﻟﺴﻘﻒ Pulley / Polea / Pulley / ﺍﻟﺒﻜﺮﺓ Polea / Ceiling Hook ﺍﻟﺒﻜﺮﺓ (“J” Hook) / C Hook / Gancho de Techo Gancho en C / (Gancho en “J”) / ﺧﻄﺎﻑ...
- Page 11 ﻧﻘﺎﻁ ﺍﻟﻔﺤﺺ ﺑﻌﺪ ﺍﻟﺘﺮﻛﻴﺐ Check Point After Installation / Compruebe el punto después de la instalación / ﺗﺤﻘﻖ Check / Verificación / Ceiling hook / 1. Ceiling Fan is securely fixed onto Ceiling Hook. Gancho de techo / El Ventilador de Techo está fijado seguro al Gancho del Techo. ﺧﻄﺎﻑ...
- Page 12 ﺗﻨﺒﻴﻪ CAUTION / PRECAUCIÓN / Power Supply / Fuente de Alimentación / Should there be a dimmer switch, disconnect it and reconnect the wiring as shown. ﻣﺼﺪﺭ ﺗﺰﻭﻳﺪ ﺍﻟﻄﺎﻗﺔ ﺍﻟﻜﻬﺮﺑﺎﺋﻴﺔ Connect Directly / Si hay un interruptor regulador, desconéctelo y reconecte el cableado como se Conectar Directamente muestra.
- Page 13 ﺗﺮﻛﻴﺐ ﻣﻨﻈ ﹼ ﻢ ﺍﻟﺴﺮﻋﺔ Installation of Speed Regulator Instalación de Regulador de Velocidad The dimension for the Speed Regulator is shown in the Diagram. La dimensión para el regulador de velocidad se muestra en el diagrama. .ﻣﻘﺎﺱ ﺍﻷﺑﻌﺎﺩ ﻟﻤﻨﻈﻢ ﺍﻟﺴﺮﻋﺔ ﻣﺒﻴ ﹼ ﻦ ﻓﻲ ﺍﻟﻤﺨﻄﻂ (80.6) (80.6) (4~5)
- Page 14 Fix the Speed Regulator box to the wall by screwing the screws as shown. Fije la caja del Regulador de Velocidad a la pared atornillando los tornillos como se muestra. .ﺛ ﺒ ﹼ ﺖ ﺻﻨﺪﻭﻕ ﻣﻨﻈﹼ ﻢ ﺍﻟﺴﺮﻋﺔ ﻋﻠﻰ ﺍﻟﺠﺪﺍﺭ ﺑﻮﺍﺳﻄﺔ ﺷﺪ ﺍﻟﺒﺮﺍﻏﻲ ﻛﻤﺎ ﻫﻮ ﻣﺒﻴ ﹼ ﻦ Live Wire / Cable con corriente / ﺍﻟﺴﻠﻚ...
- Page 15 ﺗﻨﺒﻴﻪ CAUTION / PRECAUCIÓN / After installation make sure the Ceiling Fan does not wobble extremely. Can cause injury if Ceiling Fan drops. Después de la instalación asegúrese de que el Ventilador de Techo no se tambalea. Si el Ventilador del Techo cae, puede causar lesiones. .ﺑﻌﺪ...
- Page 16 138 170 222 0.99 122 157 187 0.99 120 151 180 0.99 M60XG 126 157 200 0.98 121 148 188 0.99 KDK Company, Division of PES Head Offi ce: 4017, Takaki-cho, Kasugai, Aichi, Japan. M56XG8002CM © KDK Company, Division of PES 2011...
Need help?
Do you have a question about the M56XG and is the answer not in the manual?
Questions and answers