Advertisement
Quick Links
Operating and Installation Instructions
OFF/ON
SPEED
1
2
3
1
3
6h
CANCEL
OFF TIMER
OFF/ON
SLEEP MODE
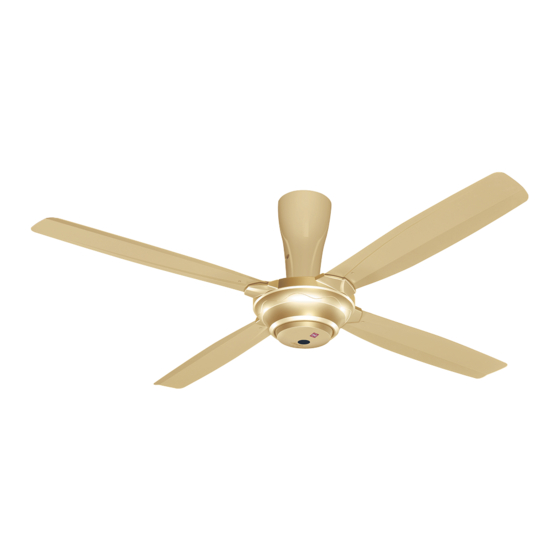
Ceiling Fan
Thank you for purchasing KDK Ceiling Fan.
感謝您購買 KDK 吊扇。
Before operating this product, please read the instructions carefully, and keep this
manual for future reference.
操作此產品前,請仔細閱讀說明書,並保存本手冊以作日後參考。
Contents / 目錄
操作和安裝指示
Ceiling Fan
Model Number
M56QR
Page / 頁數
吊扇
型號
2
5
5
7
13
15
16
Advertisement

Related Manuals for KDK M56QR


Summary of Contents for KDK M56QR
-
Page 1: Table Of Contents
SPEED CANCEL OFF TIMER OFF/ON SLEEP MODE Ceiling Fan Thank you for purchasing KDK Ceiling Fan. 感謝您購買 KDK 吊扇。 Before operating this product, please read the instructions carefully, and keep this manual for future reference. 操作此產品前,請仔細閱讀說明書,並保存本手冊以作日後參考。 Contents / 目錄 Page / 頁數... -
Page 2: Safety Precautions / 安全注意事項
Safety Precautions / 安全注意事項 To avoid the possibility of causing injury to users or damage to properties, please follow all the explanations written below. 為避免導致用戶受傷或財物損壞的可能性,請遵守以下所述的所有指示。 A state that may be caused by the mishandling of products, which, if not avoided, may lead to WARNING the possibility of death or serious injury of users. - Page 3 WARNING / 警告 Switch off power supply and wait until Do not dismantle the Ceiling Fan unless Avoid damage wire during installation the Blade is fully static, before cleaning stated by this manual. eg. Deform due to heat, twist, bend, etc. 避免在安裝時損壞電線,例如因熱量、...
- Page 4 CAUTION / 注意 Ceiling Fan must be mounted above Avoid continuously exposure of direct Do not install at places where there is 2.5m from the fl oor and 1m from the wind from the Ceiling Fan. high vibration and impact. 切勿安裝在高振動強度和高衝擊強度的...
-
Page 5: Supplied Parts / 配備零件
Supplied Parts / 配備零件 OFF/ON SPEED CANCEL OFF TIMER OFF/ON SLEEP MODE Ceiling Fan Wall Plug / Remocon Holder / Screw / 壁式插座 遙控器固定器 螺絲 零件 件 Parts / Pcs / Hexa Nut / 六角形螺帽 發動機組件 1. Motor Assembly / Spring Washer / 彈簧墊圈... - Page 6 Fix the Pipe and Motor Assembly with a) Ellipse Bolt, b) P-R Washer, c) Spring Washer, d) Hexa Nut and e) Cotter Pin. The Slit position of the bolt should be top and bottom. Bend the Cotter Pin at last. 使用以下物品組裝導管與發動機組件...
-
Page 7: How To Install / 如何安裝
Assemble Blades To Motor Assembly / 將扇翼組裝到發動機組件 Remove Blade Screws (Silver colour screws, 8 pieces) from Motor Assembly. Do not remove the black colour screws. Fix the Blades fi rmly to Motor Assembly by Blade Screws. (Tightening torque for reference: 250-300N•cm). 從發動機組件拆除扇翼螺絲(銀色螺絲,8枚)。切勿取下黑色螺絲。使用扇翼螺絲將扇翼上緊到發動機組件上。... - Page 8 Install Carl Bolt and Suspension Bolts (Optional Parts). 安裝卡爾螺栓和懸掛螺栓 (選購性部件)。 Plain Washer / 普通墊圈 Spring Washer / 彈簧墊圈 Drill / Blower / Carl Bolt / Hexa Nut / 鑽孔機 吹除機 卡爾螺栓 六角形螺帽 Hammer / 錘子 1. Make holes on the concrete ceiling as shown in Step 1. 在混凝土天花板鑽個孔如圖所示步驟...
- Page 9 ALTERNATIVE METHOD / 其他方式 Hook Set / 吊鉤組 2nd step / 步驟二 Incline Pulley Set and install Ceiling Fan. Make sure the Fan maintain straight to avoid the Blade from 1st step / 步驟一 touching the ceiling during installation. Place the Pulley Set to the Hook Set as 使滑輪組件傾斜,然後安裝吊扇。...
- Page 10 Wiring Instruction / 配線指示 Connect power supply according to the Wiring Instruction below. 按照以下的配線指示接電源。 WARNING / 警告 Electrical wiring must be done by competent personnel. Can cause fi re, electrical shock, Ceiling Fan drops and injuries. 電線配線工作必須由能胜任的人員進行。 這可導致火災、電擊、吊扇掉落及受傷。 WIRING DIAGRAM / 電線圖 Motor Assembly / 發動機組件...
- Page 11 CAUTION / 注意 This product is not provided with cord and plug or with other means for connection from the supply. When connect or change the power cord or lead wire, it must be replaced by the competent personnel in order to avoid hazard. Please use 227IEC53(RVV) or thickness of tube is 1mm or above.
- Page 12 Fix the Canopy / 安裝罩蓋 (i) Step 1 : Slide up one of the Upper Canopy to the guide rail at the Lower Canopy. (ii) Step 2 : Insert the Upper Canopy Rib to Lower Canopy slot. (iii) Step 3 : Insert another Upper Canopy Rib to the Lower Canopy slot.Then fi x the screw at Upper Canopy and tighten fi...
-
Page 13: How To Use / 如何使用
Final Confi rmation / 最後確認 Measure the distance (L) using a measuring tape. Please adjust all the Blades to get the equal distance from ceiling to the Blade Tip (L). The distance (L) should have tolerance within 1mm. 使用捲尺測量距離 (L)。 請調整所有扇翼,使天花板至扇翼末端... - Page 14 Remote Control Coverage / 遙控器覆蓋 Coverage Area 覆蓋範圍 米 8 m / 8 The fi gure above shows the best coverage area. The ideal ceiling height is 3~4m. The Remote Control must be pointed to the direction of the fan when in use. 上圖顯示最佳覆蓋範圍。最佳天花板高度是3~4米。使用時,遙控器必須指向風扇的方向。...
-
Page 15: Maintenance / 維修
Sleep Mode Function / 睡眠模式功能 ** Speed 3 for the 1st 2 hours / 前 2 個小時用速度 3 Speed 3 / 速度 3 ** Speed 2 for the next 2 hours / 下 2 個小時用速度2 6 hours Sleep Speed 2 / 速度... -
Page 16: Product Specifi Cation / 產品規格
風速 送風量 HIGH m/min /min 伏特直流 赫茲 瓦特 低 高 米/分鐘 立方米/分鐘 公斤 220-230 59-64 88-92 184-192 150-155 180-190 KDK Company, Division of PES Head Offi ce: 4017, Takaki-cho, Kasugai, Aichi, Japan. © KDK Company, Division of PES 2011 M56QR8001ZM...
Need help?
Do you have a question about the M56QR and is the answer not in the manual?
Questions and answers