Table of Contents
Advertisement
Quick Links
Advertisement
Table of Contents

Subscribe to Our Youtube Channel
Related Manuals for CyberView X117


Summary of Contents for CyberView X117
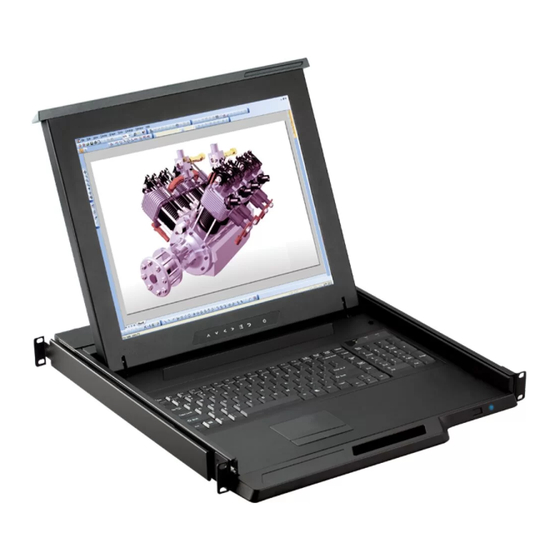
- Page 1 KVM switch and rackmount screen technology User Manual 16.2” Ultra High Resolution LCD 1920 x 1200 X117 1U LCD Console Drawer Options : - SDI - DC power Designed and manufactured by Austin Hughes UM-CV-751-X117-Q220V1 www.austin-hughes.com...
- Page 2 ■ Re-position or relocate the receiving antenna. ■ Increase the separation between the equipment and receiver. ■ Connect the equipment into an outlet on a circuit diff erent from that to which the receiver is connected. UM-CV-751-X117-Q220V1 www.austin-hughes.com...
-
Page 3: Table Of Contents
Contents < Part. 1 > X117 Package Content Structure Diagram & Dimension Installation Connection < Part. 2 > Specifi cations / OSD Product Specifi cations Keyboard / Mouse Specifi cations P.10 On-screen Display Operation ( OSD ) P.13 Picture In Picture ( PIP ) / Picture By Picture ( PBP ) P.15... - Page 4 fi rst, not directly on the parts you are cleaning. Gently wipe the surface. Use as little pressure as possible. Wait until your monitor is completely dry before plugging it in and powering it up. UM-CV-751-X117-Q220V1 www.austin-hughes.com...
-
Page 5: X117
< Part 1 > X117 < 1.1 > Package Content X117 unit X 1 - CX-6A 6ft DVI-D console cable X 1 ( Alternative : CB-6A 6ft VGA console cable ) - Power cord X 1 - M6 screw, cage nut & cup washer X 8 The above package content is only for the single console models. - Page 6 Weight 441.6 x 480 x 44 mm 590 x 808 x 140 mm 10.9 kg 15.8 kg X117 17.4 x 18.9 x 1.73 inch 23.2 x 31.8 x 5.5 inch 24 lb 34.8 lb The weight is only for the single console models. It varies with accessories & options such as KVM, SDI, HDMI &...
-
Page 7: Installation
X117 < 1.3 > Installation - Installation Slides Step ■ Insert the left and right rear mounting brackets into the LCD console drawer. Step ■ Measure the depth of the front and rear mounting rails. ■ Align each rear mounting bracket to a suitable length. - Page 8 < 1.3 > Installation- How to use the drawer ■ Hold the handle and slide out the drawer. ■ Flip up the LCD to a suitable angle. ■ Operate the LCD console drawer. UM-CV-751-X117-Q220V1 www.austin-hughes.com...
-
Page 9: Connection
X117 < 1.4 > Connection to USB Server via CX-6A cable LCD Console Drawer DVI-D AC Input 100~240V POWER CX-6A DVI-D console cable USB server DVI-D < 1.4 > Connection to external KVM via CX-6A cable LCD Console Drawer DVI-D... - Page 10 Before attempting to connect anything to the LCD console drawer, we suggest turning off the power to all devices. Apply power to connected devices again only after the LCD console drawer is receiving power. The company is not responsible for damage caused in this way. UM-CV-751-X117-Q220V1 www.austin-hughes.com...
- Page 11 X117 < 1.4 > Connection to HDMI Device via *HDMI cable LCD Console Drawer HDMI HDMI cable USB server * HDMI cable is not provided. Caution : The LCD console drawer is hot-pluggable, but components of connected devices, such as the servers and KVM switch, may not be hot-pluggable. Plugging and unplugging cables while servers and KVM are powered on may cause irreversible damage to the servers, KVM and LCD console drawer.
-
Page 12: Product Specifi Cations
Environmental Operating Temperature 0 to 55°C degree Humidity 20~90%, non-condensing Conditions Altitude 16,000 ft Storage / Temperature -20 to 60°C degree Non-operating Humidity 5~90%, non-condensing Altitude 40,000 ft Shock 10G acceleration (11ms duration) Vibration 5~500Hz 1G RMS random UM-CV-751-X117-Q220V1 www.austin-hughes.com... - Page 13 X117 Physical Product ( W x D x H ) 441.6 x 480 x 44 mm Specifi cation 17.4 x 18.9 x 1.73 inch Packing ( W x D x H ) 590 x 808 x 140 mm 23.2 x 31.8 x 5.5 inch Net Weight 10.9 kg / 24 lb...
-
Page 14: Keyboard / Mouse Specifi Cations
Travelling distance 3 ± 0.3mm Switch life > 10 million life cycle time OS support Windows / Linux / Unix / Mac OS Supporting layouts America United States EMEA United Kingdom Germany France Spain Italy Asia Japan Korea UM-CV-751-X117-Q220V1 P.10 www.austin-hughes.com... - Page 15 X117 < 2.2 > MAC Keyboard / Mouse Options MAC keyboard integrated with touchpad MAC keyboard integrated with trackball Supporting layouts America United States How to Use "MAC" Keyboard Keyboard Features Decrease display brightness Fast-forward Increase display brightness Mute sound...
- Page 16 Audio / Display Keys * Please ask your supplier for full details Audio : Mute Audio : Decrease volume Display : Degauss Display : Decrease contrast Audio : Increase volume Display : Increase contrast UM-CV-751-X117-Q220V1 P.12 www.austin-hughes.com...
-
Page 17: On-Screen Display Operation ( Osd )
X117 < 2.3 > On-screen Display Operation ( OSD ) Membrane Switch Function Turn the monitor on or off Display the OSD menu Act as an Enter key to select screen setting options Scroll through menu options and adjust the displayed control... - Page 18 Adjust picture in picture setting PIP position : Enter into PIP position PIP source : Enter into the Sub source and sound source System reset : Return the adjustment back to factory setting Information : Select for Help UM-CV-751-X117-Q220V1 P.14 www.austin-hughes.com...
-
Page 19: Picture In Picture ( Pip ) / Picture By Picture ( Pbp )
X117 < 2.4 > How to Use Picture In Picture ( PIP ) / Picture By Picture ( PBP ) < 2.4.1 > Picture in Picture ( PIP ) Mode Display the Sub screen in the Main screen. OSD Menu → MISC → PIP Mode → Large / Small / OFF... - Page 20 OSD Menu → MISC → PIP Source → VGA / S-Video / Composite / DVI / HDMI / SDI / YPbPr / TV The PIP / PBP is operable in the following table : S-Video Composite DVI-D HDMI YPbPr Main S-Video Composite HDMI YPbPr UM-CV-751-X117-Q220V1 P.16 www.austin-hughes.com...
- Page 21 Austin Hughes’ SDI input is an ideal solution for the broadcast- grade video and high resolution CCTV market. Designed for use with CyberView displays, a SDI input module can support up to 1080p @60Hz resolution without using additional space or power and it comes standard with a 2-year warranty.
- Page 22 ( 1 ) If the unit with LCD, earthing may be required ( 2 ) DC option excludes AC power adapter and power cord. ( 3 ) Casing depth will be extended from 480mm ( 18.9” ) to 530mm ( 20.9” ) UM-CV-751-X117-Q220V1 P.18 www.austin-hughes.com...
- Page 23 (W x D x H) 441.6 x 580 x 44 mm 590 x 808 x 140 mm 12.1 kg 18.1 kg X117 with KVM 17.4 x 22.8 x 1.73 inch 23.2 x 31.8 x 5.5 inch 26.6 lb 39.8 lb UM-CV-751-X117-Q220V1 P.19...
- Page 24 The company reserves the right to modify product specifi cations without prior notice and assumes no responsibility for any error which may appear in this publication. All brand names, logo and registered trademarks are properties of their respective owners. Copyright 2020 Austin Hughes Electronics Ltd. All rights reserved. UM-CV-751-X117-Q220V1 www.austin-hughes.com...
Need help?
Do you have a question about the X117 and is the answer not in the manual?
Questions and answers