CAME A3024N Installation Manual
Operator for swing gates
Hide thumbs
Also See for A3024N:
- Installation manual (13 pages) ,
- Installation manual (13 pages) ,
- Installation manual (16 pages)

Related Manuals for CAME A3024N


Summary of Contents for CAME A3024N
- Page 1 Automazione FA01163M04 per cancelli a battente A3024N IT Italiano EN English A5024N FR Français RU Русский MANUALE DI INSTALLAZIONE...
-
Page 2: Leggere Attentamente
• Il prodotto deve essere destinato solo all’uso per il quale è stato espressa- • È fatto DIVIETO all’utente di eseguire OPERAZIONI NON ESPRESSAMENTE mente studiato. Ogni altro uso è da considerarsi pericoloso. CAME Cancelli A LUI RICHIESTE E INDICATE nei manuali. Per le riparazioni, le modifi che alle Automatici S.p.A non è... -
Page 3: Legenda Simboli
Ma mentre con le automazioni reversibili è solo raccomandata, con quelle irreversibili, oltre i 4 m, è obbligatoria. Riferimenti normativi CAME cancelli automatici è una azienda certificata per il sistema di gestione della qualità aziendale ISO 9001 e di gestione ambientale ISO 14001. -
Page 4: Descrizione Delle Parti
2) Staff a di testa 3) Snodo di coda 4) Staff a di coda 5) Piastra di fi ssaggio 4.4 Misure d’ingombro A5024N A3024N Corsa Corsa 5 Installazione 5 Installation 5.1 Verifiche preliminari Prima di procedere all’installazione dell’automazione è necessario verificare che: •... -
Page 5: Impianto Tipo
Attrezzi e materiali Assicurarsi di avere tutti gli strumenti ed il materiale necessario, per effettuare l’installazione nella massima sicurezza, secondo le normative vigenti. Di seguito in figura l’attrezzatura minima per l’installatore. Tipologia cavi e spessori minimi Lunghezza cavo Lunghezza cavo Lunghezza cavo Collegamento Tipologia cavo... - Page 6 Montaggio Le applicazioni che seguono sono solo esempi, in quanto lo spazio per il fissaggio dell’automazione e gli accessori varia a seconda degli ingombri e pertanto spetta all’installatore scegliere la soluzione più idonea. Tab. 3 Tab. 3 Pilastro Ante < 3 m Anta posizione Cerniera chiusa.
- Page 7 Svitare le due viti di fi ssaggio del carter ed estrarlo. Carter Stelo Svitare le due viti di fi ssaggio dello stelo ed estrarlo. Dado M8 autobloccante Vite senza fi ne Procedere al montaggio del motoriduttore alle due staff e. M8x10 M8x50 N.B: è...
- Page 8 Fissaggio e regolazione finecorsa Microinterruttore di rallentamento in chiusura Vite senza fi ne Asta porta microinterruttore Supporto cavo Slitta azionamento microinterruttore Microinterruttore di Stop in apertura Madrevite Madrevite IN APERTURA (stop): IN CHIUSURA (rallentamento): Sbloccare il motoriduttore e portare l’anta in posizione di apertura Portare l’anta in battuta d’arresto in chiusura.
- Page 9 Collegamento a quadro comando ZL180 Collegamento 2 motori ZL180 Collegamento 1 motore ZL180...
- Page 10 Applicazione per apertura verso l’esterno Tab. 4 A3024N A5024N Esterno Interno Staff a supplementare - Rilevare le quote A e B (Tab.4). - Fissare la staff a di coda a una staff a supplementare e applicarla al pilastro. - Aprire il cancello (max 90°), rilevare la quota E (Tab.4) e fi ssare la staff a di testa all’anta.
-
Page 11: Manutenzione
7 Manutenzione Manutenzione periodica Prima di qualsiasi operazione di manutenzione, togliere la tensione, per evitare possibili situazioni di pericolo causate da accidentali movimen- ☞ tazioni del dispositivo. Registro manutenzione periodica a cura dell’utente (semestrale) Data Annotazioni Firma Manutenzione straordinaria La seguente tabella serve per registrare gli interventi di manutenzione straordinaria, di riparazione e di miglioramento eseguiti da ditte ⚠ ... -
Page 12: Risoluzione Dei Problemi
UNI EN ISO 14001 a garanzia del rispetto e della tutela dell’ambiente. Vi chiediamo di continuare l’opera di tutela dell’ambiente, che CAME considera uno dei fondamenti di sviluppo delle proprie strategie operative e di mercato, semplicemente osservando brevi indicazioni in materia di smaltimento: SMALTIMENTO DELL’IMBALLO... - Page 13 Operator FA01163-EN for swing gates A3024N A5024N EN English INSTALLATION MANUAL...
-
Page 14: Read Carefully
• Use this product only for the specifi c purpose for which it is designed. Any other use is therefore improper and dangerous. CAME Cancelli Automatici • Keep away from the hinges and any moving mechanical parts • Stay out S.p.A. -
Page 15: Legend Of Symbols
But whereas with reversible operators it is merely advisable, with irreversible ones, beyond 4 m, it is obligatory. Reference Standards The company: Came Cancelli Automatici is ISO 9001 quality certified; is has also obtained the ISO 14001 environmental safe- guarding certification. Came engineers and manufactures all of its products in Italy. -
Page 16: Installation
2) Front bracket 3) Back swivel-joint 4) Back bracket 5) Anchoring plate 4.4 Overall dimensions A5024N A3024N Travel Travel 5 Installation 5.1 Preliminary checks Before installing, do the following: • make sure the structure of the gate is sturdy, the hinges work and that there is no friction between moving parts and non-moving parts;... -
Page 17: Tools And Materials
Tools and materials Make sure you have all the tools and materials you will need for the installation at hand to work in total safety and compliance with the current standards and regulations. The following figure illustrates the minimum equipment needed by the installer. Cable list and minimum thickness Length of cable Length of cable... - Page 18 Mounting The following are just example applications, given that the space for securing the operator and accessories may vary depen- ding on the dimensions. It is thus up to the installer to choose the most suitable solution. Tab. 3 Pillar Gate leaves <...
- Page 19 Unscrew the two securing screws and remove the carter. Carter Stem Unscrew the two securing screws and remove the stem. M8 self-locking nut Endless screw Begin mounting the gearmotor to the two brackets. M8x10 M8x50 N.B.: we suggest lubricating (using neutral grease) the endless screw and the bushing upon installation. Release with customised key Door Release only with motor stopped:...
- Page 20 Securing and adjusting the endstop Closing-speed brake microswitch Endless screw Microswitch bar Cable support Microswitch actuating sled Stop brake microswitch Spindle Spindle OPENING PHASE: (stop) CLOSING PHASE (deceleration) Release the gearmotor and swing the gate-leaf to the fully open Swing the gate until fully closed. position you desire, then, unscrew the securing screws on the opening Unscrew the securing screws on the closing decelaration micro-switch stop micro-switches assembly.
- Page 21 Connecting to the ZL180 control panel Connecting 2 motors ZL180 Connecting 1 motor ZL180...
- Page 22 Application for outward opening Tab. 4 A3024N A5024N Outward Inward Extra bracket - Measure values A and B (Tab. 4) - Secure the tail bracket to an extra bracket and apply to post. - Open gate (max 90°), measure value E (Tab. 4) and secure head bracket to gate leaf.
-
Page 23: Maintenance
7 Maintenance Periodic maintenance Before doing any maintenance, cut off the power supply, to prevent any hazardous situations caused by accidentally activating the operator. ☞ Periodic maintenance log kept by users (every six months) Date Notes Signature Extraordinary maintenance The following table is for logging any extraordinary maintenance jobs, repairs and improvements performed by specialized contractors. ⚠ ... -
Page 24: Troubleshooting
CAME S.p.A. employs a UNI EN ISO 14001 certified and compliant environmental protection system at its plants, to ensure that environmental safeguarding. We ask you to keep protecting the environment, as CAME deems it to be one of the fundamental points of its market operations strategies, by simply following these brief guidelines when disposing: DISPOSING THE PACKING MATERIALS The packing components (cardboard, plastic, etc.) are solid urban waste and may be disposed of without any particular difficulty, by... -
Page 25: Manuel D' Installation
Automatisme FA01163-FR pour portails battants A3024N A5024N FR Français MANUEL D’ INSTALLATION... - Page 26 Toute autre utilisation est à considérer comme dange- et ne l'utiliser qu'après le rétablissement des conditions de sécurité • Couper reuse. La société CAME Cancelli Automatici S.p.A. décline toute responsabi- le courant électrique avant de débloquer l'automatisme pour des ouvertures lité...
-
Page 27: Légende Des Symboles
Cette application est conseillée sur les automatismes réversibles mais obligatoire sur les automatismes irréversibles de plus de 4 m. Normes de référence CAME cancelli automatici est une entreprise certifiée par le Système de Contrôle Qualité des Entreprises ISO 9001 et de Gestion de l’Environnement ISO 14001. Les produits Came sont entièrement conçus et fabriqués en Italie. -
Page 28: Description Des Parties
2) Étrier de tête 3) Articulation de queue 4) Étrier de queue 5) Plaque de fi xage 4.4 Mesure d’encombrement A5024N A3024N Course Course 5 Installation 5.1 Contrôles préliminaires Avant de procéder au montage, il est nécessaire de vérifier que : •... -
Page 29: Outils Et Matériel
Outils et matériel Assurez-vous d’avoir tous les outils et le matériel nécessaire pour effectuer le montage de l’automatisme en toute sécurité et conformément aux normes en vigueur. Sur la planche, quelques exemples de matériel pour l’installateur. Types de câbles et épaisseurs minimales Longueur câble Longueur câble Longueur câble... -
Page 30: Montage
Montage Les applications suivantes ne sont que des exemples, étant donné que l’espace pour le fixage de l’automatisme et de ses ac- cessoires varie selon les encombrements, c’est donc l’installateur qui doit choisir la solution la plus appropriée. Tab. 3 Pilier Vantaux <... - Page 31 Dévissez les deux vis de fi xage du carter et prélevez-le. Carter Tige Dévissez les deux vis de fi xage de la tige et prélevez-la. Écrou M8 autobloquant Vis sans fi n. Procédez au montage du motoréducteur aux deux étriers. M8x10 M8x50 N.B.
- Page 32 Fixage et réglage des fins de course Micro-interrupteur de ralentissement en fermeture Vis sans fi n Tige porte Micro-interrupteur Support câble Glissière actionnement micro interrupteur Micro-interrupteur de stop en ouverture Vis femelles Vis femelles EN OUVERTURE (stop) : EN FERMETURE (ralentissement) : Débloquez le motoréducteur et placez la porte en position d’ouverture Placez la porte en butée d’arrêt en fermeture.
- Page 33 Connexion armoire de commande ZL 180. Connexion 2 moteurs ZL180 Connexion 1 moteurs ZL180...
- Page 34 Application pour ouverture vers l’extérieur Tab. 4 A3024N A5024N Extérieur Intérieur Etrier supplémentaire - Relevez les données A et B (Tableau 4). - Fixez l’étrier de queue à un étrier supplémentaire et appliquez-le au pilier. - Ouvrez le portail (max. 90°), relevez la donnée E (Tableau 4) et fi xez l’étrier de tête au vantail.
- Page 35 7 Maintenance Entretien périodique Avant toute autre opération d'entretien, il est conseillé de mettre hors tension pour éviter toute situation de danger provoquée par des dépla- ☞ cements accidentels du dispositif. Registre entretien périodique tenu par l'utilisateur (semestriel) Date Remarques Signature Entretien curatif Le tableau suivant permet d'enregistrer les interventions d'entretien curatif, de réparation et d'amélioration effectuées par des sociétés...
-
Page 36: Références Normatives
• Adressez-vous au service après-vente Démolition et élimination CAME S.p.A. dispose au sein de son établissement d’un Système de Gestion de l’Environnement certifié et conforme à la norme UNI EN ISO 14001 pour garantir le respect et la sauvegarde de l’environnement. -
Page 37: Руководство По Установке
Привод для распашных FA01163-RU ворот A3024N A5024N RU Pусский РУКОВОДСТВО ПО УСТАНОВКЕ... - Page 38 Это изделие должно использоваться исключительно по прямому назна- правность фотоэлементов, необходимо провести перед ними предметом чению. Любое другое применение рассматривается как опасное. CAME во время закрывания ворот. Если створка меняет направление движения cancelli automatici S.p.A. снимает с себя всякую ответственность за воз- или...
-
Page 39: Условные Обозначения
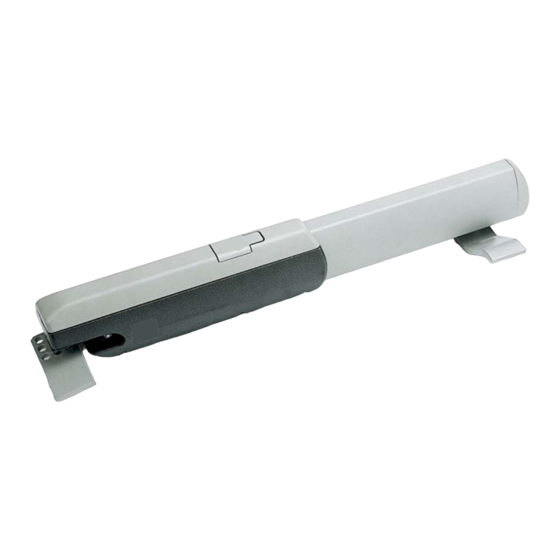
Изделие соответствует требованиям следующих стандартов: смотрите декларацию о соответствии. Описание Привод Это изделие разработано и произведено компанией CAME S.p.A в полном соответствии с действующими нормами безопасности. Корпус привода состоит из двух литых алюминиевых частей. Внутри расположены мотор, редуктор, концевые выключатели... -
Page 40: Основные Компоненты
Основные компоненты 1) Привод 2) Передний кронштейн 3) Подвижный хвостовик 4) Задний кронштейн 5) Монтажная пластина 4.4 Габаритные размеры A5024N A3024N Длина ходового винта Длина ходового винта 5. Монтаж 5. Монтаж 5.1 Предварительные проверки Перед началом монтажных работ выполните следующее: •... - Page 41 Инструменты и материалы Перед началом монтажных работ следует убедиться в наличии всех необходимых инструментов и материалов, которые позволят произвести установку оборудования в полном соответствии с действующими нормами безопасности. Ниже представлен минимальный набор инструментов для монтажника. Тип и минимальное сечение кабелей Длина...
- Page 42 Монтаж Приведенные ниже рисунки носят иллюстративный характер, так как пространство для крепления автоматики и аксессуаров меняется от случая к случаю, поэтому монтажник должен выбрать оптимальное решение исходя из конкретных условий применения. Tab. 3 Табл. 3 Столб Створки < 3 м Створка...
- Page 43 Отверните два самореза и снимите крышку. Крышка Кожух ходового винта Снимите крышку винта, отвернув два самореза. Гайка M8 самоблокирующаяся Ходовой винт Установите привод на передний и задний кронштейны. M8x10 M8x50 Важное примечание: рекомендуется смазать (жирной смазкой) ходовой винт и втулку до установки привода.
- Page 44 Регулировка микровыключателей Микровыключатель закрывания с функцией замедления Ходовой винт Направляющая микровыключателей Фиксатор кабеля Каретка микровыключателей Микровыключатель открывания Бронзовая втулка Бронзовая втулка ФАЗА ОТКРЫВАНИЯ (стоп): Установите створку в полностью закрытое положение. Разблокируйте привод и установите створку в максимально Отверните крепежные винты микровыключателя закрывания. открытое...
- Page 45 Подключение к блоку управления ZL180 Подключение 2 приводов ZL180 Подключение 1 привода ZL180...
- Page 46 Монтаж с открыванием наружу Табл. 4 A3024N A5024N Наружняя сторона объекта Внутренняя сторона объекта Дополнительная пластина - Определите расстояния A и B (табл. 4). - Соедините задний кронштейн с дополнительной пластиной и прикрепите конструкцию к столбу. - Откройте ворота (на макс. 90°), определите расстояние E (табл. 4) и прикрепите передний кронштейн к створке.
-
Page 47: Техническое Обслуживание
7. Техническое обслуживание Периодическое техническое обслуживание Перед выполнением работ по техническому обслуживанию отключите питание во избежание возникновения опасных ситуаций, ☞ вызванных непроизвольным движением устройства. Журнал периодического технического обслуживания, заполняемый пользователем (каждые 6 месяцев) Дата Выполненные работы Подпись Внеплановое техническое обслуживание и ремонт Эта... - Page 48 • Обратитесь к установщику. сигнальная лампа. Утилизация CAME S.p.A. имеет сертификат системы защиты окружающей среды UNI EN ISO 14001, гарантирующий экологическую безопасность на ее заводах. Мы просим, чтобы вы продолжали защищать окружающую среду. САМЕ считает одним из фундаментальных пунктов стратегии рыночных отношений выполнение этих кратких руководящих принципов: УТИЛИЗАЦИЯ...
Need help?
Do you have a question about the A3024N and is the answer not in the manual?
Questions and answers