
Related Manuals for Rice Lake iDimension Plus UPS WorldShip


Summary of Contents for Rice Lake iDimension Plus UPS WorldShip
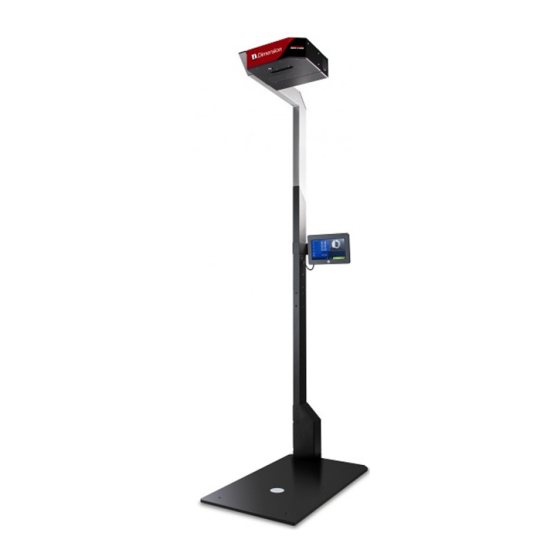
- Page 1 iDimension Plus ® Static Dimensioning System UPS WorldShip Setup Manual ® November 4, 2019 PN 198019...
- Page 2 All information contained within this publication is, to the best of our knowledge, complete and accurate at the time of publication. Rice Lake Weighing Systems reserves the right to make changes to the technology, features, specifications and design of the equipment without notice.
-
Page 3: Table Of Contents
Optimize Performance ................20 Technical training seminars are available through Rice Lake Weighing Systems. - Page 4 Plus UPS Worldship Rice Lake continually offers web-based video training on a growing selection of product-related topics at no cost. Visit www.ricelake.com/webinars www.RiceLake.com Visit our website...
-
Page 5: Introduction
When interfacing this device to third parties software, please reference the software manufacturer’s documentation for setup and configuration parameters as necessary. Manuals and additional resources are available from the Rice Lake Weighing Systems website at www.ricelake.com Warranty information can be found on the website at www.ricelake.com/warranties... -
Page 6: Safety
Do not operate or work on this equipment unless this manual has been read and all instructions are understood. Failure to follow the instructions or heed the warnings could result in injury or death. Contact any Rice Lake Weighing Systems dealer for replacement manuals. -
Page 7: Connections
1. Attach the power cable connector to the port labeled Input 24 V, prior to plugging the power cable connector into an AC outlet. Figure 2-2. AC Power Connection 2. Connect the Ethernet Cable to the iDimension Plus base. © Rice Lake Weighing Systems ● All Rights Reserved... -
Page 8: Usb Hub Connections
Plus UPS WorldShip USB Hub Connections Figure 2-3 for USB hub connection information: Figure 2-3. USB Hub Connections Item No. Item Description +5V DC Reserved for +5V DC power cable Reserved for USB hub cable, USB-B to USB-A cable to iDimension Plus base... -
Page 9: Connect The Benchpro To The Usb Hub
The USB-B to USB-A cable provides power to the BenchPro Series scale while connected via the USB port. Note 3. Connect the USB-A head to the USB 1 port of the USB hub. Figure 2-6. Scale to USB Port 1 Connection © Rice Lake Weighing Systems ● All Rights Reserved... -
Page 10: Connect The Usb Hub To The Idimension Plus
2-9). 2. Connect the FTDI USB to serial converter to the USB port of the PC. Rice Lake Weighing Systems has tested and recommends using two FTDI USB to serial converters and one slimline Note null modem DB9 F/F gender changer. -
Page 11: Configuration
Direct Connection Connect the iDimension directly to a computer with an Ethernet cable. If an Ethernet port is not available on the computer, contact Rice Lake Service for support using the USB to Ethernet adapter (PN 175621). 3.1.2 Network Connection The iDimension can be installed on the network with the Ethernet cable, and configured with a static IP address or using DHCP. - Page 12 Plus UPS WorldShip 4. Network Connections will display. Figure 3-3. Network Connections 5. Right-click on a Local Area Connection. Figure 3-4. Network Options 6. Select Properties. Figure 3-5. Network Properties www.RiceLake.com Visit our website...
- Page 13 Double-click Figure 3-6. Local Area Connection Properties 8. Select Use the following IP address. Figure 3-7. IP Address Selection 9. Change the IP address to 169.254.1.10. Figure 3-8. IP Address Configuration © Rice Lake Weighing Systems ● All Rights Reserved...
- Page 14 Plus UPS WorldShip 10. Change the Subnet mask to 255.255.255.0. Figure 3-9. Subnet Mask Configuration 11. Select Ok. Figure 3-10. Configuration Confirmation 12. Open an Internet browser. 13. Type 169.254.1.1 in the address bar and press Enter to display the iDimension QubeVu Manager.
-
Page 15: Device Manager
Figure 3-13. Ports (COM & LPT) Selection 4. Identify the com port selected in the Device Manager to ensure the USB Serial Port is connected. Figure 3-14. USB Serial Port (COM5) Detection © Rice Lake Weighing Systems ● All Rights Reserved... -
Page 16: Qubevu® Configuration
Plus UPS WorldShip QubeVu Configuration ® For complete QubeVu Manager setup instructions, see the iDimension Plus QubeVu Managers Guide (PN 195441). See the following procedure to configure QubeVu Manager settings: 1. To view the QubeVu Manager, open an Internet browser and enter http://169.254.1.1. If using DHCP, remember to replace 169.254.1.1 with the IP address provided by the network administrator. - Page 17 Configuration 4. Select Figure 3-17. Admin Tools 5. Select Figure 3-18. QubeVu Setup © Rice Lake Weighing Systems ● All Rights Reserved...
- Page 18 Plus UPS WorldShip 6. Follow the procedure below to configure general settings. • iDimension provides additional external interfaces to facilitate integration with client applications and backend systems Figure 3-19. Setup – General Settings 7. Follow the procedure below for QubeVu General Settings external interface setup: Figure 3-20.
- Page 19 11. Select Ok to proceed. 12. Select Save to complete the serial emulation setup. • The status of the serial port is viewable from General Settings. Figure 3-23. Cable Detection Notification © Rice Lake Weighing Systems ● All Rights Reserved...
- Page 20 Plus UPS WorldShip 13. After setup is configured click Save. Figure 3-24. Edit/Cancel/Save Keys 14. Select Ok; QubeVu Manager restarts. Figure 3-25. Restart Confirmation 15. After restarting, go to QubeVu Manager. Figure 3-26. QubeVu Manager Navigation www.RiceLake.com Visit our website...
- Page 21 Figure 3-27. Display Pages 17. Select within Display Pages. Figure 3-28. Demo Display Selection 18. Once within QubeVu Demo, the iDimension Plus is ready for use. Figure 3-29. QubeVu Demo Menu © Rice Lake Weighing Systems ● All Rights Reserved...
-
Page 22: Ups Worldship Configuration
Plus UPS WorldShip UPS WorldShip Configuration This section provides instructions on how to configure WorldShip settings from within the firmware. UPS WorldShip The home screen of WorldShip prompts for shipping information to be entered. Connections must be secured before proceeding. - Page 23 5. Once configuration is set, select Test Dimensioner. Figure 4-6. Test Dimensioner 6. The dimensioner model will be tested. The process will be finished when the bar at the bottom fills. Figure 4-7. Test Active Dimensioner © Rice Lake Weighing Systems ● All Rights Reserved...
-
Page 24: Optimize Performance
Plus UPS WorldShip 7. Once the Test Active Dimensioner process is finished, select Ok. WorldShip configuration is finished and the dimensioner is now ready for use. Figure 4-8. Test Active Dimensioner Processed See UPS WorldShip documentation for processing a shipment using Dimensioner. - Page 26 Specifications subject to change without notice. Rice Lake Weighing Systems is an ISO 9001 registered company. 230 W. Coleman St. • Rice Lake, WI 54868 • USA U.S. 800-472-6703 • Canada/Mexico 800-321-6703 • International 715-234-9171 • Europe +31 (0)26 472 1319...
Need help?
Do you have a question about the iDimension Plus UPS WorldShip and is the answer not in the manual?
Questions and answers