Table of Contents
Advertisement
Advertisement
Table of Contents

Related Manuals for Rice Lake iQube 920i


Summary of Contents for Rice Lake iQube 920i
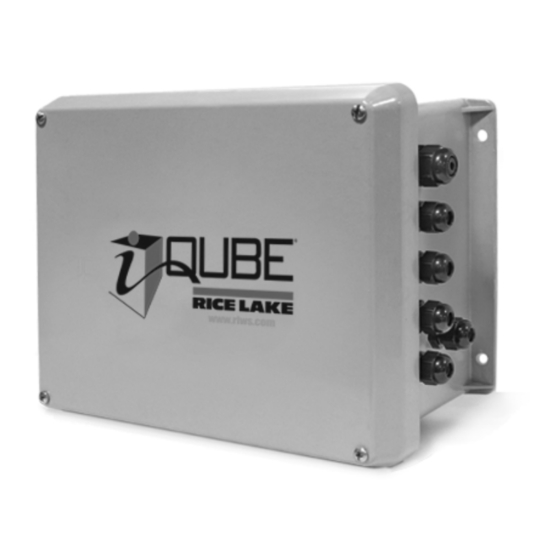
- Page 1 Digital Diagnostic Junction Box Version 1.4 Installation Manual 77224...
-
Page 2: Table Of Contents
Course descriptions and dates can be viewed at www.rlws.com or obtained by calling 715-234-9171 and asking for the training department © 2006 Rice Lake Weighing Systems. All rights reserved. Printed in the United States of America. Specifications subject to change without notice. - Page 3 Calibration ..........................31 5.1 920i Front Panel Calibration............31 5.1.1 Theoretical Calibration .
-
Page 4: About This Manual
Configuration and calibration of the iQUBE can be can view or download this manual from the accomplished using the Revolution III configuration Rice Lake Weighing Systems distributor utility. site at www.rlws.com For installations using the 920i indicator, the indicator ™... -
Page 5: System Configurations And Options
Configuration consists of the following steps: Error conditions generate a displayed error message if connected to the 920i which, with an Ethernet card, Define Load Cells: This is the electrical sensitivity can be configured to e-mail the alert message to an (mV/V output) and capacity specification of the load address. -
Page 6: Installation
, this manual, and a parts kit. If any parts were Table 2-1. iQUBE Connector and Load Cell Names damaged in shipment, notify Rice Lake Weighing Figure 2-1 shows two examples of load cell naming Systems and the shipper immediately. - Page 7 JP1 is located on the back side of the core module INPUT/OUTPUT LED : DIGITAL I/O OUTPUT: GREEN = RELAY ON MODEL ONLY INPUT: GREEN = SWITCH CLOSED + IG + IG DIGITAL I/O – IG – IG FIBER-OPTIC OR +EXC +EXC ETHERNET...
-
Page 8: Serial Communications
Serial Communications RS-485 Connections to Host 920i Table 2-4 shows the connections needed for RS-485 The J4 and J7 serial communications ports on the communications between a host and the 920i iQUBE connector board support communications iQUBE 920i serial expansion card, PN 67604, must be between the iQUBE and a host device (indicator or... - Page 9 DIP switches on the core module of each iQUBE must be set to indicate whether the unit is a primary or secondary, the communication protocol and port used, Switch Primary Unit Secondary Unit and the secondary address. 1–3 OFF, OFF, OFF ON, OFF, OFF = SECONDARY1 •...
- Page 10 NOTE! ALL SIX WIRES, INCLUDING SHIELD AND GROUND WIRES, MUST BE CONNECTED FOR COMMUNICATION BETWEEN iQUBE UNITS PRIMARY TO HOST SECONDARY1 INDICATOR OR PC iQUBE UNIT iQUBE UNIT Figure 2-4. Primary-to-Secondary Communications Wiring NOTE! ALL SIX WIRES, INCLUDING SHIELD AND GROUND WIRES, MUST BE CONNECTED FOR COMMUNICATION BETWEEN iQUBE UNITS TO HOST...
-
Page 11: Digital I/O
Digital I/O iQUBE junction box is available with support for eight channels of digital I/O. Digital inputs can be set to provide many indicator functions, including all keypad functions. Digital inputs are active low (0 VDC), inactive high (5 VDC). Digital outputs are typically used to control relays that drive other equipment. -
Page 12: Analog Output
Analog Output The analog output option consists of either a 0-30mV (PN 77146) or 0-20mA (PN 77797) digital-to-analog (DAC) card that plugs into the core module. The 0–30 mV output simulates the output of a load cell or iQUBE standard junction box, allowing connection to standard indicators. A 0–20 mA (passive only) DAC is also available for PLC applications. -
Page 13: Core Module Dip Switches
Core Module DIP Switches The DIP switches on the iQUBE core module must be set to configure the as a primary or secondary iQUBE unit, and to specify the type of serial communications provided by the unit. Table 2-7 lists the DIP switches and their functions. -
Page 14: 2.11 Iqube Communications Configurations
2.11 iQUBE Communications Configurations The following sections describe some of the ways digital or analog output from the iQUBE can be connected to weight indicators. 2.11.1 Copper-Wire Connection to the 920i A basic configuration of the iQUBE is shown in Figure 2-8. A single 6-conductor load cell cable can be used both to supply 6 VDC power to the iQUBE and to exchange serial data with the... -
Page 15: Remote Fiber-Optic Module (Pn 77789)
2.11.3 Remote Fiber-Optic Module (PN 77789) The optional remote fiber-optic module provides optically isolated digital-to-analog (DAC) conversion of digital data received from the iQUBE . The analog output from the module can be connected to the analog (load cell) signal input of a standard weight indicator that can read 0-30mV (0-20mA) referenced to ground (see Figure 2-10). -
Page 16: Analog Output
2.11.4 Analog Output The analog output from the iQUBE can be connected to the analog signal inputs of any weight indicator that can be read 0-30mV (0-20mA) referenced to ground (see Figure 2-12). Analog output from the iQUBE requires that a digital-to-analog (DAC) card be installed on the iQUBE core module. -
Page 17: 2.12 Installing Tap And Run Connectors For 920I Power
2.12 Installing Tap and Run Connectors for 920i Power iQUBE installations that are remotely powered by the 2. Close side cover of connector until latched. indicator, and those that use the internal 920i 920i 3. Insert tap wire (+6V supply to ) into iQUBE fiber-optic module, require tap and run connectors to... -
Page 18: Installing The Optional Power Supply
2.13 Installing Optional Power 2.14.2 iQUBE Internal Fiber-Optic Option Supply To install the internal iQUBE fiber-optic interface card, carefully align the option card connector with The optional internal power supply provides 6VDC connector J6 on the connector board (see Figure 2-2 power for the from 115 or 230 VAC power iQUBE... -
Page 19: 920I Internal Fiber-Optic Option
2.15 Fuse Replacement 2.14.4 920i Internal Fiber-Optic Option To install the 920i internal fiber-optic interface, Fuse F1 on the i QU B E connector board (see position the adhesive square on the top of the 920i Figure 2-2 on page 4) provides protection for power power supply shield (see Figure 2-14 on page 14). -
Page 20: 2.17 Replacement Parts And Assembly Drawings
2.17 Replacement Parts and Assembly Drawings Table 2-9 lists replacement parts for the iQUBE models, including all parts referenced in Figures 2-19 and 2-20. Ref Number Description (Quantity) iQUBE 92938 See Figure 2-19 on page 18 cover decal (1) 14822 Machine screws, 4-40NC x 1/2 (8) 77140 iQUBE... - Page 21 Figure 2-19. iQUBE Enclosure Assembly iQUBE Installation Manual...
- Page 22 Figure 2-20. iQUBE Assembly Installation...
-
Page 23: 920I Indicator Configuration
920i Indicator Configuration To configure the 920i indicator, the indicator must be placed in setup mode. The setup switch is accessed by removing the large fillister head screw on the desktop and universal enclosures. Switch position is changed by inserting a screwdriver into the access hole and pressing the switch. When the indicator is placed in setup mode, a series of menus is shown across the top of the display, along with the words . -
Page 24: Configuration And Calibration Summary
SYSTEM: The system setup display is divided into three areas: • System (middle section): Highlight the system being configured, then use the arrow key to move to left the Available Platform section. • Available Platforms (left section): Use this section to assign platforms to the system. Use the keys to highlight the desired platform, then press the softkey to assign the platform to the down... -
Page 25: Iqube-Specific Menu Structures And Parameter Descriptions
iQUBE-Specific Menu Structures and Parameter Descriptions The following sections provide graphic representations of iQUBE -specific 920i menu structures and tables describing the menu parameters. Default values are shown in bold type; numeric ranges and string values are shown in italic type. Parameters shown surrounded by a dotted-line box only appear under the special circumstances explained under each box. - Page 26 SERIAL Menu (iQUBE Submenu) Parameter Choices Description CONFIG 8/0/0/0 iQUBE Specifies the system configuration. 8/4/0/0 iQUBE The first value (8 or 4) designates the number of channels on the primary board; 8/4/4/0 the remaining three values represent attached secondary units, if any, and the number of 8/8/0/0 channels on each secondary board.
- Page 27 SERIAL Menu (iQUBE Submenu) Parameter Choices Description SOURCE Analog output source. If analog output DAC is installed, assign system name. system_name FULLSC 300000.0 Analog output full scale range. Specifies the weight value at the full scale analog output value (weight) (30 mV or 20 mA).
-
Page 28: Iqube Submenu, Iqdiag Parameters
3.4.2 iQUBE Submenu, IQDIAG Parameters Figure 3-3 shows the IQDIAG parameters on the IQUBE submenu. The IQDIAG parameters allow customization of the iQUBE ’s diagnostic routines. DIGIO IQDIAG TE TCOM ZEROREF CELLBAL ENABLE THRH %THRH DELAY ENABLE THRH %TOLR LOAD 0.125000 0.200000 5000.000... - Page 29 iQUBE Submenu, IQDIAG Parameters Parameter Subparameter Choices Description iQUBE IQDIAG ZEROREF See descriptions under Level 5 Submenus. Each group of diagnostic parameters CELLBAL can be enabled or disabled using the ENABLE subparameter. LDRIFT iQUBE See Section 6.0 on page 34 for more information about diagnostic tests.
- Page 30 iQUBE Submenu, IQDIAG Parameters Parameter Subparameter Choices Description LDRIFT ENABLE Enable loaded drift test diagnostics. Tests for drifting load cell output, which can indicate binding or a deteriorating cell, when the scale is loaded. The test begins after the load value has been exceeded and the scale is considered out of motion (see note.) Once the scale comes to a stable live load, the timer will start.
-
Page 31: Pformt Menu
3.4.3 PFORMT Menu See the 920i Installation Manual, PN 67887, for general information about print formats. See Section 7.2 on page 39 for information about the ALERT print format. iQUBE 920i NOTE: Port 3 is the default port for most print formats. If the is attached to the using port 3, ensure that the serial print format is not also routed to port 3. -
Page 32: Pc Configuration
PC Configuration When used with the 920i indicator, the iQUBE can be configured using a PC running either the iRev or the Revolution III program. iRev allows complete configuration of the 920i , with the capability to download the iQUBE configuration from the indicator to the junction box. -
Page 33: Downloading To The Iqube
• The iRev Editor provides a basic editor and a compiler for writing iRite applications. • The Rice Lake Web Update utility uses your internet connection to check for and download updates to the iRev 920i software. • The iLaunch utility can be installed to display a... -
Page 34: Calibration
Calibration iQUBE can be calibrated using the 920i front panel or Revolution III . The following sections describe the calibration procedure for each of the calibration methods. ALGOUT CALE ERIAL FEATURE PFORMT ETPT DIG I/O CALE x … … VI IBLE CALIBR GRAD FORMAT... -
Page 35: Manual Trim Factor Adjustment (Tweaking)
calibration. Cal-Match calibration can Tweaking can be performed following a Cal-Match NOTE: be canceled by pressing the key. CLEAR calibration or when replacing a load cell. 6. Ensure scale is empty, then use the 5.1.4 Final Calibration keys to select (see down Corner Cal-Match... - Page 36 iQUBE calibration is complete. You can view the active status of the cells, platform, or system by returning to the Interactive menu and selecting Status for cells, platforms, or systems. Click on the Monitoring box to automatically update the readings Auto Refresh from the iQUBE...
-
Page 37: Diagnostics
Diagnostics iQUBE Diagnostic Cell Mate Relationships iQUBE connector board provides bi-color cell Cell mates to a specific load cell are defined as the status LEDs (see Figure 2-2 on page 4) that indicate load cells that are horizontally or vertically adjacent to the status of connected load cells. - Page 38 Diagnostic Test Examples Zero Reference Error No Zero Reference Error Threshold Threshold 125 (m/v) 125(m/v) 25% Threshold 25% Threshold C3 C4 C2 C3 C4 Calibrated Dead Calibrated Dead Load Load Figure 6-2. Zero and No Zero Reference Errors Loaded Drift Error No Loaded Drift Error Limit 25 (m/v) Limit 25 (m/v)
-
Page 39: Diagnostic Setup
Diagnostic Setup • Number of weighments • Cell status for highlighted cell. Use the Parameters associated with each of the iQUBE ’s indicator navigation keys to select cells. diagnostic tests can be set using the menus, 920i iRev Revolution III . - Page 40 Table 6-4 lists the system and cell error messages. System Error Message Cell Error Message Error Categories Boundary Error Error 1 Cell Not Detected AtoD Not Responding Cell At Rail Cell Over/Under Range Weighing Error Error 2 Cell Long Term Drift Error Cell Balance Error Cell Noise Error Cell At Load Drift Error...
-
Page 41: Alerts
Alerts When attached to the 920i indicator, diagnostic error messages generated by the iQUBE are shown on the indicator display. The 920i alert support also allows messages to be printed or, if the 920i is equipped with an Ethernet card attached to a network, routed via e-mail to an alert contact. Network Alert Notification Figure 7-1 shows an example of a system configured to relay iQUBE... -
Page 42: Alert Format
Alert Format The default alert print format is as follows: 920i <COMP><NL> <COAR1><NL> <COAR2><NL> <COAR3><NL> <CONM1><NL> <COPH1><NL> <CONM2><NL> <COPH2><NL> <CONM3><NL> <COPH3><NL> <COML><NL> <ERR><NL> Commands used in the alert format are listed 920i in Table 7-1. Command Content <COMP> Company name (up to 30 characters) <COAR1>... -
Page 43: Feature Menu, Contact Submenu
FEATURE Menu, CONTACT Submenu CALE ERIAL FEATURE PFORMT ETPT DIG I/O ALGOUT CONTACT CMPNY ADDR1 ADDR2 ADDR NAME1 NAME2 NAME company_name address_line_1 address_line_2 address_line_3 contact_name_1 contact_name_2 contact_name_3 PHONE1 PHONE2 PHONE EMAIL NEXTCAL phone_number phone_number phone_number email_address date Figure 7-2. CONTACT Submenu FEATURE Menu, CONTACT Submenu Parameter Choices... -
Page 44: Pformt Menu
PFORMT Menu See the 920i Installation Manual, PN 67887, for general information about print formats. See Section 7.2 on page 39 for information about the ALERT print format. iQUBE 920i NOTE: Port 3 is the default port for most print formats. If the is attached to the using port 3, ensure that the serial print format is not also routed to port 3. -
Page 45: 920I Serial Commands
920i Serial Commands The following section lists 920i serial commands used to configure and control the iQUBE . See the 920i Installation Manual, PN 67887, for more information about using serial commands. Command Description Values SJ.SERIAL_NUMBER#n iQUBE Read-only output serial number iQUBE SJ.CONFIG#n 8/0/0/0, 4/0/0/0, 4/8/0/0, 4/4/0/0, 4/4/4/0, 4/4/4/4, 8/4/0/0, 8/4/... - Page 46 Command Description Values SJ.SYS.NAME.s#n System name System1, system_name (24 characters, maximum) SJ.SYS.PLATS.s#n System platforms 0,0,0,0 (specify platform numbers, 1–4, assigned to sytem) or NONE (to clear platform list) 920i For system (SJ.SYS.) commands ending with “s#n”, s is the system number, n is the serial port number.
- Page 47 Command Description DON.b#s iQUBE Set digital output on (active) at bit b (9–24), for connected to slot s. NOTE: Odd numbered ports use bits 9–16; even numbered ports use bits 17–24. iQUBE Example: To turn on digital output bit 1 for an attached to port 3 (slot 0), use DON.9#0.
-
Page 48: Appendix
Verify communication LEDs D5 and D6 on the core If these steps does not resolve the problem, contact module are flashing (see Figure 2-2 on page 4). If Rice Lake Weighing Systems technical support for both LEDs are not flashing, check wiring and setup. further assistance. -
Page 49: Technical Assistance Guide And Questionnaire
See Section 2.11.4 on page 13. Table 9-1. iQUBE Troubleshooting 9.1.2 Technical Assistance Guide and Questionnaire If you need to contact Rice Lake for assistance, please use the following section as a guide for troubleshooting or repair of the iQUBE 1. What are the symptoms? 2. - Page 50 Virtui _____________ 4. What communication method is being used? RS-232___________ RS-485___________ Fiber–optic_________ R/F______________ 5. What is the configuration? iQUBE 6. Do you have the manual for all the equipment in use? 7. After connection, is there Voltage at the iQUBE 8.
-
Page 51: Printed Information
20. Is the adjusted weight, in the lower right corner, reading a weight or 000000 If the adjusted weight is showing a good weight, the problem is within the 920i configuration If the adjusted weight is displaying , the iQUBE has lost calibration or the core has gone bad. -
Page 52: Flash Update Procedure
™ • iRite Programming Reference, PN 67888 Virtui Option Cards • Virtui Single-Channel A/D Card Installation Instructions, PN 69092 • Virtui Dual-Channel A/D Card Installation Instructions, PN 69090 • 24-Channel Digital I/O Expansion Card Installation Instructions, PN 69087 Virtui • Virtui Serial Expansion Card Installation Instructions, PN 69088 •... -
Page 53: Software Version Updates
22. Replace the two jumpers J3 that were removed in step 2. 23. Place new label, 2145 on the CPU chip. Software Version Updates Version Number Update 10243 Initial Release 12283 Protocol chagne from iQUBE - requires 920i version 2.01 05054 Remote diagnostic LED error corrected Reordering of the captured Cal-Match matrix... -
Page 54: Iqube Limited Warranty
Limited Warranty Rice Lake Weighing Systems (RLWS) warrants that all RLWS equipment and systems properly installed by a Distributor or Original Equipment Manufacturer (OEM) will operate per written specifications as confirmed by the Distributor/OEM and accepted by RLWS. All systems and components are warranted against defects in materials and workmanship for two years.
Need help?
Do you have a question about the iQube 920i and is the answer not in the manual?
Questions and answers