Table of Contents
Advertisement
Quick Links
SIDE-POWER
Thruster Systems
Installation & User Guide
EN
Installasjons- og brukerveiledning
NO
SLEIPNER MOTOR AS
P.O. Box 519
N-1612 Fredrikstad
Norway
Tel:
Fax:
+47 69 30 00 60
+47 69 30 00 70
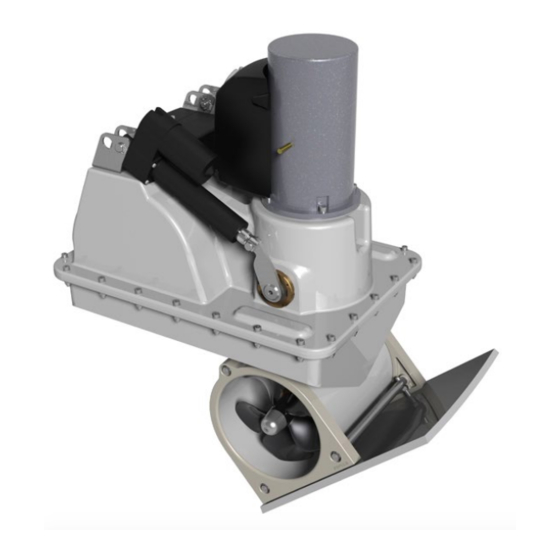
SRV 285/300 TC
w w w . s i d e - p o w e r . c o m
s i d e p o w e r @ s l e i p n e r. n o
Patent nr/EP2548797
© Sleipner Motor AS 2015
Advertisement
Table of Contents

Related Manuals for Side-Power SRV 285 TC


Summary of Contents for Side-Power SRV 285 TC
- Page 1 SRV 285/300 TC SIDE-POWER Thruster Systems Installation & User Guide Installasjons- og brukerveiledning Patent nr/EP2548797 SLEIPNER MOTOR AS P.O. Box 519 N-1612 Fredrikstad Norway Tel: +47 69 30 00 60 w w w . s i d e - p o w e r . c o m...
-
Page 2: Table Of Contents
Contents Installation instructions S-Link Measurements, thruster..............3 S-link system overview .............20 Planning and important precautions ...........4 Planning & precautions ............21 Technical specifications ..............5 User’s manual Thruster installation Control panels ................22 Positioning the thruster ..............6 General use ................23 Moulding ...................10 Installation checklist..............24 Fitting upper part and hatch ............ -
Page 3: Measurements, Thruster
Max V-angle for SR130T/170TC/210TC Measurements, thruster Målskisse, truster Max V-angle for SR130T/170TC/210TC Measurements, thruster Measurements, thruster Målskisse, truster Målskisse, truster 709,05 413,24 842,46 532,00 0T/170TC/210TC 532,00 0T/170TC/210TC 0T/170TC/210TC 604mm Designed by Checked by Approved by Date 687,50 olekr 709,05 687,50 Designed by Checked by Approved by... -
Page 4: Planning And Important Precautions
Planning and important precautions Prior to installation, it is important that the installer reads this guide to ensure necessary acquaintance with this product. The thruster must NOT be installed in compartments that require ignition proof electric equipment. If necessary, make a separate compartment. -
Page 5: Technical Specifications
Fig. 1 842,46 580,00 709,05 413,24 Present issues: 1. Aproximately 5mm of the tunnel end covers have been cut, due to adjustments. This causes incorrect angel and alignment. 2. Actuator support brackets have been moved to adjust. This also causes incorrect angel and alignment. WATERLINE Actions to be done: 3. -
Page 6: Positioning The Thruster
Fig. 1b Stern installation IMPORTANT! Fig1b is just an example of thruster positioned outside of conflict area. Detailed measurements must be done by boatbuilder. Propeller size and shaft angle will affect positioning the thruster. Vue auxiliaire B Section C-C IMPORTANT! If thruster will be stern mounted, propeller/water stream and thruster posi- tion must be considered by a Naval Architect regarding exact position- ing of the thruster. - Page 7 Fig. 4b C ( 1 : 3 ) Innstallation part ONLY for achive correct hight for the SRF-flange according to the inside hull. REMOVE after GRP-work is done! If necesarry fill gap with FILLER before GRP-work to connect SRF-flange to hull. Adjust hight according to inside hull.
- Page 8 Fig. 5 Fig. 5b IMPORTANT! Use the SRF unit as cutting 397mm template. Cut out line 135mm Ø11 Thruster casing Cut, 45 degree chamfer out- wards Hull Plassering av enheten (forts.) Positioning the thruster (cont.) Designed by Checked by Approved by Date Date olekr...
- Page 9 Fig. 6 Fig. 7 Hatch in conflict with hull Fig. 7b Pivot point for rotation (Maintain reference height here) Lift aft end to rotate unit and make clearence for hatch Make sure hatch stops free...
-
Page 10: Moulding
Fig. 9 A - A Hydropel™ H034-ADB-30 Modified Vinyl Ester Resin Vinylester for Osmosis protection ( See attached data sheet Grind in this areas, deepest where the hull and lower unit meets. Polyester ( See attached data sheet Altek™ H834-REA-30 TYPICAL SECTION VIEW Polyester Resin Designed by... -
Page 11: Fitting Upper Part And Hatch
s important that the tunnel flange sits flush on the transom. if this is not case, then the fitting area he transom will have to be worked to ensure a snug fit. Fig. 10a Fig. 10a ! Take care with grinders as it is very easy to remove to much fibreglass Bolt tightening force: his time, cut out the centre hole and the transom to the same internal diameter as the tunnel flange 4 Nm (2.9 lb/ft) - Page 12 B-B ( 1 : 10 ) B-B ( 1 : 10 ) C-C ( 1 : 10 ) Fig. 10c Fig. 10d D-D ( 1 : 10 ) C-C ( 1 : 10 ) Fig. 10e F-F ( 1 : 10 E ( 1 : 2 ) F-F ( 1 : 10 ) E ( 1 : 2 )
- Page 13 F-F ( 1 : 10 ) Fig. 10f F-F ( 1 : 10 ) E ( 1 : 2 ) B = Contact area between hatch and hull. The angle is just and recomendation from Sleipner. We only need to have a free B = Contact area between hatch and hull.
-
Page 14: Fitting The Oil Tank
Fig. 10h 709,05 413,24 Present issues: Oil tank 1. Aproximately 5mm of the tunnel end covers have been cut, due to min. 0,2 x D adjustments. This causes incorrect angel and alignment. Document1 2. Actuator support brackets have been moved to adjust. This also causes incorrect angel and alignment. -
Page 15: Fitting The Electromotor
Fig. 11 Fig. 11 Bolt tightening force (4x): 33 Nm (24 lb/ft) Fitting the electromotor Fitting the electromotor Montering av elektromotor Montering av elektromotor 1. Remove the 4 bolts in the motor bracket. 1. Remove the 4 bolts in the motor bracket. 1. -
Page 16: Electrical Installation
Fig. 13 Fig. 12 Fig. 1 Fig. 2 - LEAD + LEAD Lead ends must be isolated Table for selection of main cable, battery, up to 7m 7 - 14m 14 - 21m 21 - 28m 28 - 35m over 35m total+ and - total + and - total + and -... -
Page 17: Technical & Visual Wiring Diagrams, Srv Models
Technical wiring diagram ,SRV models Size of power cables between batteries, box and thruster is depending on distance. Minimum is 50mm Use minimum the main cable sizes for main stretch as adviced in the list in the manual Control lead to box Engine alternator and or other... -
Page 18: Check And Calibrate Drive Shaft Alignment
apshot Fig. 15 Fig. 14 Dipswitch Do not change Operating Mode Align pointer Thruster Type on lever arm with red dot on Single Service Mode Actuator bearing ... -
Page 19: Maintenance
Check and relubricate Anode, with waterproof grease if Anode, gearleg neccessary retract Check for wear in this area DO NOT apply antifoul- ing or clean with any kind of chemicals in this area. Only clean with Part no. 140117 will water. -
Page 20: S-Link System Overview
Example of wiring Wiring of S-link system Wiring of S-link system Explaining S-link Example Explaining S-link Example S-link is a ”CanBus” based control system S-link is a ”CanBus” based control system with full intelligent communication with full intelligent communication between all units in the system, much like between all units in the system, much like a computer network. -
Page 21: Planning & Precautions
Example of the control wiring with S-link system for boats with one control position and one retractable thruster. You need: 2 x 6 1327 End terminators 3 x 6 1326 T-connectors 1 x 6 1328 Power spur 2 x 6 1320-xxM Backbone cables 2 x 6 1321-xxM Spur cables BB2=___ BB1=___... -
Page 22: Control Panels
Control panels Kontrollpaneler PANEL ON: push both “ON” buttons simultaneously, thruster deploys. PANEL PÅ: Trykk begge “ON”-knappene samtidlig og trusteren felles ut PANEL OFF: push “OFF” button, thruster retracts. PANEL AV: Trykk på “OFF”-knappen og trusteren felles inn. For a detailed description of status and alarm messages shown, please For detaljert beskrivelse av status og alarmer som vises i panelene, se refer to the manual included with the control panel. -
Page 23: General Use
1. Skru på hovedstrømmen (skru alltid av hovedstrømmen når du ikke er the main power switch when not on board.) A Side-Power Automatic om bord i båten). En Side-Power Automatic Main Switch slås på / av Main Switch will turn on/off when the panel is turned on/off. -
Page 24: Installation Checklist
Checklist Sjekkliste Propeller is fastened correctly to the shaft. Propellen er festet til akselen på korrekt vis. Propeller turns freely in tunnel. Propellen roterer fritt i tunnel. The zinc-anode holding screw is tightened well with thread glue. Festeskruen til sinkanoden er festet med gjengelim. -
Page 25: Important User Precautions
Important user precautions Viktige brukerforbehold • Forviss deg om at du kjenner plasseringen av hovedstrømsbryteren • Ensure that you know the location of the main battery switch that disconnects the thruster from all power sources (batteries) so that til baugthrusteren, som kutter all strøm til thrusteren, så thrusteren the thruster can be turned off in case of a malfunction. -
Page 26: Troubleshooting
Troubleshooting Before seeking assistance at the help desk of your Side-Power dealer/distributor please perform these tests and make notes of all measurements to ensure that they have as much information as possible to work on. Some error messages and alarms will be shown in the panel display. -
Page 27: Problemer Og Løsninger
Problemer og løsninger Før du søker hjelp hos din forhandler kan du foreta noen tester, og notere ned resultatet for at forhandleren skal ha mest mulig informasjon til rådighet. Noen feilmeldinger og alarmer vil kunne vises i betjeningspanelet. Vennligst se manualen for panelet. -
Page 28: Warranty Statement
Warranty statement 1. The equipment manufactured by Sleipner Motor AS (The “Warrantor”) is warranted to be free from defects in workmanship and materials under normal use and service. 2. This Warranty is in effect for of two years (Leisure Use) or one year (Commercial use) from the date of purchase by the user. Proof of purchase must be included, to establish that it is inside the warranty period. -
Page 29: Spareparts Lists & Drawings
Partslist - SRV170/250TC Parts list will be updated shortly SRV285 TC 1.0.3 - 2015... - Page 30 Partslist - SRV210/250TC SRV285 TC 1.0.3 - 2015...
-
Page 31: Revisions
SRV285 TC 1.0.3 - 2015... -
Page 32: Service Centres
SLEIPNER MOTOR AS P.O. Box 519 N-1612 Fredrikstad Norway Tel: +47 69 30 00 60 Fax:+47 69 30 00 70 www.side-power.com sidepower@sleipner.no The information given in the document was correct at the time it was published. However, Sleipner Motor AS can not accept liability for any inaccuracies or omissions it may contain.
Need help?
Do you have a question about the SRV 285 TC and is the answer not in the manual?
Questions and answers