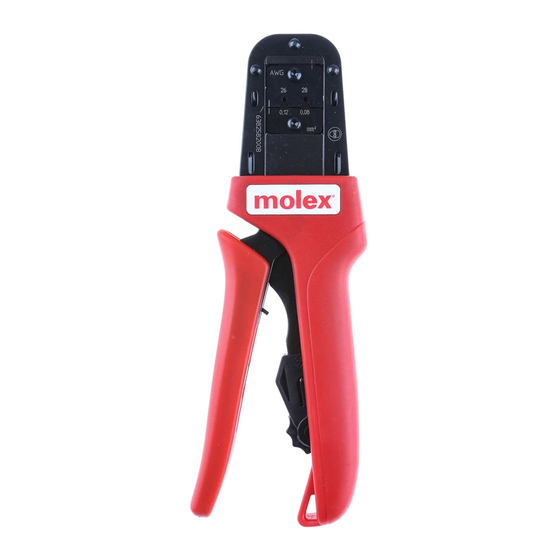
Summary of Contents for molex 57022 Series
- Page 1 STRAIGHT-ACTION (SHORT-HANDLE TYPE) HAND CRIMP TOOL OPERATING MANUAL Molex Japan Co., Ltd.
- Page 2 IS-0117E Molex Japan Co., Ltd. Contents of Update Instruction Manual No. Title Straight-Action (Short-Handle Type) Hand Crimp Tool Tool Number Rev. Issued Description 2001/06/01 New creation release. 2005/01/13 Changed the form into the bilingual version. Prepared by Y. Ishiwata ECN-JM50012 Checked by T.
-
Page 3: Dangerous Operations
1) Unauthorized reproduction of this document in part or in whole is prohibited. 2) The contents of this document are subject to change without notice. 3) Molex Japan Co., Ltd. assumes no responsibility for losses resulting from use or misuse of this document. - Page 4 A–2 <Safety Precautions> Please read the following before operating the tool. 3. Careful handling 1) Always check the tool number, applicable terminal and wire size, etc. before using the tool in the crimping process. 2) Check the tool for any damage, and repair prior to use. Defective crimping may result in fire.
-
Page 5: Tool Specification
1. Description This tool is a straight-action (short-handle type) hand crimp tool, which is designed for crimp-connecting wires to crimp terminal of Molex. Please confirm the tool number, the applicable terminal number, and the size of the applicable wire marked on the hand crimp tool before attempting to operate this tool. - Page 6 The handle will be opened by the return spring. 2) Insert a “terminal (1)” into the “crimp section (3)” from the “molex logo mark side (2).” Insert a “terminal (1)” so that the “molex logo mark side (2)” faces the “contact”, and the “terminal number engraving side (4)”...
- Page 7 Page 3 3. Operation Method (continued) 4) Insert the stripped “wire (12)” from the “terminal number engraving side (4)” until the “insulation end face (12)” contacts the “locator (8).” 5) Squeeze the tool handle firmly until the ratchet is released (clicks), while holding the wire in the same position as in below figure.
-
Page 8: Daily Maintenance
Page 4 4. Daily Maintenance 4.1. Machinery Inspection and Adjustment 1) Check to confirm that the handle moves smoothly (as heeded). 2) After using the tool, always apply machine oil or commercial anti-corrosive oil to the crimp section, the link, the ratchet, and other moving parts prior to storage (as needed). 3) Loosen the fixing nut for ratchet adjustment screw (eccentric shaft) shown in below figure by attached “exclusive tool”, and rotate the ratchet adjustment screw to change the position at which the ratchet is released. - Page 9 (4) As this tool crimps wires of various sizes using one set teeth, the insulation crimp height is for reference only. “Note” We recommend to measure the crimp height of a conductor wire by using the “crimp height micrometer” (J5830-001) of Molex. J5830-001 Measurement of crimp height of conductor wire...
- Page 10 Page 6 4.2. Crimp Terminal Inspection (continued) 2) Wire pullout strength (1) Be sure to check the wire pullout strength regularly. (2) Create a test sample like one the below figure and place it in a pullout force tester or a pull gauge.
-
Page 11: Parts List
Page 7 5. Parts List Section A-A “Note” Parts are not supplied separately. Parts Name Q’ty Remarks “U” Head Front Plate Rear Plate Link Handle “A” Handle “B” Grip Ratchet Adjust Screw Pawl Torsion Spring Spring for Locator Pawl Spring Stop Pin (phi6) - Page 12 Page 8 6. Straight-Action (Short-Handle Type) Hand Crimp Tool Startup Checklist [Applicable Tool] Straight-Action (Short-Handle Type) Hand Crimp Tool “Note” Please check the following matter before the commencement of work, and start operation after checking those without a problem. Checkpoint Standard Method/equipment Check result...


Need help?
Do you have a question about the 57022 Series and is the answer not in the manual?
Questions and answers