Table of Contents
Advertisement
Advertisement
Table of Contents

Subscribe to Our Youtube Channel
Related Manuals for John Lewis JLBIOS634


Summary of Contents for John Lewis JLBIOS634
- Page 1 Oven JLBIOS634 JLBIOSB650 JLBIOSS650 User Manual...
-
Page 2: Table Of Contents
Contents Recipes online Safety information Recipes with Recipe Automatic Children and vulnerable people safety Using the accessories General Safety Food sensor Safety instructions Inserting the accessories Installation Telescopic runners - inserting the accessories Electrical connection Trivet and Grill- / Roasting pan Care and cleaning Additional functions Pyrolytic cleaning... - Page 3 What to do if... Care and cleaning Service data Notes on cleaning Energy efficiency How to remove: shelf supports Pyrolysis Product Information and Product Information Removing and installing the door Sheet* How to replace: Lamp Energy saving Troubleshooting Repairs - after sales service...
-
Page 4: Safety Information
Safety information Before the installation and use of the appliance, carefully read the supplied instructions. The manufacturer is not responsible for any injuries or damage that are the result of incorrect installation or usage. Always keep the instructions in a safe and accessible location for future reference. -
Page 5: General Safety
General Safety Only a qualified person must install this appliance and replace the • cable. WARNING: The appliance and its accessible parts become hot • during use. Care should be taken to avoid touching heating elements. Always use oven gloves to remove or put in accessories or •... -
Page 6: Safety Instructions
Safety instructions Installation Width of the back of the 548 mm appliance Warning! Only a qualified person must install this Depth of the appliance 567 mm appliance. Built in depth of the appli- 546 mm • Remove all the packaging. ance •... -
Page 7: Use
• Connect the mains plug to the mains socket • Do not put flammable products or items that only at the end of the installation. Make sure are wet with flammable products in, near or on that there is access to the mains plug after the the appliance. -
Page 8: Pyrolytic Cleaning
• Replace immediately the door glass panels – Remove any pets (especially birds) from when they are damaged. Contact the the vicinity of the appliance location during Authorised Service Centre. and after the Pyrolytic cleaning and first use • Be careful when you remove the door from the maximum temperature operation to a well appliance. -
Page 9: Product Description
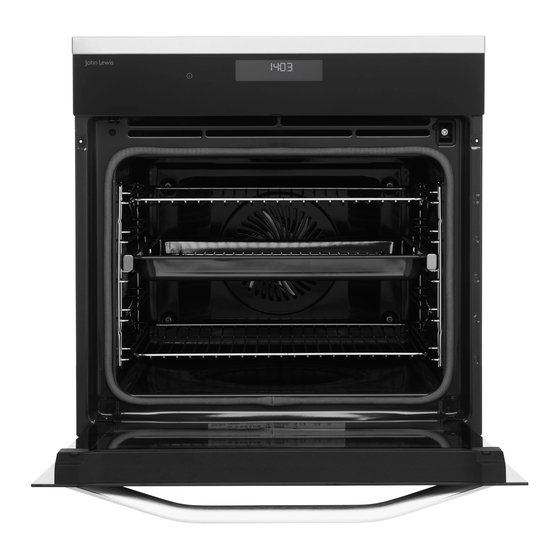
Product description General overview 1. Control panel 2. Electronic programmer 3. Socket for the core temperature sensor 4. Heating element 5. Lamp 6. Fan 7. Shelf support, removable 8. Shelf positions Accessories Grill- / Roasting pan Wire shelf To bake and roast or as a pan to collect fat. Trivet For cookware, cake tins, roasts. - Page 10 For roasting and grilling. Use the trivet only with the Grill- / Roasting pan. Food Sensor To measure the temperature inside food. Telescopic runners To insert and remove trays and wireshelf more easily. Oven User Manual...
-
Page 11: Control Panel
Control panel Electronic programmer 9 10 Use the sensor fields to operate the oven. Sensor Function Comment field ON / OFF To turn on and off the oven. Heating Functions or Press the sensor field once to choose a heating function or the Assisted Cooking menu: Assisted Cooking. -
Page 12: Display
Sensor Function Comment field Time and additional To set different functions. When a heating function operates, functions press the sensor field to set the timer or the functions: Func- tion Lock, Favourites, Heat + Hold, Set + Go. You can also change the settings of the core temperature sensor. - Page 13 Symbol Function Fast Heat Up The function is on. It decreases the heat up time. Weight Automatic The display shows that the automatic weight system is on or that weight can be changed. Heat + Hold The function is on. Oven User Manual...
-
Page 14: Before First Use
Before first use Warning! Refer to Safety chapters. Initial Cleaning Remove all accessories and removable shelf supports from the oven. Refer to "Care and cleaning" chapter. Clean the oven and the accessories before the first use. Put the accessories and the removable shelf supports back to their initial position. -
Page 15: Daily Use
Daily use Warning! Refer to Safety Symbol / Menu Application chapters. item Contains recommended Navigating the menus oven settings for a wide Assisted Cooking choice of dishes. Select a 1. Turn on the oven. dish and start the cooking 2. Press to select the menu option. -
Page 16: Heating Functions
Heating Functions Symbol / Menu Description item Heating function Application Activates and deactivates To bake on up to three shelf the time extension function. Time Extension positions at the same time and to dry food. Set the tem- True Fan Cooking Adjusts the display contrast perature 20 - 40 °C lower by degrees. -
Page 17: Specials
Heating function Application Heating function Application This function is designed to To make vegetable pre- save energy during cooking. serves (e.g. pickles). For the cooking instructions Moist Fan Baking Preserving refer to "Hints and tips" chap- ter, Moist Fan Baking. The To dry sliced fruit, vegeta- oven door should be closed bles and mushrooms. -
Page 18: Assisted Cooking
Assisted Cooking Dish Food Category: Fish / Seafood Rare Dish Scandinavian beef Medium Fish Fish, baked Fish fingers Well done Fish fillet, frozen Spare ribs Whole small fish, grilled Pork knuckle, pre- cooked Whole fish, grilled Pork joint Pork Whole fish, grilled Loin of pork Whole salmon Pork neck... - Page 19 Dish Dish Sweet dishes Pastry strips Cream puffs Food Category: Pizza / Quiche Puff pastry Dish Eclairs Pizza, thin Macaroons Pizza, extra topping Short pastry biscuits Pizza, frozen Pizza Christmas stollen Pizza American, frozen Apple strudel, frozen Pizza, chilled Sponge dough Pizza snacks, frozen Cake on tray Yeast dough...
-
Page 20: Setting A Heating Function
Food Category: Side dishes Residual heat Dish When you turn off the oven, the display shows the residual heat. You can use the heat to keep French fries, thin the food warm. French fries, thick French fries, frozen Croquettes Wedges Hash browns When it is necessary to change the weight or the core temperature of... -
Page 21: Clock Functions
Clock functions Clock functions table Setting the clock functions Before you use the functions: Clock function Application Duration, End Time, you must set a heating function and temperature To set a countdown (max. 2 h Minute Minder first. The oven turns off 30 min). -
Page 22: Time Extension
3. Set the temperature above 80 °C. 4. Press again and again until the display shows: Heat + Hold. 5. Press to confirm. When the function ends, a signal sounds. Time Extension The function: Time Extension makes the heating function continue after the end of Duration. Applicable to all heating functions with Duration or Weight Automatic. -
Page 23: Automatic Programmes
Automatic programmes Warning! Refer to Safety chapters. Recipes online You can find the recipes for the automatic programmes on our website.To find the Recipe Book check the PNC number on the rating plate on the front frame of the oven cavity. Recipes with Recipe Automatic This oven has a set of recipes you can use. -
Page 24: Using The Accessories
Using the accessories Warning! Refer to Safety chapters. Food sensor The food sensor measures temperature inside the food. When the food is at the set temperature, the appliance deactivates. There are two temperatures to be set: • the oven temperature (minimum 120 °C), •... -
Page 25: Inserting The Accessories
8. Remove the food sensor plug from the socket and remove the dish from the appliance. Warning! There is a risk of burns as the food sensor becomes hot. Be careful when you unplug it and remove it from the food. Food category: casserole 1. -
Page 26: Telescopic Runners - Inserting The Accessories
Telescopic runners - inserting the accessories With the telescopic runners you can put in and remove the shelves more easily. Caution! Do not clean the telescopic runners in the dishwasher. Do not lubricate the telescopic runners. Caution! Make sure you push Deep pan: back the telescopic runners fully in the oven before you... -
Page 27: Trivet And Grill- / Roasting Pan
Place the wire shelf and the deep pan together on the telescopic runner. 2. Put the deep pan into the oven on the necessary shelf position. Trivet and Grill- / Roasting pan Warning! Be careful when you remove the accessories from a hot oven. -
Page 28: Additional Functions
Additional functions Favourites You can press to go directly to menu: Favourites. You can save your favourite settings, such as duration, temperature or heating function. They Using the Child Lock are available in the menu: Favourites. You can save 20 programmes. When the Child Lock is on, the oven cannot be turned on accidentally. -
Page 29: Set + Go
The Automatic Switch-off does not work with When you turn off the oven, the the functions: Light, Food Sensor, Duration, End function also turns off. Time. Brightness of the display Set + Go There are two modes of display brightness: The function lets you set a heating function (or a programme) and use it later with one press of •... -
Page 30: Hints And Tips
Hints and tips Place plates and dishes in stacks evenly on the Warning! Refer to Safety wire shelf. Use the first shelf position. After half chapters. of the warming time switch their places. The temperature and baking times Dough Proving in the tables are guidelines only. -
Page 31: Tips On Baking
Tips on baking Baking results Possible cause Remedy The bottom of the cake is not The shelf position is incorrect. Put the cake on a lower shelf. baked sufficiently. The cake sinks and becomes The oven temperature is too high. Next time set slightly lower oven temper- soggy or streaky. - Page 32 CAKES / PASTRIES / BREADS ON BAKING TRAYS Preheat the empty oven unless specified otherwise. (°C) (min) Plaited bread / Bread Conventional Cook- 170 - 190 30 - 40 crown, preheating is not needed Christstollen Conventional Cook- 160 - 180 50 - 70 Rye bread: Conventional Cook-...
-
Page 33: Bakes And Gratins
BISCUITS Use the third shelf position. (°C) (min) Short pastry / Sponge cake True Fan Cooking 150 - 160 10 - 20 mixture Meringues True Fan Cooking 80 - 100 120 - 150 Macaroons True Fan Cooking 100 - 120 30 - 50 Yeast dough biscuits True Fan Cooking... -
Page 34: Multilevel Baking
Multilevel Baking Use the function: True Fan Cooking. BISCUITS For 2 trays use the first and fourth shelf position. (°C) (min) CAKES / PASTRIES / BREADS ON BAKING TRAYS Puff pastries, preheat the 170 - 30 - 50 empty oven Rolls 20 - 30 (°C) - Page 35 BEEF (°C) (min) Roast beef or fillet, rare, 1 cm thick Turbo Grilling 190 - 200 5 - 6 preheat the empty oven Roast beef or fillet, me- 1 cm thick Turbo Grilling 180 - 190 6 - 8 dium, preheat the empty oven Roast beef or fillet, well 1 cm thick...
- Page 36 VEAL Use the function: Turbo Grilling. (kg) (°C) (min) Veal knuckle 1.5 - 2 160 - 180 120 - 150 LAMB Use the function: Turbo Grilling. (kg) (°C) (min) Lamb leg / Roast lamb 1 - 1.5 150 - 170 100 - 120 Lamb saddle 1 - 1.5...
-
Page 37: Bread Baking
POULTRY Use the function: Turbo Grilling. (kg) (°C) (min) Poultry, portions 0.2 - 0.25 200 - 220 30 - 50 Chicken, half 0.4 - 0.5 190 - 210 35 - 50 Chicken, poulard 1 - 1.5 190 - 210 50 - 70 Duck 1.5 - 2 180 - 200... -
Page 38: Crispy Baking With Pizza Function
BREAD (°C) (min) Baguette 200 - 220 35 - 45 Brioche 180 - 200 40 - 60 Ciabatta 200 - 220 35 - 45 Rye bread 190 - 210 50 - 70 Wholemeal bread 180 - 200 50 - 70 Whole grain bread 170 - 190 60 - 90... -
Page 39: Grill
PIZZA Preheat the empty oven before cooking. Use the second shelf position. (°C) (min) Pizza, thin crust 200 - 230 15 - 20 Pizza, thick crust 180 - 200 20 - 30 Unleavened bread 230 - 250 10 - 20 Puff pastry flan 160 - 180 45 - 55... -
Page 40: Slow Cooking
GRILL (°C) (min) (min) 1st side 2nd side Whole fish, 0.5 - 1 kg 210 - 230 15 - 30 15 - 30 3 / 4 Slow Cooking Always cook without a lid while using this function. 3. Use Food Sensor. This function allows you to prepare lean, tender 4. -
Page 41: Frozen Foods
Frozen Foods DEFROSTING (°C) (min) Pizza, frozen 200 - 220 15 - 25 Pizza American, frozen 190 - 210 20 - 25 Pizza, chilled 210 - 230 13 - 25 Pizza snacks, frozen 180 - 200 15 - 30 French fries, thin 200 - 220 20 - 30 French fries, thick... -
Page 42: Preserving
(kg) (min) (min) Defrosting Further de- time frosting time Meat 90 - 120 20 - 30 Turn halfway through. Trout 0.15 25 - 35 10 - 15 Strawberries 30 - 40 10 - 20 Butter 0.25 30 - 40 10 - 15 Cream 2 x 0.2 80 - 100... -
Page 43: Dehydrating - True Fan Cooking
VEGETABLES VEGETABLES (min) (min) (°C) Cooking Continue to Beans 60 - 70 6 - 8 time until cook at 100 simmering °C Peppers 60 - 70 5 - 6 Carrots 50 - 60 5 - 10 Vegetables for soup 60 - 70 5 - 6 Cucumbers 50 - 60... - Page 44 BEEF Food core temperature (°C) Less Medium More Meatloaf PORK Food core temperature (°C) Less Medium More Ham / Roast Saddle chop / Pork loin, smoked / Pork loin, poached VEAL Food core temperature (°C) Less Medium More Roast veal Veal knuckle MUTTON / LAMB Food core temperature (°C)
- Page 45 POULTRY Food core temperature (°C) Less Medium More Chicken Duck, whole / half / Turkey, whole / breast Duck, breast FISH (SALMON, TROUT, Food core temperature (°C) ZANDER) Less Medium More Fish, whole / large / steamed / Fish, whole / large / roasted CASSEROLES - PRE- Food core temperature (°C) COOKED VEGETABLES...
-
Page 46: Moist Fan Baking - Recommended Accessories
Moist Fan Baking - recommended accessories Use the dark and non-reflective tins and containers. They have better heat absorption than the light colour and reflective dishes. Ramekins Pizza pan Baking dish Flan base tin Ceramic Dark, non-reflective Dark, non-reflective Dark, non-reflective 8 cm diameter, 5 28 cm diameter 26 cm diameter... -
Page 47: Information For Test Institutes
Information for test institutes Tests according to: EN 60350, IEC 60350. BAKING ON ONE LEVEL. Baking in tins (°C) (min) Fatless sponge cake True Fan Cooking 140 - 150 35 - 50 Fatless sponge cake Conventional Cooking 35 - 50 Apple pie, 2 tins Ø20 cm True Fan Cooking 60 - 90... - Page 48 MULTILEVEL BAKING. Biscuits (°C) (min) 2 posi- 3 posi- tions tions Short bread / Pastry strips True Fan Cooking 25 - 45 1 / 4 1 / 3 / 5 Small cakes, 20 per tray, True Fan Cooking 23 - 40 1 / 4 preheat the empty oven GRILL...
-
Page 49: Care And Cleaning
Care and cleaning Warning! Refer to Safety chapters. Notes on cleaning Clean the front of the oven with a soft cloth with warm water and a mild cleaning agent. To clean metal surfaces, use a dedicated cleaning agent. Clean stubborn stains with a special oven cleaner. Cleaning Agents Clean the oven cavity after each use. -
Page 50: Pyrolysis
Intense For a thorough cleaning: 3 h. 6. Press When the cleaning starts, the oven door is locked and the lamp does not work. To stop the cleaning before it is completed, turn off the oven. Install the removed accessories in the opposite Warning! After the function is sequence. -
Page 51: How To Replace: Lamp
6. Hold the door trim (B) on the top edge of the door at the two sides and push inwards to A B C release the clip seal. 7. Pull the door trim to the front to remove it. 8. Hold the door glass panels on their top edge one by one and pull them up out of the guide. - Page 52 2. Use a narrow, blunt object (e.g. a teaspoon) to remove the glass cover. 3. Clean the glass cover. 4. Replace the lamp with a suitable 300 °C heat- resistant lamp. 5. Install the glass cover. 6. Install the left shelf support. Oven User Manual...
-
Page 53: Troubleshooting
Troubleshooting Warning! Refer to Safety chapters. What to do if... Problem Possible cause Remedy You cannot activate or operate the The oven is not connected to an Check if the oven is correctly con- oven. electrical supply or it is connected nected to the electrical supply (re- incorrectly. -
Page 54: Service Data
Problem Possible cause Remedy The display shows an error code There is an electrical fault. • Turn off the oven with the that is not in this table. house fuse or the safety switch in the fuse box and turn it on again. -
Page 55: Energy Efficiency
Energy efficiency Product Information and Product Information Sheet* Supplier's name John Lewis JLBIOS634 944182403 Model identification JLBIOSB650 944182406 JLBIOSS650 944182412 Energy Efficiency Index 81.2 Energy efficiency class Energy consumption with a standard load, conventional mode 1.09 kWh/cycle Energy consumption with a standard load, fan-forced mode 0.69 kWh/cycle... - Page 56 Use metal cookware to improve energy saving. minimum 3 - 10 minutes before the end of cooking. The residual heat inside the oven will When possible, do not preheat the oven before continue to cook. cooking. Use the residual heat to warm up other dishes. Keep breaks between baking as short as possible when you prepare a few dishes at one Keep food warm...
-
Page 57: Repairs - After Sales Service
Shopping is easy with John Lewis Shops manual, the next step is to contact John Lewis John Lewis, Aberdeen 01224 625 000 technical support on: John Lewis, Basingstoke 01256 406200... - Page 58 John Lewis, Croydon 020 8662 4730 John Lewis, Stratford 020 8532 3500 John Lewis, Horsham 01403 214 740 John Lewis, The Trafford Centre 0161 491 4040 John Lewis, Ipswich 01473 275 850 John Lewis, Watford 01923 244 266 John Lewis, Newbury 01635 263 980...
- Page 59 Environmental concerns marked with the symbol with the household Recycle materials with the symbol . Put the waste. Return the product to your local packaging in relevant containers to recycle it. recycling facility or contact your municipal office. Help protect the environment and human health by recycling waste of electrical and electronic appliances.
- Page 60 867353431-A-432019 ( Subject to change without notice. )
Need help?
Do you have a question about the JLBIOS634 and is the answer not in the manual?
Questions and answers