
Related Manuals for Canon Paper Deck Unit-F1


Summary of Contents for Canon Paper Deck Unit-F1
- Page 1 Paper Deck Unit-F1 SERVICE MANUAL September 2, 2016 Rev. 2 CANON Paper Deck Unit-F1 Rev. 2 PRINTED IN U.S.A. COPYRIGHT © 2016 CANON INC.
- Page 2 When changes occur in applicable products or in the contents of this manual, Canon will release technical information as the need arises. In the event of major changes in the contents of this manual over a long or short period, Canon will issue a new edition of this manual.
- Page 3 Introduction Symbols Explanation Symbols Explanation Disconnect the connector. Connect the power cable. Connect the connector. Disconnect the power cable. Remove the cable/wire from the Turn on the power. cable guide or wire saddle. Install the cable/wire to the cable Turn off the power. guide or wire saddle.
-
Page 4: Table Of Contents
Contents Contents Safety Precautions....................1 Check Items when Turning OFF the Main Power................2 Notes Before Servicing........................2 Points to Note at Cleaning........................2 Notes On Assembly/Disassembly....................... 2 1. Product Overview.....................3 Features.............................. 4 Features...............................4 Specifications............................5 Specifications............................5 Names of Parts............................6 External View............................6 Cross Section............................ - Page 5 Contents Main Units............................29 Sensors..............................30 Solenoids............................31 Motors..............................32 PCBs..............................33 Switches.............................34 Others..............................35 External Covers..........................36 Removing the Left Upper Cover......................36 Removing the Front Cover........................36 Removing the Right Cover ........................36 Removing the Rear Cover ........................37 Removing the Upper Cover........................37 Consumable Parts and Cleaning Points....................38 Removing the Deck Feed Roller ......................38 Removing the Deck Pickup Roller .......................
- Page 6 Contents Unpacking............................75 Unpacking Procedure.......................... 75 Unpacking and Checking the Contents..................... 76 imageRUNNER ADVANCE C5500 Series.....................76 Connecting to the Host Machine of the imageRUNNER ADVANCE 4500 Series........77 Installation Procedure........................78 imageRUNNER ADVANCE C5500 Series.....................78 imageRUNNER ADVANCE 4500 Series....................89 Checking after Installation....................... 100 Checking after Installation........................100 Paper Positioning Check / Adjustment Procedure................
-
Page 7: Safety Precautions
Safety Precautions Check Items when Turning OFF the Main Power........2 Notes Before Servicing......2 Points to Note at Cleaning....2 Notes On Assembly/Disassembly..2... -
Page 8: Check Items When Turning Off The Main Power
Safety Precautions Check Items when Turning OFF the Main Power The Paper Deck Unit is not equipped with the "main power switch". The power source is supplied by turning ON "the main power switch" on the host machine. Notes Before Servicing CAUTION: At servicing, be sure to turn off the power source according to the specified steps and disconnect the power plug. -
Page 9: Product Overview
Product Overview Features..........4 Specifications........5 Names of Parts........6 Cross Section........9 Option Construction......10... -
Page 10: Features
1. Product Overview Features Features • 2,700 sheets (80 g/m ) stacking for maximum. • Easy replacement work of the consumable parts ( Deck Pickup Roller, Deck Feed Roller, Deck Separation Roller). -
Page 11: Specifications
1. Product Overview Specifications Specifications Item Specifications Remarks Pickup method Retard separation Center reference Paper accommoda- Front loading tion Paper type Transfer from the host machine Thin paper (52 to 63g/m ), Plain paper (64 to105 g/m ), Heavy paper (106 to 256g/m ), Color paper, Recycled paper, Bond paper, Pre- punched paper, Letterhead... -
Page 12: Names Of Parts
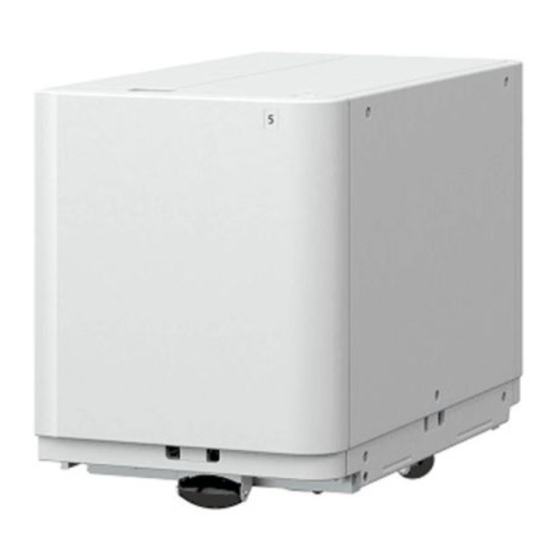
1. Product Overview Names of Parts External View ■ Front Name Left Upper Cover Upper Cover Compartment Open Button Deck Release Lever Front Cover... - Page 13 1. Product Overview ■ Rear Name Rear Cover Right Cover...
- Page 14 1. Product Overview ■ Internal Name Rear Edge Guide Plate Lifter Left/right Edge Guide Plates...
-
Page 15: Cross Section
1. Product Overview Cross Section Name Deck Pull-out Roller Deck Separation Roller Deck Feed Roller Deck Pickup Roller... -
Page 16: Option Construction
1. Product Overview Option Construction The optional equipment is as follows. Name Paper Deck Heater Unit-C1... -
Page 17: Technology
Technology Basic Configuration......12 Controls ..........16... -
Page 18: Basic Configuration
2. Technology Basic Configuration Functional Construction The Paper Deck Unit is grouped into the following 3 blocks: Pickup/feed system[1],Compartment system[2],Deck control system[3]. Overview of the Electrical Circuitry The operating sequence for the Paper Deck Unit is controlled by the DC controller PCB in the host machine. The DC controller PCB is equipped with CPU. -
Page 19: Component Configuration
2. Technology Motor Deck driver PCB (PCB2) Host Sensor machine ASIC Switch Motor driver Solenoid DC/DC converter Regulator EEPROM Sensor Box driver PCB Switch (PCB3) Motor Component Configuration ■ Roller Layout Name Deck Pull-out Roller Deck Separation Roller Deck Feed Roller Deck Pickup Roller... - Page 20 2. Technology ■ Sensor Layout Only the optical sensors on the feed path are shown below. Name Deck Pickup Sensor Deck Pull-out Sensor...
- Page 21 2. Technology ■ Drive Configuration Name Deck Pickup Motor Deck Pull-out Motor Deck Lifter Motor Deck Pickup Release Solenoid Compartment Open Solenoid...
-
Page 22: Controls
2. Technology Controls Overview Item Reference 1.Pickup/Feed System Pickup/feed control “Pickup/Feed Control” on page 16 Paper presence/absence detec- “Paper Presence/Absence Detection Control” on page 16 tion control Paper surface detection control “Paper Surface Detection Control” on page 17 2. Compartment system Lifter control “Lifter Control”... -
Page 23: Paper Surface Detection Control
2. Technology Paper Surface Detection Control Paper surface is detected by the paper level sensor (PS6) in the pickup assembly. When the lifter rises to push up detection flag of the pickup roller holder by surface of paper, the paper level sensor (PS6) detects top surface of paper and the lifter stops to keep the top surface of paper at the pickup position. -
Page 24: Paper Level Detection Control
2. Technology Paper Level Detection Control The paper level is judged by the Relay paper sensor(PS5), Paper level sensor(PS6), Deck paper sensor(PS11) and copy/print quantity. Relay paper sensor(PS5) Paper level sensor(PS6) Deck paper sensor(PS11) Paper level indica- tion Full Half(※) No-paper No-paper PS11... - Page 25 2. Technology PS11 Lifter Full PS11 Lifter...
-
Page 26: Switching The Paper Size
2. Technology Half(※) PS11 PS11 Lifter In printer inside, a memory does the printing number of sheets from deck. When the printing number of sheets reached the threshold value of the following table, Paper level indication 3to2 change. Table:Threshold value of the printing number of sheets when Paper level indication 3to2 change. Paper type weight(gsm) Threshold value(Ply) -
Page 27: Power Supply
2. Technology Compartment open Compartment open/close sensor solenoid Compartment open/close detection switch LED100 Power Supply A power source for the Paper Deck Unit is supplied by host machine. Supplied DC power is converted through the deck driver PCB (PCB2) and sent to each loads. Sensor DC5V power... -
Page 28: Upgrading
2. Technology paper supplied before the jammed paper and then stops the operation. The host machine shows instruction how to remove jams on the control panel. Jam type Sensor No. Sensor name Power ON Deck pickup sensor Stationary Deck pickup sensor Delay Deck pickup sensor Upgrading... -
Page 29: Periodical Service
Periodical Service List of Work for Scheduled Servicing ............24... -
Page 30: List Of Work For Scheduled Servicing
3. Periodical Service List of Work for Scheduled Servicing PR:Replacement(Periodical replacement) CR:Replacement (consumable parts) CL:Cleaning LU:Lubrication AD:Adjustment CH:Maintenance Cate- Part Part Interval Adjust- Counter Reference gory name num- ment(Yes/ 1 Pickup Deck pick- FL0-45 None (LV1) DRBL-2 >PD-PU- “Removing the Deck Pickup Roll- assem- up roller 1,000,000sheets,C... -
Page 31: Disassembly/Assembly
Disassembly/ Assembly Removing from the Host Machine..26 Parts List..........27 External Covers........36 Consumable Parts and Cleaning Points..........38 Main Units........... 42 Solenoids ........... 46 Motors ..........48 Lifter Wire ...........50 PCBs........... 60... -
Page 32: Removing From The Host Machine
4. Disassembly/Assembly 3. Slide the Paper Deck Unit it stops with pulling the Removing from the Host release lever. Machine Removing from the Host Machine 1. Turn OFF the main power on the host machine. 2. Remove the lattice connector[1] and the cable[2] from Wire saddle[3]. -
Page 33: Parts List
4. Disassembly/Assembly Parts List External Covers... -
Page 34: Consumable Parts And Cleaning Points
4. Disassembly/Assembly Name Reference Left Upper Cover “Removing the Left Upper Cover” on page 36 Upper Cover “Removing the Upper Cover” on page 37 Front Cover “Removing the Front Cover” on page 36 Rear Cover “Removing the Rear Cover ” on page 37 Right Cover “Removing the Right Cover ”... -
Page 35: Main Units
4. Disassembly/Assembly Main Units Name Reference Pickup Assembly “Removing the Pickup Assembly” on page 42 Compartment “Removing the Compartment ” on page 43... -
Page 36: Sensors
4. Disassembly/Assembly Sensors PS11 PS10 Name Main unit Reference Deck Pickup Sensor Pickup Assembly Deck Pull-out Sensor Pickup Assembly Deck Lifter Upper Limit Sensor 2 Pickup Assembly Deck Lifter Upper Limit Sensor 1 Pickup Assembly Relay Paper Sensor Compartment Paper Level Sensor Pickup Assembly Separation Roller Sensor Pickup Assembly... -
Page 37: Solenoids
4. Disassembly/Assembly Solenoids Name Main unit Reference Deck Pickup Release Solenoid Pickup Assembly “Removing the Deck Pickup Release Solenoid ” on page Compartment Open Solenoid “Removing the Compartment Open Solenoid ” on page NOTE: Check the operation of the part in the following service mode: Service Mode >... -
Page 38: Motors
4. Disassembly/Assembly Motors Name Main unit Reference Deck Pickup Motor Deck Pull-out Motor Pickup Assembly Deck Lifter Motor Compartment “Removing the Deck Lifter Motor ” on page 48 NOTE: Check the operation of the part in the following service mode: Service Mode >... -
Page 39: Pcbs
4. Disassembly/Assembly PCBs PCB2 PCB3 PCB1 Name Main unit Reference PCB1 Compartment Open Switch PCB - PCB2 Deck Driver PCB “Removing the Deck Driver PCB ” on page 60 PCB3 Box Driver PCB Compartment... -
Page 40: Switches
4. Disassembly/Assembly Switches Name Main unit Reference Compartment Open/close Detection Switch Deck Connection Switch Deck Lifter Lower Limit Switch Compartment NOTE: Check the operation of the part in the following service mode: Service Mode > SITUATION > Sensor Check... -
Page 41: Others
4. Disassembly/Assembly Others Name Main unit Reference Lifter Wire Compartment “Removing the Lifter Wire ” on page 50... -
Page 42: External Covers
4. Disassembly/Assembly ■ Procedure External Covers 1. Remove the Front Cover[1]. • 6 Screws[2] Removing the Left Upper • 6 Spacer[3] Cover NOTE: ■ Procedure Mark with lines on the 4 marking-off lines to fit the Front Cover onto the original position. 1. -
Page 43: Removing The Rear Cover
4. Disassembly/Assembly ■ Procedure Removing the Upper Cover 1. Remove the Right Cover[1]. ■ Preparation • 5 Screws[2] 1. Open the Compartment.“Opening the Compartment ” on page 43 2. Remove the Right Cover.“Removing the Right Cover ” on page 36 3. -
Page 44: Consumable Parts And Cleaning Points
4. Disassembly/Assembly Consumable Parts and Cleaning Points Removing the Deck Feed Roller ■ Preparation 1. Remove the Left Upper Cover.“Removing the Left Upper Cover” on page 36 ■ Procedure NOTE: When attaching the Left Upper Cover, return the Slide Guide (Upper) to the original position as shown in the CAUTION: figuer. -
Page 45: Removing The Deck Pickup Roller
4. Disassembly/Assembly 2. Remove the Deck Feed Roller[1]. Removing the Deck Pickup • 1 Claw[2] Roller ■ Preparation 1. Remove the Left Upper Cover.“Removing the Left Upper Cover” on page 36 ■ Procedure CAUTION: Be sure not to touch the surface of the roller at disassembling/assembling. -
Page 46: Removing The Deck Separation Roller
4. Disassembly/Assembly 2. Remove the Deck Pickup Roller[1]. Removing the Deck • 1 Claw[2] Separation Roller ■ Preparation 1. Remove the Left Upper Cover.“Removing the Left Upper Cover” on page 36 2. Remove the Deck Feed Roller.“Removing the Deck Feed Roller ” on page 38 ■... - Page 47 4. Disassembly/Assembly 2. Remove the Deck Separation Roller[2]. NOTE: • 1 Claw[3] How to install the Deck Separation Roller Be sure to align the groove [2] of the Torque Limiter[1] with the spring pin [3] to install the roller. Be sure to align the groove [2] of the Deck Separation Roller [1] with the protrusion [4] of the Torque Limiter[3] to install the roller.
-
Page 48: Main Units
4. Disassembly/Assembly 2. Remove the Pickup Assembly[2] while releasing the Main Units Coupling[1] toward the direction of the arrow. • 4 Screws[3] Removing the Pickup CAUTION: Assembly Slide Guide (Upper) must be positioned as shown in the figure when replacing the Pickup Assembly. ■... -
Page 49: Opening The Compartment
4. Disassembly/Assembly ■ Procedure Opening the Compartment 1. Open the Compartment[1] until it stops while ■ Procedure releasing stoppers[2] with pressing left and right Latches. 1. Insert screwdrivers into the hole at rear left side of 4 Screws[3] the compartment[2] and then release the lever[1] to open it. - Page 50 4. Disassembly/Assembly 3. Remove the 2 screws[3]. 7. Lift the Compartment[1] and then remove the 2 Guide Pins[2] on the left rail. 4. Remove the 2 screws[1]. 8. Store the left rail[1] in the Paper Deck Unit. 5. Lift the Compartment[1] and then remove the 2 Guide Pins[2] on the right rail.
- Page 51 4. Disassembly/Assembly 9. Remove the Lifter Motor Assembly Cover[1]. 10. Remove the Connection Flat Cable Part[1]. • 2 Screws[2] • 1 Flat Cable[2] • 2 Screws[3] ■ Actions when Replacing the Parts “Compartment ” on page 70...
-
Page 52: Solenoids
4. Disassembly/Assembly 2. Remove the Compartment Open Solenoid[1]. Solenoids • 2 Screws[2] • 1 E-ring[3] • 1 Edge saddle[4] Removing the Compartment Open Solenoid ■ Preparation 1. Remove the Right Cover.“Removing the Right Cover ” on page 36 ■ Procedure 1. - Page 53 4. Disassembly/Assembly 2. Remove the Deck Pickup Release Solenoid[1]. • 2 Screws[2]...
-
Page 54: Motors
4. Disassembly/Assembly ■ Procedure Motors 1. Remove the Deck Lifter Motor Assembly[1]. • 4 Wire saddles[2] Removing the Deck Lifter • 1 Reuse band[3] Motor • 3 Connectors[4] • 5 Screws[5] ■ Preparation CAUTION: The Lifter Plate must be moved to the bottom before removing the Lifter Wire. - Page 55 4. Disassembly/Assembly 2. Remove the connector[2] and the Reuse band[3] 5. Remove the Lifter Motor[1]. from behind of the Deck Lifter Motor Assembly[1]. • 2 Screws[2] 3. Remove the Deck Lifter Motor Part[1] from the Deck Lifter Motor Assembly. • 5 Screws[2] 4.
-
Page 56: Lifter Wire
4. Disassembly/Assembly ■ Procedure Lifter Wire ● Deck Lifter Motor Assembly Removing the Lifter Wire 1. Remove the Deck Lifter Motor Assembly[1]. • 4 Wire saddles[2] ■ Preparation • 1 Reuse band[3] • 3 Connectors[4] • 5 Screws[5] CAUTION: The Lifter Plate must be moved to the bottom before removing the Lifter Wire. - Page 57 4. Disassembly/Assembly ● Rear 3. Remove the Lifter Wire Fixing Cover[2] and Pulley Fixing Plate[3] from the Lifter Shaft[1]. 1. Remove the 2 Lifter Wire Pulleys[2] from top of the • 1 Screw[4] Compartment[1]. • 1 E-ring[5] • 2 Screws[3] 2.
- Page 58 4. Disassembly/Assembly 5. Remove the Lifter Wire[1]. 2. Remove the Lifter Wire Fixing Cover[2] from the Lifter Shaft[1]. • 1 Screw[3] 3. Remove the Pulley Fixing Plate[1]. • 1 E-ring[2] ● Front 1. Remove the 2 Lifter Wire Pulleys[2] from top of the Compartment[1].
-
Page 59: Installation Of The Lifter Wire
4. Disassembly/Assembly 5. Remove the Lifter Wire[1]. 2. Put the Long Lifter Wire[2] through the Small Pulley[1] and then fix it on top left part of the Compartment[3]. • 1 Screw[4] Installation of the Lifter Wire ■ Rear 1. Put the Lifter Wires through the right and the left lifter holes on the Lifter Plate. - Page 60 4. Disassembly/Assembly 3. Set the Long Lifter Wire on front side of the Large 4. Fix the Large Pulley[1] on top right of the Pulley. Set the Short Lifter Wire on rear side of it. Compartment[2]. • 1 Screw[3] CAUTION: The Lifter Wire may be disconnected by wrong assembling.
- Page 61 4. Disassembly/Assembly 5. Attach the Wire Pulley[1] and then put the Short 6. Attach the Wire Pulley[1] and then put the Long Lifter Lifter Wire along the groove. Wire along the groove. • 1 Parallel Pin[2] • 1 Parallel Pin[2] NOTE: NOTE: Pull the Short Lifter Wire[1] from bottom right of the...
- Page 62 4. Disassembly/Assembly 7. Fix the Lifter Wire[1]. ■ Front • 1 Pulley Fixing Plate[2] • 1 E-ring[3] 1. Put the Lifter Wires through the right and the left • 1 Lifter Wire Fixing Cover[4] lifter holes on the Lifter Plate. •...
- Page 63 4. Disassembly/Assembly 2. Put the Long Lifter Wire[3] through the Small 3. Set the Long Lifter Wire on front side of the Large Pulley[1] and then fix it on top right part of the Pulley. Set the Short Lifter Wire on rear side of the Compartment[2].
- Page 64 4. Disassembly/Assembly 4. Fix the Large Pulley[1] on top left of the 5. Attach the Wire Pulley[1] and then put the Short Compartment[2]. Lifter Wire in the groove. • 1 Screw[3] • 1 Parallel Pin NOTE: Pull the Short Lifter Wire[1] from bottom left of the Compartment[2] and attach it without slackness.
- Page 65 4. Disassembly/Assembly 6. Attach the Wire Pulley[1] and then put the Long Lifter 7. Attach the Pulley Fixing Plate[1]. Wire in the groove. • 1 E-ring[2] • 1 Parallel Pin[2] NOTE: Attach the Pulley Fixing Plate to the Wire Pulley with fitting the U-shaped groove.
-
Page 66: Pcbs
4. Disassembly/Assembly PCBs Removing the Deck Driver ■ Preparation 1. Remove the Rear Cover.“Removing the Rear Cover ” on page 37 ■ Procedure 1. Remove the Deck Driver PCB[1]. • 7 Connectors[2] • 4 Screws[3] ■ Actions when Replacing the Parts “Deck Driver PCB”... -
Page 67: Adjustment
Adjustment Adjustment.......... 62 Actions when Replacing the Parts..63 Other Adjustment........ 72... -
Page 68: Adjustment
5. Adjustment Adjustment Overview ■ Adjustment/Function Setting Items on the Service Mode For details, refer to the service manual of the host machine. Service mode Contents (Lv1) COPIER> ADJUST> FEED-ADJ> ADJ-DK *1 Write start position in horizontal scan:Paper Deck (Lv1) COPIER> ADJUST> FEED-ADJ> ADJ-DKRE *1 Write start position in horizontal scan:Paper Deck ,2nd (Lv1) COPIER>... -
Page 69: Actions When Replacing The Parts
5. Adjustment Actions when Replacing the Parts Front Cover ■ Actions at Replacement “Removing the Front Cover” on page 36 ■ Actions after Replacement 1. Adjust the gap as follows between the Front Cover and Upper Cover, the Front Cover and Right Cover. •... -
Page 70: Pickup Assembly
5. Adjustment Pickup Assembly ■ Actions at Replacement “Removing the Pickup Assembly” on page 42 ■ Actions after Replacement ● Pre-Separation Plate Adjustment 1. Remove all sheets of paper from the Compartment and close the Compartment. 2. Turn ON the main power. 3. - Page 71 5. Adjustment 6. Loosen the 4 screws on the Pre-Separation Plate. NOTE: There is the case that an adjustment screw is fixed with adhesive, but may turn it only at the time of adjustment.
- Page 72 5. Adjustment 7. Slide up or down the left side of the Pre-Separation Plate[1] to adjust it same position between the Pre- Separation Plate[1] and the Lifter Plate[2]. NOTE: Check the position scale on left edge of the Pre-Separation Plate[1] to record the adjusted value.
- Page 73 5. Adjustment 8. Fasten the 2 screws[1] on the left loosened at procedure.
- Page 74 5. Adjustment 9. Slide up or down the right side of the Pre-Separation Plate with the same value as procedure 6. NOTE: Check the position scale on the right edge of the Pre-Separation Plate to adjust it.
- Page 75 5. Adjustment 10. Fasten the 2 screws on the right loosened at procedure.
-
Page 76: Compartment
5. Adjustment 11. Check that the position between the Pre-Separation Plate[1] and the Lifter Plate[2] is same. NOTE: Put a sheet of paper on Deck Lifter[2]. Move it to feeding direction and check if it does not move upward or downward by Pre-Separation Plate. Compartment ■... - Page 77 5. Adjustment 2. Turn ON the host machine. 3. Execute the following item on the service mode. • (Lv.1) COPIER> OPTION> ACC> DK-P...
-
Page 78: Other Adjustment
5. Adjustment Other Adjustment Adjusting the Pressure of the Deck Separation Roller In case that the pickup failure or double feeding occurs, change the hook position of the pressure spring on the Deck Separation Roller. ■ Preparation 1. Remove the Pickup Assembly. “Removing the Pickup Assembly”... -
Page 79: Installation
Installation Checking before Installation....74 Unpacking........... 75 Unpacking and Checking the Contents.......... 76 Installation Procedure......78 Checking after Installation....100 Paper Positioning Check / Adjustment Procedure........101... -
Page 80: Checking Before Installation
6. Installation Checking before Installation Requirements for the installation place are given below. It is recommended to look over the place to be used for installation before delivering the equipment to the user. CAUTION: • Install the host machine first and then install the Paper Deck. •... -
Page 81: Unpacking
6. Installation Unpacking Unpacking Procedure NOTE: The equipment is secured by tapes, cushioning and other materials to protect it from vibration and impact during transit. Remove all such tapes and cushioning materials as instructed below before installing this equipment. Keep all fixings in a safe place for later reuse in reshipping the equipment, as for relocation and repairs. -
Page 82: Unpacking And Checking The Contents
6. Installation Unpacking and Checking the imageRUNNER ADVANCE Contents C5500 Series Check that none of the included parts is missing. □ [1]Paper Deck Unit x1 □ [2]Wire Saddle x1 □ [3]Latch Plate A (Front) x1 □ [4]Latch Plate B(Rear) x1 □... -
Page 83: Connecting To The Host Machine Of The Imagerunner Advance 4500 Series
6. Installation • *1:The parts [3],[4] are not used for imageRUNNER Connecting to the Host ADVANCE 4500 Series. Machine of the imageRUNNER • *2:Connecting to the Host Machine with Cassette Feeding Unit-AN1, use [7] Screw ADVANCE 4500 Series (Binding(Black);M4x25). • *3:Connecting to the Host Machine with High Capacity Cassette Feeding Unit-B1, use [8] Screw (Binding;M4x45). -
Page 84: Installation Procedure
6. Installation Installation Procedure 2. Remove the screw from the base stay unit and then attach it as shown in the following figure. • 1 Screw CAUTION: Check that the main power switch is OFF and the power plug is disconnected from the outlet. NOTE: Keep the removed fixing materials as they are used to transport for relocation. - Page 85 6. Installation 4. Remove the screw of the fixing plate. 6. Remove the fixing plate and the cushioning material. • 3 Screws • 2 Screws NOTE: Check that the cushioning material is removed. 5. Insert screwdrivers into the hole and push the release lever down to open the compartment.
- Page 86 6. Installation ■ Preparation of the Host Machine 8. Remove the fixing part of lifter plate, cushioning material and tapes. • 2 Screws 1. Open the cassette2, cassette1, front cover and right cover and then remove the handle cover. • 2 Claws •...
- Page 87 6. Installation 2. Close the right cover and then remove the part as 3. Cut the upper part of the part as shown in the shown in the following figure. following figure. • 2 Screws • 1 Boss CAUTION: Be sure to remove the face cover properly so that no bur is formed.
- Page 88 6. Installation 5. Open the right cover and then attach the handle 7. Close all covers and then cut the face cover. cover. • 2 Claws CAUTION: • 1 Boss Be sure to remove the face cover properly so that no bur is formed.
- Page 89 6. Installation 8. Attach the latch plate B (rear) with the 1 bundled 10. Attach the 2 feed guides. screw and 1 screw removed at procedure 2 in "Preparation of the Host Machine". • 1 Boss • 2 Screws (RS tightening; M4x8) RS tightening M4x8 9.
- Page 90 6. Installation ■ Connection with the Host Machine 2. Insert the positioning pins to the holes on the host machine and then fix the base stay and then slide the Paper Deck to the host machine. 1. Remove the 2 face seals. •...
- Page 91 6. Installation 3. Loosen the screws to move the wheel to the floor 4. Loosen the screws to move the wheel to the floor and then fasten the screws. and then fasten the screws. • 2 Screws • 2 Screws...
- Page 92 6. Installation 5. Remove the face seal and the connector cover. 7. Connect the lattice connector to the host machine and then fix the harness with the wire saddle. • 1 Connector • 1 Wire Saddle CAUTION: Check that the main power switch is OFF and the power plug is disconnected from the outlet.
- Page 93 6. Installation 8. Attach the Cassette No. Label "4" or "5" 9. Attach the Paper Size Label with a gap in 5mm from the cassette No. Label while aligning right edge of • High Capacity Cassette Feeding Unit is installed:4 the labels.
- Page 94 6. Installation ■ Switching the Paper Size 2. Relocate the paper guide plate at the specified paper size. 1. Press the open button to open the compartment. Paper size is marked as shown in the figure. • 2 Screws Paper Size Paper Size CAUTION: The paper jam may occur when the paper size is...
-
Page 95: Imagerunner Advance 4500 Series
6. Installation imageRUNNER ADVANCE 3. Relocate the paper guide plate at the specified paper 4500 Series length. Paper size is marked as shown in the figure. ■ Preparation of the Paper Deck • 1 Screw 1. Remove the screw of the fixing plate. •... - Page 96 6. Installation 2. Remove the screw from the base stay unit and then 4. Remove the screw of the fixing plate. attach it as shown in the following figure. • 3 Screws • 1 Screw 5. Insert screwdrivers into the hole and push the NOTE: release lever down to open the compartment.
- Page 97 6. Installation 6. Remove the fixing plate and the cushioning material. 8. Remove the fixing part of lifter plate, cushioning material and tapes. • 2 Screws • 2 Screws NOTE: Check that the cushioning material is removed. 9. Close the compartment. 7.
- Page 98 6. Installation 10. In the case, Cassette Feeding Unit-AN1 is installed, 2. Cut 3 face covers. remove 2 positioning pins and then attach them at position B as shown in the following figure. CAUTION: Be sure to remove the face cover properly so that no bur is formed.
- Page 99 6. Installation 4. Attach the latch plate D (rear) with the 1 bundled 6. Attach the 2 feed guides. screw and 1 screw removed at procedure 6 and 7 in "Preparation of the Paper Deck". • 2 Bosses • 2 Screws (RS tightening; M4x8) RS tightening M4x8 5.
- Page 100 6. Installation ■ Connection with the Host Machine 2. Slide the Paper Deck to the host machine. 1. Insert the positioning pins to the holes on the host machine and then fix the base stay. In the case, Cassette Feeding Unit-AN1 is installed. •...
- Page 101 6. Installation 3. Loosen the screws to move the wheel to the floor and then fasten the screws. 4. Loosen the screws to move the wheel to the floor • 2 Screws and then fasten the screws. • 2 Screws...
- Page 102 6. Installation 5. Remove the face seal and the connector cover. 7. Connect the lattice connector to the host machine and then fix the harness with the wire saddle. • 1 Connector • 1 Wire Saddle CAUTION: Check that the main power switch is OFF and the power plug is disconnected from the outlet.
- Page 103 6. Installation 8. Attach the Cassette No. Label "4" or "5" 9. Attach the Paper Size Label with a gap in 5mm from the cassette No. Label while aligning right edge of • High Capacity Cassette Feeding Unit-B1 is the labels. installed:4 •...
- Page 104 6. Installation ■ Switching the Paper Size 2. Relocate the paper guide plate at the specified paper size. 1. Press the open button to open the compartment. Paper size is marked as shown in the figure. • 2 Screws Paper Size Paper Size CAUTION: The paper jam may occur when the paper size is...
- Page 105 6. Installation 3. Relocate the paper guide plate at the specified paper length. Paper size is marked as shown in the figure. • 1 Screw Paper Size Paper Size CAUTION: The paper jam may occur when the paper size is different between top and bottom of the paper guide plate.
-
Page 106: Checking After Installation
6. Installation Checking after Installation Checking after Installation Following disposal parts are remained after completion of the installation work. ■ imageRUNNER ADVANCE C5500 Series Screw (Tooth Washer Sems; M4x8) 4pcs Screw (TP; M3x6) 2pcs Screw (Binding (Black); M4x25) 3pcs Cassette No. Label Paper Size Label Face Cover (cut) Face Cover... -
Page 107: Paper Positioning Check / Adjustment Procedure
6. Installation ■ imageRUNNER ADVANCE 4500 Paper Positioning Check / Series Adjustment Procedure 1. Adjust the setting value on the following service Adjusting Left Edge Margin(L) mode. of Image • (Lv.2) COPIER > ADJUST > MISC > DK-ADJ-Y NOTE: Setting Range: -128 to 127 1. -
Page 108: Manual Adjustment
6. Installation Manual Adjustment 2. Loosen the screws at the latch plate and then adjust the latch plate (1scale = 1mm). • 2 Screws 1. Release the Paper Deck from the host machine and • When L is large, move the latch plate to front [A]. press the open button of the Paper Deck to open the •... -
Page 109: Front Cover Positioning Adjustment
6. Installation Front Cover Positioning 3. Fasten the screws. Adjustment • 2 Screws 1. Check the gap on the front cover. • Gap between the front cover and the right cover: 3+/-1mm • Gap between the front cover and the upper cover: 4+/-1mm 4+/-1mm 3+/-1mm... -
Page 110: Appendices
APPENDICES Service Tools........105 General Circuit Diagram....106... -
Page 111: Service Tools
Service Tools Service Tools Solvents and Oils Name Uses Composition Remarks Alcohol Cleaning; e.g., plastic, Fluoride-family hydrocarbon, Alcohol, Sur- • Do not bring near fire. rubber, external cov- face activating agent, Water • Procure locally. • Substitute: IPA (isopropyl alcohol) Alcohol Cleaning;... -
Page 112: General Circuit Diagram
General Circuit Diagram General Circuit Diagram General Circuit Diagram(1/1)
Need help?
Do you have a question about the Paper Deck Unit-F1 and is the answer not in the manual?
Questions and answers