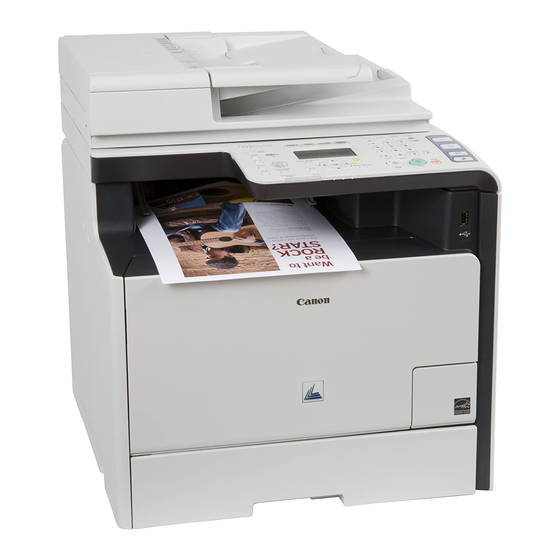
Canon imageCLASS MF8380Cdw Starter Manual
Hide thumbs
Also See for imageCLASS MF8380Cdw:
- Basic operation manual (192 pages) ,
- Starter manual (56 pages) ,
- Product specifications (4 pages)
Table of Contents
Advertisement
Quick Links
Starter Guide
Read this guide first.
Please read this guide before operating this product.
After you nish reading this guide, store it in a safe place for future reference.
Setting Up the Machine to Suit Your Needs . . . . . . . . . . . . . . . . . . . . . . . . . . . . . . . . . . . . . . . . . . . . . . . . . . 1
Available Features . . . . . . . . . . . . . . . . . . . . . . . . . . . . . . . . . . . . . . . . . . . . . . . . . . . . . . . . . . . . . . . . . . . . . . . . . 1
About the Supplied Manuals . . . . . . . . . . . . . . . . . . . . . . . . . . . . . . . . . . . . . . . . . . . . . . . . . . . . . . . . . . . . . . . 2
Connecting the Power Cord . . . . . . . . . . . . . . . . . . . . . . . . . . . . . . . . . . . . . . . . . . . . . . . . . . . . . . . . . . . . . . . . 3
Turning ON the Machine and Specifying the Initial Settings . . . . . . . . . . . . . . . . . . . . . . . . . . . . . . . . . . 3
Setting the Paper Size and Type . . . . . . . . . . . . . . . . . . . . . . . . . . . . . . . . . . . . . . . . . . . . . . . . . . . . . . . . . . . . 6
Specifying Initial Settings for the Fax Functions and Connecting the Telephone Cable . . . . . . . . . . 7
Selecting a Method for Connecting to the Machine . . . . . . . . . . . . . . . . . . . . . . . . . . . . . . . . . . . . . . . . .10
Connecting to Wired LAN . . . . . . . . . . . . . . . . . . . . . . . . . . . . . . . . . . . . . . . . . . . . . . . . . . . . . . . . . . . . . . . . .11
Installing the Driver/Software . . . . . . . . . . . . . . . . . . . . . . . . . . . . . . . . . . . . . . . . . . . . . . . . . . . . . . . . . . . . .12
Appendix . . . . . . . . . . . . . . . . . . . . . . . . . . . . . . . . . . . . . . . . . . . . . . . . . . . . . . . . . . . . . . . . . . . . . . . . . . . . . . . .13
Perform Useful Tasks . . . . . . . . . . . . . . . . . . . . . . . . . . . . . . . . . . . . . . . . . . . . . . . . . . . . . . . . . . . . . . . . . . . . . .13
Clearing Paper Jams . . . . . . . . . . . . . . . . . . . . . . . . . . . . . . . . . . . . . . . . . . . . . . . . . . . . . . . . . . . . . . . . . . . . . .15
Replacing Toner Cartridges . . . . . . . . . . . . . . . . . . . . . . . . . . . . . . . . . . . . . . . . . . . . . . . . . . . . . . . . . . . . . . . .16
Open the next page.
Advertisement
Table of Contents

Related Manuals for Canon imageCLASS MF8380Cdw


Summary of Contents for Canon imageCLASS MF8380Cdw
-
Page 1: Table Of Contents
Starter Guide Open the next page. Read this guide first. Please read this guide before operating this product. After you nish reading this guide, store it in a safe place for future reference. Setting Up the Machine to Suit Your Needs . . . . . . . . . . . . . . . . . . . . . . . . . . . . . . . . . . . . . . . . . . . . . . . . . . 1 Available Features . - Page 2 * The above label is not provided with the machine depending on your country or region. 1327 mm Paper Feeder 100 mm Feeder cover 100 mm cassette 100 mm Rear cover Notes on wireless LAN • This product is designed for indoor use at a distance of 50 m or less from an access point (the distance may vary depending on the communication speed or environmental conditions).
- Page 3 Carry the machine to the installation site. Remove the packing materials. * Do not remove the cap (A) on the USB port at this stage. Uncap when making a USB connection. Next Page...
- Page 4 Check! Did you remove all the packing materials? X 11...
- Page 5 Prepare the toner cartridges. Check! Did you remove all the packing materials?
- Page 6 Load the paper. Check! Up to here...
- Page 7 Install the handset (optional). Use only the parts which are used in the following procedure. You do not need to use unnecessary parts. Connect the modular cable for the handset in “Specifying Initial Settings for the Fax Functions and Connecting the Telephone Cable.”...
-
Page 8: Setting Up The Machine To Suit Your Needs
Setting Up the Machine to Suit Your Needs Specify settings related to the Copy, Print, Fax, PC Fax, Scan, Remote UI and Media Printing functions. Follow the steps in the flowchart below. Start Settings. Required Operations Connecting the Power Cord P. -
Page 9: About The Supplied Manuals
Connecting to a Computer and Preface Installing the Machine Configuring and Connecting the Fax Appendix Installing the Drivers About the Supplied Manuals Starter Guide This manual Read this manual first. This manual describes the settings • for setting up the machine and Preface •... -
Page 10: Connecting The Power Cord
Connecting the Power Cord Make sure that the machine is switched OFF. Plug the power cord into the power socket. Plug the power cord into an AC power outlet. Do not connect the USB cable. Connect the USB cable when installing the software. Turning ON the Machine and Specifying the Initial Settings Turn ON the machine. - Page 11 Connecting to a Computer and Preface Installing the Machine Configuring and Connecting the Fax Appendix Installing the Drivers Specify initial settings. * The screen may differ depending on the country or region where you are using the machine. Press [ ] or [ ] to select, and Press [...
- Page 12 Performing Color Correction Check the temperature of the installation site Color correction takes approximately 165 If the room temperature is low, correction may not be performed properly. seconds. If <Adjustment failed .> appears Make sure that paper is • Is the paper loaded correctly? loaded, and then press [OK].
-
Page 13: Setting The Paper Size And Type
Connecting to a Computer and Preface Installing the Machine Configuring and Connecting the Fax Appendix Installing the Drivers Setting the Paper Size and Type Press [ Press [ ] or [ ] to select, and Press [ ] or [ ] to select, and (Select Paper/Settings). -
Page 14: Specifying Initial Settings For The Fax Functions And Connecting The Telephone Cable
(FAX No.) Sender Name *Next Screen: Press OK Entry Mode: A Page Number Sending Date/Time (Unit Name) 01/01 2011 02:07 PM FAX 123XXXXXXX CANON P.0001 Press [ ] or [ ] to select Telephone Number <Apply>, and then press [OK]. Mark... - Page 15 Connecting to a Computer and Preface Installing the Machine Configuring and Connecting the Fax Appendix Installing the Drivers Select the fax receive mode. You can specify how the machine should operate for a fax call or telephone call. By answering the prompts that appear on the display, the machine will be set to one of the following four operation modes. <Auto><Fax/Tel Auto Switch><Answering Machine><Manual>...
- Page 16 Connect the telephone line. Press [OK]. Connect the telephone line to the machine as needed. The displayed screen varies depending on the specified receive mode. Handset (optional) Connect phone line. Connect phone line. Follow illustrations Follow illustrations Telephone on the next screen: on the next screen Connect line to A.
-
Page 17: Selecting A Method For Connecting To The Machine
Connecting to a Computer and Preface Installing the Machine Configuring and Connecting the Fax Appendix Installing the Drivers Selecting a Method for Connecting to the Machine Select from the following three methods, depending on your environment and devices. If you are not sure whether the router or access point you are using supports wireless LAN or wired LAN, see the instruction manual provided with the network device you are using, or contact the manufacturer. -
Page 18: Connecting To Wired Lan
Connecting to Wired LAN Before adding the machine to a wired LAN The computer and router/hub need to be connected using LAN Router cables and the network settings need to be complete . Internet • For more information, see the instruction manual for the network device you are using, or contact the networking device manufacturer. -
Page 19: Installing The Driver/Software
Connecting to a Computer and Preface Installing the Machine Configuring and Connecting the Fax Appendix Installing the Drivers Installing the Driver/Software Use the supplied User Software CD-ROM to install the drivers and software. The details of the installation is not described in this manual, see the MF Driver Installation Guide. Click. -
Page 20: Appendix
Appendix Per form Useful Tasks Copy • • Enlarged/Reduced Copies Reduced Layout You can enlarge or reduce standard size documents to copy on standard You can reduce multiple documents to copy them onto one sheet. size paper or specify the copy ratio in percentage. 2 on 1 4 on 1 •... - Page 21 Connecting to a Computer and Preface Installing the Machine Configuring and Connecting the Fax Appendix Installing the Drivers Print • • Enlarged/Reduced Printing Booklet Printing • 2-Sided Printing • Reduced Layout You can reduce multiple documents to print them onto one sheet. 2 on 1 4 on 1 •...
-
Page 22: Clearing Paper Jams
Clearing Paper Jams If the following screen appears, a paper jam has occurred in the feeder or inside the machine. Following the procedure displayed on the screen, remove the jammed document or paper. Paper jam. For details on the procedure for clearing paper jams Press [ ] to This manual indicates only areas where paper jams occur. -
Page 23: Replacing Toner Cartridges
Replacing the Toner Cartridge with a New One See the e-Manual and replace toner cartridges. For optimum print quality, replacing the toner cartridge with Canon genuine ones is recommended. Model name Supported Canon genuine toner cartridge Canon Cartridge 418 Yellow... - Page 24 About the Supplied Toner Cartridges The average yield of the toner cartridge that comes with the machine is as follows. Canon Cartridge 418 Black Starter Average yield of K (Black) toner cartridge* : 1,200 sheets Canon Cartridge 418 Yellow Starter...
- Page 25 (1) and disconnect the interface cable if it is connected (2). Then, unplug the power damage the power cord or the wires inside the machine may be disconnected. plug from the AC power outlet (3) and contact your local authorized Canon dealer. This could result in a fire. Avoid the following situations: - Connecting and disconnecting the power cord frequently.
- Page 26 • Check the power cord and plug regularly. The following conditions may result in resulting in personal injury. fire, so please contact your local authorized Canon dealer or the Canon help line. • Turn OFF the power switch when the machine will not be used for a long period - There are burn marks on the power plug.
- Page 27 Connecting to a Computer and Preface Installing the Machine Configuring and Connecting the Fax Appendix Installing the Drivers Others CAUTION • The fixing unit and its surroundings inside the machine become hot during use. When removing jammed paper or when inspecting the inside of the machine, do WARNING not touch the fixing unit and its surroundings, as this may result in burns.
- Page 28 When you have a problem with your machine and you cannot solve it, even if you PRODUCTO LÁSER DE CLASE 1 refer to the manuals or online help, please contact your local authorized Canon APARELHO A LASER DE CLASSE 1...
- Page 29 SOFTWARE. products if you need an exact specification, please contact Canon. (3) You may use the SOFTWARE solely for use with the Canon product you purchased (the “PRODUCT”). (4) You may not assign, sublicense, market, distribute, or transfer the SOFTWARE to any third party without prior written consent of rights holders of the SOFTWARE.
- Page 31 30-2, Shimomaruko 3-chome, Ohta-ku, Tokyo 146-8501, Japan CANON MARKETING JAPAN INC. 16-6, Konan 2-chome, Minato-ku, Tokyo 108-8011, Japan CANON U.S.A., INC. One Canon Plaza, Lake Success, NY 11042, U.S.A. CANON EUROPA N.V. Bovenkerkerweg, 59-61, 1185 XB Amstelveen, The Netherlands CANON CHINA CO. LTD.
Need help?
Do you have a question about the imageCLASS MF8380Cdw and is the answer not in the manual?
Questions and answers