Advertisement
Quick Links
Advertisement

Related Manuals for Displays2go IPDTBL3


Summary of Contents for Displays2go IPDTBL3
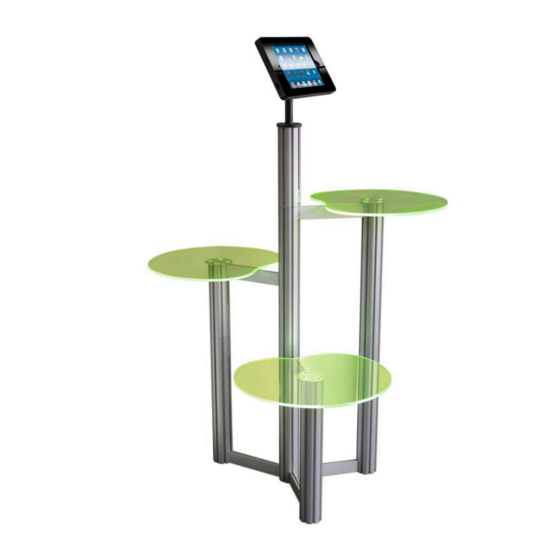
- Page 1 IPDTBL3 Assembly Instructions...
- Page 2 WARNING – Dome-headed Carefully lay all posts horizontally on floor. Insert 4 foot screws chrome nuts behind enclosure into 4 posts except 1m post with connector bars. housing must not be adjusted.
- Page 3 Feed figure-8 head of power lead through bottom of post and profiles assembly, leaving approximately 1m of cable at bottom. Stand post and profiles assembly upright ensuring lead is kept clear of foot Take 265mm post and slot clamp of three 220mm profiles into screws.
- Page 4 Feed figure-8 head of power lead through 1m post at connector Loosen and slide connector bars halfway out of 1m post. Tighten bar end, so it protrudes from top of post. grub screws of connector bars positioned in post channel to secure...
- Page 5 Connect the 1m and 265mm posts by locating connector bars into With countersunk holes in the Podium tops uppermost, align with channels and sliding together. Tighten remaining grub screws to holes of circular plates and fixings in the top of remaining small, affix.
- Page 6 Starting with the smallest Podium table, position and slot clamp of one 220mm profile into post channel. Tighten grub screw to attach. Repeat process for medium and large Podium tables.
- Page 7 Position remaining 220mm profiles between posts near underside of Podium tops. Insert clamps into channels and secure by tightening grub screws. Plug figure-8 head into USB Power Adapter (supplied with Apple iPad). If you are not using cable management for charging, please proceed to Stage 17.
- Page 8 Unlock the iPad enclosure by inserting key into security lock and Lift fascia out of enclosure. Insert cable (supplied with Apple iPad) rotate ‘QUARTER TURN ONLY’ clockwise or counter-clockwise allowing 10cm to remain “free” at charge/sync connector end by through 90 degrees which releases the locking pin. Return key back gently pressing into retaining moulding.
- Page 9 Feed USB end of charge/sync cable through middle of enclosure, Plug cable into USB Power Adapter. below pin, so it protrudes from bottom of support column.
- Page 10 Position black mains cable into internal post channel, and carefully Align first 2 holes of the iPad holder to the threads of the post. slide USB Power Adapter inside post so the USB head of charge/sync Insert and tighten screws to secure. Rotate iPad holder through 90º, cable is below upper edge of post.
- Page 11 NB – If you are not using cable management for charging, unlock the iPad enclosure by inserting key into security lock and rotate ‘QUARTER TURN ONLY’ clockwise or counter-clockwise through 90 degrees which releases Plug charge/sync cable into iPad and place inside enclosure, gently the locking pin.
- Page 12 Replace fascia and depress lock button to secure enclosure.
Need help?
Do you have a question about the IPDTBL3 and is the answer not in the manual?
Questions and answers