Yealink VC880 User Manual
Full hd video conferencing system
Hide thumbs
Also See for VC880:
- Administrator's manual (242 pages) ,
- User manual (104 pages) ,
- Quick start manual (20 pages)
Table of Contents
Advertisement
Quick Links
Advertisement
Table of Contents

Related Manuals for Yealink VC880


Summary of Contents for Yealink VC880
-
Page 2: Table Of Contents
| Contents | ii Contents About This Guide..................... 6 Related Documentation............................6 In This Guide................................7 Getting Started with Your System................8 VCR11 Remote Control............................8 Hardware of VCR11 Remote Control......................8 Entering Characters using the VCR11 Remote Control................ 10 CP960 Conference Phone...........................11 Hardware of CP960 Conference Phone.................... - Page 3 Unmuting a Conference Participant........................38 Ending the Conference............................38 Ending the Conference using Remote Control..................38 Ending the Conference using CP960 Conference Phone...............38 Using the Yealink VC Cloud Management Service Platform......38 Dialing Yealink Cloud Accounts........................39 Scheduled Conference............................39 Viewing Scheduled Conferences......................39 Joining a Scheduled Conference from a Conference Reminder............
- Page 4 Muting or Unmuting All Conference Participants................44 Muting or Unmuting a Conference Participant..................45 Leaving Conference..........................45 Ending Conference..........................45 Using the Yealink Meeting Server............... 46 Dialing YMS Accounts............................46 Scheduled Conference............................46 Viewing Scheduled Conferences......................47 Joining a Scheduled Conference from a Conference Reminder............47 Joining a Scheduled Conference from a Conference Invitation............
- Page 5 | Contents | v Configuring Audio Settings..........................61 Adjusting the Volume..........................61 Configuring the Key Tone........................62 Enabling Silent Mode..........................62 Muting Microphone..........................62 Configuring Video Settings..........................63 Maximizing Monitor Video Display...................... 63 Allowing Website Snapshot........................63 Changing the Video Input Source......................63 Screen Layout............................
-
Page 6: About This Guide
| About This Guide | 6 About This Guide Thank you for choosing the Yealink Full HD video conferencing system. It supports 1080P-full HD video conferencing and includes outstanding features such as good compatibility, easy deployment and intelligent network adaptability. -
Page 7: In This Guide
Chapter 4 Managing the Call History • Chapter 5 Operating Calls • Chapter 6 Managing Local Video Conference Using the Yealink VC Cloud Management Service Platform • Chapter 7 • Chapter 8 Using the Yealink Meeting Server • Chapter 9 Using the Third-party Video Conference Platforms •... -
Page 8: Getting Started With Your System
| Getting Started with Your System | 8 • Chapter 11 Settings • Chapter 12 Accessories with Your System Getting Started with Your System The following topics introduce how to get started with your system. • VCR11 Remote Control • CP960 Conference Phone Powering On the System •... - Page 9 | Getting Started with Your System | 9 Item Description Power Key • Power the System On and Off. • Put the system to sleep or wakes the system. Video Recording Starts or stops recording video and audio. Layout Key Adjust layout during a video call.
-
Page 10: Entering Characters Using The Vcr11 Remote Control
| Getting Started with Your System | 10 Item Description Navigation Key • Navigate through menu items using the navigation keys. • Pan and tilt the camera to adjust the viewing angle. Mute Key Toggles mute feature. Home Key • Returns to the idle screen when in the menu. -
Page 11: Cp960 Conference Phone
| Getting Started with Your System | 11 Item Description 26 English Letters Enter characters. Switches to the uppercase input mode. &123 Switches to the numeric&symbolic input mode. Switches input method. Space Key Enter a space. Cursor Position a cursor Hides the onscreen keyboard Special Characters Enter the corresponding special character. -
Page 12: Hardware Of Cp960 Conference Phone
| Getting Started with Your System | 12 Hardware of CP960 Conference Phone The following introduces the hardware of the CP960 conference phone and how to enter characters using your CP960 conference phone. Hardware component instructions of the phone are: Item Description Three Internal... -
Page 13: Entering Characters Using The Cp960 Conference Phone
| Getting Started with Your System | 13 Item Description 3.5mm Audio-out Port This port is unavailable when CP960 conference phone works with the video conferencing system. Micro USB Port This port is unavailable when CP960 conference phone works with the video conferencing system. - Page 14 | Getting Started with Your System | 14 Item Description Two Special Characters • Tap to enter special characters. • Long tap pointkey (.) then slide to choose one of the options to enter an alternate character. Space Key • Tap to enter spaces. •...
-
Page 15: Powering On The System
| Getting Started with Your System | 15 About this task If you want to Action Position the cursor. Tap to position. Select characters. 1. Long tap the entered character(s). 2. Do one of the following: • on the top of the touch screen to select all characters. •... -
Page 16: Running The Setup Wizard
| Getting Started with Your System | 16 Related tasks Powering On the System Running the Setup Wizard Your system offers a setup wizard to guide you into configuring your systems step by step, the setup wizard appears automatically at first startup or factory reset. Procedure Run the setup wizard using your remote control or just tap Exit Boot Wizard on your CP960 conference phone to skip the setup wizard. - Page 17 Generally, your system administrator configures the account. If not, contact your system administrator. Dial Enter the dialing screen. Meet Now When you register a Yealink Cloud account or YMS account, you can Initiate a meet now conference. More Configure the video conferencing system. Video image Display local video image or local PC content.
-
Page 18: Control Center/Notification Center
Status Bar Displays the icons and time. Digital Clock Widget Displays the phone’s time and date. Schedule When you register a Yealink Cloud account or YMS account, you can view conference schedule. Applications Use the corresponding features. Screen Indicator Indicates which idle screen is displayed. You can swipe left or right to switch among different screens. -
Page 19: Icon Instructions
Icon Instructions Icons appear on the monitor and CP960 conference phone. • Icons on the Monitor • Icons on the CP960 Conference phone Icons on the Monitor Icons Descriptions Network is available Local camera status is disabled (only applicable to VC880/VC800/VC500) - Page 20 PSTN account is registered SIP account is registered H.323 account is registered Log into the Yealink VC Cloud Management Service/Yealink Meeting Server Log into the StarLeaf/Zoom/Pexip/BlueJeans/Mind platform VCH50 video conferencing hub is connected to the video conferencing system Auto answer...
- Page 21 Missed calls (H.323 account/SIP account/IP Call) Missed calls (Cloud platform) Local contact Conference contact (It is only applicable to the VC880/VC800 system with a imported multipoint license. It is not applicable to VC500/VC200 endpoint) Yealink Cloud contacts or YMS contacts...
- Page 22 Output volume is 0 Call encryption Local contact Conference contact (It is only applicable to the VC880/VC800 system with a imported multipoint license. It is not applicable to VC500/VC200 endpoint) Yealink Cloud contacts or YMS contacts Permanent Virtual Meeting Room...
-
Page 23: Managing The Directory
Local directory includes local contacts and local conference contqcts. You can add, edit, delete, search or simply dial a contact from the local directory. Conference contact is only applicable to the VC880/VC800 video conference system that has a multipoint license, it is not applicable to VC500/VC200 video conference endpoint. -
Page 24: Editing Contacts
| Managing the Directory | 24 Adding a Conference Contact You can add 100 conference contact to your system at most. You can call the conference contact to initiate a conference call . Procedure 1. On your remote control, navigate to Dial > Directory. 2. -
Page 25: Deleting Contacts
Note that only theYealink Cloud enterprise administrator can add, edit and delete Yealink Cloud contacts on the Yealink VC Cloud Management Service platform. On your system, you can only search for and place calls to the Yealink Cloud contacts. For more information on Yealink VC Cloud Management Service platform, refer to... -
Page 26: Enterprise Directory
Enterprise directory includes all YMS contacts which are created by your enterprise administrator. Note that only the enterprise administrator can add, edit and delete YMS contacts on the Yealink Meeting Server. On your system, you can only search for and place calls to the YMS contacts. For more information on Yealink Meeting Server, please refer to Yealink Meeting Server Administrator Guide. -
Page 27: Viewing History Records
| Managing the Call History | 27 Viewing History Records You can view up to 100 history records using remote control or CP960 conference phone. • Viewing History Records using Remote Control Viewing History Records using CP960 Conference Phone • Viewing History Records using Remote Control Procedure 1. -
Page 28: Deleting History Records
| Operating Calls | 28 3. Tap Add to Contact. 4. Enter contact name in the Name field. 5. (Optional.) You can add more than one number for the local contact. 6. Tap √ to accept the change. Deleting History Records You can delete a history record or all history records. -
Page 29: Placing A Call
| Operating Calls | 29 • Placing a Call • Joining the Virtual Conference Room • Answering Calls • Turning off Local Camera • Rejecting Incoming Calls Ending a Call • Placing a Call You can use your system just like a regular phone to place calls in numerous ways easily. •... -
Page 30: Placing A Call From The Search Result
| Operating Calls | 30 Procedure 1. Do one of the following: On your remote control, navigate to Dial . • On your remote control, navigate to Dial > History. • 2. Select the desired history record and then press the right key. 3. -
Page 31: Placing A Call From The Call History
| Operating Calls | 31 Placing a Call from the Directory using Remote Control Procedure 1. On your remote control, navigate to Dial > Directory. 2. Select the desired contact type from the pull-down list of the All Contacts. 3. Select the desired contact and then press OK key to palce a video call. If you want to place a voice call, press the right key to select Voice Call. -
Page 32: Answering Calls
| Operating Calls | 32 • If the virtual meeting room requires a password, dial IP##meeting password or meeting password@IP . Example The IP address of virtual meeting room is 10.3.6.201. 123 is meeting password. You can dial 10.3.6.201##123 or 123@10.3.6.201 to enter the virtual meeting room. Answering Calls You can answer calls in various ways. -
Page 33: Configuring Muting Automatically Answered Calls
| Operating Calls | 33 Configuring Muting Automatically Answered Calls You can choose to mute the local microphones when a call is answered automatically. This avoids the caller hearing local conversation freely. Procedure 1. On your remote control, navigate to More > Setting > Call Feature. 2. -
Page 34: Dnd (Do Not Disturb)
| Operating Calls | 34 • or select Reject first, and then press OK key. On your remote control, press • On your CP960 conference, tap Reject. DND (Do Not Disturb) You can enable do not disturb feature to reject incoming calls automatically. All calls you reject will be logged to Missed Calls list. -
Page 35: Ending A Call
Managing Local Video Conference VCS can use own MCU (multi control unit) to hold local video conference. Local video conference involves at least three different endpoints or sites. You can use Yealink wireless presentation pod software to manage members in local video conference. -
Page 36: Initiating A Conference By Inviting Participants
You can invite contacts during a call to initiate a conference. Note: For VC880/VC800 system: the number of contacts you can invite depends on the imported multipoint license. For VC500/VC200 endpoint: there can be 6 people at most in a conference call •... -
Page 37: Removing Conference Participants
| Managing Local Video Conference | 37 Removing Conference Participants If you are the moderator of a video conference, you can remove conference participants during a call. • Removing Conference Participants using Remote Control Removing Conference Participants using CP960 Conference Phone •... -
Page 38: Unmuting A Conference Participant
2. Tap OK. Using the Yealink VC Cloud Management Service Platform The Yealink VC Cloud Management Service is a value-added cloud-based service platform for Cloud endpoints. It offers significant convenience and cost-savings to integrators and business customers in terms of deployment, configuration and usage. -
Page 39: Dialing Yealink Cloud Accounts
Dialing Yealink Cloud Accounts If you want to place a call to a Yealink Cloud contact who is in the same Yealink Cloud directory as you, you can enter the 9-digit Cloud number or the extension (the last four Cloud number) to place a call. If you want to place a call to a Yealink Cloud contact who is in different Yealink Cloud directory from you, you can enter the 9-digit Cloud number to place a call only. -
Page 40: Joining A Scheduled Conference From A Conference Reminder
Contact the conference participants. Procedure Do one of the following: If you register a Yealink Cloud account, dial the conference ID to join the conference. • If you do not register a Yealink Cloud account, dial server address to join the conference. •... -
Page 41: Meet Now
For SIP devices, dial conference ID**conference password@server address or server address##conference ID**conference password to join the conference Meet Now When you register a Yealink Cloud account, you can initiate a meet now conference at any time, without a reservation. •... -
Page 42: Dialing Into A Permanent Virtual Meeting Room
If you register a Yealink Cloud account, dial the conference ID to join the conference. • For SIP devices, if you do not register a Yealink Cloud account and the permanent VMR requires no password, dial conference ID**@ server address or conference ID**@ server address to join the permanent VMR. -
Page 43: Applying For Speaking
| Using the Yealink VC Cloud Management Service Platform | 43 About this task In Discussion mode conference, participants can speak freely. • • In Training mode conference, all guests need to wait for the moderator to appoint lecturers. Procedure 1. -
Page 44: Removing Conference Participants
Muting or Unmuting All Conference Participants If you are the organizer/moderator of a Yealink Cloud video conference, you can mute or unmute all conference participants except for yourself. And the muted participants cannot unmute themselves without your permission. -
Page 45: Muting Or Unmuting A Conference Participant
Do one of the following according to your role: • If you are a moderator (or organizer) of a Yealink Cloud video conference, tapEnd Call > Leave, others keep going. If you are not a moderator (or organizer) of a Yealink Cloud video conference, tapEnd Call. -
Page 46: Using The Yealink Meeting Server
About this task There are three types of YMS video conference: • Scheduled conference: You should schedule the conference using the Yealink Meeting Server or Microsoft Outlook software. • Meet Now: You can initiate a meet now conference at any time, without a reservation. -
Page 47: Viewing Scheduled Conferences
Watching Live Broadcast Viewing Scheduled Conferences You can schedule a conference using the Yealink Meeting Server or Microsoft Outlook software. The scheduled conference will be added to all invitees’ video conferencing system. And invitee whose YMS account is associated with an email address, will receive an email about how to join the conference. -
Page 48: Joining A Scheduled Conference From The Notification Center
| Using the Yealink Meeting Server | 48 Procedure On your remote control or CP960 conference phone, navigate to Schedule ( Your ongoing conferences and upcoming conferences are listed for the latest month. 2. Select the desired conference. 3. When the conference is about to take place in 5 minutes or less, select Join. -
Page 49: Meet Now
Dialing into a Permanent Virtual Meeting Room Joining a Permanent VMR from Directory Make sure that your enterprise administrator has synchronized the permanent VMR to your system via the Yealink Meeting Server. So that your enterprise directory can display the permanent VMR. -
Page 50: Dialing Into A Permanent Virtual Meeting Room
| Using the Yealink Meeting Server | 50 Procedure 1. On your remote control, navigate to Dial > Directory. 2. Select Cloud from the pull-down list of the All Contacts. 3. Select Virtual Meeting Room and then press OK key. -
Page 51: Appointing Yourself To Be A Lecturer
| Using the Yealink Meeting Server | 51 Appointing Yourself to be a Lecturer There are two modes for scheduled conferences and permanent VMR: Discussion mode and Training mode. The conference mode can be configured by on the Yealink Meeting Server only. About this task •... -
Page 52: Removing Conference Participants
| Using the Yealink Meeting Server | 52 Procedure 1. On your remote control, press or OK key to open Talk Menu. 2. Select Invite and then press Ok key. 3. Do one of the following: • If you select Dial, enter a YMS account, and then dial out. -
Page 53: Muting Or Unmuting A Conference Participant
| Using the Yealink Meeting Server | 53 2. Tap All mute or All unmute to mute/unmute all participants. Muting or Unmuting a Conference Participant If you are the organizer/moderator of a YMS video conference, you can mute or unmute any conference participant. -
Page 54: Using The Third-Party Video Conference Platforms
Using the Third-party Video Conference Platforms About this task Yealink video conferencing systems are compatible with StarLeaf/Zoom/BlueJeans/Pexip video conference platform. • If you log into the Zoom/BlueJeans video conference platform, you can call the meeting ID to join the Virtual Meeting Room. -
Page 55: Sharing Content
| Using Basic Features | 55 to return to see current time of the selected cities.. Sharing Content The system can show people and content at the same time. We recommend using dual screen for sharing contents. Only one content can be shared at a time. Content shared later will replace the previous one. •... -
Page 56: Wireless Sharing
On the WPP20, long press the presentation button for 3 seconds and then release this button. Choose the file or window you want to share and then click Share Now. • On the Yealink Wireless Presention Pod software, click Contents Share and choose the file you want to share, and then click Share Now. Stopping Sharing Content... -
Page 57: Recording Video
| Using Basic Features | 57 • On the Yealink Wireless Presention Pod software, click Stop Sharing. Recording Video You can record videos to system memory (only applicable to VC200), a USB flash drive or your computer.The recorded video will be saved in .mkv format and named as the recorded time and date. -
Page 58: Viewing Recorded Videos
You can view recorded videos via the remote control or a computer. Procedure 1. For VC880/VC800/VC500 video conferencing system: On your remote control, navigate to More > Record > Video. For VC200 video conferencing endpoint: On your remote control, navigate to More > File Manager > Local Storage or USB flash driver >... -
Page 59: Screenshot
| Using Basic Features | 59 Procedure 1. For VC880/VC800/VC500 video conferencing system: On your remote control, navigate to More > Record > Video. For VC200 video conferencing endpoint: On your remote control, navigate to More > File Manager > Local Storage or USB Storage >... -
Page 60: Viewing Screenshots
You can view the captured screenshots via the remote control or a computer. Procedure 1. For VC880/VC800/VC500 video conferencing system: On your remote control, navigate to More > Record > Screenshot. For VC200 video conferencing endpoint: On your remote control, navigate to More > File Manager > Local Storage or USB flash driver >... -
Page 61: Deleing Screenshots
You can delete screenshots when you need additional space on your USB drive. Procedure 1. For VC880/VC800/VC500 video conferencing system: On your remote control, navigate to More > Record > Screenshot. For VC200 video conferencing endpoint: On your remote control, navigate to More > File Manager > Local Storageor USB flash driver >... -
Page 62: Configuring The Key Tone
| Settings | 62 Related tasks Configuring the Key Tone Configuring the Key Tone You can enable the key tone feature to produce a sound when you press any key on the remote control or tap the onscreen dial pad on the CP960 conference phone. Procedure 1. -
Page 63: Configuring Video Settings
| Settings | 63 • On your CPW90-BT bluetooth wireless microphones, tap • On your CPE90 wired expansion microphones, tap If video conferencing system is muted, the icon will appear on the local video. Configuring Video Settings You can configure video settings on the system. •... -
Page 64: Screen Layout
| Settings | 64 Procedure 1. On your remote control, if is set to Input key by your system administrator, press to set the video input source. The monitor shows Camera and PC input sources. 2. Select the desired input source, and then press OK key. The monitor shows the selected source. - Page 65 | Settings | 65 • Speaker View ( ): For VC800 system: during multi-way video calls, the active speaker is given prominence in the largest pane. Other participants are displayed in a strip beside the active speaker. Speaker view is not applicable to VC500 endpoint. Changing Screen Layout You can change screen layouts during a call using using the remote control or CP960 conference phone.
- Page 66 | Settings | 66 Multi-way Video Calls with a Presentation The following takes four-way video calls as an example. Voice activation layout is used by default. The PC content is given prominence in the largest pane. Other participants are displayed in a strip beside the PC content.
-
Page 67: Configuring Camera Settings
| Settings | 67 • Primary monitor: The active speaker is given prominence in the largest pane. Other participants are displayed in a strip beside the active speaker. Secondary monitor: local image is seen in a large pane. • Multi-way Video Calls with a Presentation The following takes four-way video calls as an example. -
Page 68: Adjusting Cameras
| Settings | 68 Adjusting Cameras You can pan, tilt and zoom your own camera or far-end camera. • Adjusting Cameras using Remote Control When not in a Call • Adjusing Cameras using Remote Control during a Call • Adjusing Cameras using CP960 Conference Phone during a Call Related tasks Allowing the Far-End System to Control Your Camera Controlling the Multiple Remote Cameras... -
Page 69: Setting Camera Presets
Select local video image and press OK key, and then press 2. Select New Preset, and then press OK key. 3. If you connect VCC22 video conferencing camera to your VC880/VC800 video conferencing system, select the desired camera. 4. Press the navigation key to adjust the angle of the camera or press the zoom in/zoom out key to adjust the focus of the camera. - Page 70 | Settings | 70 Procedure 1. On your remote control, enter preset operation interface. 2. Select Update Preset and then press OK key. All preview screens will be updated. Related tasks Storing a Camera Preset Editing the Stored Preset You can edit the stored presets to adjust camera angle and focus. Procedure 1.
-
Page 71: Accessories With Your System
CPW90 wireless microphones can work as the audio input devices. About this task • If CPW90 wireless microphones work as the audio input devices of video conferencing system, refer to Yealink CPW90 Wireless Microphones Quick Start Guidefor more information. Yealink •... -
Page 72: Working Frequency
| Accessories with Your System | 72 • Viewing CPW90 Information using CP960 Conference Phone Viewing CPW90 Information using Remote Control Procedure 1. On your remote control, navigate toMore > Status > Wireless Microphone. 2. Select the desired wireless microphone to view details. Viewing CPW90 Information using CP960 Conference Phone Procedure 1. -
Page 73: Using The Cpw90-Bt Bluetooth Wireless Microphones
Using the CPW90-BT Bluetooth Wireless Microphones CPW90-BT bluetooth wireless microphones can work as the audio input devices of the video conferencing system. For more information, refer to Yealink CPW90-BT Bluetooth Wireless Microphones Quick Start Guide. Viewing CPW90-BT Information using Remote Control •... -
Page 74: Muting Or Unmuting The Cpe90
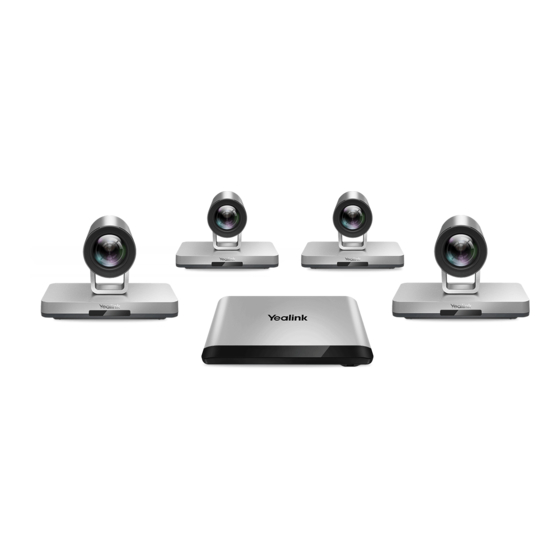
Using the VCC22 Video Conferencing Camera You can connect up to 9 VCC22 video conferencing cameras to the VC880 video conferencing system. You can connect up to 8 VCC22 video conferencing cameras to the VC800 video conferencing system. VCC22 video conferencing camera is not applicable to VC500/VC200 video conferencing endpoint. -
Page 75: Controlling Vcc22 Camera
| Accessories with Your System | 75 • Layouts of Multiple Display Screens • Resetting Camera Controlling VCC22 Camera When the system is idle, you can choose the desired camera to capture video images. • Controlling VCC22 Camera using Remote Control Controlling VCC22 Camera using CP960 Conference Phone •... -
Page 76: Controlling The Multiple Remote Cameras
When camera layout of far-end system is Equal N×N and far site is VC800 system, you can control the VC800 camera. • When camera layout of far-end system is Equal N×N and far site is VC880 system, you can control the first camera. Related tasks... - Page 77 | Accessories with Your System | 77 Note: Do not power off the system when resetting the factory settings...
Need help?
Do you have a question about the VC880 and is the answer not in the manual?
Questions and answers