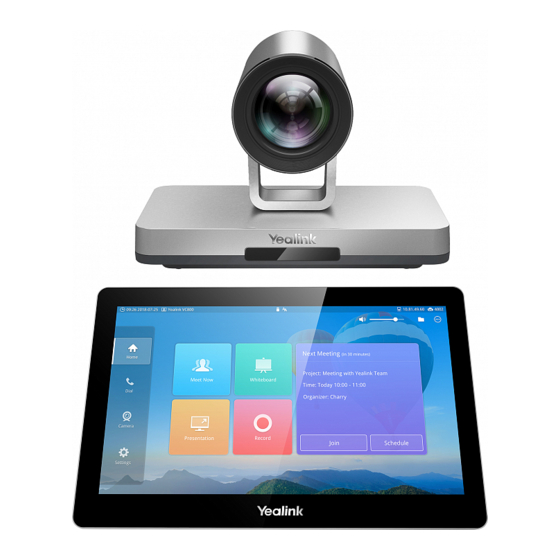
Yealink VC800 User Manual
Full hd video conferencing system
Hide thumbs
Also See for VC800:
- Administrator's manual (295 pages) ,
- User manual (223 pages) ,
- Quick start manual (12 pages)
Table of Contents
Advertisement
Quick Links
Download this manual
See also:
Administrator's Manual
Advertisement
Table of Contents

Related Manuals for Yealink VC800


Summary of Contents for Yealink VC800
- Page 2 The EULA for this product is available on the Yealink Support page for the product.
- Page 3 Technical Support http://support.yealink.com/ Visit Yealink WIKI ( ) for the latest firmware, guides, FAQ, Product documents, and more. For better service, we sincerely recommend you to use Yealink Ticketing system https://ticket.yealink.com ) to submit all your technical issues.
- Page 5 Yealink VC800/VC500 video conferencing system firmware contains third-party software under the GNU General Public License (GPL). Yealink uses software under the specific terms of the GPL. Please refer to the GPL for the exact terms and conditions of the license.
-
Page 7: About This Guide
VC800 is the best choice for middle-to-large enterprise, and VC500 is the best choice for SME. The Yealink VC800&VC500 Full HD video conferencing system is designed to help enterprises organize video conferences easily and efficiently. -
Page 8: Documentations
User Guide for the VC800 Video Conferencing System Documentations The following table shows documentations available for the VC800/VC500 video conferencing system. You can download the latest documents online: Note http://support.yealink.com/documentFront/forwardToDocumentFrontDisplayPage. Name Contents Where found Language Yealink VC800 Full System installation... -
Page 9: Typographic Conventions
English/Chinese Quick Reference conference phone. Guide Typographic Conventions Yealink documentations contain a few typographic conventions. You need to know the following basic typographic conventions to distinguish types of in-text information: Convention Description Highlights the web/phone user interface items such as menus, menu... -
Page 10: Summary Of Changes
User Guide for the VC800 Video Conferencing System Convention Description Used for hyperlinks to Yealink resources outside of this documentation Blue Text in Yealink such as the Yealink documentations (for example: Italics VC800&VC500 Full HD Video Conferencing System Administrator Guide... -
Page 11: Changes For Release 30, Guide Version 30.8
About This Guide Using the CPW90 Wireless Microphones on page Changes for Release 30, Guide Version 30.8 Documentations of the newly released VC500 video conferencing endpoints are added. The following section is new for this version: VC500 Codec on page ... - Page 12 User Guide for the VC800 Video Conferencing System...
-
Page 13: Table Of Contents
Changes for Release 30, Guide Version 30.6 ................... ix Table of Contents ................xi Overview ..................1 System Component Instructions ........................1 VC800 Codec ................................. 1 VCC22 Video Conferencing Camera ......................3 VC500 Codec ................................. 5 VCH50 Video Conferencing Hub ........................7 CP960 Conference Phone .......................... - Page 14 User Guide for the VC800 Video Conferencing System Controlling Local Camera ..........................26 Registration ................................27 Idle Screen ................................28 Idle Screen of VC800/VC500 Video Conferencing System............... 28 Idle Screen of CP960 Conference Phone ....................29 Navigating Menus and Fields ........................... 30 Navigating the Display Device ........................
-
Page 15: Table Of Contents
Screen Layout ..............................120 Network Quality Tip ............................124 Video Conference Platform ............127 Using the Yealink VC Cloud Management Service Platform ............. 127 Dialing Yealink Cloud Accounts ........................ 127 Using the Yealink Meeting Server ........................ 129 Dialing YMS Accounts ........................... 129 YMS Video Conference .......................... - Page 16 User Guide for the VC800 Video Conferencing System Using the Zoom Cloud Platform ........................155 Joining the Zoom Meeting.......................... 155 Using the BlueJeans Cloud Platform ......................157 Joining the BlueJeans Meeting ........................157 Using the Pexip Platform ..........................158 Dialing Pexip Alias ............................158 Joining the Pexip Meeting ...........................
- Page 17 Table of Contents Video & Audio Issues ............................193 System Maintenance ............................194 Regulatory Notices ..............203 Service Agreements ............................203 Limitations of Liability ............................203 Safety Instructions .............................. 203 Restriction of Hazardous Substances ......................205 Appendix - Time Zones ............. 207...
- Page 18 User Guide for the VC800 Video Conferencing System...
-
Page 19: Overview
VC800 Codec VC800 codec compresses outgoing video and audio data, transmits this information to the far end, and decompresses incoming data. It supports 16:9 and 4:3 aspect ratios. It can be compatible with different audio devices, and can adapt to the display devices automatically. - Page 20 For more information, refer to LED Instructions on page 18. The VC800 camera can be panned (± 100 degrees range), tilted (± 30 degrees range). Rear panel: Port Name Description...
-
Page 21: Vcc22 Video Conferencing Camera
VCC22 Video Conferencing Camera You can connect up to 8 VCC22 video conferencing cameras to the VC800 video conferencing system. It supports 16:9 and 4:3 aspect ratios. It can adapt to the display devices automatically. - Page 22 User Guide for the VC800 Video Conferencing System The HD camera supports 12 x optical zoom, white balance and automatic gain. The LED indicator in front of the camera indicates different statuses of the camera. For more information, refer to LED Instructions on page 180.
-
Page 23: Vc500 Codec
Overview VC500 Codec VC500 codec compresses outgoing video and audio data, transmits this information to the far end, and decompresses incoming data. It supports 16:9 and 4:3 aspect ratios. It can be compatible with different audio devices, and can adapt to the display devices automatically. Front panel: The HD camera supports 5 x optical zoom, white balance and automatic gain. - Page 24 User Guide for the VC800 Video Conferencing System Rear panel: Port Name Description Connects to an audio input device using a USB to Line-in adapter. Connects to an audio output device using a USB to Line-out adapter Inserts a DD10 dongle to one of the two USB ports for ...
-
Page 25: Vch50 Video Conferencing Hub
Resets the system to factory defaults. ⑦ Allows you to connect a universal security cable to Security Slot VC800/VC500 codec, so you can lock it down. The system ⑧ cannot be removed when locked. VCH50 Video Conferencing Hub The left side of cable hub:... - Page 26 User Guide for the VC800 Video Conferencing System The back of cable hub: Port Name Description MINI DP Connects to a PC using Mini-DP cable for sharing contents. ③ HDMI Connects to a PC using HDMI cable for sharing contents.
-
Page 27: Cp960 Conference Phone
The CP960 Conference phone supports 360-degree audio pickup at a radius of up to 6 meters. Connect the CP960 conference phone to the VC800/VC500 codec. It can work as an audio device for the system. You can also place calls, answer calls or view directory and history on the... - Page 28 Returns to the idle screen. ⑥ Wired Mic Ports Allow you to connect CPE90 to your phone (optional). ⑦ • Connect the VC Hub/Phone port on the VC800/VC500 codec. Internet Port ⑧ • Connect to the Audio port on the VCH50 video conferencing hub.
-
Page 29: Cpe90 Wired Expansion Microphones
Overview CPE90 Wired Expansion Microphones The CPE90 can work as expansion microphones of the CP960 conference phone. It supports 360-degree audio pickup at a radius of up to 3 meters. There is a mute button on its top. You can mute or unmute the CPE90 by tapping the mute button. Name Description Support 360-degree audio pickup at a radius of up to 3... - Page 30 User Guide for the VC800 Video Conferencing System Name Description Supports 360-degree audio pickup at a radius of up to 3 Built-in Microphone ② meters. Turns on or off the CPW90. Mutes or unmutes the CPW90. For more information ...
-
Page 31: Vcr11 Remote Control
Overview VCR11 Remote Control The VCR11 remote control helps users organize conference easily with intuitive and efficient operation in all screens. Hardware components of the remote control: Item Description Power the System On and Off. Power Key ① Puts the system to sleep or wakes the system. ... - Page 32 User Guide for the VC800 Video Conferencing System Item Description Assign predefined functions to this key. This key can be configured as a Presentation key (default), Custom Key ④ Input key, ScreenShot key or Mute Speaker key. For more information, refer to Custom Key Type on page 62.
-
Page 33: Icon Instructions
For VC500: CP960 conference phone or CPW90 wireless microphones are not connected SIP account is registered H.323 account is registered Log into the Yealink VC Cloud Management Service/Yealink Meeting Server Log into the StarLeaf/Zoom/Pexip/BlueJeans/Mind platform VCH50 video conferencing hub is connected to the VC800/VC500 codec Auto answer... - Page 34 User Guide for the VC800 Video Conferencing System Icons Descriptions Missed calls (this icon displays on the status bar) Output volume is 0 Do not disturb DD10 dongle is connected, while the CPW90 are unregistered (It is only applicable to the VC500 endpoint)
-
Page 35: Icons On Cp960 Conference Phone
Missed calls (H.323 account/SIP account/IP Call) Missed calls (Cloud platform) Local contact Conference contact (It is only applicable to the VC800 system with a multipoint license. It is not applicable to VC500 endpoint) Yealink Cloud contacts, YMS contacts or third party devices... -
Page 36: Led Instructions
Flashing red The VC800/VC500 codec is upgrading firmware. System exception (for example: network unavailable, update Solid orange failure). The VC800/VC500 codec is powered off, or is not connected to the power adapter. Mute key LED on the CP960: LED Status Description The CP960 conference phone is initializing. -
Page 37: User Interfaces
The CP960 conference phone is in a call and unmuted. The CPE90 is not connected to the CP960 conference phone. The CPE90 is idle. User Interfaces There are two ways to customize the configurations of your VC800/VC500 video conferencing system: Web User Interface Remote Control ... -
Page 38: Remote Control
Remote Control You can use the remote control to configure and use the VC800/VC500 video conferencing system. For more information on the function of each key on the remote control, refer to... - Page 39 To control VC800/VC500 video conferencing system via the virtual remote control: Click Home->Remote Control when the system is idle or during a call. Click the keys on the virtual remote control to control the VC800/VC500 video conferencing system. Click Remote Control to hide the virtual remote control.
- Page 40 User Guide for the VC800 Video Conferencing System...
-
Page 41: Getting Started
Getting Started Getting Started This chapter provides the following basic installation instructions and information for achieving the best performance from your VC800/VC500 video conferencing system. Topics include: Installing Batteries for the Remote Control Powering the System On Put the System to Sleep ... -
Page 42: Remote Control Battery Safety Information
Powering the System On To power on the system: Locate the DC48V port on the VC800/VC500 codec, and connect it to the electrical power outlet with the supplied power adapter. The VC800/VC500 video conferencing system starts up automatically, and the indicator LED on the VC800/VC500 codec then illuminates solid green. -
Page 43: Powering The System Off
Getting Started Press to scroll to Sleep and then press The system goes to sleep immediately. The indicator LED on the VC800/VC500 codec illuminates solid red. Wake the system via the remote control: Press any button on the remote control. -
Page 44: Setup Wizard
The indicator LED on the VC800/VC500 codec illuminates solid green. Setup Wizard VC800/VC500 offers a setup wizard to guide users into configuring their systems step by step, the setup wizard appears automatically at first start up or factory reset. Users can follow the steps using the remote control to configure their systems. -
Page 45: Registration
Registration You can register the H.323 account, SIP account and log into Cloud platform (Yealink VC Cloud Management Service/Yealink Meeting Server/StarLeaf/Zoom/Pexip/BlueJeans/Mind/Custom platform). Generally, your system administrator will configure the account beforehand, so that after you start up the system, the system will already be registered and ready for use. -
Page 46: Idle Screen
User Guide for the VC800 Video Conferencing System Idle Screen Idle Screen of VC800/VC500 Video Conferencing System Idle screen of the display device If the system starts up, the idle screen will be shown. The following figure is an example:... -
Page 47: Idle Screen Of Cp960 Conference Phone
SIP server, the account icon is . For more Yealink VC800&VC500 Full HD information, refer to Video Conferencing System Administrator Guide When the VC800/VC500 system is registered with an H.323 gatekeeper, the account icon is . For Yealink VC800&VC500 more information, refer to Full HD Video Conferencing System Administrator Guide. -
Page 48: Navigating Menus And Fields
User Guide for the VC800 Video Conferencing System Name Description Status Bar Displays the icons and time. Digital Clock Widget Displays the phone’s time and date. When you register a YMS account, this field will Scheduled conference display the scheduled conference details. For more... -
Page 49: Navigating The Cp960 Conference Phone
Getting Started Navigating the CP960 Conference phone The following sections introduce how to navigate CP960 Conference phone. Topics include: Navigating Touch Screen Gestures Control Center/Notification Center Navigating Touch Screen To operate your phone, follow these tips: If you want to Action Return to the idle screen. - Page 50 User Guide for the VC800 Video Conferencing System Control Center/Notification Center Control center or notification center allows you to access to common features or view important notifications quickly. Swipe down from the top of the screen to enter the control center and the notification...
-
Page 51: Entering Data And Editing Fields
Entering Data and Editing Fields Entering Data and Editing Fields Using Remote Control VC800/VC500 video conferencing system provides onscreen keyboard and keypad on the remote control to enter data. Keypad on the remote control provides standard key layout, which enable users to use existing or familiar key positions. You can enter data and edit fields using the onscreen keyboard or keypad on the remote control. - Page 52 User Guide for the VC800 Video Conferencing System The following takes English input method as an example: Item Description 26 English Letters Enter characters. Switches to the uppercase input mode. &123 Switches to the numeric&symbolic input mode. Switches between the Russian or English input mode.
-
Page 53: Entering Data And Editing Fields Using Cp960
Getting Started To configure keyboard input method via the web user interface: Click on Setting ->General. In the Keyboard IME block, select the desired list from the Disabled column and click The selected input method appears in the Enabled column. Repeat step 2 to add more input methods to the Enabled column. - Page 54 User Guide for the VC800 Video Conferencing System Using the Onscreen Keyboard Before using the onscreen keyboard, you need to know the function of the keys on the onscreen keyboard. CP960 conference phone supports two kinds of input methods: Android Keyboard (AOSP) –...
- Page 55 Getting Started Item Description Tap to switch to the uppercase input mode. to switch to the numeric&symbolic input mode as shown below: Item Description • Tap to enter numbers. • Long tap a key then slide to choose one Numbers of the options to enter an alternate character.
- Page 56 User Guide for the VC800 Video Conferencing System to switch to the symbolic input mode as shown below: Item Description • Tap to enter special characters. Special Characters • Long tap a key then slide to choose one of the options to enter an alternate character.
- Page 57 Getting Started When you change the input method to Google Pinyin, the onscreen keyboard displays the Chinese input mode as shown below by default: To use onscreen keyboard: Tap the field you want to edit, the onscreen keyboard displays on the touch screen. Enter the information using the onscreen keyboard.
-
Page 58: System Status
User Guide for the VC800 Video Conferencing System If you want to Action Drag to select the characters you want to delete, and then tap • Long tap Drag your finger to highlight the characters you want to Replace characters. - Page 59 Getting Started Press to view the specific information. To view the system status via the CP960 conference phone: Tap the desired list to view the specific information. To view the system status via the web user interface: Click Status.
- Page 60 User Guide for the VC800 Video Conferencing System The system status is displayed on the web user interface.
-
Page 61: Customizing The Vc800/Vc500 Video Conferencing System
Customizing the VC800/VC500 Video Conferencing System You can customize your VC800/VC500 video conferencing system by personally configuring certain settings, for example, site name, time & date and language. You can add contacts to the local directory manually or from the call history. -
Page 62: Screen Saver
User Guide for the VC800 Video Conferencing System If Always On is selected, the system will not enter the sleep mode automatically. Press to select Save and then press to accept the change. Automatic sleep time is configurable via the web user interface at the path Setting->General->Automatic Sleep Time. - Page 63 Customizing the VC800 Video Conferencing System If Never is selected, the display device will not start screen saver. Press to select Save and then press to accept the change. Four pictures are displayed like a slide show when screen saver starts.
-
Page 64: Backlight
User Guide for the VC800 Video Conferencing System Tap the desired screen saver. to accept the change or to cancel. Backlight The backlight of the CP960 conference phone is always on by default. You can configure backlight time for the CP960’s touch screen via the CP960 conference phone or web user interface. - Page 65 Customizing the VC800 Video Conferencing System Tap the desired time in the pop-up dialog box. to accept the change or to cancel. You can also drag the backlight slider on the control center to change the intensity of the touch screen.
-
Page 66: Output Resolution
User Guide for the VC800 Video Conferencing System Output Resolution You can adjust output resolution of primary/secondary display device respectively. You can configure output resolution via the CP960 conference phone or web user interface. To configure output resolution via the CP960 conference phone: ->Display->Output Resolution. -
Page 67: Language
Customizing the VC800 Video Conferencing System Press to select Save and then press to accept the change. Site name is configurable via the web user interface at the path Setting->General->Site Name. Language The default language of the display device is English, and you can change it via the remote control. -
Page 68: Time & Date
User Guide for the VC800 Video Conferencing System Select the desired language from the pull-down list of Language. Text displayed on the web user interface will change to the selected language. Time & Date Time and date is displayed on the status bar of the display device and CP960 conference phone. - Page 69 Customizing the VC800 Video Conferencing System Example (2017-5-23) Date Format WWW DD MMM Tue 23 May To configure the NTP server and date & time format via the remote control: Select (More menu). Press to scroll to Setting and then press to expand the menu.
- Page 70 User Guide for the VC800 Video Conferencing System Press to scroll to Setting and then press to expand the menu. Press to scroll to Basic and then press to enter submenu. Press to scroll to Date & Time and then press Select the desired time format from the pull-down list of Time.
-
Page 71: Configuring Camera Presets
Customizing the VC800 Video Conferencing System Do one of the following: to search for the city. Enter a few or whole characters of the city in the Search field. Cities match the characters entered will appear on the touch screen. - Page 72 Select local video image, and then press Press to select New Preset, and then press If you connect VCC22 video conferencing camera to your VC800 video conferencing system, select the desired camera. Press the navigation key to adjust the angle of the camera or press to adjust the focus of the camera.
- Page 73 Customizing the VC800 Video Conferencing System You can also press the numeric keys (corresponding to 0 to 9 preset positions) on the remote control. But in this way, you can only move local camera to 10 preset positions at most.
- Page 74 User Guide for the VC800 Video Conferencing System Select Update Preset, and then press All preview screens will be updated. Editing the Stored Preset You can edit the stored presets to adjust camera angle and focus. To edit the stored preset via the remote control: Enter preset operation interface.
- Page 75 Customizing the VC800 Video Conferencing System Placing a Preset at the Top To place a preset at the top via the remote control: Enter preset operation interface. Select Stick, and then press Select a preset, and then press The selected preset is placed at the top.
-
Page 76: Website Snapshot
User Guide for the VC800 Video Conferencing System Select the stored presets, and then press Press to scroll to OK and then press to delete selected presets. Clearing the Stored Preset To clear the stored presets during a video call: Enter preset operation interface. -
Page 77: Adjusting Zoom Level Of The Display Device
Customizing the VC800 Video Conferencing System Press to scroll to Website Snapshot, and then press to enable or disable this feature. Press to return to the idle screen. Watching website snapshot via the web user interface at the path Home. -
Page 78: Call Protocol
Call Protocol The VC800/VC500 video conferencing system supports SIP and H.323 call protocols. You can configure which protocol is to be used when the system is making calls. When the Auto call protocol is used, the system preferentially uses the H.323 protocol to place calls. If there is no available H.323 account on the system, the system will switch to the SIP protocol. -
Page 79: Video Call Rate
Customizing the VC800 Video Conferencing System Select desired type or Auto from the pull-down list of Call Protocol. Press to select Save and then press to accept the change. Call protocol is configurable via the web user interface at the path Setting->Call Features->Call Protocol. -
Page 80: Custom Key Type
User Guide for the VC800 Video Conferencing System Select the desired value and then press Press to select Save and then press to accept the change. Video call rate is configurable via the web user interface at the path Setting->Call Features->Video Call Rate. -
Page 81: Audio Settings
Customizing the VC800 Video Conferencing System Select the desired value from the pull-down list of Custom Key Type. Input: press to select the video input source. ScreenShot: press to capture screen. Mute Speaker: press to mute or unmute the speaker. -
Page 82: Key Tone
User Guide for the VC800 Video Conferencing System To adjust the volume via the CP960 conference phone: Press volume touch key to decrease or increase the volume. You can also drag the volume slider to adjust the volume. Note You can still use CP960 conference phone to adjust the system volume even if it is not the active audio device of the system. -
Page 83: Silent Mode
Customizing the VC800 Video Conferencing System Silent Mode If you turn on the silent mode, the VC800/VC500 system will not produce ring tone and key tone. Silent mode is configurable via the remote control or CP960 conference phone. Do one of the following to enable silent mode via the remote control: Long press key to decrease the ringer volume to minimum. - Page 84 User Guide for the VC800 Video Conferencing System By default, the system automatically selects the audio output with the highest priority. If the audio output with the highest priority is removed from, the VC800/VC500 will select the next highest priority device.
-
Page 85: Eq Self-Adaption
Customizing the VC800 Video Conferencing System EQ Self-adaption The system supports EQ self-adaption to optimize the acoustic effect. You can configure it via the web user interface only. To configure EQ self-adaption via the web user interface: Click on Setting->Video & Audio. -
Page 86: Audio Input
Wireless Microphone (CPW90 wireless microphones) Line Input (audio input device connected to the Line In port on the VC800 codec) USB Line in (audio input device connected to the USB port on the VC500 codec using a ... -
Page 87: Directory
Local contacts: The VC800 system can store up to 500 local contacts and 100 conference contacts (conference contacts are available only when a multipoint license is imported to the VC800 system). A conference contact consists of one or more local contacts. You can establish a conference call quickly by calling conference contacts. -
Page 88: Adding Contacts
User Guide for the VC800 Video Conferencing System and delete Yealink Cloud contacts on the Yealink VC Cloud management service. On your VC800/VC500, you can only search for and place calls to the Yealink Cloud contacts. For Yealink VC Cloud... - Page 89 Repeat steps 7 to 8 to add more contacts. The number of local contacts that you can add to a conference contact depends on the imported multipoint license. For example, if you import a 24 ways license to your VC800 system, up to 24 local contacts...
-
Page 90: Editing Contacts
Editing Contacts You can edit local contacts or conference contacts (conference contacts are only applicable to VC800 system with a multipoint license) via the remote control, CP960 conference phone or web user interface. To edit a contact via the remote control:... - Page 91 Customizing the VC800 Video Conferencing System Press to Edit and then press Edit the contact information. Press to select Save and then press to accept the change. To edit a contact via the CP960 conference phone: Tap the All Contacts field.
-
Page 92: Deleting Contacts
Deleting Contacts You can delete local contacts or conference contacts (conference contacts are only applicable to VC800 system with a multipoint license) via the remote control, CP960 conference phone or web user interface. To delete a local contact or conference contact via the remote control:... -
Page 93: Searching For Contacts
If you log into the Yealink VC Cloud Management Service platform or Yealink Meeting Server, you can also search for Yealink Cloud contacts or YMS contacts via the remote control or CP960 conference phone. To search for contacts via the remote control:... - Page 94 User Guide for the VC800 Video Conferencing System The contacts whose names or phone numbers match the characters entered will appear on the display device. You can press to scroll to the desired contact, and then call or edit this contact.
-
Page 95: Call History Management
Customizing the VC800 Video Conferencing System Call History Management The VC800/VC500 video conferencing system maintains call history lists of All Calls, Missed Calls, Placed Calls and Received Calls. The system supports up to 100 history records. You can view the call history, place a call or delete an entry from the call history entries (including local entries and Cloud entries). - Page 96 User Guide for the VC800 Video Conferencing System Press to return to the menu. Press to scroll to History and then press to enter submenu. The display device shows recent call history. Select the desired list from the pull-down list of All Calls.
-
Page 97: Deleting An Entry From The Call History List
Customizing the VC800 Video Conferencing System after the desired call records. The touch screen displays details about this call record. Call history can be viewed via the web user interface at the path Directory->History. Deleting an Entry from the Call History List You can delete an entry from the call history list via the remote control, CP960 conference phone or web user interface. - Page 98 User Guide for the VC800 Video Conferencing System Tap Delete. The touch device prompts “Delete selected item?” Tap OK to accept the change or Cancel to cancel. To clear call history via the remote control: Select (Dial menu) or press to enter the pre-dialing screen.
-
Page 99: Adding A Local Contact From The Call History List
Customizing the VC800 Video Conferencing System Select OK, and then press to clear the call history. Adding a Local Contact from the Call History List To add a local contact from the call history list via the remote control: Select (Dial menu) or press to enter the pre-dialing screen. - Page 100 User Guide for the VC800 Video Conferencing System Tap Add to Contact. Enter contact name in the Name field. Add number for the local contact. to accept the change or to cancel. Call history management feature is configurable via the web user interface at the path...
-
Page 101: Using The Vc800/Vc500 Video Conferencing System
If you dial an IP address, the priority is: H.323 IP Call>SIP IP Call. For example: system A is registered with a Yealink cloud account and a SIP account. When system A selects a call type automatically and then dials a number, it will use its cloud account (highest priority) to dial the number first. - Page 102 User Guide for the VC800 Video Conferencing System To dial a number using the remote control: Select (Dial menu) or press to enter the pre-dialing screen. Select the desired call type from the pull-down list of Call Type before calling.
- Page 103 Using the VC800/VC500 Video Conferencing System To dial a number via the web user interface: Click Home. Enter the desired number in the Enter Number field. (Optional.) Select the desired call type. (Optional.) Select the desired video call rate. If you select Auto, the system will select the appropriate video call rate automatically.
-
Page 104: Placing A Call From The Search Result
User Guide for the VC800 Video Conferencing System Press to scroll to Edit before calling and then press Edit the number and dial out. To edit numbers before calling via the CP960 conference phone: The touch screen displays all call records. - Page 105 Using the VC800/VC500 Video Conferencing System The search source list can be Local Directory, History, Cloud contacts and enterprise directory. Note Your system administrator can configure the search source list. Contact your system administrator for more information. To place a call from search results via the remote control:...
-
Page 106: Placing A Call From The Directory
User Guide for the VC800 Video Conferencing System Enter a few continuous characters of the contact name or continuous numbers of the contact number to search for a desired contact. Tap the desired contact. Placing a Call from the Directory You can place calls to contacts via the remote control, CP960 conference phone or web user interface. - Page 107 Using the VC800/VC500 Video Conferencing System Press to enter submenu, select the desired call type, and then press to dial out the number. To place a call from the directory via the CP960 conference phone: Tap the All Contacts field.
-
Page 108: Placing A Call From The Call History
User Guide for the VC800 Video Conferencing System Placing a Call from the Call History You can place a call from the call history list via the remote control, CP960 conference phone or web user interface. To place a call from the call history list via the remote control:... -
Page 109: Answering Or Rejecting Calls
Using the VC800/VC500 Video Conferencing System Tap Video Call or Voice Call. Placing a call from call history is configurable via the web user interface at the path Directory->History. Answering or Rejecting Calls When the system is receiving a call, you can answer or reject the call in the following ways: Using the remote control ... - Page 110 User Guide for the VC800 Video Conferencing System incoming call. Auto answer features you need to know: Parameters Description Enables or disables the system to automatically answer the Auto Answer incoming point-to-point call. Mute the local microphone automatically when an incoming call is answered automatically.
-
Page 111: Do Not Disturb (Dnd)
Using the VC800/VC500 Video Conferencing System Press to return to the idle screen. If the auto answer feature is enabled, the icon will appear on the status bar of the display device. To configure auto answer via the CP960 conference phone: Swipe down from the top of the screen. - Page 112 User Guide for the VC800 Video Conferencing System Press to scroll to DND, and then press to enable or disable this feature. Press to return to the idle screen. icon will appear on the status bar of display device, and “Do not disturb now!”...
- Page 113 Using the VC800/VC500 Video Conferencing System number of missed calls) will appear on the CP960 conference phone’s touch screen. To disable the DND mode via the CP960 conference phone: Do one of the following: Swipe down from the top of the screen, tap to disable DND.
-
Page 114: Ending A Call
VC500 video conferencing endpoint and VC800 video conferencing system that has no multipoint license can host a Regular Mode conference only. VC800 video conferencing system with a multipoint license can host a Regular Mode conference or a VMR Mode conference. - Page 115 100. Note For VC500 and VC800 that has no multipoint license, the regular mode conference supports up to one video call and 5 voice calls (a conference moderator and 6 participants). For VC800 with a multipoint license, the number of participants depends on the multipoint license you imported.
- Page 116 join the meeting, the moderator does not join the meeting. If you import a multipoint license to the VC800 system, you can allocate the MCU ways between two virtual meeting rooms. If you import an 8 ways multipoint license to the VC800 system, X+Y<=8. Two virtual ...
-
Page 117: Meeting Password
Using the VC800/VC500 Video Conferencing System Select maximum ways of video calls from the pull-down list of Virtual Meeting Room 2. By default, the MCU are distributed equally between two virtual meeting rooms. Click Confirm to accept the change. For more information on how to join a VMR mode conference, refer to Joining the Meeting page 100. -
Page 118: Joining The Meeting
User Guide for the VC800 Video Conferencing System Enter meeting password in the Password field. Click Confirm to accept the change. Joining the Meeting Participants can dial IP##meeting password or meeting password@IP to enter the virtual meeting room. For example: The IP address of moderator is 10.3.6.201. -
Page 119: Video Conference Management
Group Dial and then press to enter submenu. Select the desired contacts you want to call. For VC800 system: The number of contacts you can call depends on the imported multipoint license. For VC500 endpoint: you can select up to 6 contacts. - Page 120 Tap the Call multiple members? Click here field. Tap the desired contacts you want to call. For VC800 system: The number of contacts you can call depends on the imported multipoint license. For VC500 endpoint: you can select up to 6 contacts.
- Page 121 Using the VC800/VC500 Video Conferencing System Do one of the following: If you select Dial, enter a phone number, and then dial out. If you select Directory, select a desired contact, and then dial out. If you select Group Dial, check the desired contacts’ checkboxes, and then select Start conference call.
-
Page 122: Removing Conference Participants
User Guide for the VC800 Video Conferencing System Do one of the following: If you tap , enter a phone number and then tap Invite. If you tap , tap a desired contact to dial out. If you tap , tap the desired history record to dial out. -
Page 123: Muting Or Unmuting All Conference Participants
Using the VC800/VC500 Video Conferencing System Press to scroll to Remove and then press to enter submenu. Select the party you want to remove, and then press To remove any party via the CP960 conference phone: during a call. to remove the desired participant. - Page 124 User Guide for the VC800 Video Conferencing System participants via the CP960 conference phone only. To mute all conference participants via the CP960 conference phone: during a call. The touch screen displays all participants. Tap All mute to mute all participant.
-
Page 125: Muting Or Unmuting A Conference Participant
Using the VC800/VC500 Video Conferencing System Muting or Unmuting a Conference Participant If you are the moderator of a video conference, you can mute or unmute any conference participant via the CP960 conference phone only. To mute a conference participant via the CP960 conference phone: during a call. -
Page 126: Ending The Conference
User Guide for the VC800 Video Conferencing System after the participant that you want to unmute. The participant is unmuted, and the icon changes to Ending the Conference If you are the moderator of a video conference, you can end the conference via the remote control, CP960 conference phone or web user interface. -
Page 127: Call Management
Using the VC800/VC500 Video Conferencing System Call Management You can enable mute mode, record video, control the video and change screen layout during an active call. Call Mute You can enable mute mode to mute the microphone of the active audio device so that other parties cannot hear you. - Page 128 User Guide for the VC800 Video Conferencing System Press to view call statistics for every participant. Press to return. To view call statistics via the CP960 conference phone: -> during a call. The touch screen displays all participants. Tap the desired participant to view call statistics.
-
Page 129: Changing The Video Input Source
VC800/VC500 system is idle, the display device displays PC content by default. If two display devices are connected to the VC800/VC500 codec, local video image is shown on the main display device, and the PC content is shown on the secondary display device. -
Page 130: Far Control Near Camera
User Guide for the VC800 Video Conferencing System Press to select the desired input source , and then press If you select PC, the remote video image is shown in big size, and the PC content is shown in small size (Picture-in-Picture). - Page 131 Using the VC800/VC500 Video Conferencing System & Audio->Far Control Near Camera. Controlling the Remote Camera If the remote camera enables the Far Control Near Camera feature and corresponding camera control protocol is enabled (For more information, refer to your system administrator), you can control the remote camera during a video call via the remote control or CP960 conference phone.
-
Page 132: Presentation
The system supports sharing video and documents on a PC while simultaneously displaying the main video. We recommend using dual display devices for sharing contents. If a PC is connected to the VCH50 video conferencing hub, the VC800/VC500 system will start presentation automatically. You can also start/stop presentation manually via the remote control or CP960 conference phone. - Page 133 Using the VC800/VC500 Video Conferencing System Video can be played on either the system itself or on a computer using an application capable of playing .wav files. Note The system supports FAT32 and NTFS format USB flash drive or removable hard drive. When using the NTFS format, only the first partition is supported.
- Page 134 User Guide for the VC800 Video Conferencing System f you connect dual screen, select the desired screen you want to record from the pull-down list of Dual Screen Recording Setting. Click Confirm to accept the change. Recording Videos To record videos via the remote control when the system is idle or during a call:...
-
Page 135: Screenshot
You can capture the screenshot from the camera via the remote control, CP960 conference phone or web user interface. Make sure a USB flash driver is connected to VC800/VC500 codec, VCH50 video conferencing hub or CP960 conference phone and the USB feature is enabled. - Page 136 User Guide for the VC800 Video Conferencing System computer. The stored screenshot will be saved in .jpg format and named as the captured time and date. You can view the screenshot using an application capable of viewing .jpg pictures. The system supports FAT32 and NTFS format USB flash drive or removable hard drive. When Note using the NTFS format, only the first partition is supported.
- Page 137 Using the VC800/VC500 Video Conferencing System Capturing Screenshots To capture screenshots via the remote control when the system is idle or during a call: is set to Screenshot key, press to capture screenshot. For more information on how to customize the key, refer to Custom Key Type on page 62.
-
Page 138: Screen Layout
PIP (Picture-in-Picture). Speaker View ( ): For VC800 system: during multi-way video calls, the active speaker is given prominence in the largest pane. Other participants are displayed in a strip... - Page 139 Using the VC800/VC500 Video Conferencing System Changing Screen Layout To change screen layout via the remote control: Press during a call. Select the desired layout, and then press To change screen layout via the CP960 conference phone: during a call.
- Page 140 User Guide for the VC800 Video Conferencing System Single Display Screen Layouts Two-way Video Calls Picture-in-picture layout is used by default. Far end Local Two-way Video Call with a Presentation The PC content is given prominence in the largest pane. Other participants are displayed beside the PC content.
- Page 141 To make it easier for users to view video images, users can connect two display devices to Display1 and Display2 ports respectively. When two display devices are connected to the VC800/VC500 codec, the status bar of the primary display device will display icon.
-
Page 142: Network Quality Tip
User Guide for the VC800 Video Conferencing System Secondary display device: local image is seen in a large pane. Speaker Local Local Primary display device Secondary display device Multi-way Video Call with Presentation Multi-way video calls are only applicable VC800 system . - Page 143 Using the VC800/VC500 Video Conferencing System This tip disappears after 3 seconds. Please check your network, and make sure your network meets the requirements.
- Page 144 User Guide for the VC800 Video Conferencing System...
-
Page 145: Video Conference Platform
StarLeaf/Zoom/Pexip/BlueJeans/Mind, including high end customization & interoperability. If you don’t log into Cloud platform or you only log into the Yealink VC Cloud Management Service platform/Yealink Meeting Server, you can configure the address of the third-party platform in advance. So that your dialing screen will appear this third-party platform, even if you don’t log into the third-party platform, you can still select the desired third-party platform to call... - Page 146 User Guide for the VC800 Video Conferencing System before calling. Enter the desired Yealink Cloud account using the keypad or the on-screen keyboard. Press to select (video call) or (voice call), and then press to dial out the account. To dial Yeaink Cloud accounts via the CP960 conference phone: Tap the Auto field.
-
Page 147: Using The Yealink Meeting Server
9-digit Cloud number or the extension (the last four Cloud number) to place a call. If you want to place a call to a Yealink Cloud contact who is in different Yealink Cloud directory from you, you should enter the 9-digit Cloud number to place a call. -
Page 148: Yms Video Conference
YMS Video Conference When you register a YMS account, you can use video conference feature. There are three types of YMS video conference: Scheduled conference: You should schedule the conference using the Yealink Meeting Server or Microsoft Outlook software. - Page 149 And invitee whose YMS account is associated with an email address, will receive an email about how to join the conference. For more information on how to schedule a conference using the Yealink Meeting Server or Yealink Meeting Server User Guide...
- Page 150 User Guide for the VC800 Video Conferencing System The conference schedule will appear again 30 minutes before the conference starts, and then be hidden automatically. And it will appear every 10 minutes until the conference starts. The conference schedule shows the conference details, as below: The conference reminder will appear 5 minutes before the conference starts.
- Page 151 Video Conference Platform Your ongoing conferences and upcoming conferences are listed for the latest month. Press to scroll to the desired conference. You can view subject, time, organizer, ID, password and participants. To view schedule conferences in the menu via the CP960 conference phone: Your ongoing conferences and upcoming conferences are listed for the latest month.
- Page 152 User Guide for the VC800 Video Conferencing System Joining a Scheduled Conference You can join conferences in following ways: Joining a scheduled conference from a conference reminder Joining a scheduled conference from a conference Invitation Joining a scheduled conference from the conference schedule ...
- Page 153 When the scheduled conference begins, the system will receive a call that invites you to join the conference. This feature is available only if the enterprise administrator enables the automatic dialing feature Note on the Yealink Meeting Server. For more information, refer to Yealink_Meeting_Server_Administrator_Guide...
- Page 154 User Guide for the VC800 Video Conferencing System If you receive a conference invitation, do one of the following via the remote control: – Select Answer, and press to join the scheduled conference. – Select Reject, and press to remove the invitation.
- Page 155 Video Conference Platform Joining a Scheduled Conference from Conference Schedules To join a schedule conferences from conference schedule via the remote control: Select (Schedule menu). Your ongoing conferences and upcoming conferences are listed for the latest month. Press to scroll to the desired conference. When the conference is about to take place in 5 minutes or less, a Join soft key appears by default.
- Page 156 User Guide for the VC800 Video Conferencing System Tap Join. Joining a Scheduled Conference from Notification Center By default, when the conference is about to take place in 5 minutes, the status bar of CP960 conference phone displays the icon and the notification center displays the conference information.
- Page 157 To dial into the scheduled conference, do one of the following: If you register a YMS account, dial the conference ID to join the conference. Obtain the conference information from VC800/VC500 video conferencing system, your email or the other conference participants.
- Page 158 If the system fails to join the scheduled conference, please refer to General Issues on page 190. Meet Now When you log into the VC800/VC500 system using an YMS account, you can use Meet Now feature. Initiating a Meet Now Conference You can initiate a meet now conference at any time.
- Page 159 Video Conference Platform Permanent Virtual Meeting Room The enterprise administrator can configure the permanent VMR via the Yealink Meeting Server. You can join a permanent VMR in following ways at any time, without a reservation. Dialing from enterprise directory ...
- Page 160 User Guide for the VC800 Video Conferencing System after the desired permanent VMR. Tap Video Call or Voice Call. Dialing to Join a Permanent Virtual Meeting Room Do one of the following to dial to join a permanent VMR. If you register a YMS account, dial the conference ID to join the permanent VMR.
- Page 161 There are two modes for scheduled conferences and permanent VMR: Discussion mode and Training mode. The conference mode can be configured by enterprise administrator on the Yealink Meeting Server User Guide Yealink Meeting Server only. For more information, refer to In Discussion mode scheduled conference/permanent VMR, participants can speak freely. ...
- Page 162 User Guide for the VC800 Video Conferencing System The touch screen prompts “Apply to speak, please wait”. You do not need to apply for speaking in a meet now conference. Note Processing the Application If you are the moderator (or an organizer) of a Training mode conference, you can allow or refuse the applicant to speak via the CP960 conference phone.
- Page 163 Video Conference Platform Inviting Conference Participants During the YMS video conference, you can use the remote control or CP960 conference call to invite other YMS contacts to join the conference. To invite participants during a YMS video conference via the remote control: Press to open Talk Menu.
- Page 164 User Guide for the VC800 Video Conferencing System Removing Conference Participants If you are the organizer/moderator of a YMS video conference, you can remove conference participants via the remote control or CP960 conference phone. To remove conference participants via the remote control: Press to open Talk Menu during a call.
- Page 165 Video Conference Platform after the participant that you want to remove. Muting or Unmuting All Conference Participants If you are the organizer/moderator of a YMS video conference, you can use the CP960 conference phone to mute or unmute all conference participants except for yourself. In Training mode conference, conferences participants muted by an organizer/moderator cannot unmute themselves.
- Page 166 User Guide for the VC800 Video Conferencing System Tap All mute or All unmute to mute/unmute all participants. Muting or Unmuting a Conference Participant If you are the organizer/moderator of a YMS video conference, you can use the CP960 conference phone to mute or unmute any conference participants.
- Page 167 Video Conference Platform after the participant that you want to mute. The participant is muted, and the icon changes to To unmute a conference participant via the CP960 conference phone: during a call. The touch screen displays all participants. after the participant that you want to unmute. The participant is unmuted, and the icon changes to...
- Page 168 User Guide for the VC800 Video Conferencing System Leaving Conference All participants can leave the conference at any time via the remote control or video conferencing phone. Other participants remain connected. To leave a conference via the remote control: If you are a moderator (or organizer) of a YMS video conference, do the following: Press Select Leave, others keep going.
- Page 169 Video Conference Platform To leave a conference via CP960 conference phone: If you are a moderator (or organizer) of a YMS video conference, do the following: Tap EndCall. Tap Leave, others keep going. If you are not a moderator (or organizer) of a YMS video conference, do the following: Tap EndCall.
-
Page 170: Using The Starleaf Cloud Platform
User Guide for the VC800 Video Conferencing System To end a conference via remote control: Press Select End conference. To end the conference via the CP960 conference phone: Tap EndCall. Tap End conference. Using the StarLeaf Cloud Platform You can log into the StarLeaf Cloud platform. -
Page 171: Dialing Starleaf Cloud Numbers
Video Conference Platform When you place a call using the StarLeaf Cloud account, you can: Call the other StarLeaf Cloud account to establish a point to point call. Call the conference ID to join the Virtual Meeting Rooms. Call between StarLeaf Cloud account and Microsoft Skype for Business/Lync account. -
Page 172: Joining The Starleaf Meeting
User Guide for the VC800 Video Conferencing System Tap StarLeaf Cloud number in the pop-up dialog box. Enter the desired StarLeaf Cloud number. Tap Send. Joining the StarLeaf Meeting To join the StarLeaf meeting via the remote control: Select (Dial menu) or press to enter the pre-dialing screen. -
Page 173: Using The Zoom Cloud Platform
Video Conference Platform To join the StarLeaf meeting via the CP960 conference phone: Tap the Auto field. Tap the StarLeaf Cloud number in the pop-up dialog box. Enter a conference ID. Tap Send. Using the Zoom Cloud Platform You can log into the Zoom Cloud platform, and join the Zoom meeting. Joining the Zoom Meeting To join the Zoom meeting via the remote control: Select... - Page 174 User Guide for the VC800 Video Conferencing System Select Zoom from the pull-down list of Call Type before calling. Enter a conference ID using the keypad or the on-screen keyboard. Press to select (video call) or (voice call), and then press to dial out the number.
-
Page 175: Using The Bluejeans Cloud Platform
Video Conference Platform Follow the voice prompt to join the Zoom meeting. If you enter nothing or enter wrong information, you can still be sent to the Zoom welcome Note screen. Using the BlueJeans Cloud Platform You can log into the BlueJeans Cloud platform, and join the BlueJeans meeting. Joining the BlueJeans Meeting To join the BlueJeans meeting via the remote control: Select... -
Page 176: Using The Pexip Platform
User Guide for the VC800 Video Conferencing System Tap BlueJeans in the pop-up dialog box. Enter a conference ID. Tap Send. Follow the voice prompt to join the BlueJeans meeting. Note If you enter nothing or enter wrong information, you can still be sent to the BlueJeans welcome screen. - Page 177 Video Conference Platform Select the registered alias from the pull-down list of Call Type before calling. Enter the device alias or URI using the keypad or the on-screen keyboard. Press to select (video call) or (voice call), and then press to dial out the number.
-
Page 178: Joining The Pexip Meeting
User Guide for the VC800 Video Conferencing System Joining the Pexip Meeting To join the Pexip meeting via the remote control: Select (Dial menu) or press to enter the pre-dialing screen. Select the registered alias from the pull-down list of Call Type before calling. -
Page 179: Using The Mind Platform
Video Conference Platform Tap the registered alias in the pop-up dialog box. Enter the conference alias or URI. Tap Send. Using the Mind Platform You can log into the Mind platform, and join the Mind meeting. Joining the Mind Meeting To join the Mind meeting via the remote control: Select (Dial menu) or press... - Page 180 User Guide for the VC800 Video Conferencing System Select Mind from the pull-down list of Call Type before calling. Enter a conference ID using the keypad or the on-screen keyboard. Press to select (video call) or (voice call), and then press to dial out the number.
-
Page 181: Using The Custom Platform
Video Conference Platform Follow the voice prompt to join the Mind meeting. Using the Custom Platform When you register a custom account, you can use the corresponding platform feature. - Page 182 User Guide for the VC800 Video Conferencing System...
-
Page 183: Using The Cpw90 Wireless Microphones
Using the CPW90 Wireless Expansion Microphones Using the CPW90 Wireless Microphones This chapter provides basic operating instructions for the CPW90 wireless microphones. Topics include: LED Instructions Charging the CPW90 Turning the CPW90 On or Off Registering CPW90 with the CP960 Conference Phone ... -
Page 184: Placing The Cpw90
User Guide for the VC800 Video Conferencing System LED Status Description Slowly flashing red The system is receiving an incoming call. Solid red The system is muted. Fast flashing yellow The CPW90 is in the registration mode. The CPW90 has registered with the CP960/VC500, but the CP960/VC500 is out of range. -
Page 185: Charging The Cpw90
Using the CPW90 Wireless Expansion Microphones If your CPW90 is working with VC500 video conferencing endpoint, do the following to ensure optimal voice quality: Charging the CPW90 If the CPW90 is not in use, we recommend you to charge the CPW90 even when the battery is full. -
Page 186: Turning The Cpw90 On Or Off
User Guide for the VC800 Video Conferencing System During charging, the battery LED indicator on the CPW90 illuminates solid red. When the battery capacity reaches 100%, the battery LED indicator on the CPW90 will illuminate solid green. If it is the first time you use the CPW90, you need to fully charge the CPW90 for normal use. - Page 187 Using the CPW90 Wireless Expansion Microphones to search for a CPW90. Turn on the CPW90. The CPW90 enters the registration mode automatically. And the mute indicator LED on the CPW90 fast flashes yellow. The CPW90 registers with the CP960 conference phone automatically. If the registration is successful, the mute indicator LED on the CPW90 goes out and the touch screen of CP960 conference phone prompts the CPW90 information: battery, work time and standby time.
-
Page 188: Registering Cpw90 With The Vc500 Video Conferencing Endpoint
User Guide for the VC800 Video Conferencing System Tap Unbind to deregister the CPW90. The CPW90 can only be registered with one CP960 conference phone. If you want to register the CPW90 to another CP960 conference phone, the CPW90 will be deregistered from the previous CP960 conference phone automatically. - Page 189 Using the CPW90 Wireless Expansion Microphones To connect the CPW90 to the VC500 video conferencing endpoint, do the following: Connect the DD10 USB dongle to one of the USB ports on the VC500 codec. The display device prompts “Dongle connected!”, and the (unregistered) icon appears on the status bar.
- Page 190 User Guide for the VC800 Video Conferencing System Click Deregistration. Click Confirm to deregister the wireless microphone. The paired information will be cleared. To register the CPW90 via the web user interface: Click on Setting-> Wireless Microphone. Click Search Mic.
-
Page 191: Viewing Cpw90 Information
Using the CPW90 Wireless Expansion Microphones Viewing CPW90 Information You can view CPW90 status via the remote control, CP960 conference phone or web user interface. Available information of CPW90 includes: Register Status MIC Model MICROPHONE IPEI Battery Status ... -
Page 192: Finding The Registered Cpw90
User Guide for the VC800 Video Conferencing System Tap Detail to view details. Finding the Registered CPW90 Choose the desired method to find your CPW90 according to the package you purchase. If your CPW90 is working with CP960 conference phone, do the following to find the CPW90 which has registered with your CP960 conference phone. -
Page 193: Working Frequency
Using the CPW90 Wireless Expansion Microphones Tap Exit. If your CPW90 is working with VC500 video conferencing endpoint, do the following to find the CPW90 which has registered with your VC500 video conferencing endpoint. To find the registered CPW90 via the web user interface: Click on Setting->Wireless Micphone. - Page 194 User Guide for the VC800 Video Conferencing System RF Carrier Index (DECT tester Numbering) Freq (MHz) Taiwan Korea Brazil Japan 1895.616 4(F1) 1897.344 3(F2) 1899.072 2(F3) 1900.800 1(F4) 1902.528 0(F5) 1904.256 1905.984 1907.712 1909.440 1911.168 1912.896 1914.624 1916.352 1918.080 1919.808 1921.536...
-
Page 195: Using The Cpe90 Wired Expansion Microphones
Using the CPE90 Wired Expansion Microphones Using the CPE90 Wired Expansion Microphones This chapter provides basic operating instructions for the CPE90 wired expansion microphones. Topics include: Placing the CPE90 Muting or Unmuting the CPE90 If you require additional information or assistance with your new phone, contact your system administrator. - Page 196 User Guide for the VC800 Video Conferencing System...
-
Page 197: Using The Vcc22 Video Conferencing Camera
Using the VCC22 Video Conferencing Camera Using the VCC22 Video Conferencing Camera You can connect up to 8 VCC22 video conferencing cameras to the VC800 video conferencing system. VCC22 video conferencing camera is not applicable to VC500 video conferencing endpoint. -
Page 198: Led Instructions
User Guide for the VC800 Video Conferencing System Select the desired camera from the pull down list of Camera. The VCC22 information is displayed on the web user interface. LED Instructions Indicator LED on the VCC22 video conferencing camera: LED Status Description The VC800 codec is powered on. - Page 199 Using the VCC22 Video Conferencing Camera Press to scroll to the desired camera and then press Press the navigation key to adjust the angle of the camera. Press to adjust the focus of the camera. To control the VCC22 camera via the CP960 conference phone: Tap The current control camera.
-
Page 200: Adjusting Camera Layout
User Guide for the VC800 Video Conferencing System Controlling VCC22 Camera is configurable via the web user interface at the path Home->Camera Layout. Adjusting Camera Layout During a call, all video streams captured from the connected cameras are synthesized to one video stream, and then sent to the far site. -
Page 201: Controlling The Multiple Remote Cameras
113. Layouts of Multiple Display Screens If two display devices already connect to the VC800 codec, a third display device can still connect to HDMI OUT port on the VCC22 video conferencing camera. The third display device is used for viewing shared content. -
Page 202: Upgrading The Camera Firmware
VCC22 video conferencing camera shows a static image only. Upgrading the Camera firmware The newly released firmware version may add new features. Because of this, Yealink recommends you to update the latest firmware. You can upgrade the firmware via the web user interface only. - Page 203 Using tiny objects (for example, the paper clip) to press and hold the reset button for 15 seconds until the screen turns black. Do not power off the system during the factory restore process. The VC800 video conferencing system, CP960 conference phone and VCC22 video conferencing camera are reset synchronously.
- Page 204 User Guide for the VC800 Video Conferencing System...
-
Page 205: Troubleshooting
Troubleshooting This chapter provides general troubleshooting information to help you solve problems you might encounter when using your VC800/VC500 system. If you require additional information or assistance with your new phone, contact your system administrator. Ensure the system has not been physically damaged when experiencing a problem. Check whether the cables are loose and the connections are correct and secure. - Page 206 User Guide for the VC800 Video Conferencing System Speak into the microphone. Check whether the microphone can pick up audio normally. If the microphone picks up audio and plays back audio normally, it means that the audio works well. Press to stop audio diagnostics.
- Page 207 Troubleshooting Press to adjust the focus. If the camera can move and zoom normally, it means that the camera is working well. Press to stop camera diagnostics. Network diagnosis: Select (More menu). Press to scroll to Setting and then press to expand the menu.
-
Page 208: General Issues
You can also enter other IP address (for example, the IP address of the remote system) in the Trace Route field. If the test is successful, the VC800/VC500 system lists the hops between the system and the IP address you entered. You can check whether congestion happens via the time cost between hops. - Page 209 Troubleshooting more information, refer to Time & Date on page 50. How to obtain the IP address of the system? Three are three ways to obtain the IP address of the system: The IP address of the system is shown on the top right corner of the display device. ...
-
Page 210: Camera Issues
User Guide for the VC800 Video Conferencing System Prompts Description when you place an H.323 call. Network disconnected Local network is disconnected Maximum number of sessions Local system has reached maximum sessions. reached Why does the system fail to call the far site via IP address? Ensure that the network is connected correctly. -
Page 211: Display Issues
Ensure that you have selected the correct video input source. Why can’t the display device start presentation? Ensure that a PC is properly connected to the VC800/VC500 video conferencing system. Ensure that the PC is turned on. ... -
Page 212: System Maintenance
Adjust the priority order for your audio codec if you have chosen a low-bandwidth audio codec to be first. For best results, ensure that the caller is using a Yealink video conferencing system. Audio quality from your video conferencing system will vary when calling a non-Yealink system. - Page 213 Troubleshooting Enter admin password (default password: 0000) in the Password field. Press Press to scroll to Reboot & Reset and then press Press to scroll to Reboot and then press The display device prompts “Reboot the system?”. Select OK, and then press You can reboot the system via the web user interface at the path Setting->Upgrade->Reboot.
- Page 214 Click Export to open the file download window, and then save the file to your local system. To export a PCAP trace via remote control: Before capturing packets, make sure a USB flash driver is connected to VC800/VC500 codec, VCH50 video conferencing hub or CP960 conference phone and the USB feature is enabled.
- Page 215 Troubleshooting The default system log level is 6. Click Confirm to accept the change. The web user interface prompts “Operating…Please wait…”. Export the system log referring to the following steps. Recreate the error to be documented in the trace. Click Export to save the file to your local system. How to export/import the system configurations? We may need you to provide your system configurations to help analyze problems.
- Page 216 You can upgrade the firmware via the web user interface. The firmware name of the VC800/VC500 video conferencing system is 63.x.x.x.rom and the firmware name of the CP960 conference phone is: 73.x.x.x.rom (x is the actual firmware version).
- Page 217 Troubleshooting In the Upgrade CP Firmware field, click Browse to locate the CP960 firmware from your local system. Click Upgrade to upgrade the firmware. The browser pops up the dialog box “Firmware will be updated. It will take 5 minutes to complete.
- Page 218 The display device prompts “Reset to Factory?” Select OK, and then press To reset the system via the rest key on the VC800/VC500 codec: Using tiny objects (for example, the paper clip) to press and hold the reset button for 15 seconds until the screen turns black.
- Page 219 Troubleshooting The VC800 video conferencing system, CP960 conference phone and VCC22 video conferencing camera are reset synchronously. Resetting the system is configurable via the web user interface at the path Setting->Upgrade->Reset to Factory.
- Page 220 User Guide for the VC800 Video Conferencing System...
-
Page 221: Regulatory Notices
Without prior written consent, no organization or individual is permitted to make any change to the structure or the safety design of the device. Yealink is under no circumstance liable to consequences or legal issues caused by such changes. - Page 222 User Guide for the VC800 Video Conferencing System Environmental Requirements Place the device in a well-ventilated place. Do not expose the device to direct sunlight. Keep the device dry and free of dust. Place the device on a stable and level platform.
-
Page 223: Restriction Of Hazardous Substances
GB/T26572-2011 standard. This table lists the toxic and hazardous substances contained in the machine. Based on the material type, the data is provided by the supplier and has already been validated by Yealink company. - Page 224 User Guide for the VC800 Video Conferencing System...
-
Page 225: Appendix - Time Zones
Appendix - Time Zones Appendix - Time Zones Time Zone Time Zone Name Samoa −11:00 United States-Hawaii-Aleutian −10:00 United States-Alaska-Aleutian −10:00 French Polynesia −09:30 United States-Alaska Time −09:00 Canada(Vancouver, Whitehorse) −08:00 Mexico(Tijuana, Mexicali) −08:00 United States-Pacific Time −08:00 Canada(Edmonton, Calgary) −07:00 Mexico(Mazatlan, Chihuahua) −07:00... - Page 226 User Guide for the VC800 Video Conferencing System Time Zone Time Zone Name Greenland Denmark-Faroe Islands(Torshavn) Ireland(Dublin) Portugal(Lisboa, Porto, Funchal) Spain-Canary Islands(Las Palmas) United Kingdom(London) Morocco +01:00 Albania(Tirane) +01:00 Austria(Vienna) +01:00 Belgium(Brussels) +01:00 Caicos +01:00 Chad +01:00 Spain(Madrid) +01:00 Croatia(Zagreb)
- Page 227 Appendix - Time Zones Time Zone Time Zone Name +03:00 Russia(Moscow) +03:30 Iran(Teheran) +04:00 Armenia(Yerevan) +04:00 Azerbaijan(Baku) +04:00 Georgia(Tbilisi) +04:00 Kazakhstan(Aktau) +04:00 Russia(Samara) +04:30 Afghanistan(Kabul) +05:00 Kazakhstan(Aqtobe) +05:00 Kyrgyzstan(Bishkek) +05:00 Pakistan(Islamabad) +05:00 Russia(Chelyabinsk) +05:30 India(Calcutta) +05:45 Nepal(Katmandu) +06:00 Kazakhstan(Astana, Almaty) +06:00 Russia(Novosibirsk, Omsk) +06:30...
- Page 228 User Guide for the VC800 Video Conferencing System Time Zone Time Zone Name +13:30 Chatham Islands +14:00 Kiribati...
Need help?
Do you have a question about the VC800 and is the answer not in the manual?
Questions and answers