
Subscribe to Our Youtube Channel
Related Manuals for Daikin Destiny VFD Series


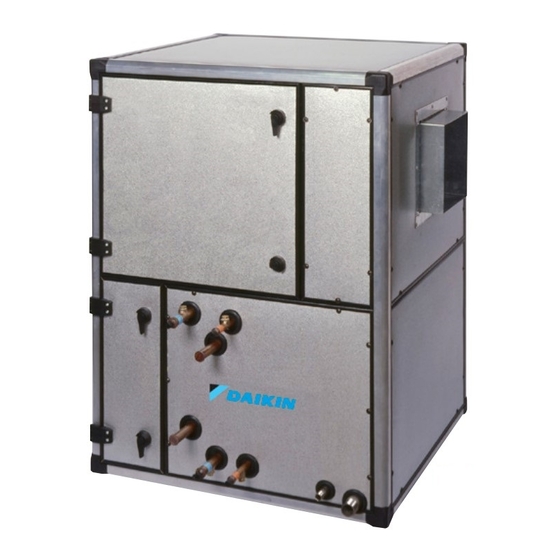
Summary of Contents for Daikin Destiny VFD Series
- Page 1 Installation and Maintenance Manual IM 782-12 Group: Applied Air Systems Part Number: IM 782 Date: August 2019 Destiny Indoor Air Handler ® Sizes 002 through 030 Horizontal Model Vertical Model...
-
Page 2: Table Of Contents
Table of Contents Table of Contents Introduction . . . . . . . . . . . . . . . . . . . . . . . . . . . . . . . . . . 3 Physical Data . -
Page 3: Introduction
Introduction Introduction Hazardous Information Messages Smoke Control and Management Systems CAUTION Cautions indicate potentially hazardous situations, which can result in WARNING personal injury or equipment damage if not avoided. Improper smoke or fume air handling can result in severe personal injury or death. -
Page 4: Installation
Installation Installation Receiving and Handling Storing the Unit 1. Carefully check items against the bills of lading to verify Store unit on a level surface. If air handling units are to be all crates and cartons were received. Carefully inspect stored for any period of time, it is important to rotate the all units for damage when received. -
Page 5: Attaching The Mixing Box
Installation Attaching the Mixing Box Mixing boxes ship with Destiny units as a field-installed option. Attach the mixing box to the intake end of the air handler using cleats included with the mixing box section. Install the cleats into the interior mounting frames, with the hardware included as shown in Figure Figure 1: Mixing Box Installation... -
Page 6: Service Clearances
Installation Service Clearances Leave adequate space around the unit for piping, coils, and For routine maintenance, remove panels on either side of the drains. Always have access to at least one side of the unit for unit. See Panel Removal on page 8. -
Page 7: Rigging
Installation Rigging Unit Leveling Rig units using straps or a sling. Fasten strapping under the Place the equipment on a flat and level surface (or verify skid that ships with the section. If a field-installed mixing box is that unit is level when hanging from the ceiling). Where the attached, adjust to balance the unit properly. -
Page 8: Panels And Doors
Installation Panels and Doors Actuators DANGER CAUTION Hazardous moving parts, high static pressure, and/or high voltage. Can Maximum damper rotation is 70°. Maximum shaft torque is 205 in.-lb. cause severe injury or death. Disconnect and lock ALL electric power OFF Greater rotation or torque can cause equipment damage. -
Page 9: Installing Damper Actuator
Installation Installing Damper Actuator Figure 9: Actuator Manual Override Button and Strap 1. Turn the damper shaft until the blades are fully closed. 2. Place the actuator’s universal clamp over the damper shaft (Figure 8). Make sure that the controls on the actuator cover are accessible. -
Page 10: Reversing The Coil Handing
Installation Reversing the Coil Handing Depending on whether the air handler was purchased from CAUTION stock or if it was manufactured for the specific job, the Sharp edges and coil surfaces can cause personal injury. Avoid contact panel on the opposite side may or may not have predrilled with them. - Page 11 Installation Figure 11: Reversing the Coil Handing Remove screws from the upper track that hold coil/drain pan in place Drill holes in coil header plate flanges, position block offs and install screws to secure to coil. Airflow Lift drain pan connection up and slide coil/drain pan assembly out.
-
Page 12: Reversing The Belt Drive Package
Installation Reversing the Belt Drive Package Hanging the Unit from a Ceiling A motor side or “hand” is determined by looking in the direction WARNING of air flow with the air contacting the back of the head. The drive Do not suspend the unit from the top. The unit top will not support the weight package on the air handler can be changed to the other side of of the unit. -
Page 13: Piping And Coils
Installation Piping and Coils Direct Expansion Coils Follow applicable piping design, sizing, and installation information presented in ASHRAE Handbooks in the design Direct expansion coil connection guidelines are listed below. and installation of piping. Observe all local codes and industry Also, refer to Figure standards. -
Page 14: Steam Coils
Installation Steam Coils (provided as Specials only) Steam coil connection guidelines are listed below. Also, refer to Figure 17: Steam Coil Connections (Type SS) Figure 1. All steam coils are non-distributing (freeae) type. They are not designed to be used in 100% OA applications. 2. -
Page 15: Water Heating Coils
Installation Water Heating Coils Drain Pan Traps Heating coil connection guidelines are listed below. Also, refer Destiny air handlers have a drain pan connection on both Figure 18 Figure sides of the unit. Drain connections can be made on either side or both sides. -
Page 16: Internal Isolation Assembly Adjustment
Installation Internal Isolation Assembly Spring Mount Adjustments—Twin Fan Units Adjustment The spring isolators under the four corners of the fan and Units have internally isolated fan and motor assemblies that motor assembly have been factory adjusted while the fan was are secured with brackets for shipment. -
Page 17: Electric Heat Section
Installation Electric Heat Section (Optional) Optional factory installed electric heat section consists of Figure 23: Heater Nomenclature open coil duct heater mounted to the unit at the supply fan C M XX - XX - X X discharge. Heat section includes heating coils and an electrical control box with single point field power connection for heater and supply air fan. - Page 18 Installation Heater Amps Table 3: Heater Amps Heater Amps 120V / 1Ø 240V / 1Ø 240V / 3Ø 480V / 3Ø 600V / 3Ø 8.33 4.17 2.41 1.20 0.96 12.50 6.25 3.61 1.81 1.45 16.67 8.33 4.82 2.41 1.93 20.83 10.42 6.02 3.01...
- Page 19 Installation Minimum Air Velocity Recommended minimum air flow through a specific heater is shown in Table 4 through Table Table 4: LAH002 Minimum Air Flow Heater Capacity, kW 1 .5 2 .5 3 .5 4 .5 5 .5 6 .5 7 .5 8 .5 Minimum air flow, CFM...
- Page 20 Installation Electric Heat Operation The sampling probe is suitable for left-hand or right-hand CAUTION airflow and in positive pressure applications may require field Heaters are furnished for zero clearance between the duct and combustible adjustment so the probe faces upstream. This is normally done surfaces.
-
Page 21: Field Power Wiring
Installation Field Power Wiring Electrical Installation DANGER 1. Electrical service to the fan must correspond to the rated Improper ground may result in severe injury or death . Check grounding nut tightness before connecting power to the external voltage on the motor nameplate and be in conformance junction box. -
Page 22: Variable Frequency Drive (Vfd)
Installation Variable Frequency Drive (VFD) Starters and Disconnects (Optional) (Optional) DANGER 1. The fan motor is factory wired to an externally mounted Fire hazard. Failure to use fast-blow J-type fuses could result in property d control box. Control box options include: disconnect- mage, injury, or death. -
Page 23: Wiring Diagrams
Wiring Diagrams Wiring Diagrams Electric Heat Diagrams Figure 25: Typical 1-Phase, 240 Volt Electric Heat Wiring Diagram 1 step, 1 phase, 240 VAC, 60 Hz Figure 26: Typical 3-Phase, 575 Volt Electric Heat Wiring Diagram T1 T2 T3 T1 T2 T3 T1 T2 T3 T1 T2 T3 www.DaikinApplied.com... -
Page 24: Disconnect-Only Diagrams
Wiring Diagrams Disconnect-Only Diagrams Figure 27: Typical Single-Phase, Disconnect-Only Wiring Diagram Figure 28: Typical 3-Phase, Disconnect-Only Wiring Diagram IM 782-12 • DESTINY AIR HANDLERS www.DaikinApplied.com... -
Page 25: Vfd Diagrams
Wiring Diagrams VFD Diagrams Figure 29: Typical MD4 VFD Wiring Diagram 208VAC, 3 PHASE, 60Hz MTR1 AFD10 CUSTOMER SUPPLIED POWER GLG1 GND2 Note: Fused disconnect DS1 is optional Figure 30: Typical MD5 VFD Wiring Diagram 575VAC, 3 PHASE, 60Hz MTR1 AFD10 CUSTOMER SUPPLIED... - Page 26 Wiring Diagrams Figure 31: Typical Single-Phase Starter/Disconnect Wiring Diagram Figure 32: Typical 3-Phase Starter/Disconnect Wiring Diagram IM 782-12 • DESTINY AIR HANDLERS www.DaikinApplied.com...
-
Page 27: Physical Data
Physical Data Physical Data Component and Section Weights Table 11: Unit Coil Weights Weight—lbs (kg) Coil type 31.64 40.56 54.30 59.19 84.80 111.99 185.93 255.08 298.34 341.54 4-row chilled water (14.35) (18.40) (24.64) (26.85) (38.46) (50.80) (84.34) (115.70) (135.32) (154.92) 39.94 54.81 69.01... - Page 28 Physical Data Table 14: Base Unit Cabinet Weights—Vertical Unit Weight—lbs (kg) Configuration Configuration No heat Reheat coil No heat* Reheat coil Unit size Flat filters Flat filters Flat filters Flat filters Cooling coil Cooling coil 134.70 (61.10) 134.70 (61.10) 183.20 (83.10) 183.20 (83.10) 209.79 (95.16) 209.79 (95.16)
- Page 29 Physical Data Table 16: Motor Weights*** Unit Motor Fan motor size – horsepower (hp) size 0 .33 0 .5 0 .75 1 .5 7 .5 Max. weight, 25 (11.33) — — — — — — lb (kg) (12.25) (12.25) (18.41) (19.96) (20.87) Frame size...
-
Page 30: Fan Data
Physical Data Fan Data Table 17: Forward Curved Fan Data Unit size Twin DWDI Twin DWDI Twin DWDI Twin DWDI Fan type DWDI FC DWDI FC DWDI FC DWDI FC DWDI FC DWDI FC Diameter 10/10 12/12 12/12 10/10 12/12 15/15 15/15 HP range... -
Page 31: Coil Data
Physical Data Coil Data Table 20: Coil Data—Chilled Water Unit size Fin height 32.5 52.5 Fin length Rows 4, 6 4, 6 4, 6 4, 6 4, 6 4, 6 4, 6 4, 6 4, 6 4, 6 Copper Copper Copper Copper Copper... -
Page 32: Drain Pan Data
Physical Data Drain Pan Data Table 23: Drain Pan Connections Standard and optional stainless steel Unit size Arrangement Sloped Sloped Sloped Sloped Sloped Sloped Sloped Sloped Sloped Sloped Connection 1-1/4ʺ ID 1-1/4ʺ ID 1-1/4ʺ ID 1-1/4ʺ ID 1ʺ ID MPT 1ʺ... -
Page 33: Fan Curves
Physical Data Fan Curves Figure 33: 9.0" SWSI - Backward Inclined Plenum Supply Fan at Standard Conditions Figure 34: 10.0" SWSI - Backward Inclined Plenum Supply Fan at Standard Conditions www.DaikinApplied.com IM 782-12 • DESTINY AIR HANDLERS... - Page 34 Physical Data Figure 35: 11.0" SWSI - Backward Inclined Plenum Supply Fan at Standard Conditions Figure 36: 12.0" SWSI - Backward Inclined Plenum Supply Fan at Standard Conditions IM 782-12 • DESTINY AIR HANDLERS www.DaikinApplied.com...
- Page 35 Physical Data Figure 37: 14.0" SWSI - Backward Inclined Plenum Supply Fan at Standard Conditions Figure 38: 16.0ʺ SWSI - Backward Inclined Plenum Supply Fan at Standard Conditions www.DaikinApplied.com IM 782-12 • DESTINY AIR HANDLERS...
- Page 36 Physical Data Figure 39: 20.0ʺ SWSI - Backward Inclined Plenum Supply Fan at Standard Conditions Figure 40: 22.0ʺ SWSI - Backward Inclined Plenum Supply Fan at Standard Conditions IM 782-12 • DESTINY AIR HANDLERS www.DaikinApplied.com...
- Page 37 Physical Data Figure 41: 25.0ʺ SWSI - Backward Inclined Plenum Supply Fan at Standard Conditions www.DaikinApplied.com IM 782-12 • DESTINY AIR HANDLERS...
-
Page 38: Dimensional Data
Dimensional Data Dimensional Data Cabinet Dimensions—Horizontal Table 25: Cabinet Dimensions—Horizontal Unit Unit size Dimension/ Configuration Cabinet Dimension Unit height and width dimensions in. (mm) 39.37 51.57 51.57 59.06 Height 20.47 (520) 22.44 (570) 22.44 (570) 28.35 (720) 28.35 (720) 32.48 (825) (1000) (1310) (1310) - Page 39 Dimensional Data Table 26: Cabinet Dimensions—Horizontal Unit with Plenum Fan Unit size Dimension/ Configuration Cabinet Dimension Unit height and width dimensions in. (mm) 39.37 51.57 51.57 59.06 Height 20.47 (520) 22.44 (570) 22.44 (570) 28.35 (720) 28.35 (720) 32.48 (825) (1000) (1310) (1310)
-
Page 40: Cabinet Dimensions-Vertical
Dimensional Data Cabinet Dimensions—Vertical Table 27: Cabinet Dimensions—Vertical Unit Unit size Dimensions Cabinet Dimension Unit height, length, and width dimensions in. (mm) 28.54 34.84 42.52 42.52 56.50 62.99 74.41 75.00 89.96 89.96 Width, in (mm) (725) (885) (1080) (1080) (1435) (1600) (1890) (1905) -
Page 41: Mixing Box Dimensions
Dimensional Data Mixing Box Dimensions Table 28: Horizontal and Vertical Units Cabinet, in. (mm) Damper, in. (mm) Unit size Area (ft 28.54 (725) 20.47 (520) 10.24 (260) 26.18 (665) 7.87 (200) 1.43 34.84 (885) 22.44 (570) 10.24 (260) 32.48 (825) 7.87 (200) 1.78 42.52 (1080) -
Page 42: Electric Heat Dimensions-Left/Right Oriented
Dimensional Data Electric Heat Dimensions—Left/Right Oriented Table 29: Electric Heat Dimensions - in. (mm), Sizes 002 through 004 Unit Size Dimension, in. (mm) 1 Step 2 Steps 1Step 2 Steps 3 Steps 4 Steps 1Step 2 Steps 3 Steps 4 Steps 9-1/2 (241) 9-1/2 (241) 9-1/2 (241) -
Page 43: Control Box Dimensions
Dimensional Data Control Box Dimensions Table 31: Control Box Dimensions – Left and Right Hand Access Unit size Dimension/Configuration Disconnect/Starter/Transformer Dimensions, in. (mm) Width 8 (203) 8 (203) 8 (203) 8 (203) 8 (203) 8 (203) 12 (305) 12 (305) 12 (305) 12 (305) Depth... -
Page 44: Operation Guidelines
Operation Guidelines Operation Guidelines Startup Checks Before Starting the Unit WARNING ROTATING FAN Make sure that fan electrical power source is disconnected and locked in the OFF position before entering fan section. Can cause severe injury or death. Before servicing fans, lockout and tag out power. -
Page 45: Operating Limits
Operation Guidelines Operating Limits Fan Vibration Levels Do not exceed the operating limits in Table 33 Table Each unit as shipped is trim balanced to operate smoothly. To A fan wheel that is operated beyond the rpm and temperature provide satisfactory operation after shipping and installation, limits shown may suffer permanent distortion or fracture. -
Page 46: Service And Maintenance
Service and Maintenance Service and Maintenance Periodic Service and Maintenance 1. Check all moving parts for wear every six months. 2. Check bearing collar, sheave, and wheel hub setscrews, sheave capscrews, and bearing hold-down bolts for tightness every six months. Ball Bearing Lubrication 1. -
Page 47: Fan Drive Adjustments
Service and Maintenance Fan Drive Adjustments VM and VP Variable Pitch Key Type WARNING Sheaves ROTATING FAN can use severe injury or death. Before servicing fans, lockout and tag out power. Mounting: Do not open the hinged access door and access panels while the unit is operating. -
Page 48: Lvp Variable Speed Sheaves
Service and Maintenance LVP Variable Speed Sheaves Mounting: Adjusting: 1. Slide sheave on motor shaft so that the side of the sheave 1. Slack off belt tension if belts have been installed. with setscrew A is next to the motor, when setscrew A is in 2. -
Page 49: Mvp Variable Speed Sheaves
Service and Maintenance MVP Variable Speed Sheaves Mounting: Adjusting: 1. Verify that both driving and driven sheaves are in 1. Adjust motor base forward to release belt tension. For alignment and the shafts are parallel. The centerline of easier adjustment, remove the belts. the driving sheave must be in line with the centerline of 2. -
Page 50: Fan Drive Belt Adjustment
Service and Maintenance Fan Drive Belt Adjustment General Rules of Tensioning WARNING Moving belt and fan can cause severe personal injury or 1. The ideal tension is the lowest tension at which the belt death . does not slip under peak load conditions. During installation and filter maintenance: 2. - Page 51 Service and Maintenance Table 37: Screw Torque Values Hollow head setscrews only Flat head socket Socket head cap screws Lengths equal or greater than screws For lengths (L) less than diameter Nominal screw diameter size, (dia-thds/in) Seating torque Seating torque Seating torque Length (L) Seating torque...
-
Page 52: Coil Maintenance
Service and Maintenance Coil Maintenance Coil Removal and Replacement WARNING SHARP EDGES AND COIL SURFACES are a potential injury Before removing the coil, disconnect all piping. hazard. Avoid contact with them. 1. Remove exterior panels from both sides of the coil section. -
Page 53: Warranty
Enter the required information to expedite handling and prompt issuance of credits. All parts must be returned to the appropriate Daikin facility, designated on the “Return Goods” tag. Transportation charges must be prepaid. -
Page 54: Destiny Equipment Warranty Registration
Air Handling Equipment Warranty Registration Form To comply with the terms of Daikin Applied Warranty, complete and return this form within 10 days to the Warranty Department of Daikin Applied. Check, test, and start procedure for air handling units with or without heat recovery and roof mounted air handlers. - Page 55 Destiny Equipment Warranty Registration AHU Equipment Warranty Registration Form (continued) Select Yes or No. If not applicable to the type of unit, select N/A. I. INITIAL CHECK A. Is any shipping damage visible? ........Yes B.
- Page 56 Destiny Equipment Warranty Registration AHU Equipment Warranty Registration Form (continued) Select Yes or No. If not applicable to the type of unit, select N/A. IV. ELECTRIC HEAT A. Electrical heat service corresponds to unit nameplate? ......Yes Volts _____________ Hertz _____________ Phase _____________ B.
- Page 57 Destiny Equipment Warranty Registration AHU Equipment Warranty Registration Form (continued) VIII. Design Flow calibration A. Verify power is supplied to the MicroTech III unit controller ......Yes B.
- Page 58 AAH.Wty_WAR_forms@daikinapplied.com Please fill out the Daikin Applied “Quality Assurance Survey Report” and list any additional comments that could affect the operation of this unit; e.g., shipping damage, failed components, adverse installation applications, etc. If additional comment space is needed, write the comment(s) on a separate sheet, attach it to the Survey Report and return it to the Warranty Department of Daikin Applied with the completed Equipment Warranty Registration form.
-
Page 59: Quality Assurance Survey
Poor 10. How would you rate the overall quality of the product? Excellent Good Fair Poor 11. How does the quality of Daikin Applied products rank in relation to competitive products? Excellent Good Fair Poor Comments _______________________________________________________________________________________ Please list any additional comments which could affect the operation of this unit; i.e., shipping damage, failed components, adverse installation applications, etc. If additional comment space is needed, write the comment(s) on a separate sheet, attach the sheet to this completed Quality Assurance Survey Report, and return it to the Warranty Department with the completed preceding “Equipment Warranty Registration Form”. - Page 60 Daikin Applied Training and Development Now that you have made an investment in modern, efficient Daikin equipment, its care should be a high priority. For training information on all Daikin HVAC products, please visit us at www.DaikinApplied.com and click on Training, or call 540-248-9646 and ask for the Training Department.
Need help?
Do you have a question about the Destiny VFD Series and is the answer not in the manual?
Questions and answers