Table of Contents

Related Manuals for Daikin DM AHU


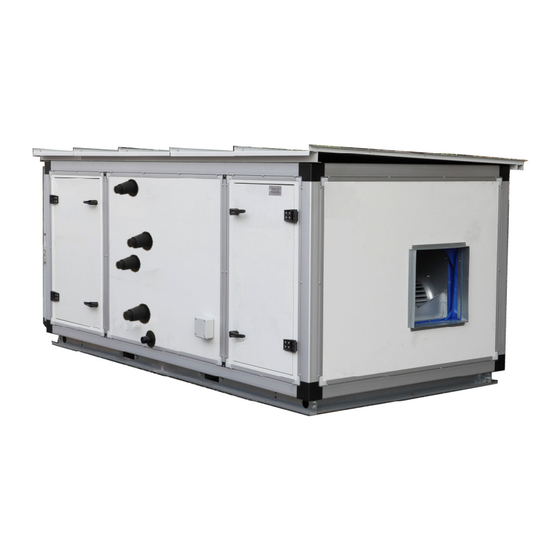
Summary of Contents for Daikin DM AHU
- Page 1 MANUAL INSTALLATION OPERATION MAINTENANCE Double Skin Modular Air Handling Unit MODELS DM AHU DS AHU AHUR VRV AHU VER: O-AHU01-JUN24-25 The design and construction are subject to change without any notice for future improvement.
-
Page 2: Table Of Contents
Table of Contents 1. General ........................1 2. Shipment ........................1 3. Handling / Rigging ......................2 4. Storage ........................3 5. Assembly and Installation ....................3 6. Commissioning and Operation ..................18 7. Maintenance ....................... 23 8. Storage ........................28 9. -
Page 3: Handling / Rigging
checked before commissioning to avoid more For stacking unit, 2 methods are suggested damage caused by unbalanced fan. below to lift the top cabinet without base Screws, bolts, nuts, etc. for assembly of frame. The top cabinet can be rigged using sections are supplied in a bag attached to straps or slings (see Figure 2). -
Page 4: Storage
Transportation on the building site should be The fan impeller or motor drive must be done using a forklift truck or a crane (See rotated once every month. Should the units be Figure 4). The forks must only be applied stored for a period of exceeding 6 months, under the unit base frame and not against the then it is recommended that the drive belts be... - Page 5 5.2 Foundation Adequate space should be left around the unit for coils & drainage piping, filter replacement, Figure 8 – Cabinet Section Joint and maintenance. (See Figure 6). If site access space coil follow recommendation, AHU need to dismantle for coil replacement.
- Page 6 lubricant on the fastener threads. Avoid excessive tightening torque or fastening too quickly else it may cause the fasteners to lock and unable to be removed. Figure 13 – Tighten the cabinet section joint Intermediate to intermediate post joining WARNING CABINET SECTION JOINTS ARE NOT INTENDED FOR LIFTING PURPOSE AND PULLING CABINET FROM A DISTANCE TO JOIN SECTION TOGETHER.
- Page 7 Figure 15 – Removing of transport bracket Figure 14 – Section Joint for pentapost to pentapost or different width cabinets Lastly, it is a must to apply silicone sealant to in-between sections to seal the gap. For Hygienic and clean AHU, please ensure that sealant used does...
- Page 8 Refer to Installation and Operation manual of Air handling unit thermistors “EKEQMCBAV3 / EKEQFCBA – Option kit for Control wiring for control box and combination of Daikin condensing units with MicroTech III air handling units” for further instructions. Power supply and control wiring for air...
- Page 9 below 40 F (4.4 C). Refer appendix 9.2 for water quality. 5.6.3 Winterizing Water Coils Coil freeze-up occur stratification, failure of outdoor air dampers and/or preheat controls. Routine draining of water coils for winter shutdown cannot guarantee zero freeze-up incidents, which may result in coil damage.
- Page 10 CAREFULLY READ THROUGH MANUFACTURING majority of high or medium pressure returns INSTRUCTION APPLING ANTI-FREEZE end in hot wells or deaerators which vent air. SOLUTION. SOME PRODUCTS WILL HAVE All coils in a system should be piped separately. It is not recommended to put DIFFERENT FREEZING POINT IN ITS NATURAL multiple coils on a STATE WHEN MIXED WITH WATER.
- Page 11 5.7.2. Make sure that installation, servicing, Table 1 Minimum Room Area, A Requirement maintenance and repair comply with instructions from Daikin and with (m²) applicable legislation and are executed only by qualified person. h₀=0.6m h₀=1.8m h₀=2.2 m...
- Page 12 76.6 10.9 977.2 1172.6 136.2 15.1 11.8 1368.1 212.8 23.6 15.8 1563.5 306.4 34.0 22.8 1759.0 417.0 46.3 31.0 1954.4 544.7 60.5 40.5 2149.8 689.4 76.6 51.3 2345.3 851.1 94.6 63.3 2540.7 1029.8 114.4 76.6 2736.2 1225.6 136.2 91.2 2931.6 15.9 3107.5 1438.3...
- Page 13 No auxiliary devices are installed in associated parts, appropriate fire the duct work (example: hot surfaces extinguishing equipment shall with a temperature exceeding 600°C available to hand. A dry powder or and electric switching device), except fire extinguisher must be kept those approved by the manufacturer adjacent to the charging area.
- Page 14 frame must be grounded. Suitable electrical protection isolators should be installed to protect motor other electrical equipment. Flexible conduits must be used when wiring up fan motors to allow the fan motor to move freely on its anti-vibration mounts. Cables Figure 28 –...
- Page 15 WARNING OVER TENSION TOWARD DRIVE BELT WILL CAUSE PREMATURE FAILURE OF BELT AND BEARING DAMAGE. Figure 30 – Belt tensioning Figure 29 – Alignment of belt pulley Figure 31 – Belt deflection distance Table 4 - Belt Tensioning Force Deflection Force (N) Belt Section Pulley Diameter Initial Fitting...
- Page 16 2.25 86.20 103.36 123.60 140.60 158.33 156.29 85.11 102.13 122.51 139.51 156.88 154.65 2.75 84.02 100.90 121.42 138.42 155.43 153.02 82.93 99.68 120.33 137.33 153.98 151.38 3.25 98.45 119.24 136.24 152.52 149.75 97.22 118.15 135.15 148.11 3.75 117.07 134.07 115.98 132.98 5.10 Accessory Items 5.10.1 Filter...
- Page 17 discharge should avoided, particularly turns opposed wheel rotation. Turning vanes should be used. Discharge plenums or any abrupt change in duct should be avoided. Figure 33 Drive Belt Deflection for Heat Wheel 5.10.5 Heat Pipe After installation of Heat Pipe with refers to manufacturer recommendations, site installer to install heat pipe baffle plates at site, this is to avoid air bypass heat...
- Page 18 Figure 38 – Side view of Return duct to be large enough to cover exposed area IMPORTANT Top roof are not intended for people to step on. 5.12 Assembly of Complete Knock Down Unit (CKD) Due to container size constraints, some air handling units are packed in unassembled Figure 35 –...
-
Page 19: Commissioning And Operation
the protection purpose. Peel off the 5.13.3 Coil lamination film when the unit is in position. The coil can be pulled out from side or top WARNING of cabinet. The coil is fastened with bolts and nuts on the coil support bracket at the ISOLATE THE ELECTRICAL &... - Page 20 nonfunctional fan to prevent air re- from the average velocity. Air velocities circulation while waiting fan replacement should be maintained between 200 and (See Figure 39). If present of differential 1500 feet per minute. Operating pressures pressure controller, ensure the pressure must be at or below the maximum tube of nonfunctional fan is capped and operating pressure for the coil at steam...
- Page 21 identified by the yellow and black striped transportation sticker on it (See Figure 42). Figure 42 – Transportation Sticker Figure 40 - Wiring Diagram without Neutral 6.2 Start-up Check FOR 380-415V/3PH, STAR CONNECTION WITH Competent, well-trained personnel must NEUTRAL (Figure 41), NEUTRAL POINT MUST be employed in the following operations to BE CONNECTED IN ACCORDANCE WITH ensure Safety Rules and Regulation being...
- Page 22 c. Check and adjust the pulley alignment 6.7 Door opening to ensure the motor fixing is properly secure. d. Check all bearing, wheel bolts & nuts and sheave set screws (or cap screw) are in secure position. CAUTION HIGH AIR TEMPERATURE IN FAN SECTION CAN CAUSE MOTOR OVERHEAT AND DAMAGE.
- Page 23 stopped on the safety latch, then carefully pull the safety latch open to fully open the door. Figure 47 – Screw Location on view port cover Figure 45 – DMA6 Door Opening Procedure while fan running 6.11 Heat Wheel 6.11.1 Start-up Check Check if the casing / cassette is ...
-
Page 24: Maintenance
Check for misalignment of the IMPORTANT drive belt pulley DURING MAINTENANCE AND SERVICING, UNIT periphery of the rotor. MUST COMPLETELY ISOLATED Check the belt joint. Replace it, if PRECAUTIONS TAKEN TO PREVENT ACCIDENT necessary. FROM HAPPENING. Check the length of the drive belt. ... - Page 25 7.4 Steam Coil Section material will be washed out of the coil rather than pushed further in. Internal coil Scheduled plant maintenance should maintenance consists primarily include the draining and flushing of the preventing scale and corrosion. This is condensate drip legs and sediment traps accomplished through aggressive boiler as well as inspection of condensate traps, water treatment, removal of dissolved...
- Page 26 ● Filter Resistance (Washable) Check / Clean ● Resistance (Disposable) Check / Replace ● Damper Dirt accumulation Check / Clean ● Sign of damage Check / Repair / Replace ● Turning torque Check / Repair ● Control box & wiring Check / Repair / Replace Electrical Control...
- Page 27 ● Function-check disinfection system Repair Completely empty and dry humidifier During system standstills Check moisture eliminator for If deposits formed, extract and clean ● contamination, damage, scaling and unit and then check the region corrosion downstream of droplet eliminator Non - Check if there is any contamination, recirculating ●...
- Page 28 7.8 Heat Wheel cleaner with the nozzle 300mm from the For rotor inspection, heat wheel. For disinfection, please use an Check for signs of damage, dirt or isopropanol-based substance such as LIV contamination accumulation +45. the face of the rotor. Clean when pressure drops greater than 1.25.
-
Page 29: Storage
cleaning agents should be used unless VDI 6022 part 4 are qualified to service specified otherwise. Ensure dirt and dust the AHU. does not get into adjacent parts of the system. 8. Storage Please store the AHU in a dry place If disinfection is required for example in protected from the weather. - Page 30 Bearing excessively hot a) Over-tensioned belts. a) Re-tension belts. b) No lubricant. b) Apply lubricant c) Over-lubricant. c) Purge and clean surface. d) Misaligned bearing. d) Check & re-align shaft. Water present in cooling a) Drain trap clog. a) Clean & clear clog. coil drain pan or overflow b) Incorrect hydraulic trapping.
-
Page 31: Appendix
10. Appendix 10.1 Assembly of heat wheel 1. Heat wheel unit bottom section has already assembled with heat wheel support assembly and heat wheel baffle bottom when delivered. 2. Placed the baffle centre to the penta-post / centre-post or panel. 3. -
Page 32: General Information
10.2 AHU Commissioning Check Sheet AHU Commissioning Check Sheet General Information Project Unit Name Unit Model Unit Serial Number Installation Date Commissioning Date Initial Checking (Pre-start Up) A) Fan Section Are all fasteners tightened? Answer: Motor winding Resistances. U1-U2: __________ V1-V2: __________ W1-W2: __________ Motor Megger Test. - Page 33 No construction debris or foreign material left inside AHU. Answer: Is the condensate drain trapped properly? Answer: Are pipe connections to coil header correct? Answer: Ensure good sealing around the coil header and drain pipe externally. Answer: C) Others Make sure all dampers in AHU or ducting (if applicable) are in open position. Answer: Are filters installed in correct airflow direction? Answer:...
Need help?
Do you have a question about the DM AHU and is the answer not in the manual?
Questions and answers