Table of Contents
Advertisement
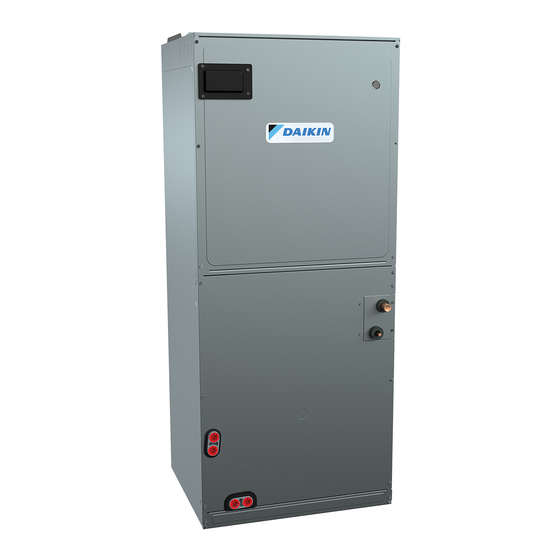
DV**PEC / DV**FEC
1 Important Safety Instructions ............................................................... 2
2 Shipping Inspection ............................................................................... 3
2.1 Parts ........................................................................................................ 3
2.2 Handling .................................................................................................. 3
3 Codes & Regulations ............................................................................. 3
4 Replacement Parts................................................................................. 3
5
Pre-Installation Considerations ........................................................... 3
5.1 Preparation .............................................................................................. 3
5.2 System Matches ...................................................................................... 3
5.3 Interconnecting Tubing ............................................................................ 3
5.4 Clearances .............................................................................................. 3
5.5 Horizontal Applications ............................................................................ 3
6
Installation Location ............................................................................. 4
6.1 Upflow Installation ................................................................................... 4
6.2 Horizontal Left Installation ....................................................................... 4
6.3 Downflow/Horizontal Right Installation .................................................... 4
7 Refrigerant Lines ................................................................................... 7
7.1 Tubing Size .............................................................................................. 7
7.2 Tubing Preparation .................................................................................. 7
7.3 Tubing Connections ................................................................................. 8
8 Condensate Drain Lines ........................................................................ 8
9 Ductwork................................................................................................. 9
9.1 Return Ductwork ...................................................................................... 9
10 Return Air Filters .................................................................................. 9
11 Electric Heat ......................................................................................... 9
12 Electrical and Control Wiring ............................................................ 11
12.1 Building Electrical Service Inspection .................................................. 11
12.2 Wire Sizing .......................................................................................... 11
12.3 Maximum Overcurrent Protection (MOP) ............................................ 11
12.4 Electrical Connections - Supply Voltage ............................................. 11
12.4.1 Air Handler Only (Non-Heat Kit Models) ........................................... 11
12.4.2 Air Handler - Non-Circuit Breaker Heat Kits ..................................... 11
12.4.3 Air Handler With Circuit Breaker Heat Kit ......................................... 11
13 Achieving 1.4% & 2% Low Leakage Rate ........................................ 12
14 Airflow Trim ........................................................................................ 12
15 Miscellaneous Start-Up Checklist .................................................... 12
15.1 Auxiliary Alarm Switch ......................................................................... 13
15.2 Circulator Blower ................................................................................. 14
15.3 Motor Orientation ................................................................................. 14
15.4 Accessory Contacts ............................................................................. 14
16 Troubleshooting .................................................................................. 15
16.1 Electrostatic Discharge (ESD) Precautions ....................................... 15
16.2 Diagnostic Chart ................................................................................. 15
16.3 Fault Recall......................................................................................... 15
17 Fully Communicating Daikin System ................................................ 16
17.1 Overview.............................................................................................. 16
17.2 Airflow Consideration ........................................................................... 16
17.3 Thermostat Wiring ............................................................................... 16
17.3.1 Two-Wire Outdoor and Four-Wire Indoor Wiring ......................... 16
17.4 Network Troubleshooting ..................................................................... 16
17.5 System Troubleshooting ...................................................................... 17
Troubleshooting ........................................................................................ 18
Diagnostic Codes ...................................................................................... 21
Setting the mode display .......................................................................... 22
Wiring Diagram .......................................................................................... 24
Routine Maintenance ................................................................................ 25
IOD-4018J
11/2019
Our continuing commitment to quality products may mean a change in specifications without notice.
© 2015-2019
5151 San Felipe St., Suite 500, Houston, TX 77056
www.daikincomfort.com
(EEV SERIES AIR HANDLERS)
Only personnel that have been trained to install, adjust, service or
repair (hereinafter, "service") the equipment specified in this manual
should service the equipment. The manufacturer will not be
responsible for any injury or property damage arising from improper
service or service procedures. If you service this unit, you assume
responsibility for any injury or property damage which may result. In
addition, in jurisdictions that require one or more licenses to service
the equipment specified in this manual, only licensed personnel
should service the equipment. Improper installation, adjustment,
servicing or repair of the equipment specified in this manual, or
attempting to install, adjust, service or repair the equipment specified
in this manual without proper training may result in product damage,
property damage, personal injury or death.
FOR CALIFORNIA CONSUMERS
RECOGNIZE THIS SYMBOL
AS A SAFETY PRECAUTION.
NOTICE
If an "Ed" error is encountered
on startup, verify that the
electric heater DIP switches
have been set to the appropriate
heater size. See Tables 9 and 10
for the heater kit airflow delivery
and DIP switch settings.
INSTALLATION INSTRUCTIONS
PROP 65 WARNING
Cancer and Reproductive Harm
www.P65Warnings.ca.gov
-
0140M00517-A
Advertisement
Table of Contents
Troubleshooting

Related Manuals for Daikin EEV Series


Summary of Contents for Daikin EEV Series
-
Page 1: Table Of Contents
16.1 Electrostatic Discharge (ESD) Precautions ........15 16.2 Diagnostic Chart ................. 15 NOTICE 16.3 Fault Recall..................15 17 Fully Communicating Daikin System ..........16 If an “Ed” error is encountered 17.1 Overview....................16 on startup, verify that the 17.2 Airflow Consideration ................16 electric heater DIP switches 17.3 Thermostat Wiring ................ -
Page 2: Important Safety Instructions
1 IMPORTANT SAFETY INSTRUCTIONS The following symbols and labels are used throughout this manual to indicate immediate or potential safety hazards. It is the owner’s and installer’s responsibility to read and comply with all safety information and instructions accompanying these symbols. Failure to heed safety information increases the risk of personal injury, property damage, and/or product damage. -
Page 3: Shipping Inspection
The entire system (combination of indoor and outdoor are present and intact. Report any missing components sections) must be manufacturer approved and Air-Con- immediately to Daikin or to the distributor. Use only fac- ditioning, Heating, and Refrigeration Institute (AHRI) tory authorized replacement parts (see Section 4). Make listed. -
Page 4: Installation Location
On these installations, a wrap of 2” fiberglass insulation with a vapor HIGH HUMIDITY KIT barrier is recommended. Table 1 The EEV Series Air Handler product line may be installed in CMK0008 CMK0009 CMK0010 CMK0011... - Page 5 WIRE TIE LOCATION TO BE REMOVED Figure 2-1 Screw mount Screw wire tie (Side view) (Front view) Detail D Screw mount wire tie Sensor wires (15 mm ) Screw Screw mount 1.57 wire tie (40 mm ) Wire ti e Center Insulation *Do not get the...
- Page 6 HORIZONTAL LEFT Figure 5 HORIZONTAL RIGHT Figure 6 UPFLOW DOWNFLOW Figure 3 Figure 4 Upper Tie Plate Control Deck Blower Access Panel Coil Tubing Access Downflow Panel Panel Bracket Center Support Filter Bracket Filter Access Knockout Panel INTERNAL PART TERMINOLOGY EXTERNAL PART TERMINOLOGY Figure 7 Figure 8...
-
Page 7: Refrigerant Lines
Refer to Figure 7 and 8 for the location of the components referenced in the following steps. 1. Before flipping the air handler, remove blower access This product is factory-shipped with R410A and dry nitrogen panel and coil access panel. The coil access panel and mixture gas under pressure. -
Page 8: Tubing Connections
NOTE: When units are installed above ceilings, or in other 7.3 Tubing Connections locations where damage from condensate overflow may occur, EEV Series Air Handler models come with factory installed it is MANDATORY to install a field fabricated auxiliary drain electronic expansion valve (EEV) pre-installed on the pan under the coil cabinet enclosure. -
Page 9: Ductwork
If installing this option, the ONLY heat kits that are permitted to be used are the Daikin produced NOTE: Trapped lines are required by many local codes. In HKS series. Refer to the air handler unit’s Serial and Rating... - Page 10 Drain HEAT KIT NOMINAL Kw Connection 15 19/20 25 1000 Air Handler 2" MIN. 1200 1400 1600 POSITIVE LIQUID 1800 SEAL REQUIRED 3" MIN. 2000 AT TRAP 230/1/60 SUPPLY VOLTAGE - TEMP. RISE °F Figure 12 Table 5 HEAT KIT NOMINAL Kw 15 19/20 25 1000 1200...
-
Page 11: Electrical And Control Wiring
12 ELECTRICAL AND CONTROL WIRING conduit, an adapter ring must be used in order to meet UL1995 safety requirements. An NEC or CEC approved IMPORTANT: All routing of electrical wiring must be made strain relief is to be used at this entry point. Some codes/ through provided electrical knockouts. -
Page 12: Achieving 1.4% & 2% Low Leakage Rate
13 ACHIEVING 1.4% AND 2.0% AIRFLOW LOW 15 MISCELLANEOUS START-UP CHECKLIST LEAKAGE RATE • Prior to start-up, ensure that all electrical wires are prop- Ensure all the gaskets remain intact on all surfaces as shipped erly sized and all connections are properly tightened. with the unit. -
Page 13: Auxiliary Alarm Switch
A UXA LA R M ACC-OUT (Accessory) ACC-IN (Accessory) RX LED X13A FUSE X12A STATUS LE D CPU LED Micro Processor 7seg SEG2 7seg SEG1 X15A PRESSURE SENSOR THERMISTOR CO IL . INDOOR UNIT COMMUNICATING BOARD (PCB) Figure 15 15.1 Auxiliary Alarm Switch The control is equipped with two Auxiliary Alarm termi- nals, labeled TB4 and TB5 which are typically utilized in series with a condensate switch but could also be used SWITCH... -
Page 14: Circulator Blower
Second Valid Setting with communication thermostat: Heater Kit Third Valid For a detailed procedure of thermostat heater kit capacity Heater Kit selection process, please visit the Daikin One website at Fourth Valid http://www.daikinone.com Heater Kit Setting with DIP Switch: Fifth Valid... -
Page 15: Troubleshooting
Humidifier Relay For the setup for humidification functionality, the ac- Peripheral devices to be cessory terminals have 3 operational modes. linked (Example: Humidifier) 1. ON: Humidifier is only enabled during a call for heat. During a heat call the accessory relay will 10A max: 250VAC close only if there is an active call for humidifi- 5A max: 30VDC... -
Page 16: Fully Communicating Daikin System
ECM motor then delivers the low stage cooling airflow. NOTE: For a detailed procedure of thermostat commission- See the applicable fully communicating Daikin System ing process, please visit the Daikin One+ website at air conditioner or heat pump installation manual for the http://www.daikinone.com airflow delivered during cooling or heat pump heating. -
Page 17: System Troubleshooting
#R from indoor unit must connect to terminal #R on thermostat. Verify wires are not reversed. (Note:The order of the terminals of the indoor unit and the Daikin One+ thermostat may be different.) • Do not attach any wires to the R & C Terminals on the Communica�ng Thermostat... - Page 18 Indication Possible Causes Corrective Action(s) Notes & Cautions Status None None None None Communi ca ti ons Communi ca ti ons Depres s Lea rn Button Depres s once qui ckl y for ...
-
Page 19: Troubleshooting
TROUBLESHOOTING... - Page 20 TROUBLESHOOTING...
-
Page 21: Diagnostic Codes
DIAGNOSTIC CODES 7 SEGMENT LED DESCRIPTION OF CONDITION DISPLAY Normal Operation NO HTR KIT INSTALLED - SYSTEM CALLING FOR AUXILIARY HEAT (Minor Error Code) HEATER KIT DIP SWITCHES NOT SET PROPERLY FUSE OPEN AUXILIARY SWITCH OPEN DATA NOT ON NETWORK ... -
Page 22: Setting The Mode Display
SETTING THE MODE DISPLAY MODE DISPLAY INTRODUCTION A 2-digit display is provided on the printed circuit board (PCB) as a backup tool to the thermostat for accessing error codes and erasing error code history of the indoor unit. Follow the information provided in this section to learn how to use the mode display DISPLAY The display consists of 2 digits. - Page 23 SETTING THE MODE DISPLAY <SCREEN ZERO> First Error Code Idle Release Fault Recall in less than 2 sec mins. Press Fault Recall for Error Code Second Error Code Hold Fault Recall for more than 2 sec Solid Display Press Fault Recall for Error Code Release Fault Recall between 2 Last Error Code...
-
Page 24: Wiring Diagram
WIRING DIAGRAM NOTE: THESE INSTRUCTIONS ARE SPECIFICALLY FOR DV**PEC MODELS. DO NOT ATTEMPT TO APPLY THESE HIGH VOLTAGE! DISCONNECT ALL POWER DIAGRAMS FOR ANY OTHER MODELS. BEFORE SERVICING. MULTIPLE POWER SOURCES MAY BE PRESENT. FAILURE TO DO SO MAY CAUSE PROPERTY DAMAGE, PERSONAL INJURY OR DEATH. 208/230 (SEE NOTE 4) GROUND LUG HEATER KIT (SEE NOTE 7) GRND ECM MOTOR DISCONNECT (SEE NOTE 1) (SEE NOTE 1) -
Page 25: Routine Maintenance
AIR HANDLER AIR HANDLER HOMEOWNER’S ROUTINE MAINTENANCE RECOMMENDATIONS We strongly recommend a bi-annual maintenance checkup be performed before the heating and cooling seasons begin by a qualified servicer. REPLACE OR CLEAN FILTER IMPORTANT NOTE: Never operate unit without a filter installed as dust and lint will build up on internal parts resulting in loss of efficiency, equipment damage and possible fire. - Page 26 THIS PAGE INTENTIONALLY LEFT BLANK...
- Page 27 THIS PAGE INTENTIONALLY LEFT BLANK...
- Page 28 CUSTOMER FEEDBACK Daikin is very interested in all product comments. Please fill out the feedback form on the following link: https://daikincomfort.com/contact-us You can also scan the QR code on the right to be directed to the feedback page. PRODUCT REGISTRATION Thank you for your recent purchase. Though not required to get the protection of...
Need help?
Do you have a question about the EEV Series and is the answer not in the manual?
Questions and answers