Circutor Wallbox eNext Series Installation Manual
Hide thumbs
Also See for Wallbox eNext Series:
- Instruction manual (50 pages) ,
- Installation manual (32 pages)
Table of Contents
Advertisement
Quick Links
Advertisement
Table of Contents

Related Manuals for Circutor Wallbox eNext Series


Summary of Contents for Circutor Wallbox eNext Series
- Page 1 Wallbox eNext Series INSTALLATION GUIDE (M255A01-03-20A)
-
Page 2: Disclaimer
CIRCUTOR, SA reserves the right to make modifications to the device or the unit specifi- cations set out in this instruction manual without prior notice. CIRCUTOR, SA on its web site, supplies its customers with the latest versions of the de- vice specifications and the most updated manuals. - Page 3 C O P Y R I G H T I N F O R M AT I O N This document is copyrighted, 2019 by Circutor, S.A. All rights are reserved. Circutor, S.A. reserves the right to make improvements to the products described in this manual at any time without notice.
- Page 4 Wallbox eNext Installation guide...
-
Page 5: Table Of Contents
Wallbox eNext Here’s your guide to install eNext. Disclaimer ..............................2 Revision log..............................2 Here’s your guide to install eNext......................5 1.-So,hello!..............................6 2.-Before the installation...........................8 3.- Overview..............................12 4.- Dimensions............................14 5.- Installation............................16 A. Requirements............................17 B. Opening..............................18 C. Positioning............................19 D. Fixing..............................20 E. Wiring..............................21 F. CirBEON..............................23 G. - Page 6 Wallbox eNext Installation guide...
-
Page 7: So,Hello
Wallbox eNext So, hello! This manual provides commissioning information about Wallbox eNext, which has been designed and tested to allow electric vehicle charging, specified in IEC 61851. This document has different sections such as step-by-step installation procedure and technical data. THE FOLLOWING SYMBOLS ARE USED FOR IMPORTANT SAFETY INFORMATION IN THIS DOCUMENT ELECTRIC RISK... - Page 8 Wallbox eNext I M P O R TA N T E L E C T R I C A L S A F E T Y I N S T R U C T I O N S Read carefully all the instructions before starting in order to ensure properly handling of electrical parts.
-
Page 9: Before The Installation
IEC 61851. for users (broken plugs, caps that • Do modify this unit. don’t close...). modified, CIRCUTOR will reject all • Use only CIRCUTOR supplied spare responsibility and the warranty will be void. parts. • Comply strictly with electrical •... - Page 10 Wallbox eNext E L E C T R I C A L W I R I N G C O N S I D E R AT I O N S Take into consideration this section before starting wiring connections of the charge point. 1 —...
- Page 11 Wallbox eNext Installation guide...
- Page 12 Wallbox eNext What’ s included: Installation Guide Installation Charge Point Guide Identification Allen wrench label 2.5 mm Installation guide...
-
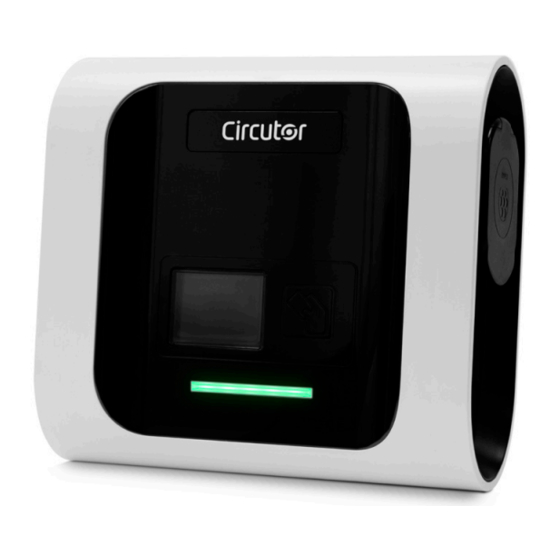
Page 13: Overview
Wallbox eNext Overview 3 — Plugs 5 — Closing box holes 1 — Beacon lights 2 — Cable glands 4 — Wall support holes Plugs may vary depending on the model Installation guide... - Page 14 Wallbox eNext Measures in mm Installation guide...
-
Page 15: Dimensions
Wallbox eNext Dimensions 62.5 52.5 52.5 62.5 39.5 20.5 This measurement may vary. Installation guide... - Page 16 Wallbox eNext Material: • Allen wrench of 2,5 mm is included in the installation kit. Screws, sealing washers and plastic anchors are not included. • • The fastening system of the Charge Point has been designed to be installed on a wall. »...
-
Page 17: Installation
Installation Requirements • Please comply with your country regulations. The Charge Point shall be installed on a wall or on CIRCUTOR accessories. • • When installing the unit, some space shall be reserved for usability, maintenance and safety reasons. The picture below shows the recommended minimum... -
Page 18: Opening
Wallbox eNext Opening Open the Wallbox using allen wrench. 2.5mm Allen wrench Screw DIN-7380-2 M4x14 INOX Sealing washer DIN 7712 4.8 14MM INOX Use the ratchet tool to open/close at difficult access case Installation guide... -
Page 19: Positioning
Wallbox eNext Positioning Make the holes. Tap drill M 6/8 1100 Dimensions in mm Installation guide... -
Page 20: Fixing
Wallbox eNext Fixing Place the unit on the previous pierced points and fix it with screws. Installation guide... -
Page 21: Wiring
Wallbox eNext Wiring Use provided cable glands in order to mantain the IP protection Cable glands M32 • The current of the power supply can be limited. In order to perform this adjustment please refer to the Instruction Manual. • The IEC-61851-1 ed 3 standard indicates that each plug shall have protections. - Page 22 Wallbox eNext External electric protections should be placed upstreams as shown below: SINGLE-PHASE CHARGE POINT THREE-PHASE CHARGE POINT Connect to the 230V~. • Connect to the 400V~. • • If the Power Supply is Single-Phase, connect L1 and N. Protections Protections Terminal block maximum cross-section: 10mm Do not forget to connect the ground cable to the ground terminal...
-
Page 23: Cirbeon
Wallbox eNext CirBEON CirBEON is an optional device that optimises the Electric Vehicle (EV) Charge Point. Analysing the total current consumption in residential facilities, CirBEON manages the remaining current for the EV Charge Point, avoiding any tripping on the Main Circuit. CirBEON is only available on single-phase charge points. -
Page 24: Dc Current Leakage Detector
Wallbox eNext DC current leakage detector This protection is performed in two different ways depending on the Charge Point power supply. • Single-phase power supply: The detector sends a signal to the Charge Point main PCB which stops the charge transaction by opening the inner relays. This error is notified by 6 blinking red lights. -
Page 25: Remote Control Function
Wallbox eNext Remote control function Remote control function is a potential free contact which allows the charge transaction remote start and stop. This remote control function is disabled by default, by means of a jumper (as shown in the picture below). -
Page 26: Closing
Wallbox eNext Closing C l o s e t h e C h a r g e P o i n t a s p e r t h e f o l l o w i n g s t e p s o f v e r i f i c a t i o n a n d o p e r a t i o n . 1 —... - Page 27 Wallbox eNext 8 — S E C U R E C L O S U R E • Tighten the screws crosswise in the sequence shown below. • As a guideline, the recommended assembly torque is 0.8-1Nm. 9 — O P E R AT I O N Check that no abnormal noise appears while the unit is charging.
- Page 28 Wallbox eNext ELECTRICAL DATA MODEL : eNext M-C1 M-C2 T-S2 T-C2 1P+N+PE 1P+N+PE 3P+N+PE 3P+N+PE Power supply 230V~±10% 230V~±10% 400V~±10% 400V~±10% Input voltage 50Hz / 60Hz Frequency Ouput Power 7.4 kW 7.4 kW 22 kW 22 kW 32 A Ouput current Connectors type Type 1 Cable Type 2 Cable...
-
Page 29: Technical Data
Wallbox eNext Technical Data (Continuation) MECHANICAL DATA Connectors Shutter Type 2 Socket, Type 1 Cable, Type 2 Cable Depending on the model, some components may vary This is the minimum cable cross section recommended for the maximum AC input current. The final cross section must be calculated by a qualified technician taking into account the specific conditions of installation Optional. - Page 30 Wallbox eNext Installation guide...
-
Page 31: Need Help
Wallbox eNext Need help? In case of any query in relation to unit operation or malfunction, please contact the CIRCUTOR, SA Technical Support Service. Technical Assistance Service Vial Sant Jordi, s/n, 08232 - Viladecavalls (Barcelona) Tel: 902 449 459 (Spain) / +34 937 452 919 (outside of Spain) email: sat@circutor.com... - Page 32 CIRCUTOR, SA. Vial Sant Jordi, s/n 08232 - Viladecavalls (Barcelona) Tel: (+34) 93 745 29 00 - Fax: (+34) 93 745 29 14 www. circutor.com central@circutor.com...
Need help?
Do you have a question about the Wallbox eNext Series and is the answer not in the manual?
Questions and answers