
Related Manuals for Wilo DrainLift SANI-L Series


Summary of Contents for Wilo DrainLift SANI-L Series
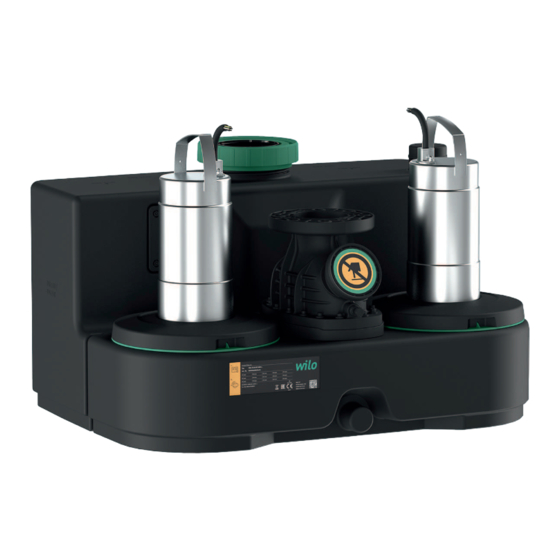
- Page 1 Pioneering for You Wilo-DrainLift SANI-L en Installation and operating instructions · 2552854 • Ed.01/2020-06...
-
Page 3: Table Of Contents
Operation ......................................... 22 Test run .......................................... 22 Follow-up time........................................ 23 Setting for venting screw .................................... 23 8 Operation.................................... 23 Application limits ...................................... 23 During operation ...................................... 24 Emergency operation ..................................... 24 9 Shut-down/dismantling................................. 25 Installation and operating instructions Wilo-DrainLift SANI-L... - Page 4 Clean and disinfect ...................................... 27 10 Maintenance and repair................................ 27 11 Spare parts.................................... 27 12 Disposal.................................... 27 12.1 Protective clothing ...................................... 27 12.2 Oils and lubricants...................................... 27 12.3 Information on the collection of used electrical and electronic products.................... 27 WILO SE 2020-06...
-
Page 5: General Information
Distribute any content. ƒ Use any content for competition purposes without authorisation. Wilo shall reserve the right to change the listed data without notice and shall not be li- able for technical inaccuracies and/or omissions. Subject to change Wilo shall reserve the rights to make technical changes to the product and individual components. - Page 6 Personal protective equipment: wear safety footwear Personal protective equipment: wear protective gloves Personal protective equipment: wear face mask Personal protective equipment: wear safety goggles Working alone is prohibited! A second person must be present. Transport by two persons WILO SE 2020-06...
-
Page 7: Personnel Qualifications
Ensure all connections for the inlet, pressure pipe and venting are sealed tightly and in accordance with regulations! ƒ When opening the tank (e.g. during maintenance work), ensure appropriate ex- change of air! ƒ Transport Wear the following protective equipment: Installation and operating instructions Wilo-DrainLift SANI-L... -
Page 8: Installing/Dismantling
Maintenance tasks Maintenance work may only be carried out by qualified personnel (trained specialists in plant technology for sanitary facilities). ƒ Wear the following protective equipment: – Sealed safety goggles – Safety gloves for protection against cuts WILO SE 2020-06... -
Page 9: Operator Responsibilities
(e.g. fleece cloths, moist toilet paper wipes), nappies, cardboard, coarse paper, synthetic resins, tar, kitchen waste, grease, oil ƒ Slaughterhouse waste, disposal of slaughtered animals and animal waste (liquid ma- nure etc.) Installation and operating instructions Wilo-DrainLift SANI-L... -
Page 10: Product Description
When the high water level is reached, there is an audible and visual alarm signal. Forced switch-on of the pump takes place. Furthermore, the collective fault signalling contact is activated. An external alarm (horn, SMS via SmartHome connection) can be triggered via the potential-free contact. WILO SE 2020-06... -
Page 11: Operating Principle
Activation type ƒ SANI-L.../1...: S3 10%/60 s – Cycle duration: 60 s Operating mode – Activation period: 6 s (based on one pump) – Downtime: 54 s ƒ SANI-L.../4...: S1 IP68 Protection class 1.5 m (5 ft) Cable length to plug Installation and operating instructions Wilo-DrainLift SANI-L... -
Page 12: Scope Of Delivery
Diaphragm hand pump with R 1½ connection (without hose) ƒ 3-way stopcock for switching over to manual suctioning ƒ Horn 230 V, 50 Hz ƒ Flash light 230 V, 50 Hz ƒ Signal lamp 230 V, 50 Hz ƒ SmartHome radio transmitter for connectivity with the Wilo wibutler WILO SE 2020-06... -
Page 13: Transportation And Storage
Permitted storage temperature: -15 ... 60 °C (5 ... 140 °F), max. humidity: 90 %, non- condensing. We recommend frost-proof storage. Storage temperature: 5 ... 25 °C (41 ... 77 °F), relative humidity: 40 ... 50 %. ƒ Drain the collection reservoir completely. Installation and operating instructions Wilo-DrainLift SANI-L... -
Page 14: Installation And Electrical Connection
Ensure a clearance area of min. 60 cm (2 ft) around the unit. ƒ In the event of an accident: Provide pump sump in the operating space, min. dimen- sions: 500x500x500 mm (20x20x20 in). Select pump accordingly. Ensure that manual drainage is possible. WILO SE 2020-06... - Page 15 No tensile or compressive forces must act on the lifting unit. ƒ Pressure resistance of pipework and pipe adaptors ƒ Tensile strength of the pipe adaptors (= longitudinal force fit connection) ƒ Connect the pipes free of stress and vibrations. Installation and operating instructions Wilo-DrainLift SANI-L...
- Page 16 9. Attach the switchgear to the wall so as to be overflow-proof (see switchgear in- structions). 10.Lay the connection cable in accordance with regulations. ▶ Lifting unit installed so as to protect against buoyancy and twisting. Next step: Connect the pressure pipe. WILO SE 2020-06...
- Page 17 ▶ Pressure pipe connected. Next step: Connect the inlet. 6.4.7 Connecting the inlet The inlet can be in the areas indicated for the rear wall, both side walls and the tank roof, as desired. Installation and operating instructions Wilo-DrainLift SANI-L...
- Page 18 Reservoir wall Hole saw for drill Inlet seal Inlet pipe Pipe clamp ‡ Lifting unit installed properly. ‡ Inlet pipe installed properly up to collection reservoir and according to consulting documents. ‡ Assembly materials provided: 1x hole saw WILO SE 2020-06...
- Page 19 The collection reservoir is pumped out via the emergency drain for inspection work or in the event of an accident. Do not connect inlets to the emergency drain! The collection reservoir cannot be drained in case of emergency otherwise! Installation and operating instructions Wilo-DrainLift SANI-L...
-
Page 20: Electrical Connection
Earth the device in accordance with local regulations. ƒ Install the socket so as to be overflow-proof. ƒ Socket version: – Single-phase current: SANI-L12M...: Shock-proof socket SANI-L16M...: CEE 32A, 2P+PE, 6 h – Three-phase current: CEE 16A, 3P+N+PE, 6 h, clockwise rotating field WILO SE 2020-06... -
Page 21: Commissioning
Danger of (serious) injuries during work. Wear safety shoes! NOTICE Automatic activation after power cut Depending on the process, the product is switched on and off using separate con- trols. The product may automatically switch on following power cuts. Installation and operating instructions Wilo-DrainLift SANI-L... -
Page 22: Personnel Qualifications
⇒ If all connections are leak-proof, the lifting unit can run in automatic mode. ▶ Test run completed. ▶ Lifting unit is put into operation: Keep gate valve open in the pressure pipe. ▶ Lifting unit in standby mode: Close the gate valve in the pressure pipe. WILO SE 2020-06... -
Page 23: Follow-Up Time
ƒ Max. intake/h: 7200 l (1902 US.liq.gal) ƒ Max. positive suction head: 5 m (16 ft) ƒ Max. pressure in the pressure pipe: 6 bar (87 psi) ƒ Fluid temperature: 3 ... 40 °C (37 ... 104 °F), max. 65 °C (149 °F) for 5 min Installation and operating instructions Wilo-DrainLift SANI-L... -
Page 24: During Operation
• Flush rinsing water into the sewer system. • Dispose of protective clothing and cleaning material in accordance with local regulations. • Observe the specifications in the work regulations! The operator must make sure that personnel have received and read the work regulations! WILO SE 2020-06... -
Page 25: Shut-Down/Dismantling
⇒ Mouth protection ⇒ Protective gloves • Immediately wipe up drips. • Observe the specifications in the work regulations! The operator must make sure that the personnel have received and read the work regulations! Installation and operating instructions Wilo-DrainLift SANI-L... - Page 26 7. Release the floor anchoring. 8. Pull the lifting unit carefully out of the pipework. ▶ Lifting unit is dismantled. Clean and disinfect the lifting unit and operating space. WILO SE 2020-06...
- Page 27 Wipe up drips immediately! 12.3 Information on the collection of Proper disposal and appropriate recycling of this product prevents damage to the envi- used electrical and electronic ronment and putting your personal health at risk. products Installation and operating instructions Wilo-DrainLift SANI-L...
- Page 28 ƒ Observe the locally applicable regulations! Please consult your local municipality, the nearest waste disposal site, or the dealer who sold the product to you for information on proper disposal. See www.wilo‑recycling.com for more information about recycling. WILO SE 2020-06...
- Page 31 WILO Pompa Sistemleri Jakarta Timur, 13950 Sistemas Hidraulicos Lda. San. ve Tic. A.S¸ T +62 21 7247676 4475-330 Maia 34956 İstanbul citrawilo@cbn.net.id T +351 22 2080350 T +90 216 2509400 bombas@wilo.pt wilo@wilo.com.tr Further subsidiaries, representation and sales offices on www.wilo.com Oktober 2018...
- Page 32 WILO SE Nortkirchenstr. 100 44263 Dortmund Germany T +49 (0)231 4102-0 T +49 (0)231 4102-7363 wilo@wilo.com Pioneering for You www.wilo.com...
Need help?
Do you have a question about the DrainLift SANI-L Series and is the answer not in the manual?
Questions and answers