
Related Manuals for Wilo DrainLift SANI-S


Summary of Contents for Wilo DrainLift SANI-S
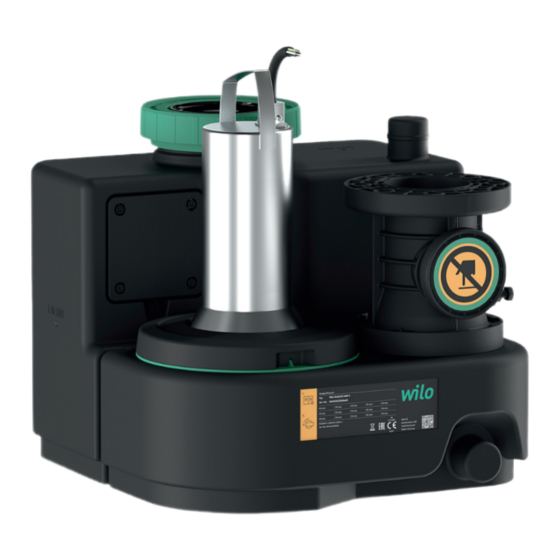
- Page 1 Pioneering for You Wilo-DrainLift SANI-S en Installation and operating instructions · 2552852 • Ed.03/2023-06...
- Page 2 DrainLift SANI-S https://qr.wilo.com/480...
-
Page 3: Table Of Contents
Staff qualifications.............. 14 Installation types.............. 14 Operator responsibilities............ 14 Installation ................ 14 Electrical connection ............ 19 7 Commissioning ................. 21 Staff qualifications.............. 21 Operator responsibilities............ 21 Operation ................ 22 Test run ................ 22 Follow-up time.............. 22 Setting the venting screw.......... 22 8 Operation .................. 23 Installation and operating instructions • Wilo-DrainLift SANI-S • Ed.03/2023-06... -
Page 4: Subject To Change
All rights reserved. Subject to change Wilo reserves the right to change the listed data without prior notice and is not liable for technical inaccuracies and/or omissions. The illustrations vary from the original and are in- tended as a sample representation of the device. - Page 5 Danger due to bacterial infection Warning – risk due to hot surfaces Wear protective helmet. Wear safety shoes. Wear safety gloves. Wear respiratory mask. Wear safety glasses. Be aware about the instructions. Useful information Installation and operating instructions • Wilo-DrainLift SANI-S • Ed.03/2023-06...
-
Page 6: Electrical Work
The mentioned branded articles are non-binding suggestions. Similar products from other brands can also be used. The pre- requisite is the fulfilment of the mentioned standards. WILO SE accepts no liability for the mentioned articles regarding their conformity to the relevant standards. Electrical work •... -
Page 7: Monitoring Devices
Only use undamaged tanks (no cracks, leaks, porous material). Switch off lifting units with damaged tanks immediately. • Ensure that all connections for the inlet, discharge pipe, and ventilation are sealed tightly and executed according to the local regulations. Installation and operating instructions • Wilo-DrainLift SANI-S • Ed.03/2023-06... -
Page 8: Transport
• Max. pressure in the discharge pipe: 2.5 bar (36 psi) • Fluid temperature: 3 ... 40 °C (37 ... 104 °F), max. 65 °C (149 °F) for 5 min • Ambient temperature: 3 ... 40 °C (37 ... 104 °F) Installation and operating instructions • Wilo-DrainLift SANI-S • Ed.03/2023-06... -
Page 9: 2.11 Cleaning And Disinfection
Cleaning agents, disinfectants, dishwashing or laundry detergents – Condensate from condensing boiler CAUTION! The fluid in the collection tank must not exceed or fall short of the pH value of 5 … 12! Installation and operating instructions • Wilo-DrainLift SANI-S • Ed.03/2023-06... -
Page 10: Improper Use
Operation via display and icon-based, alphanumeric menu • Collective fault signal with potential-free contact • Individual fault signal with potential-free contact • ModBus interface • Integrated and mains-independent alarm • Adjustable follow-up time Installation and operating instructions • Wilo-DrainLift SANI-S • Ed.03/2023-06... -
Page 11: Materials
3 ... 40 °C (37 ... 104 °F), max. 65 °C (149 °F) for 5 min Ambient temperature 3 ... 40 °C (37 ... 104 °F) Motor data Mains connection • SANI-S...M/...: 1~230 V, 50 Hz • SANI-S...T/...: 3~400 V, 50 Hz Installation and operating instructions • Wilo-DrainLift SANI-S • Ed.03/2023-06... -
Page 12: Manufacturer Date
DN 80 flange shut-off valve made of cast material with flat seal and assembly material On the inlet side • DN 100/DN 150 shut-off valve made of plastic with fixed pipe ends • DN 100/DN 150 inlet seals Installation and operating instructions • Wilo-DrainLift SANI-S • Ed.03/2023-06... -
Page 13: Transportation And Storage
Protect the lifting unit from direct sunlight and heat. Extreme heat can cause damage to the plastic parts. • Elastomeric parts are subject to natural brittleness. Contact customer service if storage is required for more than 6 months. Installation and operating instructions • Wilo-DrainLift SANI-S • Ed.03/2023-06... -
Page 14: Installation And Electrical Connection
• Only perform the work with another person! WARNING Head injuries due to lack of protective equipment! Danger of (serious) injuries during work can occur. If a lifting accessory is used, wear a safety helmet! Installation and operating instructions • Wilo-DrainLift SANI-S • Ed.03/2023-06... - Page 15 Prepare the installation location: – Horizontal and flat installation surface. – Ensure an extra free space of min. 60 cm (2 ft). – Fixation with dowels possible. – Clean, free of coarse solids – Installation and operating instructions • Wilo-DrainLift SANI-S • Ed.03/2023-06...
- Page 16 Lifting unit installed properly. Fig. 3: Fitting discharge connection ✓ Discharge pipe installed correctly according to consulting documents and perpendicular to the discharge port. ✓ Assembly materials prepared: 1x shut-off valve 1x collar Installation and operating instructions • Wilo-DrainLift SANI-S • Ed.03/2023-06...
- Page 17 CAUTION! Surging inflow or air intake into the collection tank can lead to malfunc- tions of the lifting unit! • To allow the inlet pipe to drain off by itself, install the inlet pipe with a slope gradient to the lifting unit. Installation and operating instructions • Wilo-DrainLift SANI-S • Ed.03/2023-06...
- Page 18 The connection of a ventilation pipe is mandatory. Furthermore, ventilation is absolutely necessary to ensure proper functioning of the lifting unit. Observe the following points when connecting the ventilation pipe: • Guide the ventilation pipe over the roof. Installation and operating instructions • Wilo-DrainLift SANI-S • Ed.03/2023-06...
-
Page 19: Electrical Connection
Danger of death due to electrical shock! Improper conduct when carrying out electrical work can lead to danger of death due to electric shock! • Perform electrical work by a qualified electrician. • Observe local regulations. Installation and operating instructions • Wilo-DrainLift SANI-S • Ed.03/2023-06... - Page 20 NOTICE! If the inlet is lower than the “Pump ON” switching point, there is backflow in the inlet pipe! Wilo-Control MS-L switchgear The switching points are set via permanently defined parameter sets for the Wilo-Con- trol MS-L switchgear. Set the required parameter set to DIP switch 3: Switching points Pump ON: 180 mm (7 in)
-
Page 21: Commissioning
NOTICE! For the position of DIP switch 3, refer to the installation and operating instruc- tions of the switchgear! Wilo-Control EC-L switchgear The switching points are set via the menu for the Wilo-Control EC-L switchgear. Set the following values in the specified menus: Switching points Pump ON: 180 mm (7 in) -
Page 22: Operation
Setting the venting screw The non-return valve is equipped with a venting screw. The non-return valve can be opened via the venting screw for inspection. As a result, the remaining fluid can flow back Installation and operating instructions • Wilo-DrainLift SANI-S • Ed.03/2023-06... -
Page 23: Operation
• Increase the follow-up time to prevent the pressure surges. • An extended follow-up time results in slurping operation and smoother closing of non-return valve. Installation and operating instructions • Wilo-DrainLift SANI-S • Ed.03/2023-06... - Page 24 • Installation and dismantling to be performed by a trained expert for sanitary installa- tions, including fastening of buoyancy safeguard and connection of plastic pipes. Installation and operating instructions • Wilo-DrainLift SANI-S • Ed.03/2023-06...
- Page 25 Performing work in chambers and narrow rooms as well as in areas with risk of falling can be dangerous. Do not perform this work alone! • Only perform the work with another person! Installation and operating instructions • Wilo-DrainLift SANI-S • Ed.03/2023-06...
- Page 26 Close the inspection opening on the collection tank and non-return valve again. Maintenance and repair Maintenance and repair work can only be carried out by qualified staff (e.g. customer ser- vice). The maintenance intervals in accordance with EN 12056‑4: Installation and operating instructions • Wilo-DrainLift SANI-S • Ed.03/2023-06...
- Page 27 • Observe the locally applicable regulations. Consult your local municipality, the nearest waste disposal site, or your retailer for informa- tion on proper disposal. See www.wilo‑recycling.com for more information about recycling. Installation and operating instructions • Wilo-DrainLift SANI-S • Ed.03/2023-06...
- Page 32 Local contact at www.wilo.com/contact WILO SE Wilopark 1 44263 Dortmund Germany T +49 (0)231 4102-0 T +49 (0)231 4102-7363 wilo@wilo.com Pioneering for You www.wilo.com...
Need help?
Do you have a question about the DrainLift SANI-S and is the answer not in the manual?
Questions and answers