Table of Contents
Advertisement
Advertisement
Table of Contents

Related Manuals for Hubsan Zino 2+


Summary of Contents for Hubsan Zino 2+
- Page 1 Zino 2+ 《 U s e r M a n u a l 》 V2.0...
- Page 3 Hubsan liability and operational guidelines. This product is not suitable for minors under 14 years of age. While operating a Hubsan product (s), users also accept all liability and responsibility for their own behavior, actions as well as any consequences resulting thereof while using a Hubsan product(s).
-
Page 4: Important Safety Information
MAINTENANCE Do not try to open or repair the units by yourself. Please contact Hubsan or Hubsan authorized dealers for service. For more information, please visit the official website at www.hubsan.com. - Page 5 ● If you do not plan to fly the aircraft for a long time, store the battery ~50% charged to maintain battery performance and life. ● Please use Hubsan chargers for battery charging. ● Discharge the battery at 5C current or below. To avoid discharge related battery damage, do not prolong the discharge time.
-
Page 6: Table Of Contents
2.6 Transmitter Calibration 4.6.3 Tf Card 2.7Transmitter Control stick settings 5 Faq 3 Flight Limitation Of Liability 3.1 Download The X-hubsan 2.0 App Fcc Information 3.2 Main Interface Guide 3.3 Pairing The Aircraft 3.4 Aircraft Calibration 3.4.1 Horizontal Calibration 3.4.2 Compass Calibration... -
Page 7: Aircraft
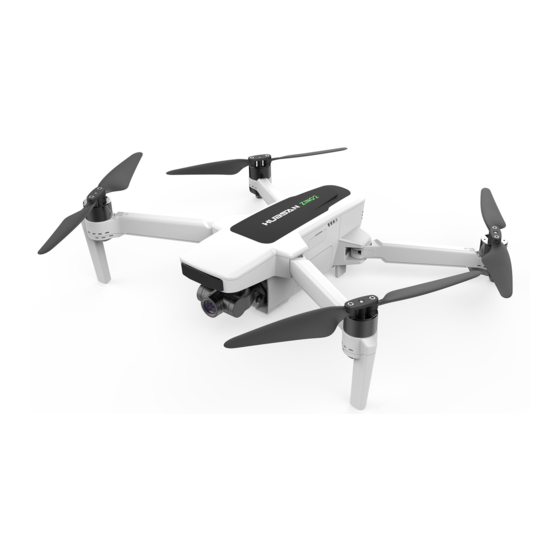
1.Aircraft 1.1 Aircraft Spare Part Body shell Propeller A Motor 4K HD Camera Propeller B Tripod (With Antenna) Bind key 3-axis gimbal Gimbal Protection Guard TF Slot USB port (for upgrade) Video upgrade button Video indicator Video transmission indicator... - Page 8 Battery power switch Intelligent Battery Battery buckle Battery level indicator Auxiliary altitude hold system Rear LOGO...
-
Page 9: Aircraft Battery
1.2 Aircraft Battery 1.2.1 Aircraft Battery Charging Aircraft Lithiun Battery Capacity: 3800mAh, 15.2V lithium battery equipped with a standard charger,charging time is about 110 minutes. ① Connect the power adapter to AC power (100V-240V, 50-60Hz). ② Connect the Intelligent Flight Battery and the power adapter with Intelligent Flight Battery turned off ③... -
Page 10: Intelligent Flight Battery Function
1.2.3 Intelligent Flight Battery Function (1) Power display: The battery has a power indicator, which can display the current battery power. (2) Battery storage self-discharge protection: After the battery is fully charged and stored for 10 days without any operation, the battery will automatically turn on the self-discharge mode to protect the battery (there may be slight heating during discharge). -
Page 11: Precautions For Low Temperature
Be sure to fully charge each time before using the Intelligent Flight Battery.The Intelli- gent Flight Battery must be use a Hubsan dedicated power adapter for charging. (1) The temperature of the Intelligent Flight Battery is high after the flight is over. The Intelligent Flight Battery must be cooled to room temperature before charging the battery. -
Page 12: Remote Controller(America Mode
2. Remote Controller(America Mode 2) 2.1 Names Of Remote 1) Mobile Device holder Controller Components 2-1)Throttle / Rudder Stick 2-2) Forward / backward / left / right flight control levers 3) Return to Home 4) Power 5) F / N / S mode: Movie mode / normal mode / sport mode 6) Display... -
Page 13: Remote Controller Features
2.2 Remote Controller Features S/N Key / Switch Function Push the stick forward or backward and the quad- Throttle / Rudder copter will ascend or descend (respectively). Push the Stick stick left or right and the quadcopter will fly left or right (respectively). -
Page 14: Charging The Transmitter Battery
S/N Key / Switch Function Press and hold the Fn button, turn the gimbal adjustment Wheel to adjust tthe brightness of the remote control display at the same time. The remote control buzzer beeps when a low battery is triggered or RTH Press the Fn button for 1.5 seconds, and the beep will stop. -
Page 15: Remote Control Diagram
2.4 Remote Control Diagram Propellers Status Aircraft Battery Aircraft Mode Remote Controller Battery Aircraft GPS Satellite Heading Angle Aircraft Signals Character Area Compass Calibration / Photo / Video Headless Mode Flight Distance Aircraft speed Photo / Video 2.5 Remote Control Antenna Angle (1) Adjust the angle of the remote control antenna and try to face the flight direc- tion of the aircraft as much as possible;... -
Page 16: Transmitter Calibration
Turn Left Turn Right Turn Right 3 Flight 3.1 Download The X-hubsan 2.0 App Before flying, users must download the X-Hub- san 2.0 APP. Download the APP for free by scanning the code as shown or by download it via APP Store (IOS) Or Goggle Play. -
Page 17: Main Interface Guide
Note: This is the interface in Map mode 3.3 Pairing The Aircraft (1) Run X-Hubsan 2.0 APP, choose the aircraft model. (2) Short press the aircraft power button and then long press for a few seconds to turn it on. - Page 18 (4) Start binding (This step is only required when first binding or replace the trans- mitter, do it manually.) Synchleas 1. Go to APP - Setting - Controller, transmitter connection method: Synchleas Tr a n s m i t t e r m o d e l C o n t ro l l e r S e t t r a n s m i t t e r a n d a i rc r a f t c o n n e c t i o n J o y s t i c k s e t t i n g...
-
Page 19: Aircraft Calibration
3.4 Aircraft Calibration 3.4.1 Horizontal Calibration During the flight, when the aircraft has a significant horizontal deviation, please land the drone, lock the motor, and place it on the horizontal ground. Then enter the APP setting interface, select horizontal calibration, the aircraft will automatically perform the calibration, the four heading lights will flash, and it will stay on after the calibration is completed. -
Page 20: Gps Accuracy Test
3.4.3 GPS Accuracy Test After entering the APP interface, tap on "Aircraft", select "GPS Accuracy Test" then tap on "En able / Restart GPS Accuracy Test". The aircraft will automatically proceed to test. If the GPS signal of the mobile phone or the aircraft is poor that may cause the GPS accuracy test to fail. -
Page 21: Staring/Stopping The Motors
(3) The aircraft must be placed horizontally (4) It is not recommended to take off forcefully when the GPS satellite signal is not reached. Connected Starting the Motors Push both stick to the bottom outer corners to start the motors. Once the motors have started spinning,Release both sticks simultaneously. -
Page 22: Flight Control Mode
Flight Speed Movie Mode Maximum speed 1m/s Maximum speed is 12m / s, which can be adjusted in the Normal Mode APP settings by 10% -100% The maximum speed is 20m / s, the sport mode is only Sport Mode available in the GPS mode. -
Page 23: Eturn-To-Home(Rth)
4.3 Return-to-home(Rth) There are three types of RTH: One-key RTH, Low Battery RTH,and Failsafe RTH. When taking off, GPS ≥ 6 stars, the aircraft successfully recorded to the return point. If there is no GPS signal forced take-off, the position with the latest GPS ≥ 6 stars is recorded as the return point. -
Page 24: Search The Drone Apron
4.4 Search The Drone Apron When the aircraft landed or returned to a height of about 10 meters from the ground, it will automatically enter the search for the drone apron func- tion. Connected 1 0 0 % S P E E D 0 . 0 M / S 4 5 . -
Page 25: Creative Video
4.5.2 Creative Video Panorama Photography: (1) Select the direction of rotation (clockwise / counterclockwise); (2) Set the rotation angle, the range of rotation angle (90 ° -360 ° ,accuracy 1°); (3) Set the speed (2-30 ° / sec, accuracy 1); (4) Click GO, the aircraft rotates in place in the hover position,shooting during the rotation + storage Video recording;... -
Page 26: Orbiting
4.5.3 Orbiting Tap on "Mode Selec tion" then "Orbit Mode" to set the current location or the position of the mobile device as the center.During Orbit mode, you can adjust the speed and direction by moving the control stick left and right and adjust the orbit radius by moving the control stick forward and backward. -
Page 27: Line Fly Mode
4.5.5 Line Fly Mode Tap on "Mode Selection" then "Line Fly Mode".Set the angle,distance and speed of the aircraft. Performance requirements: 1. Set the angle (0 ~ 360 °, accuracy 1 °); Set the distance (10-100 meters, accuracy 1 meter); set the speed (1-12 m / s, accu- racy 0.1);... -
Page 28: Time-Lapse Photography
4.5.7 Time-lapse Photography When you choose time compressor mode, you can choose free time-lapse and surround time-lapse. Hover mode 1 0 0 % free surround time-lapse time-lapse Free Time-lapse The aircraft will take a certain number of photos and compose time-lapse videos automatically according to the parameters which you set. -
Page 29: Panorama Mode
Surround Time-lapse The aircraft will take a certain number of photos and compose time-lapse video automatically according to the circle point of interest and the parameters which you set. During shooting, oper- ating lever will automatically quit the task. (1) select surround time-lapse (2) set the shutter interval taken by the aircraft, the time of video generated and the maximum flight speed (3) set the circle direction, and position the circle center by adjust-... -
Page 30: Gimbal Camera
4.6 Gimbal Camera 4.6.1 Camera Settings Click the setting icon for camera on the main interface of the APP and you can set the resolution, white balance, color and other parameters as follows: Connected N V i d e o Re s o l u t i o n E : 0 % R : 0 % T : 0 %... -
Page 31: Tf Card
(2) For USB Settings on android phones, check out "Android phone connection tutorial" 2. Aircraft cannot be searched (1) Restart the plane, remote control and x-hubsan 2.0 APP (2) Update the aircraft firmware (3) Check whether the TF card slot of the drone is keeps on red light, if it flashing, means the aircraft is abnormal 3. - Page 32 8. The tilt Angle of the gimbal is too large or the gimbal show abnormal (1) Restart the aircraft to recalibrate the gimbal (2) Check on the APP to see whether the gimbal status is normal 9. Gimbal initialize failed Before starting the aircraft, take off the protective cover of the gimbal 10.The picture is not clear (1) Check whether the lens protective film is peeled off...
-
Page 33: Limitation Of Liability
L i m i t a t i o n o f L i a b i l i t y Hubsan accepts no liability for damages, injuries or any legal responsibi li-ties incurred directly or indirectly from the use of Hubsan products under the following conditions: 1.Damages, injuries or any legal responsibilities incurred when users are... - Page 34 / methods given through official Hubsan website announcements, prod- uct quick start guides, user manuals, etc. 17. Other losses, damages, or injuries that are not within the boundaries of Hubsan responsibility. RISK OF EXPLOSION IF BATTERY IS REPLACED BY AN INCORRECT TYPE.
-
Page 35: Fcc Information
F C C I N F O R M A T I O N This equipment has been tested and found to comply with the limits for a Class B digital device, pursuant to Part 15 of the FCC Rules. These limits are designed to provide reasonable protection against harmful interference in a residential installa- tion. - Page 36 ●Not suitable for children under 14 years of age Flight Academy Product name: ZINO 2+ Product Standard Number:Q / HBS 001-2017 Vendor: Shenzhen Hubsan Technology Co., Ltd Address: Unit 2801-2802A, Building F, Xinghe WORLD , Yabao Road, Bantian Street, Longgang District, Shenzhen Email: service@hubsan.com...
Need help?
Do you have a question about the Zino 2+ and is the answer not in the manual?
Questions and answers