Table of Contents
Advertisement
Quick Links
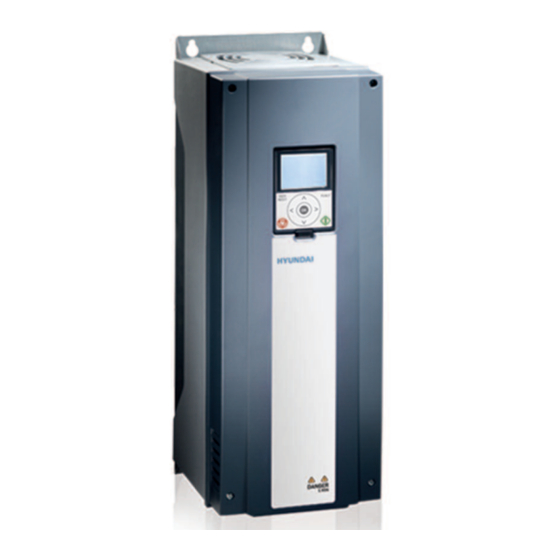
N800-Series
Notice
Read and understand these manuals before attempting any un-
packing, assembly, operation or maintenance of the inverter
This manual should be applied only to N800A inverter.
This manual dose not include all items regarding installation and
N800A Inverter
maintenance procdures.
For more information, please contact authorized parteners.
Installation Manual
Advertisement
Table of Contents

Related Manuals for Hyundai N800 Series


Summary of Contents for Hyundai N800 Series
- Page 1 N800-Series Notice Read and understand these manuals before attempting any un- packing, assembly, operation or maintenance of the inverter This manual should be applied only to N800A inverter. This manual dose not include all items regarding installation and N800A Inverter maintenance procdures.
- Page 2 ISSUE DATE : 2015.06.26 (VER. 1)
-
Page 4: Table Of Contents
TABLE OF CONTENTS Safety ……………………………………………………………………………………………………………1 The safety symbols used in the manual …………………………………………………………… 1 Warning …………………………………………………………………………………………………………1 Caution ……………………………………………………………………………………………………………2 Earthing and earth fault protection ……………………………………………………………………3 Electro-magnetic compatibility (EMC) ………………………………………………………………4 Using an RCD or an RCM device ………………………………………………………………………4 Receiving the delivery ……………………………………………………………………………………………………5 Package label …………………………………………………………………………………………………5 Type designation code ………………………………………………………………………………………5 Unpacking and lifting the AC drive ……………………………………………………………………6... - Page 5 TABLE OF CONTENTS Dimensions for flange mounting ……………………………………………………………………19 3.3.1 Flange mounting of MR4 ……………………………………………………………………23 3.3.2 Flange mounting of MR5 ……………………………………………………………………24 3.3.3 Flange mounting of MR6 ……………………………………………………………………25 3.3.4 Flange mounting of MR7 ……………………………………………………………………26 3.3.5 Flange mounting of MR8 ……………………………………………………………………27 3.3.6 Flange mounting of MR9 ……………………………………………………………………28 Cooling …………………………………………………………………………………………………………29 Power cabling …………………………………………………………………………………………………………32...
- Page 6 TABLE OF CONTENTS Commissioning and additional instructions Commissioning safety ……………………………………………………………………………………75 Commissioning of the drive ……………………………………………………………………………75 Operation of the motor ……………………………………………………………………………………76 6.3.1 Checks before starting the motor ………………………………………………………76 Measuring the cable and motor insulation ………………………………………………………76 Installation in an IT system ……………………………………………………………………………77 6.5.1 Frames MR4, MR5, and MR6 ……………………………………………………………77...
-
Page 7: Safety
1. SAFETY 1. SAFETY 1.1 THE SAFETY SYMBOLS USED IN THE MANUAL This manualcontains warnings andcautions, whichareidentifiedwithsafety symbols. Thewarnings andcautions giveimpor- tant information on how to prevent injury and damage to the equipment or your system. Read the warnings and cautions carefully and obey their instructions. Table 1: The safety symbols The safety symbol Description... -
Page 8: Caution
1. SAFETY WARNING! Before you do electrical work, make sure that there is no voltage in the components of the drive. WARNING! To do work on the terminal connections of the drive, disconnect the drive from mains and make sure that the motor has stopped. -
Page 9: Earthing And Earth Fault Protection
1. SAFETY CAUTION! MakesurethattheEMCleveloftheACdriveiscorrectforyourmains.Seechapter6.5InstallationinanITsystem. An incorrect EMC level can cause damage to the drive. CAUTION! Prevent radio interference. The AC drive can cause radio interference in a domestic environment. NOTE! If you activate the autoreset function, the motor starts automatically after an automatic fault reset. See the Ap- plication Manual. -
Page 10: Electro-Magnetic Compatibility (Emc)
1. SAFETY If this is not so, the cross-sectional area of the protective earthing conductor must be determined in a manner that produces a conductance equivalent to that which results from the application of this table. • 2.5 ㎟ if there is mechanical protection, and •... -
Page 11: Receiving The Delivery
2. RECEIVING THE DELIVERY 2. RECEIVING THE DELIVERY 2.1 PACKAGE LABEL To make sure that the delivery is correct, compare your order data to the data on the package label. If the delivery does not agree with your order, speak to the vendor immediately. N800A Fig. -
Page 12: Unpacking And Lifting The Ac Drive
2. RECEIVING THE DELIVERY Table 3: The description of the parts in the type designation code Code Description N800A This part is same for all the products. 0100 The product range: 0100 = Vacon 100 Input/Function: 3L = A 3-phase input The drive rating in amperes. -
Page 13: Accessories
2. RECEIVING THE DELIVERY 3) Put the lifting hooks symmetrically in a minimum of 2 holes. 4) The maximum lifting angle is 45 degrees. N800A Before a AC drive is sent to the customer, the manufacturer makes many tests on the drive. After you lift the drive, do a check for signs of damage on the drive. -
Page 14: Frame Mr4
2. RECEIVING THE DELIVERY 2.4.1 FRAME MR4 Table 5: The content of accessories bag, MR4 Item Quantity Purpose Screws for the power cable clamps (6), the M4x16 screw control cable clamps (3), and the grounding clamps (2) M4x8 screw Screw for the optional grounding M5x12 screw Screw for the external grounding of the drive Control cable grounding lamella... -
Page 15: Frame Mr6
2. RECEIVING THE DELIVERY 2.4.3 FRAME MR6 Table 7: The content of the accessories bag, MR6 Item Quantity Purpose Screws for the power cable clamps (6), and M4x20 screw the grounding clamps (4) M4x16 screw Screws for the control cable clamps M4x8 screw Screw for the optional grounding M5x12 screw... -
Page 16: Frame Mr7
2. RECEIVING THE DELIVERY 2.4.4 FRAME MR7 Table 8: The content of the accessories bag, MR7 M6x30 slotted nut Nuts for the power cable clamps M4x16 screw Screws for the control cable clamps M6x12 screw Screw for the external grounding of the drive Control cable grounding lamella Control cable grounding EMC cable clamps, size M25... -
Page 17: Frame Mr9
2. RECEIVING THE DELIVERY 2.4.6 FRAME MR9 Table 10: The content of the accessories bag, MR9 Item Quantity Purpose M4x16 screw Screws for the control cable clamps Control cable grounding lamella Control cable grounding Cable lugs KP40 Clamping power cables Cable insulator To prevent contact between cables Cable grommet, hole diameter 25.3 mm... -
Page 18: Mounting
3. MOUNTING 3. MOUNTING 3.1 GENERAL INFORMATION ABOUT MOUNTING Install the AC drive in a vertical position on the wall. If you install the drive in a horizontal position, it is possible that some func- tions with the nominal values that are found in chapter 7 Technical data are not available. Attach the AC drive with the screws and other components that you received in the delivery. -
Page 19: Wall Mounting Of Mr5
3. MOUNTING 3.2.2 WALL MOUNTING OF MR5 N800A Fig. 3: The dimensions of the AC drive, MR5... -
Page 20: Wall Mounting Of Mr6
3. MOUNTING 3.2.3 WALL MOUNTING OF MR6 N800A Fig. 4: The dimensions of the AC drive, MR6... -
Page 21: Wall Mounting Of Mr7
3. MOUNTING 3.2.4 WALL MOUNTING OF MR7 N800A Fig. 5: The dimensions of the AC drive, MR7 ... -
Page 22: Wall Mounting Of Mr8, Ip21 And Ip54
3. MOUNTING 3.2.5 WALL MOUNTING OF MR8, IP21 AND IP54 N800A Fig. 6: The dimensions of the AC drive, MR8, IP21 and IP54... -
Page 23: Wall Mounting Of Mr8, Ip00
3. MOUNTING 3.2.6 WALL MOUNTING OF MR8, IP00 N800A Fig. 7: The dimensions of the AC drive, MR8, IP00... -
Page 24: Wall Mounting Of Mr9, Ip21 And Ip54
3. MOUNTING 3.2.7 WALL MOUNTING OF MR9, IP21 AND IP54 N800A Fig. 8: The dimensions of the AC drive, MR9, IP21 and IP54... -
Page 25: Wall Mounting Of Mr9, Ip00
3. MOUNTING 3.2.8 WALL MOUNTING OF MR9, IP00 N800A Fig. 9: The dimensions of the AC drive, MR9, IP00 A. An optional main connector cover for the cabinet installation 3.3 DIMENSIONS FOR FLANGE MOUNTING You can also install the AC drive into the cabinet wall with a flange mounting option. - Page 26 3. MOUNTING The protection classes are different in different sections of the drive. NOTE! N800A Fig. 10: Example of flange mounting (frame MR9) A. The cabinet wall or other surface D. IP00 / UL Open Type B. The front E. IP54 / UL Type 12 C.
- Page 27 3. MOUNTING Fig. 11: The dimensions of the opening and drive outline with flange N800A A. The height of the opening for the flange E. The distance between the bottom of the mounting drive and the bottom of the opening B.
- Page 28 3. MOUNTING Table 12: The dimensions of the opening for the flange mounting, frames MR4 to MR9 Frame A[mm] B[mm] E[mm] A[in] B[in] E[in] 12.4 16.1 21.3 25.8 33.8 11.7 38.4 19.1 N800A Fig. 12: Sealing of the opening for MR8 and MR9 A.
-
Page 29: Flange Mounting Of Mr4
3. MOUNTING 3.3.1 FLANGE MOUNTING OF MR4 N800A Fig. 13: The dimensions of the AC drive, flange mounting, MR4... -
Page 30: Flange Mounting Of Mr5
3. MOUNTING 3.3.2 FLANGE MOUNTING OF MR5 N800A Fig. 14: The dimensions of the AC drive, flange mounting, MR5... -
Page 31: Flange Mounting Of Mr6
3. MOUNTING 3.3.3 FLANGE MOUNTING OF MR6 N800A Fig. 15: The dimensions of the AC drive, flange mounting, MR6... -
Page 32: Flange Mounting Of Mr7
3. MOUNTING 3.3.4 FLANGE MOUNTING OF MR7 N800A Fig. 16: The dimensions of the AC drive, flange mounting, MR7... -
Page 33: Flange Mounting Of Mr8
3. MOUNTING 3.3.5 FLANGE MOUNTING OF MR8 N800A Fig. 17: The dimensions of the AC drive, flange mounting, MR8... -
Page 34: Flange Mounting Of Mr9
3. MOUNTING 3.3.6 FLANGE MOUNTING OF MR9 N800A Fig. 18: The dimensions of the AC drive, flange mounting, MR9... -
Page 35: Cooling
3. MOUNTING 3.4 COOLING The AC drive produces heat in operation. The fan circulates air and decreases the temperature of the drive. Make sure that there is sufficiently free space around the drive. Some free space is also necessary for maintenance. Make sure that the temperature of the cooling air does not become more than the maximum ambient operating temperature or less than the minimum ambient operating temperature of the drive. - Page 36 3. MOUNTING Table 13: The minimum clearances around the AC drive Minimum clearance[mm] Minimum clearance[in] Frame * For a drive with IP54 / UL Type 12, the minimum clearances A and B are 0 mm / 0 in. 11.8 13.8 Table 14: The necessary quantity of cooling air N800A The quantity of cooling...
- Page 37 3. MOUNTING N800A Fig. 20: The installation space when drives are installed on top of each other If you install many drives above each other 1. The necessary free space is C + D. 2. Make the outlet air of the lower unit go away from the air intake of the upper unit. To do this, attach a metal plate to the cabinet wall between the drives.
-
Page 38: Power Cabling
4. POWER CABLING 4. POWER CABLING 4.1 CABLE CONNECTIONS The mains cables are connected to terminals L1, L2 and L3. The motor cables are connected to terminals U, V and W. N800A Fig. 21: The principal connection diagram A. The control panel C. -
Page 39: Ul Standards On Cabling
4. POWER CABLING 1. A power cable for a fixed installation. A cable for the specified mains voltage. A shielded cable is not necessary. We recom- mend an MCMK cable. 2. A symmetrical power cable with a concentric protection wire. A cable for the specified mains voltage. We recommend an MCMK cable. -
Page 40: Cable And Fuse Sizes
4. POWER CABLING 4.3.1 CABLE AND FUSE SIZES We recommend the fuse type gG/gL (IEC 60269-1). To make a selection of the fuse voltage rating, refer to the mains. Do not use larger fuses than what is recommended Table 16. Make sure that the operation time of the fuse is less than 0.4 seconds. -
Page 41: Cable And Fuse Sizes, North America
4. POWER CABLING Table 16: The cable and fuse sizes for N800A Terminal cable size Mains, motor and Fuse brake resistor* Frame Type (gG/gL) Main terminal Earth terminal cable Cu [㎟] [㎟] [㎟] 0140 2 3*70+35 (Cu) 140.0 Bolt size M8 Bolt size M8 0140 5 3*95+29 (Al) - Page 42 4. POWER CABLING Table 17: The cable and fuse sizes for N800A in North America Terminal cable size Fuse Mains, motor and Frame Type (Class brake resistor* Main terminal Earth terminal T/J) [A] cable Cu [AWG] [AWG] [AWG] 0003 2 AWG14 AWG24-AWG10 AWG17-AWG10...
-
Page 43: Brake Resistor Cables
4. POWER CABLING The dimensions of the cables must agree with the requirements of the Underwriters Laboratories UL508C. • The cables must be PVC-isolated. • The maximum ambient temperature is +30 °C (86 °F). • The maximum temperature of the cable surface is +70 °C (158 °F). •... -
Page 44: Cable Installation
4. POWER CABLING Table 18: The minimum distances between cables The distance between cables [m] The length of the shielded cable [m] 4.6 CABLE INSTALLATION 4.6.1 FRAMES MR4 TO MR7 Table 19: The cable stripping lengths [mm]. See the figure in step 1. Frame As short as possible. - Page 45 4. POWER CABLING 1) Strip the motor cable, the mains cable, and the brake resistor cable. G. The earth conductor 2) Open the cover of the AC drive. N800A 3) Remove the screws of the cable cover. Remove the cable cover. Do not open the cover of the power unit.
- Page 46 4. POWER CABLING 4) Put the grommets in the openings of the cable entry plate. These parts are included in the package. The picture shows the grommets in IP21 in the EU version. N800A...
- Page 47 4. POWER CABLING 5) Put the cables - the mains cable, the motor cable and the op- tional brake cable - in the openings of the cable entry plate. a) Cut the grommets open to move the cables through them. If the grommets fold in when you put the cable, pull the cable back to make the grommets straight.
- Page 48 4. POWER CABLING 7) Put the cable entry plate with the cables into the groove on the frame of the drive. 8) Connect the stripped cables. a) Expose the shield of all the 3 cables to make a 360-degree N800A connection with the cable clamp.
- Page 49 4. POWER CABLING 9) Make sure that the earth conductor is connected to the motor and also to the terminals that are identified with. a) To obey the requirements of the standard EN61800-5-1, obeytheinstructionsinchapter1.4Earthingandearthfault protection. b) If a double earthing is necessary, use the earth terminal under the drive.
-
Page 50: Frames Mr8 To Mr9
4. POWER CABLING Table 21: The tightening torques of the terminals Tightening torque: the Tightening torque: the Tightening torque: the power and motor EMC grounding clamps earth terminals Frame Type terminals Ib-in. Ib-in Ib-in 0003 2—0012 2 0.5—0.6 4.5—5.3 13.3 17.7 0003 5—0012 5 0018 2—0031 2... - Page 51 4. POWER CABLING Table 23: The cable stripping lengths [in]. See the figure in step 1. Frame As short as possible. 11.8 11.8 1) Strip the motor cable, the mains cable, and the brake resistor 11.8 11.8 cable. N800A G. The earth conductor 2) MR9 only: Open the cover of the AC drive.
- Page 52 4. POWER CABLING 3) Remove the cable cover. N800A...
- Page 53 4. POWER CABLING 4) Remove the cable entry plate. N800A...
- Page 54 4. POWER CABLING 5) MR9 only: Loosen the screws and remove the sealing plate. N800A...
- Page 55 4. POWER CABLING 6) Remove the EMC shield plate. A. The wing nut in MR8 N800A A. MR9...
- Page 56 4. POWER CABLING 7) Find the terminals of the motor cables. The location of the terminals is unusual, especially in MR8. N800A...
- Page 57 4. POWER CABLING 8) Cut the grommets open to move the cables through them. a) Do not cut the grommet openings wider than what is necessary for the cables that you use. b) If the grommets fold in when you put the cable, pull the cable back to make the grommets straight.
- Page 58 4. POWER CABLING 10) If you use thick cables, put the cable insulators in between the terminals to prevent contact between the cables. N800A...
- Page 59 4. POWER CABLING 11) Connect the stripped cables. a) Connect the phase conductors of the mains cable and of the motor cable into the correct terminals. If you use a brake resistor cable, connect its conductors into the correct terminals. b) Attachtheearthconductor ofeachcabletoanearthterminalwith a clamp.
- Page 60 4. POWER CABLING A. The first cable lug B. The second cable lug C. The connector N800A 12) If you use many cables on one connector, put the cable lugs on top of each other. 13) Expose the shield of all 3 cables to make a 360- degree connection with the cable clamp.
- Page 61 4. POWER CABLING 15) Attach the cable entry plate, and then the cable cover. 16) For MR9, attach the cover of the drive (unless you want to make the control connections first). N800A 17) Make sure that the earth conductor is connected to the motor and also to the terminals that are identified with a) To obey the requirements of the standard EN61800-5-1, obey the instructions in chapter 1.4 Earthing and earth...
-
Page 62: Installation In A Corner-Grounded Network
4. POWER CABLING Table 24: Tightening torques of the terminals Tightening torque: the Tightening torque: the Tightening torque: the power and motor EMC grounding clamps earth terminals Type Frame terminals [Nm] lb-in. [Nm] [Nm] lb-in. lb-in. 0140 2—0205 2 13.3 4.7 INSTALLATION IN A CORNER-GROUNDED NETWORK 0140 5—0205 5 0261 5—0310 5... -
Page 63: Control Unit Components
5. CONTROL UNIT 5. CONTROL UNIT 5.1 CONTROL UNIT COMPONENTS The control unit of the AC drive contains the standard boards and the option boards. The option boards are connected to the slots of the control board (see 5.4 Installation of option boards). N800A Fig. -
Page 64: Control Unit Cabling
5. CONTROL UNIT J. The status indicator of the Ethernet connection K. A fan (only in IP54 of MR4 and of MR5) L. The battery for the RTC When you receive the AC drive, the control unit contains the standard control interface. If you included special options in your order, the AC drive will be as in your order. - Page 65 Standard I/O board 5. CONTROL UNIT Terminal Signal Description +10 Vref Reference output Reference AI1+ potentiometer Frequency reference 1...10kΩ AI1- AI2+ 2-wire transmitter Frequency reference AI2- Actual value I=(0) 24Vout 24V auxiliary voltage 4...20mA Analogue input, voltage or current I/O ground Analogue input common, (current) Digital input 1 Start forward...
- Page 66 5. CONTROL UNIT * You can isolate digital inputs from ground with a DIP switch. See 5.2.2.2 Isolation of digital inputs from ground. From Standard I/O board Relay board From term. From term. Default Terminal Signal #6 or 12 RO1 NC RO1 CM Relay output 1 RO1 NO...
- Page 67 5. CONTROL UNIT bus termination N800A Fig. 27: The selections of the DIP switches A. The voltage signal, 0-10 V input C. OFF B. The current signal, 0-20 mA input D. ON Table 26: The default positions of the DIP switches The DIP switch The default position 종단저항...
-
Page 68: Fieldbus Connection
5. CONTROL UNIT Fig. 28: Change the position of this switch to isolate the digital inputs from ground A. The digital inputs C. Connected to GND (default) B. Floating N800A 5.3 FIELDBUS CONNECTION You can connect the drive to fieldbus with an RS485 or an Ethernet cable. If you use an RS485 cable, connect it to terminal A or B of the standard I/O board. -
Page 69: Using Fieldbus Through An Ethernet Cable
5. CONTROL UNIT N800A Fig. 29: The Ethernet and RS485 connections A. RS485 A=Data - D. The Ethernet terminal B. RS485 B=Data+ E. The I/O terminals C. The DIP switches F. The grounding bar 5.3.1 USING FIELDBUS THROUGH AN ETHERNET CABLE Table 27: Ethernet cable data Item Description... - Page 70 5. CONTROL UNIT 1) Connect the Ethernet cable to its terminal. 2) InIP21,cutfreetheopeningonthecoveroftheACdriveforthe Ethernet cable. In IP54, cut a hole in a grommet and move the cable through it. a) If the grommet folds in when you put the cable, pull the cable back to make the grommet straight.
- Page 71 5. CONTROL UNIT 3) Putthecoverofthedriveback.Keepthedistancebetween the Ethernet cable and the motor cable at a minimum of 30 cm. N800A A. The Ethernet cable in IP21 A. The Ethernet cable in IP54 See more in the Installation Manual of the fieldbus that you have.
-
Page 72: Using Fieldbus Through An Rs485 Cable
5. CONTROL UNIT Table 28: RS485 cable data 5.3.2 USING FIELDBUS THROUGH AN RS485 CABLE Item Desctiption The plug type 2.5 ㎟ STP (shielded twisted pair), Belden 9841 or almost The cable type the same So that it agrees with the fieldbus. See the fieldbus The cable length manual. - Page 73 5. CONTROL UNIT 2) Connect the cable to the standard I/O board of the drive, in terminals A and B. • A = negative • B = positive N800A 3) Attach the shield of the cable to the frame of the drive with a cable clamp to make a grounding connection.
- Page 74 5. CONTROL UNIT 4) If the drive is the last device on the fieldbus line, set the bus termination. a) Find the DIP switches on the right side of the control panel of the drive. b) Set the DIP switch of the RS485 bus termination to the ON position. c) Biasing is built in the bus termination resistor.
- Page 75 5. CONTROL UNIT 6) Put the cover of the drive back. Pull the RS485 cables to the side. a) Keep the distance of the Ethernet, I/O and Fieldbus cables from the motor cable at a minimum of 30 cm. b) Move the fieldbus cables away from the motor cable. N800A A.
-
Page 76: Installation Of Option Boards
5. CONTROL UNIT E. The fieldbus If you do power-down to the last device, there is no bus termination. NOTE! 5.4 INSTALLATION OF OPTION BOARDS Do not install, remove, or replace option boards on the drive when the power is on. Doing this can cause damage to the boards. - Page 77 5. CONTROL UNIT Table 29: The option boards and their correct option board slots Type of the option board Description of the option board The correct slot or slots OPT-B1-V The I/O expander board C, D, E OPT-B2-V The Thermistor relay board C, D, E OPT-B4-V The I/O expander board...
- Page 78 5. CONTROL UNIT 2) If you have an OPT-B or an OPT-C option board, make sure that the label on it says "dv" (dual voltage). This shows that the option board is compatible with the drive. It is not possible to install option boards that are not compatible with the drive.
-
Page 79: Installation Of A Battery For The Real Time Clock (Rtc)
5. CONTROL UNIT 4) Install the option board into the correct slot: C, D or E. See Table 29. a) The option board has a slot coding, because of which it is not possible to install the option board in an incorrect slot. N800A A. - Page 80 5. CONTROL UNIT N800A Fig. 30: The galvanic isolation barriers A. The control unit B. The power unit...
-
Page 81: Commissioning And Additional Instructions
6. COMMISSIONING AND ADDITIONAL INSTRUCTIONS 6. COMMISSIONING AND ADDITIONAL INSTRUCTIONS 6.1 COMMISSIONING SAFETY Before you start the commissioning, read these warnings. Do not touch the internal components or the circuit boards of the drive when the drive is connected to mains. These components are live. -
Page 82: Operation Of The Motor
6. COMMISSIONING AND ADDITIONAL INSTRUCTIONS After the installation: • Make sure that the motor is installed correctly. • Make sure that the motor terminals are not connected to mains. • Make sure that the AC drive and the motor are grounded. •... -
Page 83: Installation In An It System
6. COMMISSIONING AND ADDITIONAL INSTRUCTIONS The insulation checks of the mains cable 1) Disconnect the mains cable from the terminals L1, L2, and L3 and from mains. 2) Measure the insulation resistance of the mains cable between phase conductors 1 and 2, between phase conductors 1 and 3, and between phase conductors 2 and 3. - Page 84 6. COMMISSIONING AND ADDITIONAL INSTRUCTIONS 3) Find the EMC jumpers that connect the RFI filters to ground. N800A...
-
Page 85: Frames Mr7 And Mr8
6. COMMISSIONING AND ADDITIONAL INSTRUCTIONS 4) To disconnect the RFI filters from ground, remove the EMC jumpers. N800A 5) Afterthechange,write"TheEMClevelwaschanged"andthedateonthe "productchanged"label.Ifthelabelisnotattachedatthistime,attachiton thedrivenearthenameplate. 6.5.2 FRAMES MR7 AND MR8 Change the EMC protection of the AC drive to level C4. 1) Open the cover of the AC drive. - Page 86 6. COMMISSIONING AND ADDITIONAL INSTRUCTIONS 2) Find the EMC box. To get access to the EMC jumper, remove the cover of the EMC box. 3) Remove the EMC jumper. Attach the cover of the EMC box again. N800A...
- Page 87 6. COMMISSIONING AND ADDITIONAL INSTRUCTIONS 4) In MR7, find the DC grounding busbar between the connectors R - and U. To remove the busbar from the frame, remove the M4 screw. 5) In MR8, find the grounding arm and push it down. N800A 6) After the change, write "The EMC level was changed"...
-
Page 88: Frame Mr9
6. COMMISSIONING AND ADDITIONAL INSTRUCTIONS 6.5.3 FRAME MR9 To make a change in the EMC protection of the AC drive, you must find the 3 EMC jumpers. To change the EMC level from C2 to C4, remove the EMC jumpers. To change the EMC level from C4 to C2, install the EMC jumpers. You can find the EMC jumpers, which are not installed, in the accessories bag. -
Page 89: Maintenance
6. COMMISSIONING AND ADDITIONAL INSTRUCTIONS 6.6 MAINTENANCE To make sure that the drive operates correctly and has a long life, we recommend that you do regular maintenance. Refer to the table for maintenance intervals. It is not necessary to replace the capacitors, because capacitors of the drive are thin film capacitors. Table 30: The maintenance intervals and tasks Maintenance interval Maintenance task... -
Page 90: Technical Data
7. TECHNICAL DATA 7. TECHNICAL DATA 7.1 AC DRIVE POWER RATINGS 7.1.1 MAINS VOLTAGE 208-240 V Table 31: The power ratings of N800A in mains voltage 208-240V, 50-60 Hz, 3~ Loadability Motor shaft power Low * High * 230 V mains 230 V mains Drive Frame... - Page 91 7. TECHNICAL DATA * See chapter 7.1.3 Overload capability. The rated currents in given ambient temperatures (in Table 36 The technical data of the N800A AC drive) are achieved only when the switching frequency ≤ the factory default. NOTE! If your process includes a cyclical load, for example if there are lifts or winches, speak to the manufacturer to get the dimensioning information.
-
Page 92: Mains Voltage 380-500 V
7. TECHNICAL DATA 7.1.2 MAINS VOLTAGE 380-500 V Table 32: The power ratings of N800A 100 in mains voltage 380-500V, 50-60 Hz, 3~ Motor shaft power Loadability Low * High * 400 V mains 480 V mains Drive Frame Continu Continu type current... -
Page 93: Overload Capability
7. TECHNICAL DATA The rated currents in given ambient temperatures (in Table 36 The technical data of the N800A AC drive) are achieved only when the switching frequency ≤ the factory default. NOTE! If your process includes a cyclical load, for example if there are lifts or winches, speak to the manufacturer to get the dimensioning information. -
Page 94: Brake Resistor Ratings
7. TECHNICAL DATA Fig. 32: High overload in N800A For more information, refer to the standard IEC61800-2 (IEC:1998). N800A Make sure that the resistance is higher than the set minimum resistance. The power handling capacity must be sufficient for 7.1.4 BRAKE RESISTOR RATINGS the application. - Page 95 7. TECHNICAL DATA • The light duty cycle is for brake resistor cyclic use (1 LD pulse in a 120-second period). The light duty resistor is rated for a 5-second ramp from full power to 0. • The heavy duty cycle is for brake resistor cyclic use (1 HD pulse in a 120-second period). The heavy duty resistor is rated for a 3-second full power braking with a 7-second ramp to 0.
- Page 96 7. TECHNICAL DATA Table 35: The minimum resistance and the brake power, mains voltage 380-500V Mains voltage 380-500 V, 50/60 Hz, 3~ Brakepower*@845VDC The minimum brake Frame [kW] resistance [Ω] 11.3 63.0 41.0 17.0 34.0 21.0 51.0 14.0 * When you use recommended resistor types. 109.9 216.4 N800A...
-
Page 97: N800A - Technical Data
7. TECHNICAL DATA 7.2 N800A - TECHNICAL DATA Table 36: The technical data of the N800A AC drive Input voltage Uin 208...240 V; 380…500 V; -10%…+10% Input frequency 50...60 Hz -5...+10% Mains con- nection Connection to mains Once per minute or less Starting delay 6s (MR4 - MR6);... - Page 98 7. TECHNICAL DATA 100% load capacity (no derating) up to 1000 m 1% derating for each 100m above 1000 m Maximum altitudes: • 208...240 V: 4000 m (TN and IT systems) • 380...500 V: 4000 m (TN and IT systems) Altitude Voltage for relay outputs: •...
-
Page 99: Technical Data On Control Connections
8. TECHNICAL DATA ON CONTROL CONNECTIONS 8. TECHNICAL DATA ON CONTROL CONNECTIONS 8.1 TECHNICAL DATA ON CONTROL CONNECTIONS Table 37: The standard I/O board Standard I/O board Terminal Signal Technical information Reference output Analogue input channel 1 0...+10 V (Ri = 200 kΩ) 4...20 mA (Ri =250 Ω) Analogue input, voltage or current Resolution 0.1 %, accuracy ±1 %... - Page 100 8. TECHNICAL DATA ON CONTROL CONNECTIONS Standard I/O board Terminal Signal Technical information Digital inputs can be isolated from ground, see chapter 5.2.2.2 Iso- Common A for DIN1-DIN6 lation of digital inputs from ground. Analogue output channel 1, selection 0 ...20 mA, load <500 Ω Analogue signal (+output) Default: 0...20 mA, 0...10 V Resolution 0.1 %, accuracy ±2 %...
- Page 102 Tel: 81-3-3212-2076, 3215-7159 Fax: 81-3-3211-2093 Osaka I-Room 5th Floor Nagahori Plaza Bldg. 2-4-8 Minami Senba, Chuo-Ku, Osaka, 542-0081, Japan www.hyundai elec.com Tel: 81-6-6261-5766~7 Fax: 81-6-6261-5818 Mumbai 5th Floor, East Quadrant, The IL & FS Financial Centre, Plot No. C-22, G-Block,...
Need help?
Do you have a question about the N800 Series and is the answer not in the manual?
Questions and answers