Advertisement
Quick Links
Advertisement

Related Manuals for Motobilt MB1110


Summary of Contents for Motobilt MB1110
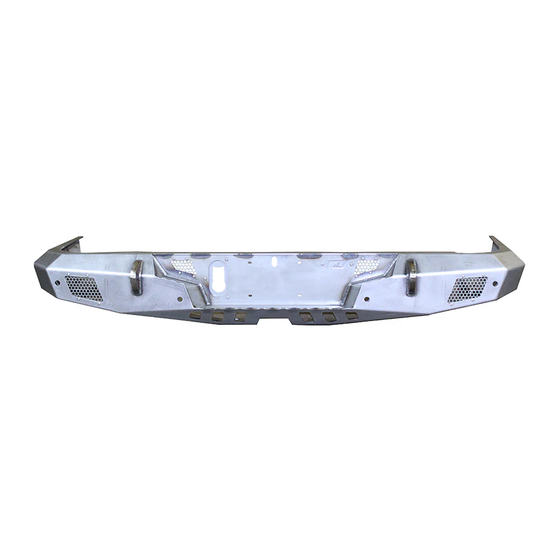
- Page 1 MB1110 JT Gladiator Crusher Rear Bumper Contents motobilt.com | 334-219-2333...
- Page 2 MB1111 Rear Corner Supports (sold separately) prior to your installation. Paint or powder coat all Motobilt parts to your desired colors. Place vehicle in park. Apply park brake. Disconnect negative terminal on battery.
- Page 3 MB1110 JT Gladiator Crusher Rear Bumper – Installation Instructions Disconnect trailer 7 pin connector from inside the bumper. Using a T-50 Torx socket, remove two (2) M10 bolts located on the underside of the hitch cross frame member. Using a flat screwdriver, remove the license plate.
- Page 4 MB1110 JT Gladiator Crusher Rear Bumper – Installation Instructions Using a 15mm socket, remove two (2) bolts located behind the license plate. OPTIONAL REAR ROCK RAILS: If your vehicle is equipped with the optional rear rock rails located behind rear tires, you may reuse the mounting brackets holding the rock rails to the frame.
-
Page 5: Preparing For Installation
MB1110 JT Gladiator Crusher Rear Bumper – Installation Instructions Loosen the bolts holding the rock rail mounting brackets. Do not remove the bolts. If your vehicle is NOT equipped with the optional rear rock rocks, you will need the MB1111 Gladiator Rear Corner Supports to complete your installation. - Page 6 Labelling them now will ensure you position the bumper wiring harness correctly into your new Motobilt bumper. Also, the positions of the park sensors (if equipped) must be placed back into their relative positions in the new bumper.
- Page 7 MB1110 JT Gladiator Crusher Rear Bumper – Installation Instructions Remove the factory rear bumper wiring harness from the factory bumper. Install Covers MB1110-10, MB1110-11 & MB1110-12 with the supplied Hex Button Screws #10-24 x ¾” long & #10-24 Nylock Nuts. Use a 1/8” hex bit & 3/8” wrench.
- Page 8 MB1110 JT Gladiator Crusher Rear Bumper – Installation Instructions Install MB1110-13 (Harness Tie Plate) with tab facing up using ¼” x 1.0” L Hex Button Screw & ¼” Nylock Nut. Install license plate & tag light during this same time.
- Page 9 MB1110 JT Gladiator Crusher Rear Bumper – Installation Instructions If adding a light over your license plate/ tag, then splice into one of the two factory light connectors shown. With the bumper assembled & wiring in place, grab an assistant to help you lift the bumper by supporting each end &...
- Page 10 MB1110 JT Gladiator Crusher Rear Bumper – Installation Instructions Loosely install two (2) M10 x 25mm Hex Bolts & flat washers to the hitch cross frame member underside where shown. Do NOT tighten yet. With all fasteners loosely installed, measure the gaps on each side between the body &...
- Page 11 MB1110 JT Gladiator Crusher Rear Bumper – Installation Instructions Connect the bumper wiring harness to the main chassis wiring harness in two (2) locations Connect the trailer 7 pin wiring connector. Check all lights & park sensors for proper operation.
Need help?
Do you have a question about the MB1110 and is the answer not in the manual?
Questions and answers