Advertisement
Quick Links
Advertisement

Subscribe to Our Youtube Channel
Related Manuals for DV8 Gladiator RBGL-03


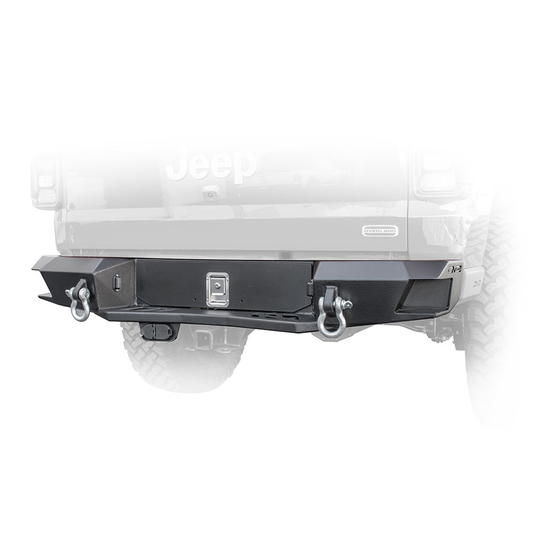
Summary of Contents for DV8 Gladiator RBGL-03
- Page 1 RBGL-03 Gladiator Rear Bumper with Drawer...
- Page 2 1. Begin by opening your new bumper and inspecting all items for damage or missing items. 2. Remove factory bumper and tie up wiring for license plate lights and sensors if applicable. 3. Using Mopar provided tools, drop spare tire and remove tire. 4.
- Page 3 6. Begin by installing the rear bracket. Note the orientation in the image. Using factory hardware, loosely secure this to cross member as shown. 7. Install forward side brackets using the M12x30mm bolts and associated nuts and washers. (NOTE: Keep all hardware loose to allow for adjustment when drawer is installed)
- Page 4 8. Place brackets with rails onto each forward bracket as shown. Use the image for orientation of each bracket. When placing bolts into these brackets, feed the bolt from the top as shown in the image below with the M12x30mm bolts. This makes tightening them during adjustment much easier.
- Page 5 9. Loosely attach the rear bracket to rail brackets with the same hardware on both sides. 10. Reverse the rubber bumpstops to face towards the rear of the vehicle. They are faced on the wrong side for packing reasons. This is what the rear should look like prior to installing the bumper.
- Page 6 11. With help, loosely mount the rear bumper using the supplied M12x40mm bolts. Center the bumper and tighten. (NOTE: use the side of the bumper and the gap between the sides to help with centering the bumper.) 12. Pull the slide rails out, and with help, line up the drawer and push in. This may be tight, however do not force the drawer.
- Page 7 13. Once drawer is closed. Move to the back and tighten these three bolts on each side. 14. Place a pry bar or large flat head screwdriver between front of drawer and hitch on the underside and lift. Do this until there is 1/8”-1/4” gap between drawer and footstep of bumper.
- Page 8 15. Starting with the forward side brackets, tighten all hardware. Then work you way back down each side rail bracket until secure. Green arrows then red. 16. Using the provided long nut plate, insert plate with nut upward into frame in hole shown. Using provided hardware, tighten bolt.
- Page 9 17. Next close drawer and check handle adjustment. If the handle is not latching adjust handle so drawer latches properly by moving the handle up. 18. Once drawer is working properly, install the provided flip down license plate kit. The flip down will pull down from the top.
- Page 10 19. Using the two tapered Allen head bolts, install the trail plug. The bottom lip should be facing out to the back of the vehicle as shown below. 20. Lastly, using the remaining supplied hardware, install the skid plate to the bottom of the drawer. The remaining long volts will go in the back-rear holes with the shorter around the sides.
Need help?
Do you have a question about the Gladiator RBGL-03 and is the answer not in the manual?
Questions and answers